manuals.online logo
Brands
  1. Home
  2. •
  3. Brands
  4. •
  5. Vision
  6. •
  7. Security Camera
  8. •
  9. Vision VD70PA-180 User manual

Vision VD70PA-180 User manual

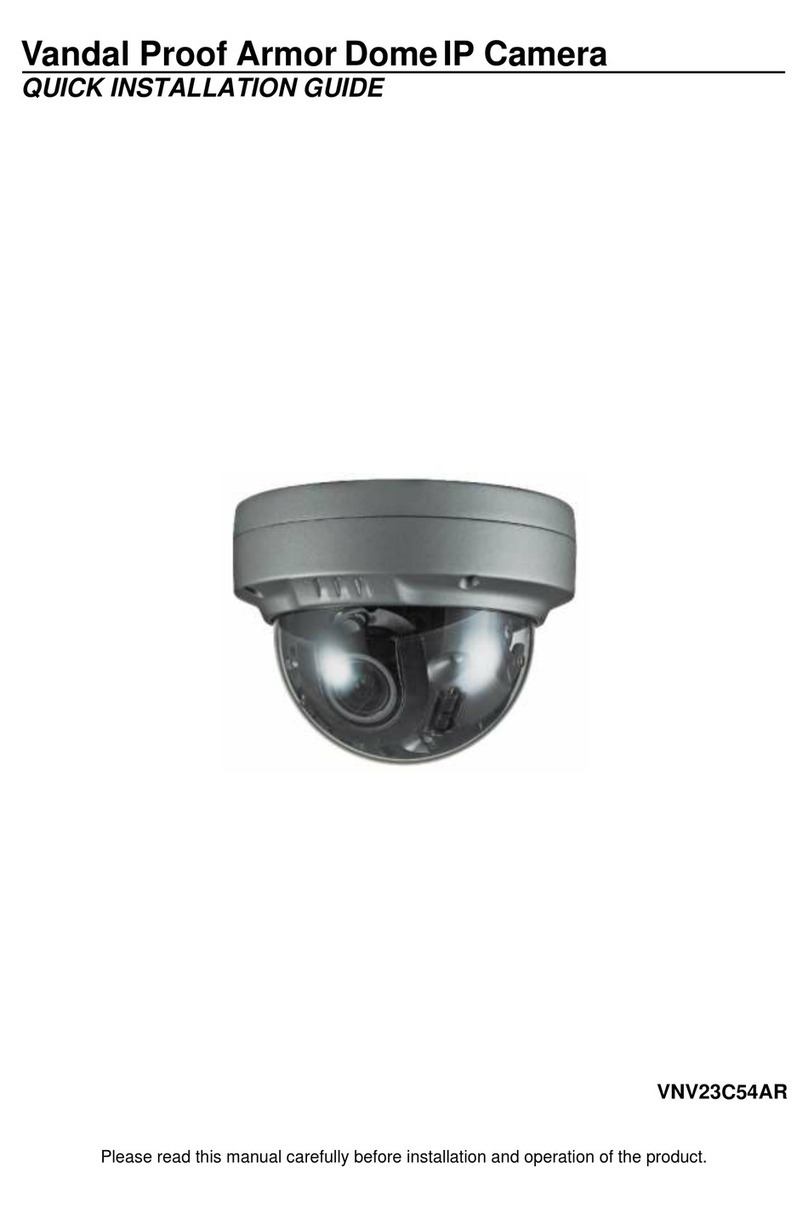
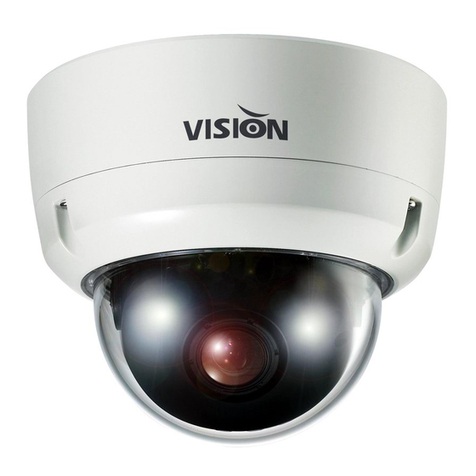
Mega Pixel Panorama Amor Dome Camera
◆Special features
4. Package
5. Installation
5-1. How to mount to ceiling
5-2. Cable connection
Installation guide x 1Camera x 1
Tapping screws x 4
(Ø3x15L)
L-Wrench
x 1
Ø1.5
Dear Customers!
The lighting flash with an arrowhead symbol, within an equilateral triangle is
intended to alert the user to the presence of uninsulated dangerous voltage
within the product’s enclosure that may be of sufficient magnitude to
constitute a risk of electric shock to persons.
INFORMATION
CAUTION – To prevent electric shock and risk of the fire hazards
This installation should be made by a qualified service person and should
conform to all local codes.
The exclamation point within an equilateral triangle is intended to alert the
user to the presence of important operating and maintenance(servicing)
instructions in the literature accompanying the appliance.
This equipment has been tested and found to comply with limits for a Class A digital
device, pursuant to part 15 of the FCC Rules. These limits are designed to provide
reasonable protection against harmful interference when the equipment is operated
in a commercial environment. This equipment generates, uses, and can radiate radio
frequency energy and, if not installed and used in accordance with the instruction
manual, may cause harmful interference to radio communications.
Operation of this equipment in a residential area is likely to cause harmful interference
in which case the user will be required to correct the interference at his own expense.
WARNING
Changes or modifications not expressly approved by the manufacturer could void the
user’s authority to operate the equipment.
Do NOT use power source other than that specified.
Do NOT expose this appliance to rain or moisture.
By selecting this product, you have decided to use a professional device that
guarantees highest quality and reliability. We would like to thank you very much for
your confidence and kindly ask you to read the following instructions carefully before
installation and operation in order to take full advantage of all quality features
regarding this product.
CAUTION
CAUTION
RISK OF ELECTRIC
SHOCK
DO NOT OPEN
TO REDUCE THE RISK OF ELECTRIC SHOCK,
DO NOT REMOVE THE COVER (OR BACK).
NO USER SERVICEABLE PARTS INSIDE.
REFER SERVICING TO QUALIFIED PERSONNEL.
!"#$%&'%"(%&)"*+%",&-.&$"/&(%0.$$1"2%03(%"*+%"4-'*&$$&*43-"4-"3()%("*3",&5%".'%"*+%"
camera to be set up correctly and to have the best picture quality.
!"#$%&'%"5%%6"*+%",&-.&$"4-"733)"/3-)4*43-"03("13.("0.*.(%"(%0%(%-/%"&-)"'%(84/%"
application.
!"9-'*&$$&*43-"&-)"'%(84/%'"'+3.$)"3-$1"2%"/&((4%)"3.*"21"&-"&.*+3(4:%)"6%('3--%$"
according to local safety regulations.
!"90"&-1"$4;.4)"3("'3$4)",&**%("7%*'"4-*3"*+%"+3.'4-7<"4,,%)4&*%$1")4'/3--%/*"*+%"
""/&,%(&"0(3,"63=%("'.66$1"&-)"+&8%"4*"/+%/5%)"21"13.("&.*+3(4:%)")%&$%("2%03(%"
reusing.
!">834)"4-'*&$$4-7"*+%"/&,%(&"&*"%?*(%,%$1"+3*"3("/3$)"6$&/%'@
!">834)"4-'*&$$4-7"*+%"/&,%(&"&*"&"6$&/%"30"+47+"+.,4)4*1@
!">834)"4-'*&$$4-7"*+%"/&,%(&"&*"*+%"6$&/%"%?63'%)"*3"7&'"3("34$@
!"90"13."&(%"-3*"&"/%(*404%)"6%('3-<"-%8%("*(1"*3")4',&-*$%"*+%"/&,%(&@"
To avoid electric shock, never remove the screws or covers. There are no parts
inside that need maintenance by the user. All maintenance should be carried out
by qualified personnel.
!"A%%6"*+%"*36"7$&''"30"*+%"$%-'"&$=&1'"/$%&-"4-"3()%("*3"32*&4-"*+%"2%'*"64/*.(%"
quality all the time. Be careful not to be stained by fingerprint.
!"B3-C*"0&/%"*+%"/&,%(&")4(%/*$1"*3=&()"'.-$47+*"3("'.-$47+*"(%0$%/*4-7"&(%&@"
The image sensor may go defective at this condition.
!"#$%&'%"748%"&"'6%/4&$"&**%-*43-"*3"5%%6"*+%".-4*"0(3,")&-7%(3.'")(36"3("%?*%(-&$"
shock during the process of transportation or handling.
!"D%8%("*(1"*3"*3./+"*+%"/&,%(&"4-"=%*"+&-)@"9*",&1"/&.'%"&-"%$%/*(4/"'+3/5@
!"B3"-3*"%?63'%"*+%"/&,%(&"*3"(&)43&/*484*1@"9*"/&.'%'"&"'%(43.'")&,&7%"3-"*+%"
image sensor.
1. Precautions
This publication is provided “AS IS” without warranty of any kind, either express or
implied, including but not limited to, the implied warranties of merchantability, fitness
03("&-1"6&(*4/.$&("6.(63'%<"3("-3-E4-0(4-7%,%-*"30"*+%"*+4()"6&(*1C'"(47+*@"
This publication could include technical inaccuracies or typographical errors. Changes
are added to the information herein, at any time, for the improvements of
this publication and/or the corresponding product(s).
In no event shall seller be liable to any party or any person, except for
replacement or reasonable maintenance of the product, for the cases, including
but not limited to below:
(1) Any damage and loss, including without limitation, direct or indirect, special,
consequential or exemplary, arising out of or relating to the product;
(2) Personal injury or any damage caused by inappropriate use or negligent
operation of the user;
FGH"I-&.*+3(4:%)")4'&''%,2$%<"(%6&4("3(",3)404/&*43-"30"*+%"6(3)./*"21"*+%".'%(J
(4) Inconvenience or any loss arising when images are not displayed, due to any
reason or cause including any failure or problem of the product;
(5) Any problem, consequential inconvenience, or loss or damage, arising out of
the system combined by the devices of third party.
FKH">-1"/$&4,"3("&/*43-"03(")&,&7%'<"2(3.7+*"21"&-1"6%('3-"3("3(7&-4:&*43-"2%4-7
photogenic subject, due to violation of privacy with the result of that
"""""'.(8%4$$&-/%E/&,%(&C'"64/*.(%<"4-/$.)4-7"'&8%)")&*&<"03("'3,%"(%&'3-<"
becomes public or is used for the purpose other than surveillance.
2. Limitation of liability
3. Disclaimer of warranty
Surface Mount
Flush Mount
oGiiGjiGmGO{PvTyGOzPkOjGGzPoG{O{GPzGsGzGMG~OsGGGGGUPcvTyGneQGwGGGGGGGGGGGGGGGGGGUoGiiGjiGmGO{PvTyGOzPkOjGGzPoG{O{GPzGsGzGMG~OsGGGGGUPcvTyGneQGwGGGGGGGGGGGGGGGGGGGGGU
QUICK INSTALLATION GUIDE
!"LMG"9-/+"NBO"PQRS"S%-'3(
!"N4)%">-7$%"LTUV"#&-3(&,&"84%='
!"Q.$*46$%"9,&7%">(%&'
!"W3(4:3-*&$"O%'3$.*43-"30"38%("LUUUXY"Z4-%
!"LU@U?"B474*&$"[33,"S.663(*
!"NBO"FN4)%"B1-&,4/"O&-7%H
!"Z%-'"B4'*3(*43-"P3,6%-'&*43-
!"#(48&/1"Q&'5"\.-/*43-
!"S.663(*'"#%$/3EB
!"Z3="#3=%("/3-'.,6*43-"]"L^U,>
!">-*4EY&-)&$"/&,%(&"23)1"&-)"B3,%"/38%(
!"9#KK"N%&*+%(6(330
MegaPixel Panorama Amor Dome Camera
◆Specialfeatures
QUICKINSTALLATIONGUIDE
!"LMG"9-/+"NBO"PQRS"S%-'3(
!"N4)%">-7$%"LTUV"#&-3(&,&"84%='
!"Q.$*46$%"9,&7%">(%&'
!"W3(4:3-*&$"O%'3$.*43-"30"38%("LUUUXY"Z4-%
!"LU@U?"B474*&$"[33,"S.663(*
!"NBO"FN4)%"B1-&,4/"O&-7%H
!"Z%-'"B4'*3(*43-"P3,6%-'&*43-
!"#(48&/1"Q&'5"\.-/*43-
!"S.663(*'"#%$/3EB
!"IXP"S.663(*"FO_LU^"M"O_"`Z`PXORD9PSH
!">.)43"S.663(*
!"Z3="#3=%("/3-'.,6*43-"]"L^U,>
!">-*4E8&-)&$"/&,%(&"23)1"&-)")3,%"/38%(
!"9#KK"N%&*+%(6(330
140926-1PA
5. Installation 6. Troubleshooting 8. Specification
7. Dimension (mm)
If there are problems in operating, please refer to the checklist below.
If the problem persists, please contact the agent where this product is purchased.
Nothing appears on
the screen.
The dim image
on the screen.
The dark image
on the screen
The camera is not
working properly,
and the body of the
camera is hot.
Color is not correct.
The screen is
flickering.
·
Please check that the power cord and line connection
between the camera and monitor are fixed properly.
·
Please check that you have properly connected VIDEO cable
to the camera VIDEO output jack.
·
Is lens stained with dirt? Clean your lens with soft,clean cloth.
·
Set the monitor to proper condition.
·
If the camera is exposed to too strong light, change the
camera position.
·
Please check if the power supply is within the specification&
cables.(Due to the voltage drop with distance and gauges,
LED will light poor)
·
Adjust the contrast feature of the monitor.
·
If there is an intermediate device, set the 75Ω / Hi-Z properly.
(Please check the impedance)
·
Please check if the power supply is regulated and is within
the standard requirement of the products.
·
Please check the setting of White Balance setup.
·
Please check if the camera is facing directly towards
sunlight or fluorescent light.
Problems Troubleshooting
Mega Pixel Panorama Amor Dome CameraMODEL
specifications are subject to change without prior notice for improvement.
1/3” WDR CMOS SensorImage Sensor
ProgressiveScanning system
1312(H) x 828(V) = 1,086,336 (pixel)Total Pixels
1280(H) x 720(V) = 921,600 (pixel)Active Pixels
Rolling shutterSHUTTER
0.01Lux / F2.0 (Sens up ON)Min. illumination
More than 39dB (AGC off)S/N Ratio
ELCLENS
0 ~ 100 stepsBRIGHTNESS
0 ~ 15 stepsAGC
ON / OFFSENS UP
OFF / BLC / WDRBLACK LIGHT
LOW / MIDDLE / HIGHBLC
LOW / MIDDLE / HIGHWDR
AUTO / COLOR / B&W / EXT HIGH / EXT LOWDAY & NIGHT
AUTO / MANUALWHATE BALANCE
0 ~ 15 stepsSHARPNESS
OFF / H REV / V REV / HV REVREVERSE
OFF / ONFREEZE
0 ~ 5 stepsCOLOR GAIN
AUTO / MANUAL (1.0x ~ 10.0x)D-ZOOM
SupportePTZ
0 ~ 255CAM ID
CVBS, NTSC / PALVIDEO OUTPUT
8 ZonePRIVACY
OFF / ON2D DNR
ENGLISHLANGUAGE
CAM ID, ZOOM MAGDISPLAY
FACTORYRESET
DC12V±10%POWER
300Weight(Approx. g)
Max. 1.5W (120mA)
POWER
CONSUMPTION
-10℃~ +50℃
Operating
Temperature
-20℃~ +60℃
Storage
Temperature
79(dia.) x 57(H) - Surface Mount
79(dia.) x 60(H) - Flush Mount
Measurement(mm)
SupportDAY & NIGHT LEVEL
DAY & NIGHT DELAY 0 ~ 60 steps
NORMAL / ORIGINAL / TOP VIEW / PANORAMA / NOR-2WIN
/ NOR-3WIN
VIEW
1000 TV Lines (1.5x DZOOM)
Horizontal
Resolution
SETUP 1. VIEW NORMAL
ORIGINAL
TOP VIEW
PANORAMA
NOR-2WIN
NOR-3WIN
1. SELECT 2 / 1
X1.0 ~ X10.0
SET X : 90 ~ X : 110
X : 90 ~ X : 110
3 / 2 / 1
X1.0 ~ X10.0
SET X : 90 ~ X : 110
X : 90 ~ X : 110
2. ZOOM
3. POSITION
4. RESET
5. RETURN
1. SELECT
2. ZOOM
3. POSITION
4. RESET
5. RETURN
2. EXPOSURE 1. BRIGHTNESS 0 ~ 100
2. AGC 0 ~ 15
3. SENS-UP OFF / ON
4. RETURN
3. BACKLIGHT OFF
BLC
WDR
1. LEVEL
2. RETURN
LOW / MIDDLE / HIGH
1. LEVEL
2. RETURN
LOW / MIDDLE / HIGH
4. DAY NIGHT
AUTO
COLOR
BW
EXT-HIGH
EXT-LOW
1. D→N LEVEL 17 ~ 255
2. N→D LEVEL 16 ~ 254
3. DELAY 0 ~ 60
4. IR LED
5. RETURN
1. RED 0 ~ 255
0 ~ 2552. BLUE
3. RETURN
ACTIVE-L / ACTIVE-H
6. IMAGE 1. SHARPNESS 0 ~ 15
OFF / H REV / V REV / HV REV
OFF / ON
0 ~ 5
AUTO
MANUAL 1. RATIO
2. RETURN
x1.0 ~ X10.0
0 ~ 3
2. REVERSE
WAIT
OK
3. FREEZE
4. COLOR GAIN
5. D-ZOOM
6. RETURN
7. SPECIAL
1. COM
2. CVBS
3. PRIVACY
1. CAM ID
OFF
4. DNR
ON
5. VERSION
6. RETURN
Vx.x
1. ZONE
2. DISPLAY
6. RETURN
5. SIZE
4. POSITION
3. COLOR
1. LEVEL
2. RETURN
0 ~ 7
SET X : 0 ~ X : 89
Y : 1 ~ Y : 239
SET X : 1 ~ X : 90
Y : 1 ~ Y : 240
OFF / ON
BLACK / GRAY /
WHITE / RED /
GREEN / BLUE /
CYAN / YELLOW /
MAGENTA
NTSC / PAL
0 ~ 255
2400 / 4800 / 9800 / 19200 / 38400
OFF
2. BAUDRATE
OFF
ON
3. DISPLAY ID
4. RETURN
8. RESET
9. EXIT
5. WHITE BAL AUTO
MANUAL
Surface Mount Flush Mount
Ø79
37
57
Ø53
Ø694-Ø5
Ø79
Ø59
29.5
60
Ø694-Ø5
5-3. OSD MENU Tree

Other Vision Security Camera manuals

Vision VN6XSFHD User manual

Vision

Vision VN6XSFHD User manual

Vision VPD270 User manual

Vision

Vision VPD270 User manual

Vision VNV23C54AR User manual

Vision

Vision VNV23C54AR User manual

Vision VN7X Manual

Vision

Vision VN7X Manual

Vision VN101PN User manual

Vision

Vision VN101PN User manual

Vision VDA100SFHD User manual

Vision

Vision VDA100SFHD User manual

Vision VN6XSFHD User manual

Vision

Vision VN6XSFHD User manual

Vision VN7XFHD User manual

Vision

Vision VN7XFHD User manual

Vision VDA100SII User manual

Vision

Vision VDA100SII User manual

Vision VD102SFHD User manual

Vision

Vision VD102SFHD User manual

Vision VPD200PM2Ti Manual

Vision

Vision VPD200PM2Ti Manual

Vision VD-80PN User manual

Vision

Vision VD-80PN User manual

Popular Security Camera manuals by other brands

Honeywell ACM574TPX Specifications

Honeywell

Honeywell ACM574TPX Specifications

Wisenet PNV-A6081R user manual

Wisenet

Wisenet PNV-A6081R user manual

System Q SEE496 manual

System Q

System Q SEE496 manual

avertX HD7022-FPW user manual

avertX

avertX HD7022-FPW user manual

D-Link DCS-1100 install guide

D-Link

D-Link DCS-1100 install guide

Axis P3905-RE installation guide

Axis

Axis P3905-RE installation guide

Verkada CD31-E Setup

Verkada

Verkada CD31-E Setup

Panasonic WVCP230 - CCD 120V operating instructions

Panasonic

Panasonic WVCP230 - CCD 120V operating instructions

Airsight X10 P2P Setup

Airsight

Airsight X10 P2P Setup

Novus NVIP-4H-8002M user manual

Novus

Novus NVIP-4H-8002M user manual

Monacor TVCCD-25IR quick guide

Monacor

Monacor TVCCD-25IR quick guide

TRASSIR TR-D2251WDIR4 quick start guide

TRASSIR

TRASSIR TR-D2251WDIR4 quick start guide

LTS UD05332N user manual

LTS

LTS UD05332N user manual

Panasonic AJ-HDC27FE operating instructions

Panasonic

Panasonic AJ-HDC27FE operating instructions

Aventura CAM-7D-21IR-WDR Installation and user manual

Aventura

Aventura CAM-7D-21IR-WDR Installation and user manual

TP-Link NC230 user guide

TP-Link

TP-Link NC230 user guide

Mobotix p26 Indoor PT Series Quick install

Mobotix

Mobotix p26 Indoor PT Series Quick install

Vivotek FE9182-H Quick installation guide

Vivotek

Vivotek FE9182-H Quick installation guide

manuals.online logo
manuals.online logoBrands
  • About & Mission
  • Contact us
  • Privacy Policy
  • Terms and Conditions

Copyright 2025 Manuals.Online. All Rights Reserved.