Vispero Enhanced Vision DaVinci Pro HD OCR User manual

User Manual

Enhanced Vision
ii DaVinci Pro User Manual
+44 (0) 115 9442317 (UK Office)
www.enhancedvision.com
800 440 9476 (US Office, toll free)
+001 714 465 3400 (US Office)
+44 (0) 115 9442317 (UK Office)
Fax + 49 (0) 6078 96982733 (DE Office)
Tel. + 49 (0) 6078 9698270 (DE Office)
Part # MAN-1501-00 X12
April 2020
Copyright © 2020 by Enhanced Vision. All rights reserved.
Product specifications subject to change without prior notice.
Product enhancements and revisions are an integral part of
what we do here at Enhanced Vision. Visit us at
https://www.enhancedvision.com/support/user-manuals.html
and select your Enhanced Vision product. You will find the
most up-to-date version of your User Manual here.

Enhanced Vision
DaVinci Pro User Manual iii
Contents
Before You Start............................................................................................................1
About This Manual........................................................................................................1
DaVinci Pro Packaging and Accessories .........................................................................3
Optional Accessories .....................................................................................................3
Setting Up DaVinci Pro ..................................................................................................4
Control Console.............................................................................................................6
Modes of Operation......................................................................................................7
Turning Off the Device ..................................................................................................8
CCTV Mode ...................................................................................................................9
CCTV Basic Control Console.........................................................................................11
CCTV Advanced Control Console .................................................................................13
CCTV Camera Orientations..........................................................................................14
OCR Mode ..................................................................................................................17
OCR Basic Control Console ..........................................................................................19
OCR Advanced Control Console...................................................................................21
Scanning a Document .................................................................................................21
Setting the OCR Mode.................................................................................................23
Quick Language Swap..................................................................................................26
Adjusting User Settings...............................................................................................27
Lights...........................................................................................................................28
Magnification ..............................................................................................................28
Volume........................................................................................................................29
Brightness ...................................................................................................................29
Colors..........................................................................................................................30
Line and Window Markers ..........................................................................................31
HDMI/VGA Toggle .......................................................................................................33
Focus Lock...................................................................................................................33
Menus ........................................................................................................................34
Introduction ................................................................................................................35
Games.........................................................................................................................36
Settings .......................................................................................................................37
Help ............................................................................................................................48
Library .........................................................................................................................49
Factory Settings...........................................................................................................55
EXIT .............................................................................................................................55

Enhanced Vision
iv DaVinci Pro User Manual
Tips and Tricks ............................................................................................................56
Improving OCR Accuracy .............................................................................................56
Using Multiple Orientations ........................................................................................56
Restarting Your System................................................................................................56
Configuring Your System .............................................................................................56
Control Console Shortcuts...........................................................................................57
Troubleshooting..........................................................................................................58
Device Will Not Power On ...........................................................................................58
OCR Results Poor.........................................................................................................58
Slow Text-to-Speech ....................................................................................................58
Replacement LED lamps ..............................................................................................59
Firmware Update ........................................................................................................59
Technical Assistance ....................................................................................................59
FCC Compliance Notice................................................................................................60
Safety and Care ..........................................................................................................61
Precautions for Use.....................................................................................................61
Additional Electrical Safety Precautions ......................................................................61
Additional Mechanical Safety Precautions ..................................................................62
Transporting DaVinci Pro.............................................................................................62
Caring for DaVinci Pro .................................................................................................62
Susceptibility to Interference ......................................................................................63
DaVinci Pro Specifications...........................................................................................64
Warranty Statement & Contact Information ...............................................................65
Enhanced Vision DaVinci Pro Warranty Policy .............................................................65
Service Process............................................................................................................65

Enhanced Vision
DaVinci Pro User Manual 1
Before You Start
DaVinci Pro is a fully integrated solution, offering the advantages of both CCTV and OCR
(Optical Character Recognition). DaVinci Pro enables individuals with low vision to read
by listening or by viewing the text in color or in enhanced high-contrast positive or
negative modes. With easy-to-use buttons and dials, you can enlarge or reduce the text
in seconds, and change viewing options for easier visibility.
Prior to using this system, please carefully review and follow the instructions provided
within this booklet. Your DaVinci Pro is ready to use right out of the box. By reviewing all
the DaVinci Pro features and controls before use and following the directions carefully,
you will be able to enjoy all the great benefits from your purchase. Enhanced Vision
products are designed to give you the highest quality image, OCR accuracy, convenient
easy-to-use features, and years of reliable service. Thank you for choosing the Enhanced
Vision DaVinci Pro.
About This Manual
Reference the illustrations in this book as you follow the instructions. The next section
provides an overview of everything included in your package. The buttons on the control
console are explained in “CCTV Mode” on page 9 and “OCR Mode” on page 17.
Some features on DaVinci Pro are accessed by pressing a button or a combination of
buttons. When steps refer to a button on the device or its control console, the button
name is capitalized, such as the Color Mode button. When steps refer to text displayed
on the DaVinci Pro screen, the text is bold. For example, the Product Settings menu is in
boldface, as well as the Extended Zoom option on that menu.
Instructions for going to a menu option are given using right angle brackets >. When you
see Settings > Audio > Volume, for example, you use the Zoom wheel to highlight
Settings and press the Find button, then do the same for Audio, then again for Volume.
To view a quick reference of the control console buttons, do the following:
1. Go to the main menu by pressing up on the Color Mode
button and pressing the Find button on the control
console.
2. Use the Zoom wheel (around the Find button) to
highlight Help.
3. Press the Find button.

Enhanced Vision
2 DaVinci Pro User Manual
DaVinci Pro Packaging

Enhanced Vision
DaVinci Pro User Manual 3
DaVinci Pro Packaging and Accessories
Take a few moments to familiarize yourself with items included with the DaVinci Pro,
which are illustrated on the previous page.
1. Power button
2. Speakers
3. Audio jack (3.5mm) for headphones
4. Camera arm
5. Camera arm LED button
6. 19V power supply
7. Power cord – Power cord style may vary based upon country.
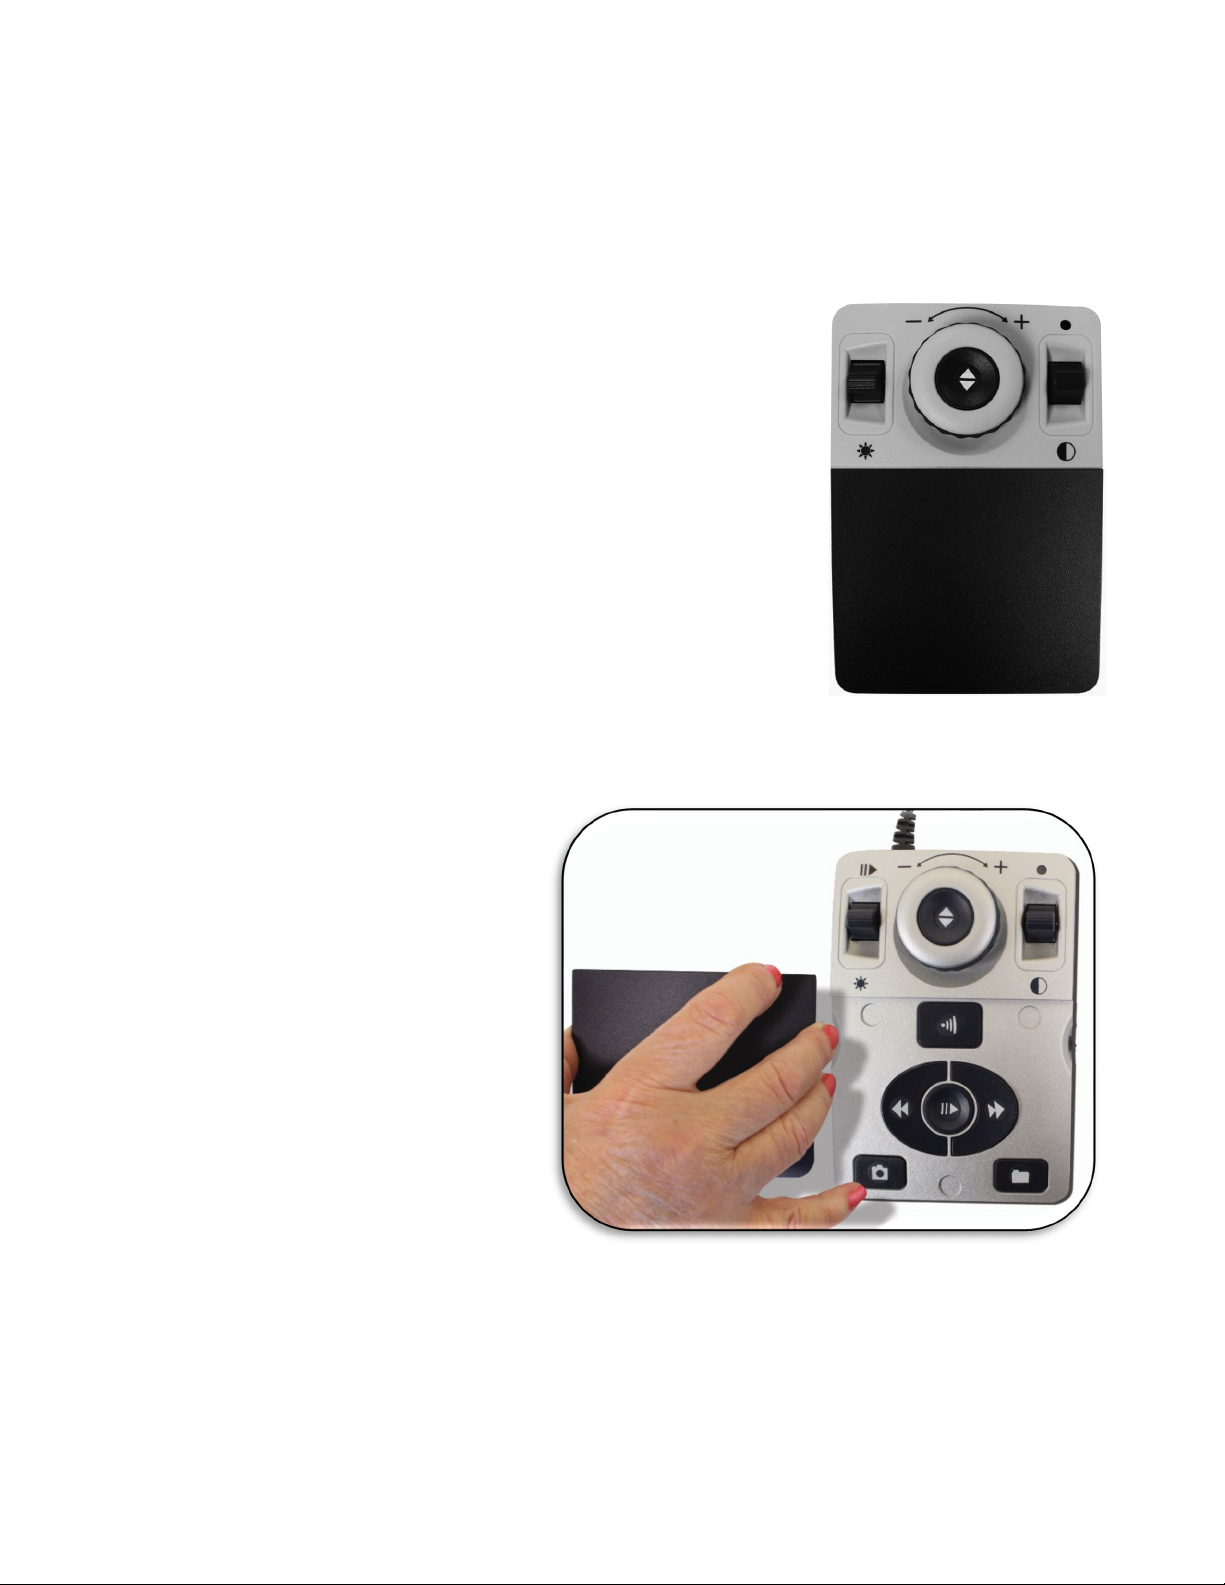
8. Control console – Allows you to control DaVinci Pro functions. Can be used with the
cover on for Basic mode or cover off for Advanced mode.
The control console must be plugged in to use DaVinci Pro and
access menu items for OCR/text-to-speech.
9. Lens cloth – Permits cleaning of the LCD screen or lenses.
10. OCR/CCTV toggle button with CCTV Zoom wheel
Optional Accessories
Headphones and a microphone are not included but available to purchase separately.
On the left side of DaVinci Pro, a 3.5mm input jack is provided for use of standard
headphones. A microphone can be added to record a custom voice tag while saving files.
Note: Sound from DaVinci Pro speakers will not be available while the headphone jack is
in use.
10

Enhanced Vision
4 DaVinci Pro User Manual
Setting Up DaVinci Pro
To set up DaVinci Pro, follow these steps:
1. Find a steady and level location, such as a
table or desk, where you will be
comfortable using DaVinci Pro.
2. Carry DaVinci Pro only by the recessed
handle on the back of the unit for a secure
grip. Gently place it on the table or desk.
Warning:Do not lift DaVinci Pro by the
camera arm.
3. Connect the control console cord to either of the two USB ports on the back of your
DaVinci Pro.
4. Connect the power cord to the power supply.

Enhanced Vision
DaVinci Pro User Manual 5
5. Connect the power cord to an available electrical outlet.
6. Connect the other end of the power supply to DaVinci Pro
where it is labeled “19VDC” on the rear panel.
Note: To offer additional protection during an electrical
storm, a surge protector is recommended.
7. Press the Power button to turn on the device. A DaVinci
Pro Logo is displayed, followed by a message and a
startup chime indicating that the device is initializing.
When you enter live CCTV mode, an image is displayed.
Warning: To maximize the life of your product, complete the
shutdown sequence before disconnecting DaVinci Pro. Press the
Power button and hold it for five seconds to initiate shutdown,
which lasts about 10 seconds. Wait until the status LED lights are
no longer illuminated before disconnecting the device.
Enhanced Vision
6 DaVinci Pro User Manual
Control Console
The control console and its cover are required to use DaVinci Pro. Familiarizing yourself
with the console will be helpful because how you configure the console will affect your
user experience.
The control console for DaVinci Pro has an intelligent design
that allows you to customize features on demand and switch
between “Basic” and “Advanced” modes. When the cover is
on the control console, you are in Basic mode. When the
cover is off, you are in Advanced mode. If you add or remove
the cover, DaVinci Pro immediately detects the change and
modifies available features.
Basic Controls
Beginners may be more comfortable with the Basic control
console, whether in CCTV or OCR mode. With the cover on
the console, fewer features are available but the product is
easier to use. You still have access to the essential features necessary to magnify an
object or perform an OCR scan.
Advanced Controls
When you remove the control
console cover, you are in Advanced
mode. This enables features such as
the Library option, which is
otherwise grayed out in the menu,
as well as saving, recall, OCR zone
identifiers, and OCR line navigation.

Enhanced Vision
DaVinci Pro User Manual 7
Modes of Operation
DaVinci Pro is a CCTV and OCR product that can function in a variety of modes. The unit
consists of the built-in monitor, cameras, and mechanical assembly. The OCR and CCTV
cameras can be moved, and the CCTV camera can also be tilted depending on your
target. Whichever mode you choose, you will have several ways to customize it to fit
your unique needs and preferences. Familiarize yourself with these options to discover
which settings are right for you.
DaVinci Pro has two main modes of operation—CCTV mode and OCR mode—that can be
toggled by pressing the center button on the front panel under the LCD screen.
CCTV is the default mode that will display immediately
after you power on the device. This high-quality full-
screen live image is designed for real-time 1080p high
definition viewing.
OCR mode is available
to assist you with
reading by
automatically scanning
documents for OCR,
then reading the text
using text to speech (TTS).

Enhanced Vision
8 DaVinci Pro User Manual
Turning Off the Device
You can either put your device into standby or shut it down. If you are going to be gone a
short time, consider standby, but when you are done for the day, consider a shutdown.
Warning: To maximize the life of your product, do not disconnect DaVinci Pro from
power while in standby or during the shutdown sequence. Wait until the shutdown
sequence has completed to disconnect your unit. A message will display during
shutdown, which lasts about 10 seconds. When complete, the LED lights will no longer be
illuminated.
Standby
When your DaVinci Pro is not
in use you may want to place it
into standby. Placing your
device into standby mode
saves power and allows a
quicker return to normal
operation than compared to a
full shutdown.
To place your device into
standby, briefly press the Power button on the front. The LCD display dims and the front
panel indicator lights blink several times before turning off.
To resume, press the Power button again. It takes approximately 15 seconds until the
device ready to use after it has been in standby.
Shutdown
When your DaVinci Pro is not in use, you may want to power it off. Placing your device
into a full shutdown saves the most power but takes a little longer to start up when
compared with standby. To perform a full shutdown, follow these steps:
1. Hold down the Power button on the front panel of the DaVinci Pro for five seconds to
begin the shutdown sequence. A message indicates you are entering into the
shutdown sequence and asks you to wait until the status LEDs are no longer
illuminated and the message is no longer displayed before removing your DaVinci Pro
from the power source.
2. Once the status LEDs are dark and the message is no longer displayed, remove the
unit from the power source.
Enhanced Vision
DaVinci Pro User Manual 9
CCTV Mode
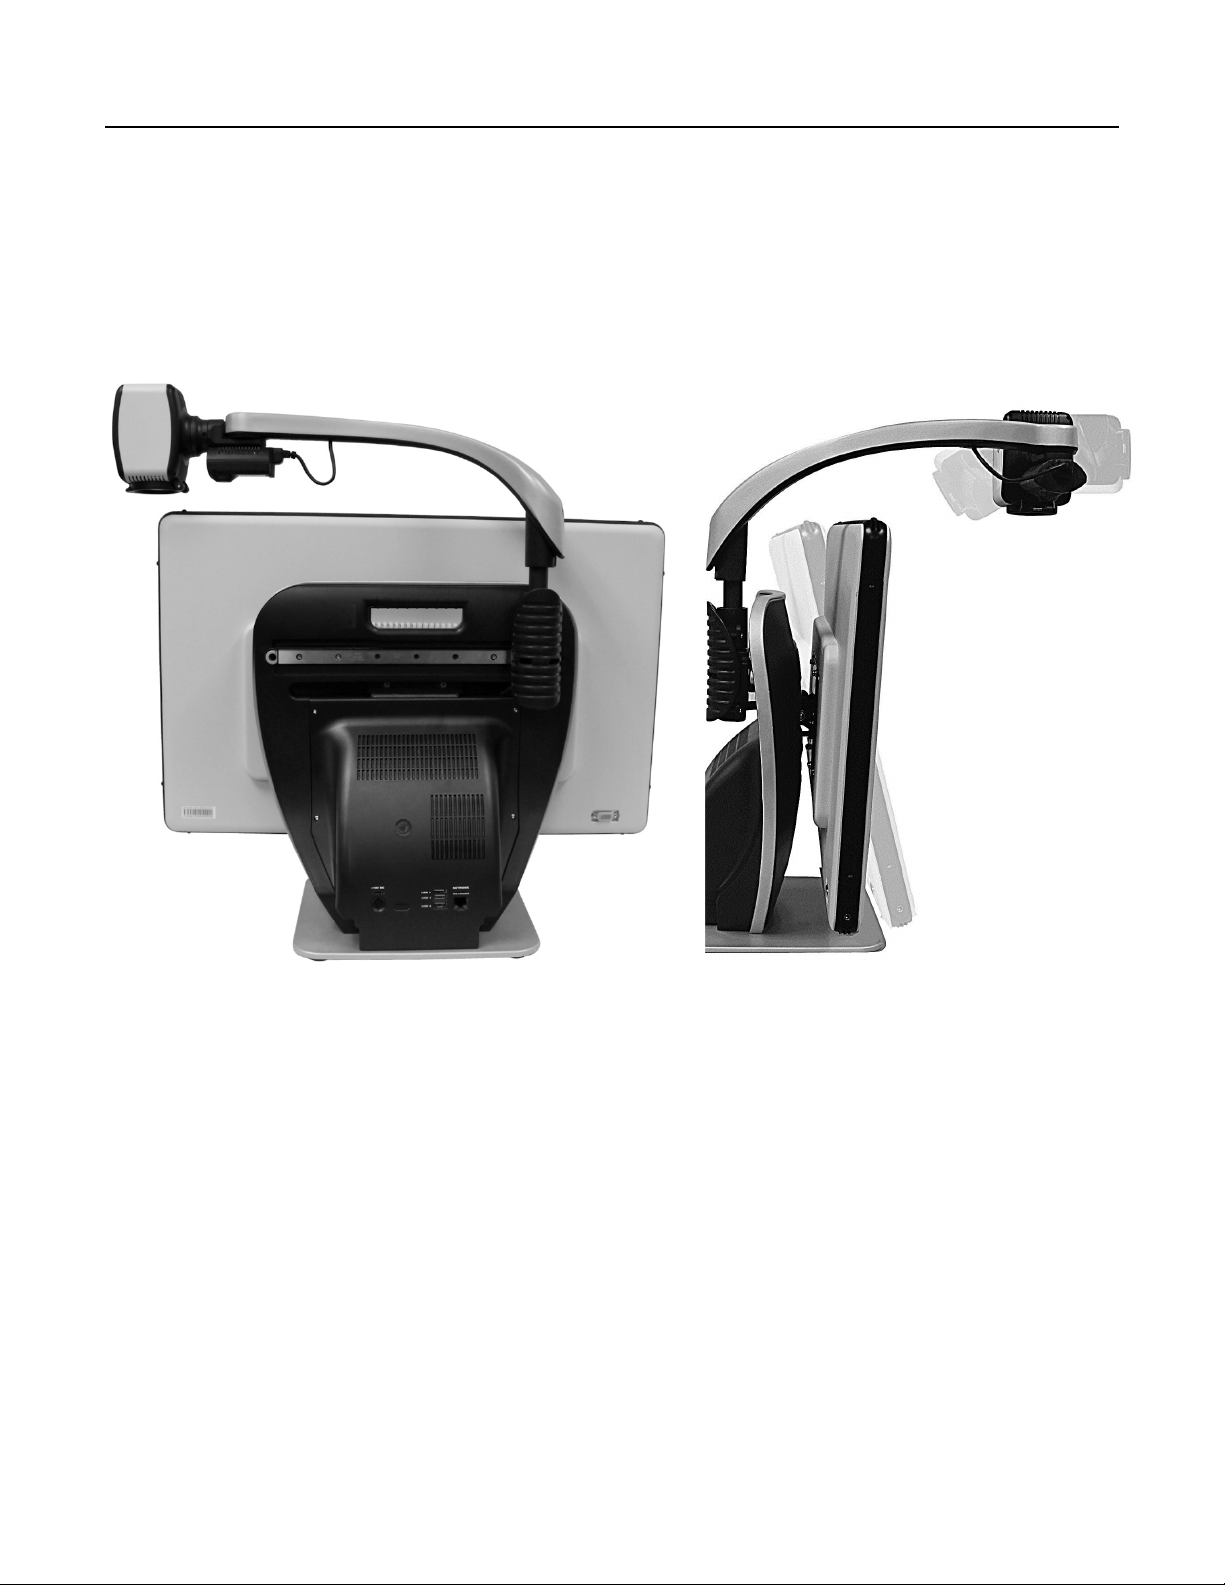
The DaVinci Pro camera is attached to a specifically designed arm that allows the camera
to slide left to right or to pivot in multiple directions. In CCTV mode, the device is
operated by moving this arm or camera assembly and pointing it at your target. The
image can then be viewed on the LCD monitor.
DaVinci Pro is mounted on a bracket that allows you to tilt the screen to adjust for the
best viewing position. Choose an angle or position that is most comfortable for you.
Enhanced Vision
10 DaVinci Pro User Manual
CCTV Basic Control Console

Enhanced Vision
DaVinci Pro User Manual 11
CCTV Basic Control Console
Basic mode is when the cover is on the control console. You do not have access to the
Library button and other features, which are described in “Advanced Mode.”
You can take the cover off or put it back on at any time. With the cover on, the OCR
button configuration changes to a more basic format but still provides the essential
features needed for a document scan.
Some features on DaVinci Pro are accessed through a combination of buttons on your
control console, meaning that the buttons should be pressed at the same time. For
example, you might be instructed to press up on the Color Mode button while pressing
the Find button. If neither the front panel nor control console is specified, then the
button is available on either one.
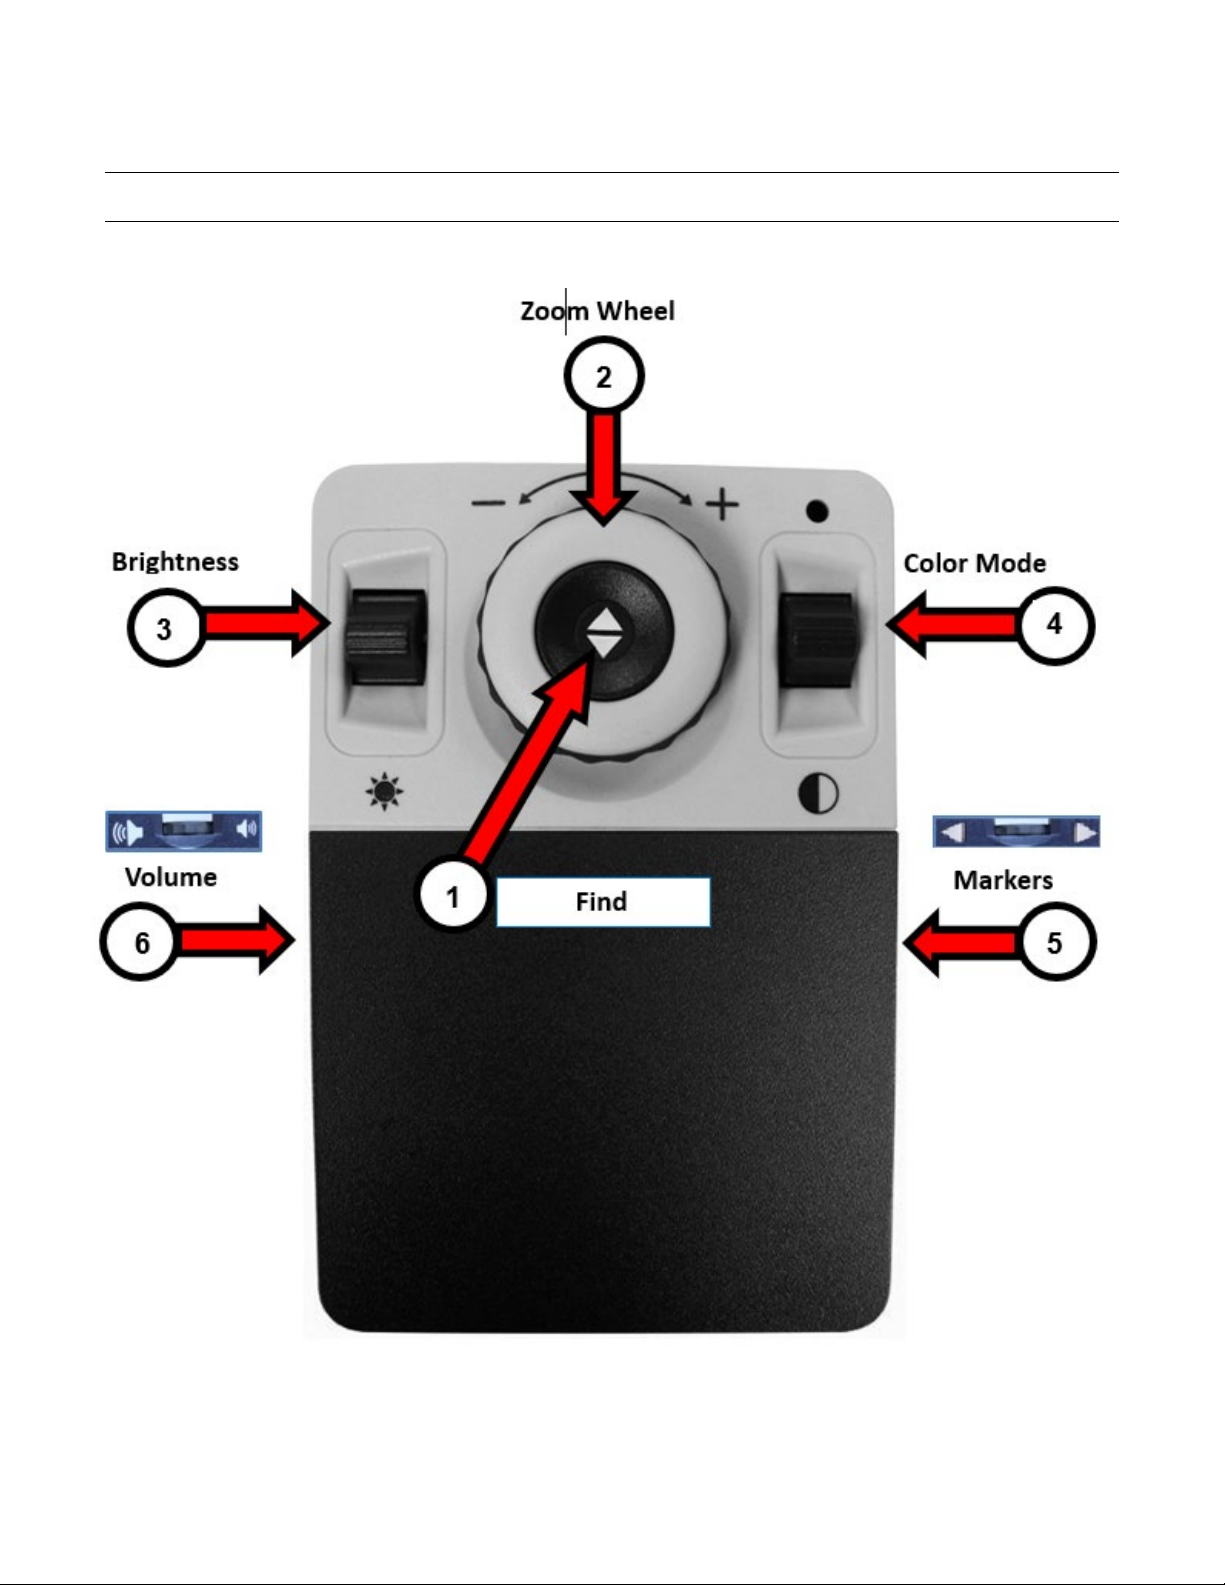
The Basic controls are shown on the previous page and described in the following table.
Label Name Description
1 Find Press and hold to minimize your magnification level. When you
release the button, it returns to your previous magnification
level.
Note: You can use this feature to find your target easily, which
can sometimes be challenging at higher magnification levels.
2 Zoom
Wheel
Turn clockwise or counterclockwise to increase or decrease the
zoom level.
3 Brightness Press up or down to increase or decrease the screen brightness.
4 Color Mode Press up or down to toggle through color viewing modes.
5 Markers Rotate to toggle through the line and window markers, which
are dependent on your user settings.
6 Volume Rotate to increase/decrease system volume.

Enhanced Vision
12 DaVinci Pro User Manual
CCTV Advanced Control Console

Enhanced Vision
DaVinci Pro User Manual 13
CCTV Advanced Control Console
Advanced mode is when the cover of the control console is off. You have access to
additional buttons and features, such as saving, zone identifiers, and line navigation as
detailed in “OCR Mode.” You can take the cover off or put it back on at any time.
In CCTV mode, the button functions are the same except for the addition of the Library
button (#7) at the bottom of the console.
Label Name Description
1 Find Press and hold to minimize your magnification level. When you
release the button, it returns to your previous magnification
level.
Note: You can use this feature to find your target easily, which
can sometimes be challenging at higher magnification levels.
2 Zoom
Wheel
Turn clockwise or counterclockwise to increase or decrease the
zoom level.
3 Brightness Press up or down to increase or decrease the screen brightness.
4 Color Mode Press up or down to toggle through color viewing modes.
5 Markers Rotate to toggle through the line and window markers, which
are dependent on your user settings.
6 Volume Rotate to increase/decrease system volume.
7 Library Press and hold for two seconds to enter the library. Rotate the
Zoom wheel to navigate. Select Exit and press the Find button to
return to live mode.

Enhanced Vision
14 DaVinci Pro User Manual
CCTV Camera Orientations
DaVinci Pro has three modes of orientation: desktop viewing, distance viewing, and
self-viewing.
Desktop Viewing
The camera can be adjusted downward for reading, writing, and enjoying crafts or other
hobbies. It is ideal for classroom use. When the camera is rotated downward, “Desktop”
is announced. DaVinci Pro can slide freely, left or right, along the specially designed
bracket mechanism.
For optimal viewing clarity, close the close-up lens and place
objects 12 to 19 inches away from the camera.

Enhanced Vision
DaVinci Pro User Manual 15
Distance Viewing
The camera can rotate forward to magnify people, objects, and scenery at a distance.
“Far” is announced when changing to this viewing angle.
Open the close-up lens for optimal focus at all zoom levels for
distance viewing. Although the camera can view objects at an
infinite distance, the recommended distance from camera to the
object is approximately 5 to 30 feet.

Enhanced Vision
16 DaVinci Pro User Manual
Self-Viewing
The camera can be rotated backwards to provide you with the equivalent of a digital
mi r ro r. “Self” is announced by the device when changing to this position. You can use
DaVinci Pro to help you put on make-up, shave, or perform other personal hygiene.
For optimum clarity, use the close-up lens and position yourself
between 7.5 to 22 inches away from the camera.
Other manuals for Enhanced Vision DaVinci Pro HD OCR
1
Table of contents
Other Vispero Magnifier manuals


