Koba Vision EasyViewer Silver Quartz HD Video magnifiers User manual

KOBA VISION
Video magnifiers
EasyViewer
Silver
Quartz HD
Manual
EN
Downloaded From TV-Manual.com Manuals

i
This manual decribes the following versions of the KOBA Vision video magnifiers:
EasyViewer 2.8.0
Silver 2.8.0
Quartz HD 2.8.0 (HD)
In combination with screen: Philips 26PF5321/12.
Slight differences are possible if other verions or screens are used.
The latest versions of the manual can be downloaded from the KOBA Vision website:
http://www.kobavision.be.
Downloaded From TV-Manual.com Manuals

1
VIDEO MAGNIFIERS
Manual
KOBA Vision
De Oude Hoeven 6 • 3971 Leopoldsburg • Belgium
Tel +32 (0)11 34 45 13 • Fax +32 (0)11 34 85 25
info@kobavision.be
http://www.kobavision.be
Downloaded From TV-Manual.com Manuals

2
Index
Index .........................................................................................................................2
Introduction ..............................................................................................................4
Video magnifier parts .......................................................................................................................4
Video magnifier EasyViewer, Silver, Quartz HD.........................................................................4
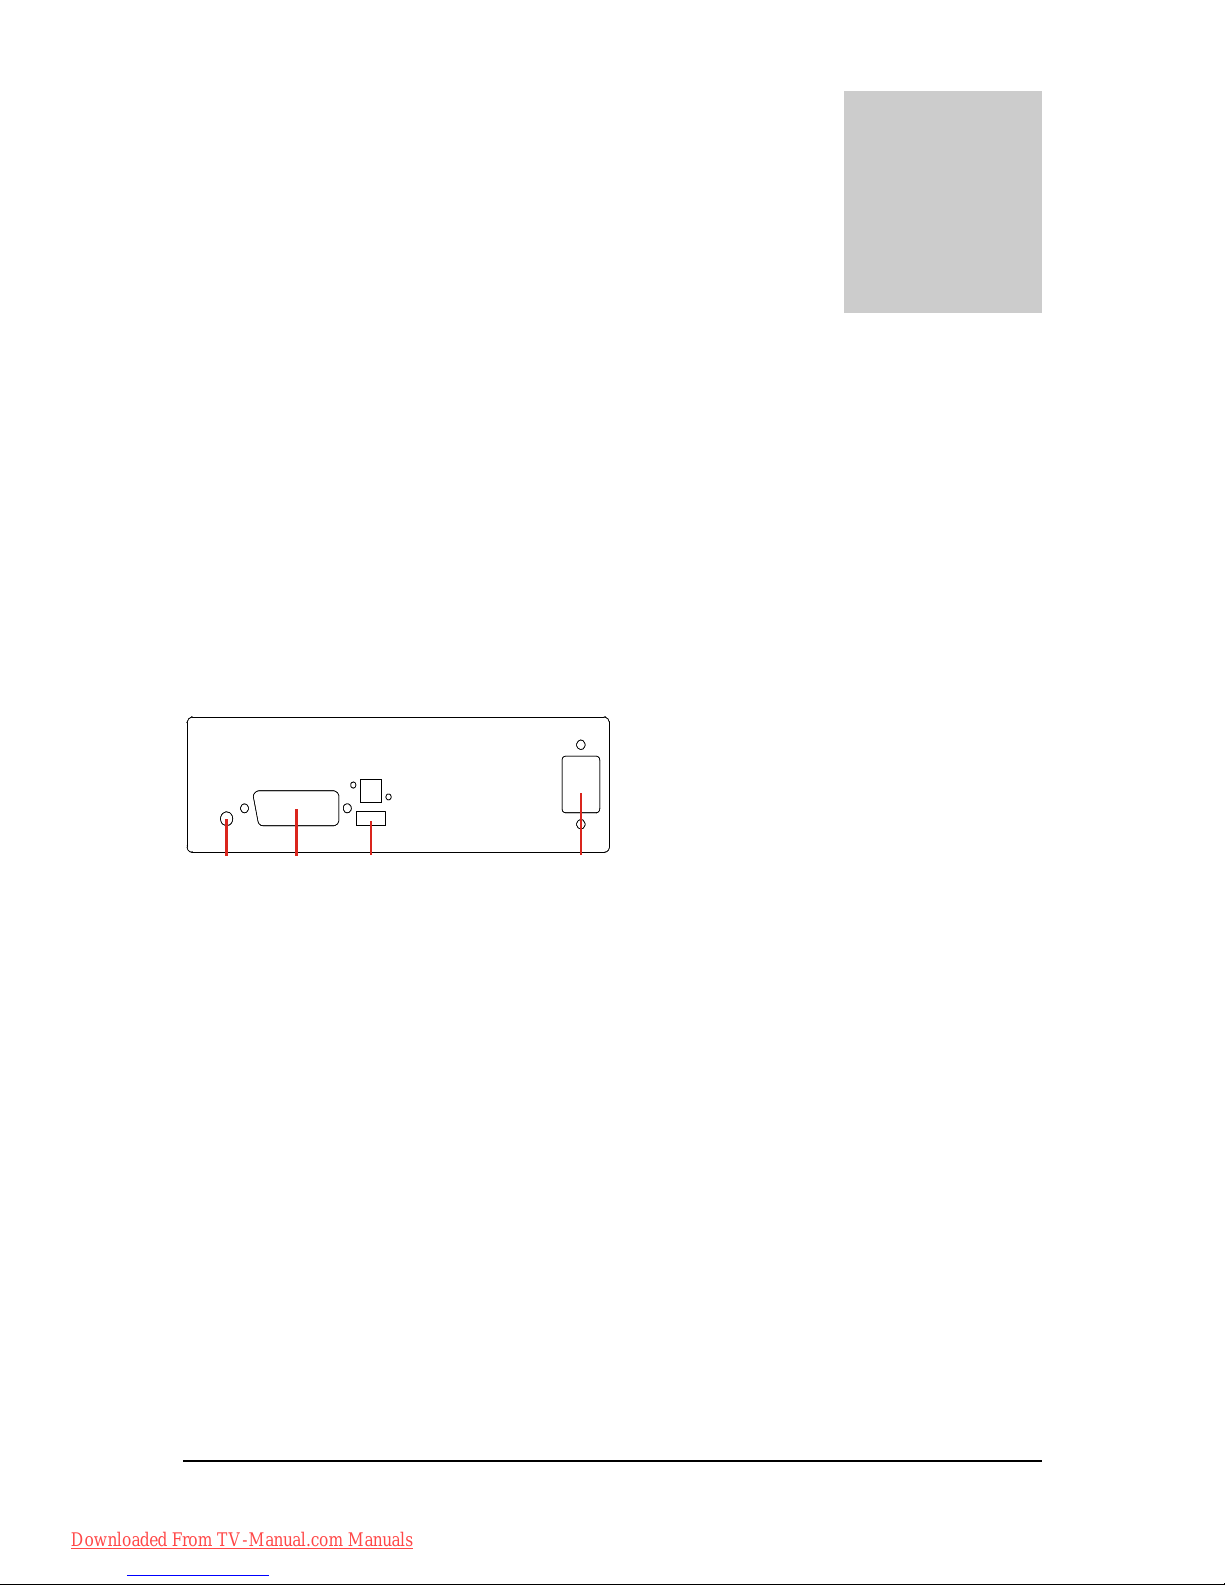
Screen.........................................................................................................................................4
Power cord..................................................................................................................................5
SCART connector (EasyViewer, Silver)......................................................................................5
HDMI-HDMI or HDMI-DVI connector (EasyViewer, Silver, Quartz HD) .....................................5
What would you need?.....................................................................................................................5
Aerial cable..................................................................................................................................5
HDMI–DVI, HDMI-HDMI, VGA-VGA connector (computer connector).......................................5
Audio cable..................................................................................................................................5
Safety and maintenance instructions ......................................................................6
Safety instructions............................................................................................................................6
Maintenance instructions..................................................................................................................7
First-time use............................................................................................................8
Connecting cables............................................................................................................................8
Set screen ........................................................................................................................................8
Checking whether the device works.................................................................................................8
Controls.....................................................................................................................9
Switching on/off................................................................................................................................9
Brief manual ...................................................................................................................................10
Slide table.......................................................................................................................................12
Control panel..................................................................................................................................12
Zoom in/zoom out......................................................................................................................12
Autofocus ..................................................................................................................................12
Negative reading.......................................................................................................................12
Photo mode...............................................................................................................................12
Positive reading.........................................................................................................................13
Factory settings.........................................................................................................................13
Help (voice buttons, helpt texts)................................................................................................13
Contrast.....................................................................................................................................13
Brightness .................................................................................................................................13
Background suppression...........................................................................................................13
Colour........................................................................................................................................13
Readhelp...................................................................................................................................13
Usage tips.......................................................................................................................................14
Reading.....................................................................................................................................14
Watch photos ............................................................................................................................14
Downloaded From TV-Manual.com Manuals

3
Crafting......................................................................................................................................14
Writing.......................................................................................................................................14
Readhelp...................................................................................................................................14
Factory settings.........................................................................................................................14
Video magnifier - computer............................................................................................................15
Switching between video magnifier and computer....................................................................15
Troubleshooting......................................................................................................16
Warranty..................................................................................................................17
Express warranty............................................................................................................................17
Warranty provisions........................................................................................................................17
Service fulfillment...........................................................................................................................17
Data chart ...............................................................................................................18
EasyViewer.....................................................................................................................................18
Silver...............................................................................................................................................19
Quartz HD.......................................................................................................................................20
Downloaded From TV-Manual.com Manuals

INTRODUCTION
4
Introduction
Thank you very much for buying this video magnifier. We have gone to great lengths to
create a qualitative and user-friendly device and we hopeyout will be able to use it for
years to come.
Video magnifier parts
You will need the following parts to be able to use the video magnifier:
Video magnifier EasyViewer, Silver, Quartz HD
Screen
To be able to use the video magnifier, you need a screen with the following specifications:
EasyViewer, Silver:
-SCART – RGB input or HMDI input
-NTSC
-Suspension VESA 75/75, VESA 100/100, VESA 200/100
-Mains switch and remote receiver at the side
Quartz HD:
-HDMI input
-Suspension VESA 75/75, VESA 100/100, VESA 200/100
-Mains switch and remote receiver at the side
Always ask KOBA Vision or your dealer whether your screen specifications are sufficient.
Chapter
1
Downloaded From TV-Manual.com Manuals

INTRODUCTION
5
Power cord
You need a power cord to feed the device.
SCART connector (EasyViewer, Silver)
You need a scart connector to connect the video magnifier to the screen.
HDMI-HDMI or HDMI-DVI connector (EasyViewer, Silver, Quartz
HD)
You need a HDMI-HDMI of HMDI –DVI connector to connect the
video magnifier to the screen. Depending on the input on the
screen, you will choose an HDMI-HDMI or HDMI-DVI.
What would you need?
Aerial cable
If you also wish to use the screen as a TV, you will need an aerial cable that plugs into the
cable distribution network.
Not all screens have an aerial terminal.
HDMI–DVI, HDMI-HDMI, VGA-VGA connector (computer connector)
To use the screen as a computer screen, you will need an HDMI-DVI, HDMI-HDMI of VGA–
VGA connector. This connector will help you connect your computer to the creen.
Depending on the screen type, you will need an HDMI-DVI, HDMI-HDMI of VGA-VGA
connector. Always look at the screen specifications.
Audio cable
If the video magnifier is plugged in with an HDMI-DVI connector, you will need an audio cable
to transmit the sound.
Warning
Cables are to be plugged in by authorized persons exclusively. Non-
compliance can cause severe damage.
Warning
The screen is to be assembled and disassembled by authorized persons
exclusively. Non-compliance can cause severe damage.
Downloaded From TV-Manual.com Manuals

SAFETY AND MAINTENANCE INSTRUCTIONS
6
Safety and maintenance
instructions
Safety instructions
Save this manual carefully. It contains all necessary information about your device.
Keep the device in a dry, well-vented and clean spot. Do not place the device in direct
sunlight or next to a source of heat.
Never use this device in ambient temperatures higher than 35°C.
The design of the inputs allows for them to be used in one way exclusively. Never
force an input.
It is compulsory to electrically ground the device. The manufacturer cannot be held
responsible for any injuries to humans or animals or for any damage to objects caused
by non-compliance with this safety instruction.
Never attempt to repair the device by yourself. It is dangerous to remove protective
covers which are there to prevent electric shock. You must contact KOBA Vision or
your dealer in case of defects.
To avoid electrocution, do not place the device in a spot where it can come into
contact with liquids.
Your product is designed and manufactured with high quality materials
and components, which can be recycled and reused. Do not dispose of
your old product in your general household waste bin. Dispose of the
complete product (including its cables, plugs and accessories) in the
designated collection facilities.
Chapter
2
Downloaded From TV-Manual.com Manuals

SAFETY AND MAINTENANCE INSTRUCTIONS
7
Maintenance instructions
The device can be cleaned with a damp cloth. Never use chemicals for they can
damage the finish and/or other parts.
Occasionally clean the glass plate of the scanner using a damp cloth.
After a certain amount of time, the slide rails need to be lubricated with oil or
adequately fluid grease.
Lamps must only be replaced by the same type (Philips Master PL-Electronic 8W/827
E27 230-240 VAC) after switching off the device and removing the power cord from
the grid.
Treat your device with care and you will enjoy it for years to come.
Warning
The screen is to be assembled and disassembled by authorized persons
exclusively. Non-compliance can cause severe damage.
Warning
You must be extremely cautious when moving the video magnifier.
The video magnifier must not be picked up by the screen, the type panel,
the light shades or the slide table.
Downloaded From TV-Manual.com Manuals

FIRST-TIME USE
8
First-time use
You need to go through the following steps to use the video magnifier for the first time:
Connect cables
Set screen
Check wether the device works
Connecting cables
Audio: Jack for a headphone or external
speakers. This jack is also used when the
screen has a DVI jack.
SCART (EasyViewer, Silver): Input for SCART
connector to the video magnifier screen.
HDMI (Quartz HD): Input for HDMI connector
to the video magnifier screen.
Mains supply: Power cord plug.
Set screen
Set the screen before taking the device into use.
To be able to make maximum use of the video magnifier, set the following display controls:
Contrast: maximum
Brightness: 40%
Colour: 30%
Sharpness: 40%
Checking whether the device works
Please check whether the device works after installing and setting. Switch on the screen and
the video magnifier. (See next chapter – Switching on/off)
Chapter
3
Netvoeding
SCART
Audio
HDMI
Netvoeding
SCART
Audio
HDMI
Downloaded From TV-Manual.com Manuals

CONTROLS
9
Controls
After having successfully connected and tested the video magnifier, we will now go into
the controls and the operation of the video magnifier.
Switching on/off
Switching on
1. Press the button to switch on the screen. (1)
2. Press the button at the left side of the interface to switch on the video magnifier. (2)
2
Switching off
1. Switch off the video magnifier with the button at the left side of the interface. (1)
2. Press the button to switch off the screen. (2)
1
2
Chapter
4
Downloaded From TV-Manual.com Manuals

CONTROLS
10
Brief manual
FOCUS
K
vision
BA
EasyViewer
PHOTO
12-3
RESET
HELP
FOCUS
K
vision
BA
Silver PHOTO
1
5
6
2
3
7
8
9
10
11
12
RESET
HELP
FOCUS
PHOTO
+TEXT
K
vision
BA
Quartz
HD
3
13
52 7911
1
4
8
10 1
2
6
Downloaded From TV-Manual.com Manuals

CONTROLS
11
1 Right: zoom in
Left: zoom out
Push: autofocus
2 Negativ reading (black background - white
letters)
Font colours: push once more
3 Photo mode
2-3 Switch between negative reading and
photo mode (only EasyViewer)
4 Positive reading (white background - black
letters)
Font colours: push once more
5 Factory settings
6 Help
7 More contrast
8 Less contrast
9 More brightness (photo mode)
More background (negative and positive
reading)
10 Less brightness (photo
mode)
Less background (negative and
positive reading)
11 More colour (only in photo mode)
12 Less coulour (only in photo mode)
13 Readhelp
Downloaded From TV-Manual.com Manuals

CONTROLS
12
Slide table
The slide table is made of high-grade materials and can display a whole A3 size sheet.
2 brakes stop the slide table from moving horizontally and vertically. The brakes can be
enabled and disabled.
Control panel
This part deals with the control panel for the video magnifier. The illustrations can be found in
the middle of this manual.
Zoom in/zoom out
Zoom in: Turn central turning knob 1 to the right.
Zoom out: Turn central turning knob 1 to the left.
Autofocus
Autofocus is activated by pressing central turning knob 1. The red autofocus LED will light
up. Autofocus is best activated when reading thick books and when crafting. The camera
automatically adapts to height variations, keeping the image focused.
Autofocus is automatically activated when zooming in or out for a few seconds. In this way,
autofocus is not used continuously, limiting wear and tear to the camera.
Negative reading
Press button 2 to activate negative mode. (Negative: black background and white letters)
EasyViewer:
Buttons 2-3 are used for switching between negative reading and photo
mode with the EasyViewer.
Negative reading –Photo mode –Negative reading - …
Quartz HD and Silver (option):
By pressing button 2 once more, font colours will change.
White – Red – Green – Blue –Cyan –Yellow – Magenta –Blue/Yellow –White -…
Photo mode
Press button 3 to activate photo mode.
EasyViewer:
Buttons 2-3 are used for switching between negative reading and photo
mode with the EasyViewer.
Negative reading –Photo mode –Negative reading - …
1/4
1/4
Downloaded From TV-Manual.com Manuals

CONTROLS
13
Positive reading
Press button 4 to activate positive mode. (Positive: White background and black letters)
Quartz HD and Silver (option):
By pressing button 4 once more, background colours will
change.
White – Red – Green – Blue –Cyan –Yellow – Magenta –Blue/Yellow –White -…
Factory settings
Press button five to go to factory settings.
Help (voice buttons, helpt texts)
Press button 6 to switch between the various help functions.
Help function off – Help function speech only – Help function text only –Help function text and
speech – Help function off -…
Contrast
More contrast: Press button 7.
Less contrast: Press button 8.
Brightness
You can set the brightness in photo mode. You can set background suppression with negative
or positive reading.
More brightness: Press button 9.
Less brightness: Press button 10.
Background suppression
You can set the background in positive or negative reading mode. Brightness can be adjusted
in photo mode.
More background: Press button 9.
Less background: Press button 10.
Colour
You can set the colour in photo mode. This button is of no use when you are working in
positive or negative reading mode.
Less colour: Press button 11.
Less colour: Press button 12.
Readhelp
The readhelp consists of a reading line and a reading bar. This readhelp is extremely useful to
people suffering from tunnel vision. The horizontal reading line or reading bar helps to follow
the text properly without skipping lines (vertical confusion).
The readhelp is only available in the negative or positive reading mode.
Downloaded From TV-Manual.com Manuals

CONTROLS
14
Press turning knob 13 to activate the reading line. You can set the position (higher/lower)
by turning. You can select the line colour by turning and pressing.
Press turning knob 13 once more to activate the reading bar. You can set the position
(higher/lower) by turning. You can adjust the width of the bar with pressing and turning.
Press turning knob 13 once more to deactivate the readhelp.
Usage tips
Reading
Reading is best done in positive or negative mode. These modes adapt the image for the
visually impaired to a high-contrast image with improved background. Background and letters
can be set at your discretion. The background can be set by means of background
suppression. This will allow you to filter out the structure of a sheet. This unique KOBA Vision
function allows you at all times to set a contrasty background without annoying paper
impurities. A newspaper can be read without annoying paper impurities. Factory settings will
take you back to the original settings.
Watch photos
Photos are best watched in photo mode. This mode is a unprocessed image without contrast
enhancement. Using the buttons contrast, brightness and colour, you can adjust the image so
that the photo becomes clearly visible. Factory settings will take you back to the original
settings.
Crafting
Crafting is best done with a small enlargement. It is better to select a dark background during
this activity so that the camera is not hindered by large differences in contrast with whatever
is darkened by the hands.
Writing
You can also write under your video magnifier. It is best to use a black pen and lined paper.
Readhelp
This readhelp is extremely useful for visually impaired people suffering from tunnel vision. The
readhelp consists of a reading line and a reading bar. This help allows a horizontal line or bar
to appear. This will keep you from confusing lines in the text (vertical confusion). The reading
line can be set to take on different colours. It is adviseable to select a line with a colour that is
different from the text. The read help can only be activated in the negative and positive
reading mode.
Factory settings
The factory settings button was especially provided to be able to return to the original settings
at all times. This means that you can always return to the original settings after having
adjusted contrast, background, colour, brightness, zoom, etc.
Downloaded From TV-Manual.com Manuals

CONTROLS
15
Video magnifier - computer
Switching between video magnifier and computer
The video magnifier screen can be used as a computer screen. There are two options:
Connect your computer to the screen. You can use the screen to switch to another
input that will allow you to use your computer.
If video magnifier and computer are both plugged into the HDMI input of the screen,
you can easily switch between them by keeping the big round central turning knob
1 pressed in. Warning! This option is available only if the screen supports CEC.
Downloaded From TV-Manual.com Manuals

TROUBLESHOOTING
16
Troubleshooting
Below is a list of problems that may occur with your video magnifier. Consult the list first
before contacting KOBA Vision or your dealer.
Symptom Possible causes What to do
The lights are out • The lights are
malfunctioning
• The video magnifier is
not switched on
• Replace the lights
• Switch on the video magnifier
• Check the power cord
No display on
the screen
• Power failure
• The screen is not
switched on
• Check wether the plug of the power cord has
been properly plugged into the power point If the
device still won’t work, pull the plug out of the
power point. Then wait 60 seconds before plugging
it back into the power point. Turn the screen on
again.
• Press the “on” button on the remote
No sound
• The screen volume is
on zero
• The sound has been
disrupted
• The headphone is
plugged in
• The SCART or HDMI
connector is loose
• Slightly turn up the screen volume.
• Check wether the sound has not been disrupted.
• Point the remote control directly towards the
sensor at the front of the screen.
• Unplug the headphone
• Check the SCART or HDMI plug.
No sound or image
while the red stand-by
light at the front of the
screen is burning
• Screen is on stand-by
mode
• Press the “on” or “1” button on the remote
The pc modes don’t
work
• Wrong connectors
• Wrong source
• Wrong screen
resolution
• Check wether the source has been selected
correctly. Press the button to open the source list
and select the correct source.
• Check whether you have set the computer to the
correct screen resolution.
• Check the settings of the video card in the pc.
Stripes running
through the image • SCART or HDMI
connector is loose • Check the SCART or HDMI connector.
Bad colours • SCART or HDMI
connector is loose • Check the SCART or HDMI connector.
Image is dark • The lights are
malfunctioning • Replace the lights
The image is blurred • Autofocus is not
activated • Press the central turning knob 1 to activate
autofocus
Chapter
5
Downloaded From TV-Manual.com Manuals

WARRANTY
17
Warranty
Express warranty
Koba Vision bvba offers a two-year warranty on every KOBA VISION video magnifier, starting
from the purchase date. The warranty covers materials and workmanship. This warranty
includes transportation costs for the first year.
Warranty services are provided by KOBA Vision bvba or a dealer acting for KOBA Vision bvba.
When the video magnifier cannot be repaired correctly, KOBA Vision can decide on its own
inititiative to replace the reading device by another video magnifier featuring the same
specifications. All components and products replaced within the warranty period become
property of KOBA Vision bvba.
Warranty provisions
1. The warranty becomes invalid if the video magnifier:
Was not used according to instructions or was misused,
Was damaged as a result of a fall or blow,
Was disassembled or tinkered with,
Was repaired earlier by a non-official service partner.
2. Consequential loss is under no circumstances covered by the warranty.
KOBA Vision bvba will neither assume any liability whatsoever nor accept any possibility of
liability except for the warranty provisions expressedly stated above. This limitation to the
liability does not imply a breach of the customer’s legal consumer rights or his or her rights
vis-à-vis the seller.
Service fulfillment
Before claiming the warranty or service and before contacting KOBA Vision bvba or a dealer,
you must write down product name, serial number, purchase date, invoice number and any
error messages or particular problem aspects.
Chapter
6
Downloaded From TV-Manual.com Manuals

DATA CHART
18
Data chart
EasyViewer
Type: KOBA Vision EasyViewer
Inputs: SCART, HDMI, audio, mains supply
Power supply: 230V-240V
1,2A
50-60Hz
Total capacity: 61W
Measurements (without screen) Height
X Width X Depth 300 x 430 x 580 mm
Measurements (with 32”screen): Height
X Width X Depth 750 x 930 x 580 mm
Maximum viewing angle 107 mm
Minimum viewing angle 9 mm
Enlargement: 23” screen – 58 cm
5x – 57x
26” screen – 66 cm
6x – 64x
32” screen – 82 cm
7x – 78x
Features:
Wide-range slide table
Illuminated buttons
Zoom in/zoom out
Negative reading mode
Photo mode
Autofocus
Chapter
7
Downloaded From TV-Manual.com Manuals
This manual suits for next models
1
Table of contents
Other Koba Vision Magnifier manuals
Popular Magnifier manuals by other brands

Magnifying America
Magnifying America Patriot ViewPoint user manual

MagniSight
MagniSight EXPLORER Classic MSE-L19 user manual

Eurotops
Eurotops SC885 instruction manual

Eschenbach
Eschenbach visolux DIGITAL HD operating instructions

National Geographic
National Geographic 9044000 operating instructions

Rehan
Rehan ACUITY BASIC user manual