Vitea Care Genesis User manual
1
NÁVOD K POUŽITÍ
Vydání EJ.12.2021
Trenažér pohybu dolních
i horních končetin
Modely: Genesis, Genesis Plus
INSTRUCTIONS FOR USE
Edition EJ.12.2021
Rotor Exerciser
Models: Genesis, Genesis Plus
rOT

2
Obsah
1. Úvod................................................................................................................................................ 3
Introduction............................................................................................................................................. 3
2. Popis výrobku.................................................................................................................................. 3
Product description.................................................................................................................................. 3
3. Použití. ............................................................................................................................................ 4
Application.............................................................................................................................................. 4
4. Kontraindikace ................................................................................................................................ 4
Contraindication...................................................................................................................................... 4
5. Používání. ........................................................................................................................................ 4
Use........................................................................................................................................................... 4
6. Bezpečnostní pokyny. ..................................................................................................................... 4
Safety of use............................................................................................................................................ 4
7. Každodenní používání a údržba. ..................................................................................................... 6
Everyday use and maintenance ............................................................................................................... 6
8. Technické údaje ............................................................................................................................ 11
Technical parametres............................................................................................................................. 11
9. Symboly......................................................................................................................................... 11
Symbols................................................................................................................................................. 11
10. Kontaktní údaje............................................................................................................................. 13
Contact details....................................................................................................................................... 13
PŘED POUŽITÍM SI PROSÍM PŘEČTĚTE
CELÝ NÁVOD
PLEASE READ CAREFULLY USING
BEFORE ALL INSTRUCTIONS
3
1. Úvod Introduction
Děkujeme, že jste si vybrali náš výrobek. Pevně
věříme, že splní vaše očekávání. Před prvním
použitím se prosím seznamte s tímto
dokumentem. Tento návod slouží k poskytnutí
nezbytných informací o bezpečném používání
zařízení. Dodržování doporučení ovlivní
trvanlivost a estetiku výrobku. Rádi bychom
upozornili, že se neustále snažíme zlepšovat
kvalitu našich výrobků, což může způsobit
drobné změny, které nemusí být obsaženy v
tomto návodu.
Thank you for choosing our product. We are
strongly believe it will meet your expectations.
Please get acquainted with this document before
first use. This instruction is delivered to give
necessary information about safe use of the
device. Obeying the recommendations will
influence the durability and aesthetics of the
product. We would like to indicate that we keep
trying to improve the quality of our products
which may cause minor changes that may not be
included in the instruction.
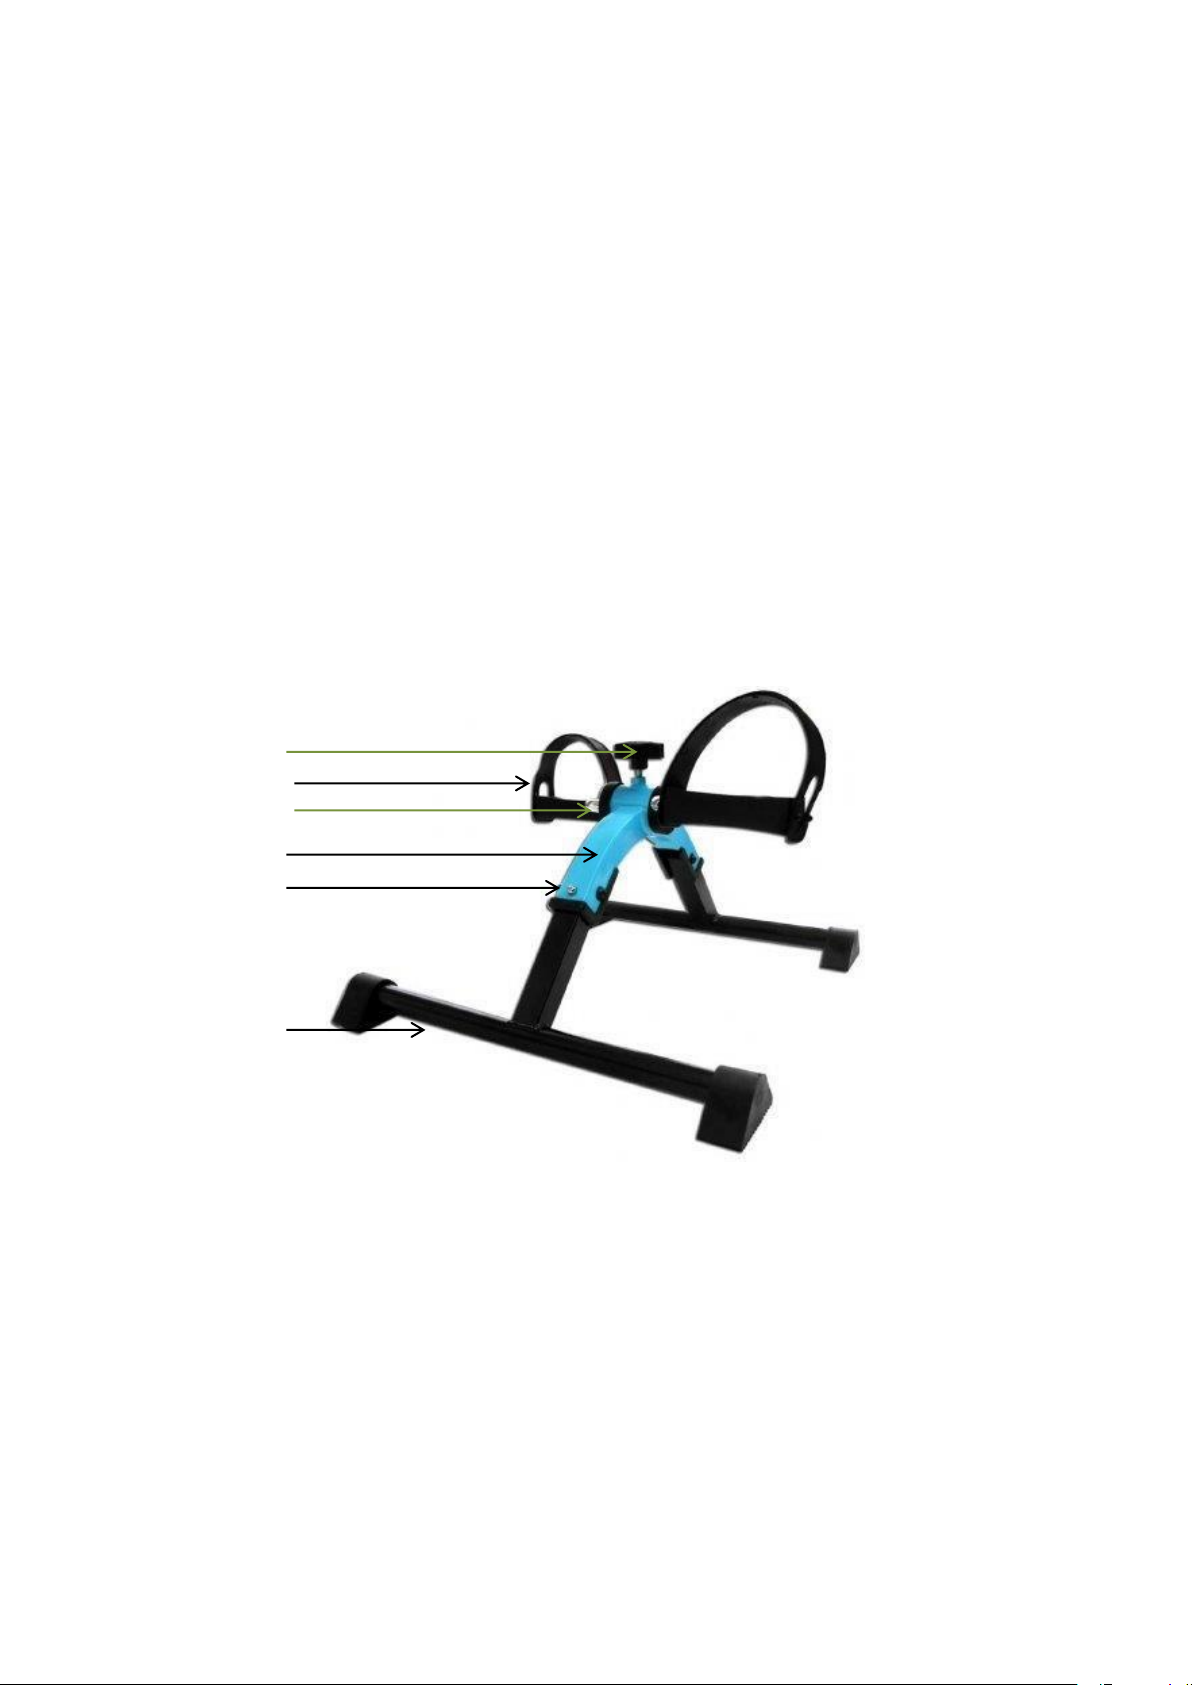
2. Popis výrobku Product description
Obrázek / Illustration 1.
1. Šroub regulující odpor pedálů
2. Rehabilitační pedály
3. Ramena pedálů
4. Hlavní rám
5. Zámek skládání
6. Ramena základny
1. Knob regulating the resistance of the pedals
2. Rehabilitation pedals
3. Bicycle shoulders
4. The main frame
5. Lock of submission
6. Base arms
1
2
3
4
5
6
4
Application3. Použití
Rehabilitace a rekreace, doporučeno při
ochrnutí horních a dolních končetin a ortope-
dických onemocněních.
Cvičení s využitím trenažéru umožňuje for-
movat svalovou sílu, zlepšovat krevní oběh
v končetinách, stimulovat nervový systém a
zlepšovat kloubní rozsah pohybu. Zvláště se
doporučuje pro cvičení při ochrnutí periferních
nervů dolních končetin a pro ty, kteří prodělali
mozkovou mrtvici nebo jinou neurologickou
dysfunkci.
Možnost uplatnění trenažéru v nemocnicích
i v domácích podmínkách.
Rehabilitation and recreation, recommended
for upper and lower limbs paralysis and
orthopaedic diseases.
Exercises with use of the exerciser allow to
form the muscle power, improve blood
circulation within limbs, stimulate nervous
system and improve the joint range of motion.
Especially recommended for exercises during
paralyses of lower limb peripheral nerves and
for those who have experienced the cerebral
stroke or other neurological dysfunction.
The possibility of applying the exerciser at
hospitals as well as in household conditions.
4. Kontraindikace Contraindication
Conditions requiring limited upper and lower
limbs motion.
contraindication to physical movements (high
blood pressure, cardio-vascular and breathing
disorder)
Use
Stavy vyžadující omezený pohyb horních a
dolních končetin.
Kontraindikace cvičení (vysoký krevní tlak,
kardiovaskulární a dýchací potíže).
5. Používání
ROZKLÁDÁNÍ UNFOLDING
After removing the packaging, make sure the
exerciser is not mechanically damaged.
Then straighten the base frame until the lock
of submission is latched in the main frame.
Make sure the legs are properly installed and
that do not move.
Knob governing the resistance of the pedals
lightly screw into the hole located in the
central part of the frame.
ASSEMBLING
To submitted the exerciser, press lock
of submission and submit his arms
toward the main frame.
Po vyjmutí obalu se ujistěte, že trenažér není
mechanicky poškozen.
Poté narovnejte rám základny, dokud zámek
skládání nezapadne do hlavního rámu.
Ujistěte se, že nohy jsou správně nainstalovány
a že se nepohybují.
Šroub regulující odpor pedálů lehce
zašroubujte do otvoru umístěného ve střední
části rámu.
SKLÁDÁNÍ
Chcete-li trenažér složit, stiskněte
zámek skládání a složte ramena
směrem k hlavnímu rámu.
Bezpečnost používání Safety of use
VAROVÁNÍ ! WARNING!
a) Před použitím trenažéru pro horní a dolní kon-
četiny si přečtěte tento návod a uschovejte jej
pro budoucí použití.
a) Before using exerciser for upper and
lower limbs , refer to this manual and
keep it for future reference.

5
b) Before using the exerciser should consult your
doctor.
c) Stop exercises and consult your specialist
immediately if you feel dizziness,
severe muscle/joint pain or chest pain.
d) Warm-up and stretch about 5 minutes
before beginning your exercises.
e) Exercises should begin slowly and stay in
controlled manner.
f) Keep a minimum safety area clearance of 1
meter of the pedal exerciser. Be sure these area
remains clear during use of the exerciser.
g) Keep it away from children. The exerciser
shall not be used as a toy.
h) When it is used by, on or near children,
invalids or disabled persons close
supervision is necessary.
b) Před použitím trenažéru se poraďte se svým
lékařem.
c) Zastavte cvičení a okamžitě se poraďte se svým
specialistou, pokud pocítíte závrať, silnou bolest
svalů/kloubů nebo bolest na hrudi.
d) Asi 5 minut před začátkem cvičení se zahřejte a
protáhněte.
e) Cvičení by mělo začínat pomalu a mělo by zůstat
kontrolované.
f) Dodržujte minimální bezpečnostní vzdálenost 1
metr od pedálového trenažéru. Ujistěte se, že tato
oblast zůstává během používání trenažéru volná.
g) Uchovávejte mimo dosah dětí. Trenažér se nesmí
používat jako hračka.
h) Při použití dětmi, invalidy nebo postiženými
osobami nebo v jejich blízkosti je nutný přísný
dohled.
i) Trenažér je určen pro použití na rovném, plochém
povrchu.
j) Používání trenažéru na povrchu, který neposkytuje
určitou oporu, tj. mokrý, mastný, je nepřípustné z
důvodu rizika poranění těla.
k) Cvičení dolních končetin na trenažéru lze
provádět pouze vsedě. Vyberte si k tomu stabilní
židli.
l) Vybírejte boty, jejichž podrážka z pedálů
trenažéru nebude klouzat.
m) Nestoupejte na pedály trenažéru.
n) Nebezpečí popálení - trenažér může být po
tréninku zahřátý, je to způsobeno třením
pohyblivých částí.
o) Přípustný tlak na pedály trenažéru je 50 kg
(celkem).
p) Nepoužívejte trenažér v případě, že zjistíte
jakékoli viditelné nebo znatelné poškození (např.
prasklina ramen pedálů, nosníků), protože to může
způsobit nehodu.
q) Hrozí nebezpečí skřípnutí prstu kolem skládacích
ramen základny.
r) Veškeré opravy by měl provádět kvalifikovaný
personál výrobce.
i) The exerciser is designed for using on
flat , even surfaces.
j) Using the exerciser on a surface which does
not provide the certain support, i.e. wet, greasy
is unacceptable for the reason of the risk of the
body injury
k) Exercises of lower limbs on the exerciser can
be done in a sitting position only. Choose a
stable chair.
l) Select shoes, whose sole do not slip off
the exerciser pedals.
m) Do not stand on the exerciser pedals.
n)Risk of burns –the exerciser can be warm
after training, it is caused by the friction
of moving parts.
o) The acceptable pressure on the rotor’s pedals
amounts to 50 kg (altogether).
p) Do not use the exerciser in case of discovering
any visible or perceptible damage (e.g. the
crack of the pedal shoulders, trusses), because
it can cause the accident.
q) There is a risk of trapping your finger in
around the folding arms of base.
r) All of repairs should be made by qualified
manufacturer personnel .
6
7. Každodenní používání a údržba Everyday use and maintenance
CVIČENÍ DOLNÍCH A HORNÍCH
KONČETIN
LOWER AND UPPER LIMBS EXERCISE
Sedněte si na židli, postavte trenažér před
sebe, s pedály umístěnými k nohám uživatele.
Sedněte si na židli, postavte trenažér před sebe
na stůl nebo jiný kus nábytku s rovnou
plochou tak, aby se pedály nacházely u rukou
uživatele.
Dále vložte nohy / ruce do třmenů pedálů.
Pokud pociťujete nepohodlí způsobené
nesprávnou vzdáleností mezi pedály a židlí,
doporučuje se nastavit správnou vzdálenost.
Nyní můžete začít cvičit.
Sitting on a chair, set the exerciser in front of
you, with the pedals located within the user's
legs.
Sitting on a chair, set the exerciser in front of
you on a table or other piece of furniture with
a flat area with that the pedals located within
the user's hand.
Next, insert your feet / hands into pedals
stirrups. if you feel discomfort caused by
improper distance between the pedals and the
chair, it is recommended to set a proper
distance.
Now you can start exercises.
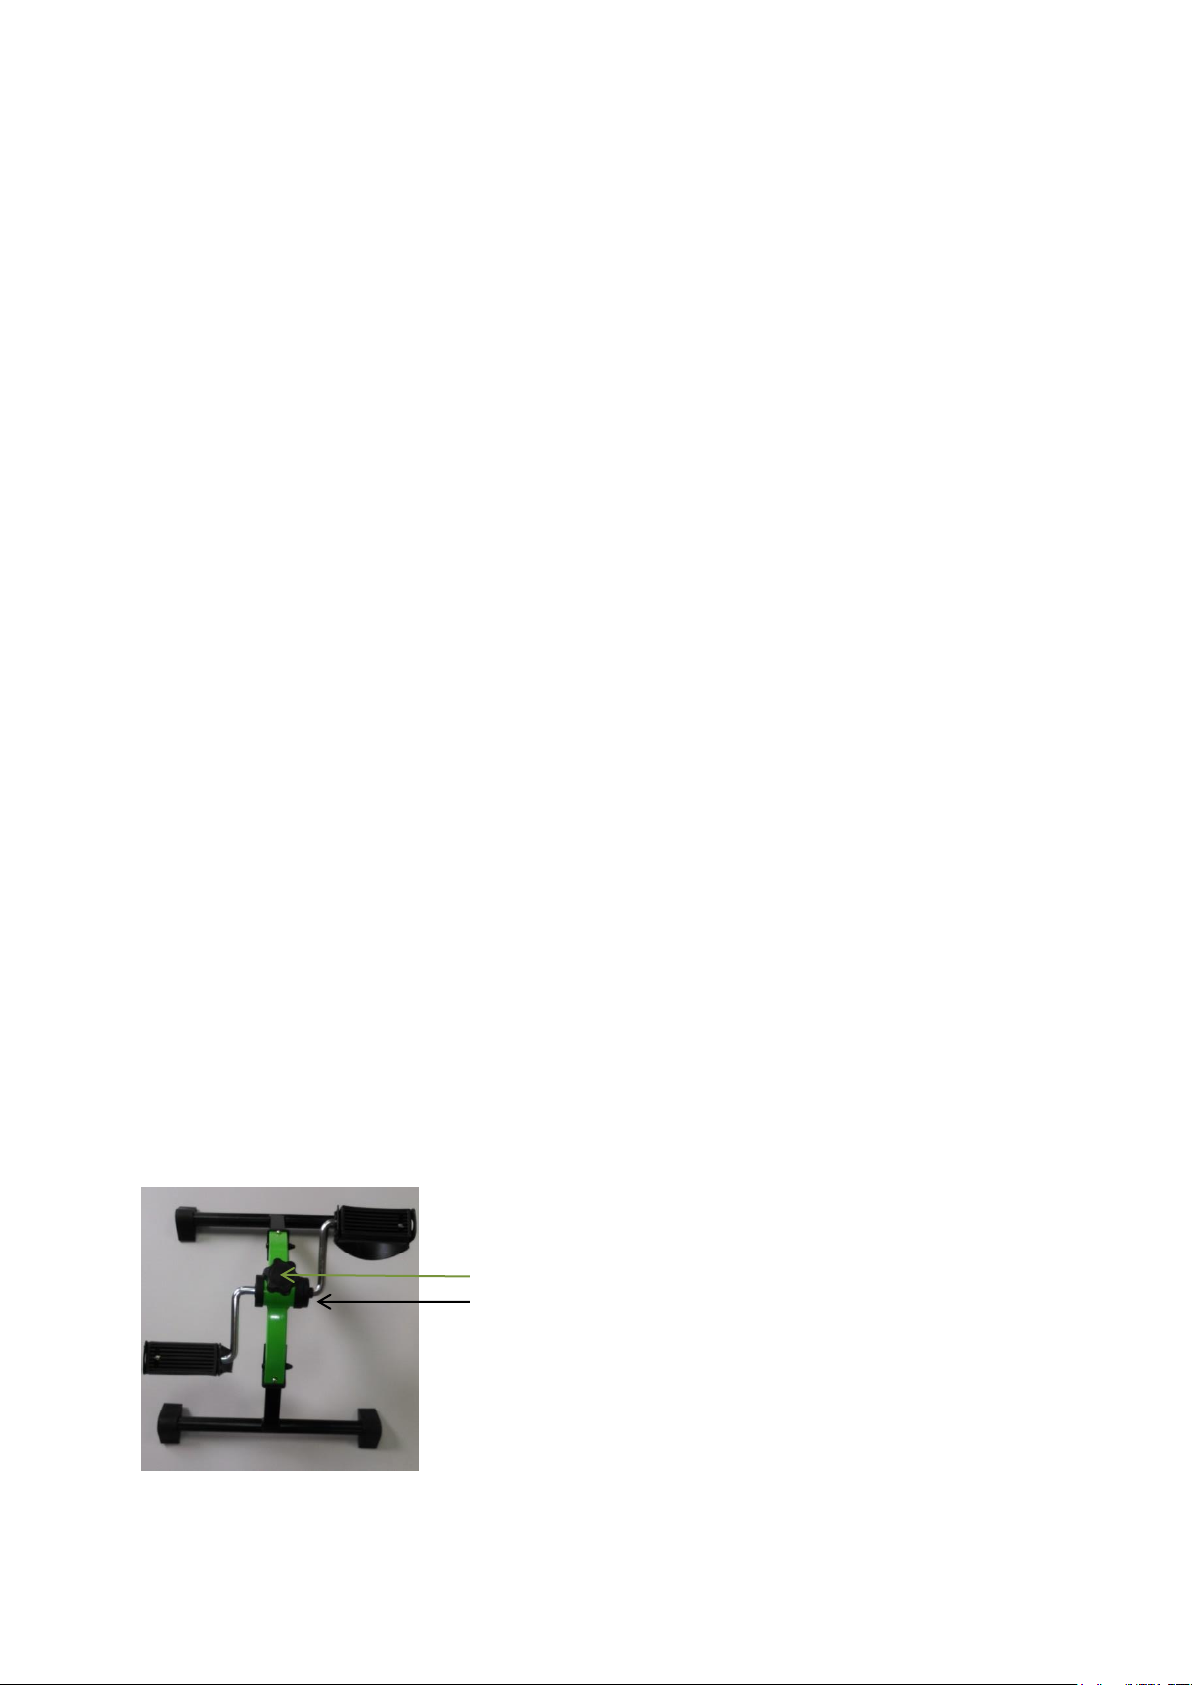
NASTAVENÍ ADJUSTMENT
Ve střední části trenažéru je šroub, kterým se
reguluje odpor pedálů.
Když šroubem otočíte ve směru hodinových
ručiček, odpor se zvýší, to znamená, že byste
měli použít větší sílu k pohybu pedálů.
Když otočíte šroubem proti směru hodinových
ručiček, odpor se sníží, to znamená, že byste
měli k pohybu pedálů vynaložit menší sílu.
In the central part of the exerciser is a knob
which regulate the resistance of the pedals.
When You turn the knob clockwise, the
resistance is increased , it means that you
should use more force to move the pedals.
When You turn the knob counterclockwise,
the resistance is decreased , it means that you
should use less force to move the pedals.
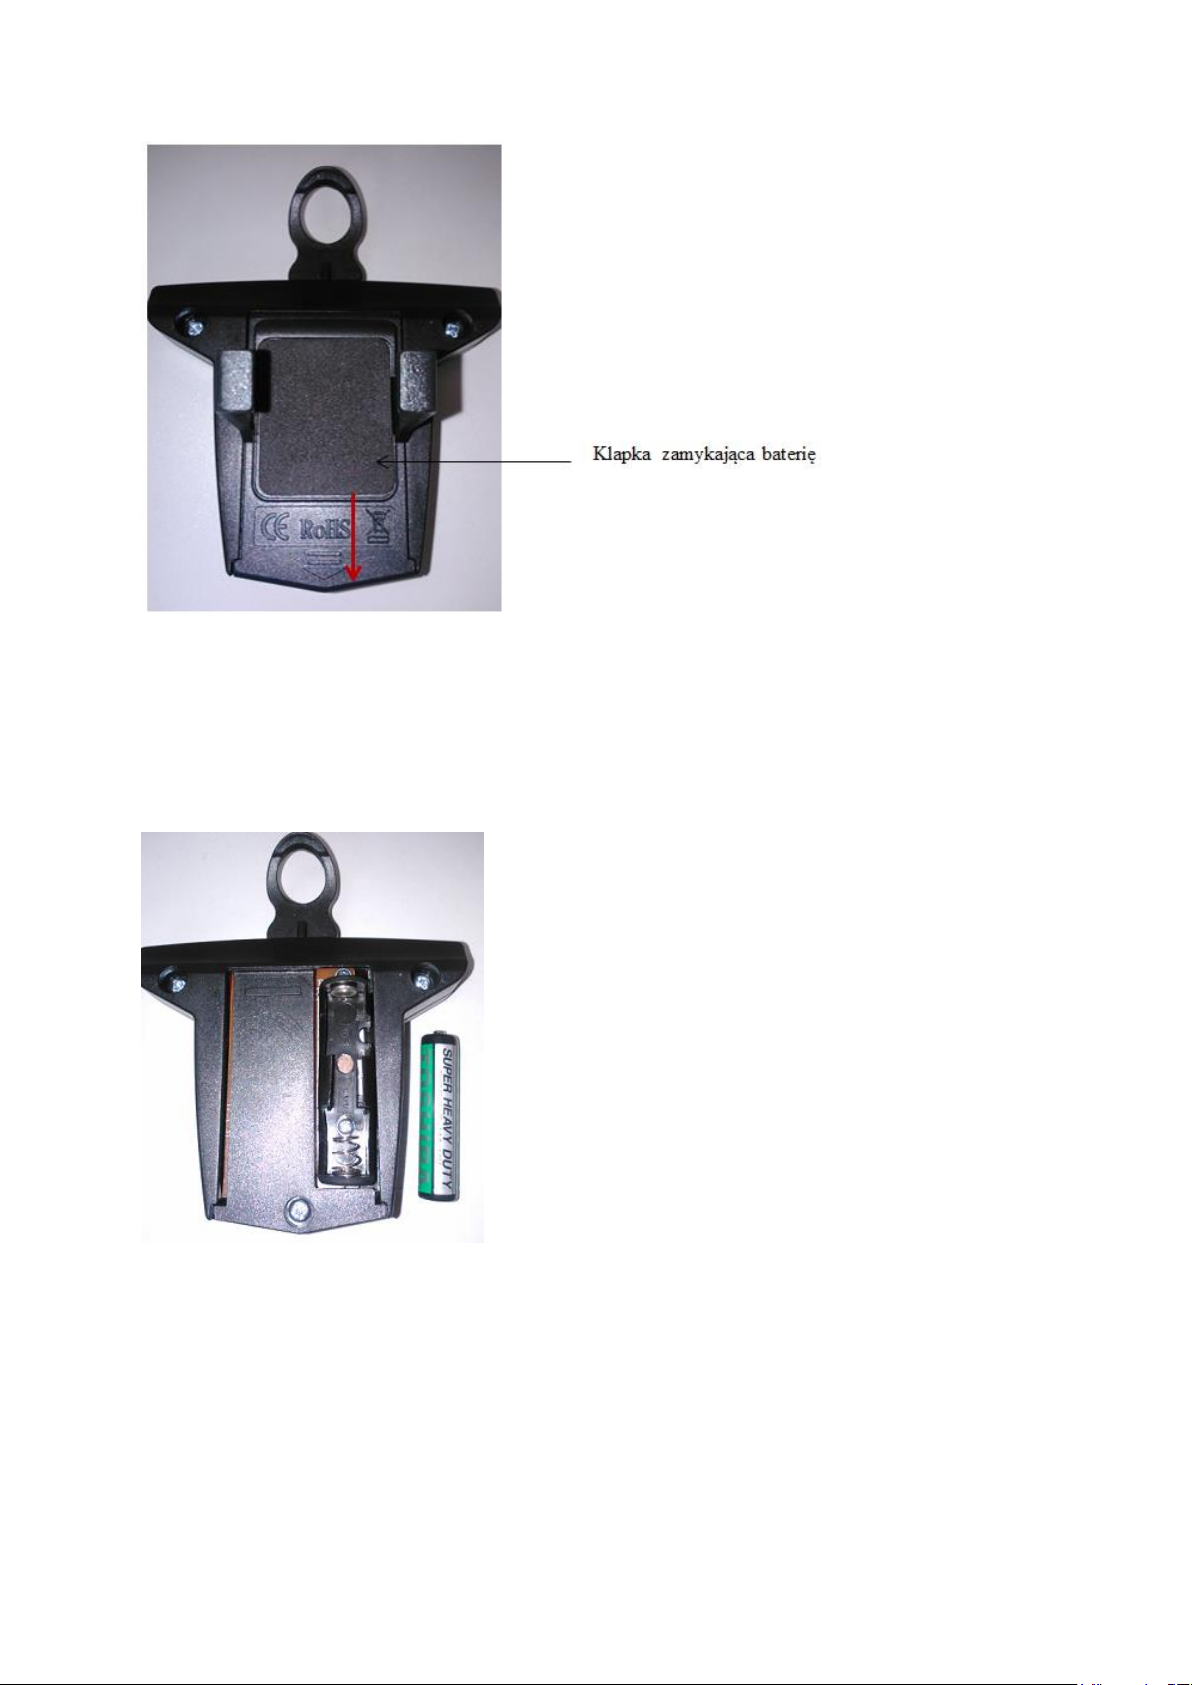
INSTALACE POČÍTADLA KALORIÍ POUZE PRO
MODELY POČÍTADLEM KALORIÍ
CALORIE COUNTER INSTALLATION ONLY FOR
MODELS WITH CALORIE COUNTER
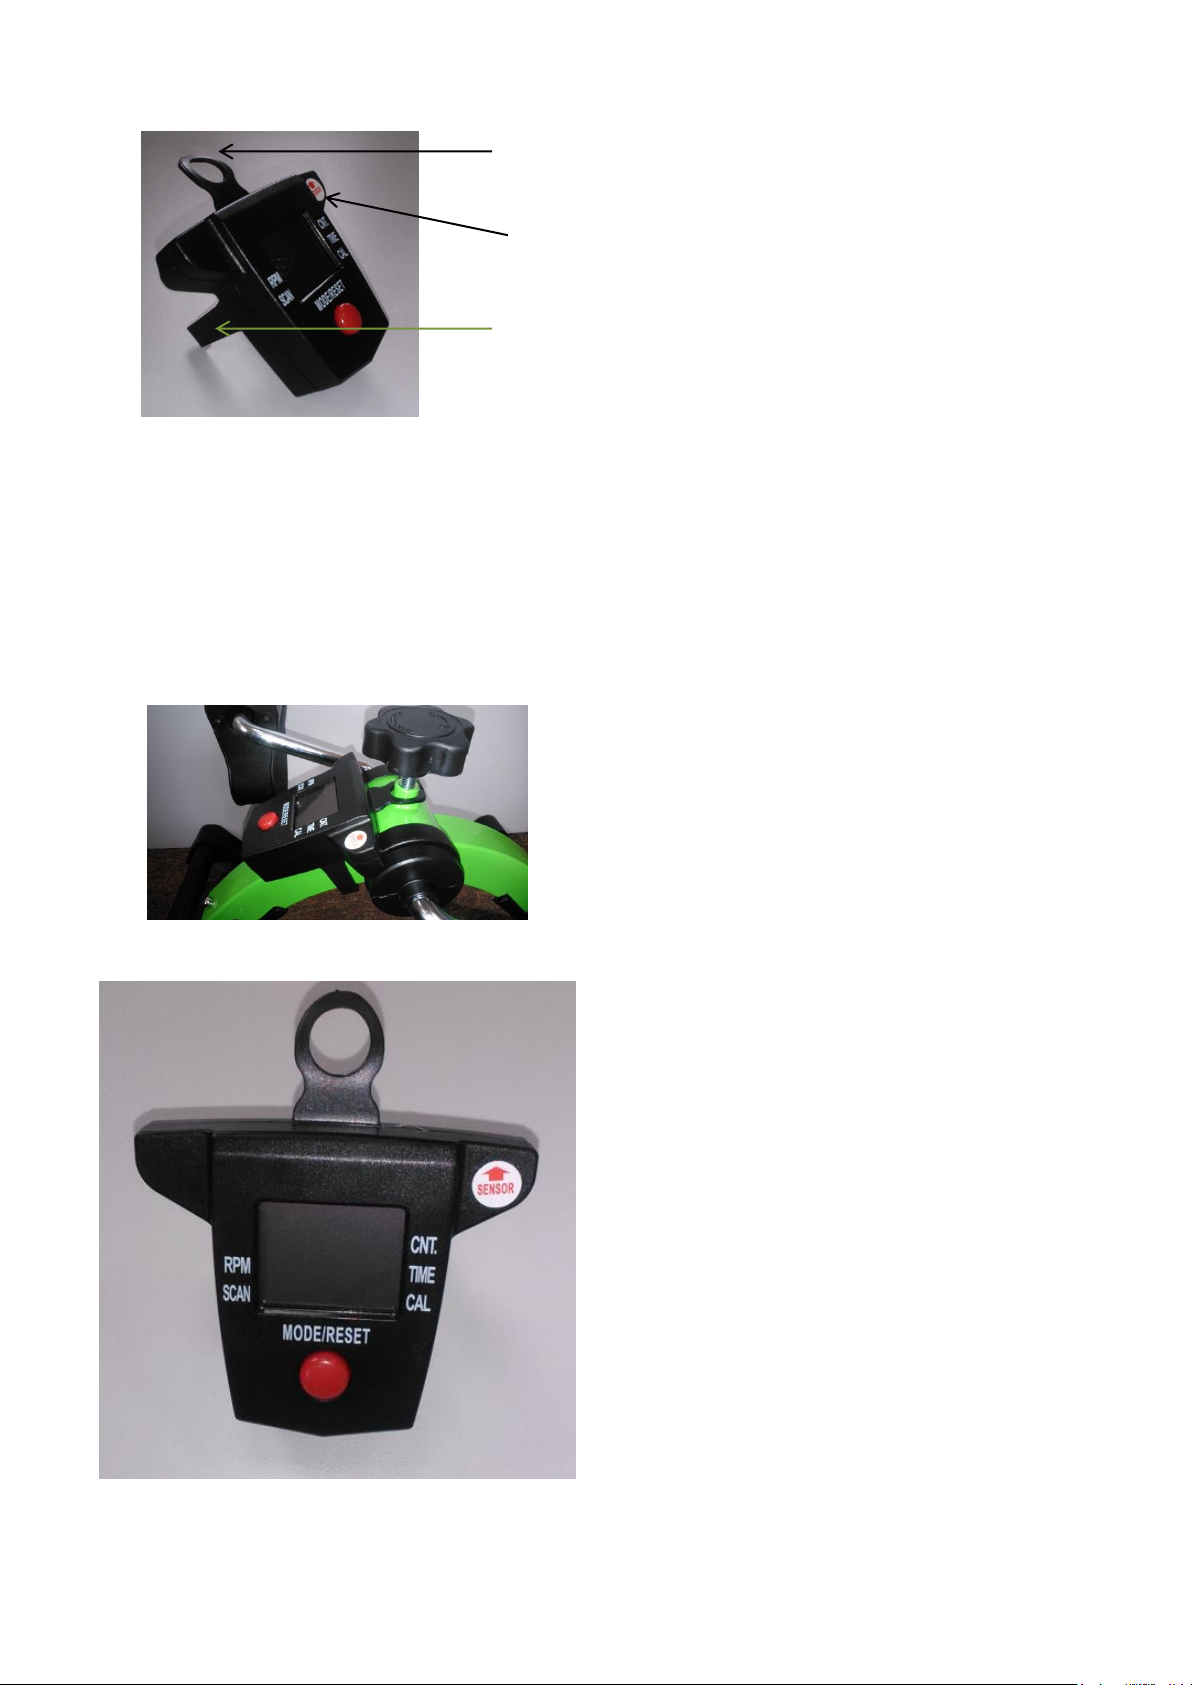
Obrázek / Illustration 2.
Pokrętło regulujące opór pedałów
Šroub regulující odpor pedálů
Sensor wykonanej pracy
Snímač počítadla
7
Před instalací počítadla kalorií odšroubujte
šroub regulující odpor pedálů.
Before installing the calorie counter, unscrew
the knob regulating the resistance of the pedal.
Obrázek / Illustration 3. Počítadlo kalorií / Calorie counter
Počítadlo kalorií by mělo být instalováno tak,
aby informační nálepka byla na stejné straně
jako snímač počítadla.
Montážní držák musí obklopovat závit. Šroub
regulující odpor pedálů musí být zašroubován
do závitu. Háčky by měly zakrývat hlavní rám
trenažéru. (Obrázek 4.)
The calorie counter should be installed in such
a way that information sticker was on the
same side like of the sensor of counter.
Thread must be surrounded by the mounting
bracket . Knob regulating the resistance of the
pedals must be screwed in the thread. Hooks
should cover the main frame of exerciser.
(Illustration 4.)
Obrázek / Illustration 4.
FUNGOVÁNÍ POČÍTADLA KALORIÍ CALORIE COUNTER
Obrázek/ Illustration 5.
Uchwyt mocowania
Montážní držák
Naklejka informacyjna
Informační nálepka
Zaczep
Háček

8
Počítadlo kalorií se aktivuje automaticky po
několika sekundách od začátku sešlápnutí
pedálů nebo stisknutím červeného tlačítka
MODE/RESET.
Několik sekund po zastavení šlapání se v
levém horním rohu objeví ikona STOP. Po
zahájení cvičení a zahájení počítání parametrů
hotového cvičení zmizí.
Počítadlo kalorií má různé funkce:
(Obrázek 5.)
The calorie counter is activated automatically
after a few seconds of starting work of the
pedals, or by pressing the red button MODE /
RESET.
A few seconds after stop of pedalling in the
upper left corner will appears the STOP icon.
It disappears after start exercising and start of
counting the parameters of the finished work.
The calorie counter has different functions.
Illustration 5.
CNT: udává počet otáček pedálů (převádí na
metry a množství spálených kalorií během
jednoho tréninku
CAL: udává celkové množství kalorií
spotřebovaných během cvičení.
TIME: udává celkový čas cvičení.
CNT: Gives the amount of rotations of the
pedals (count how many meters on the pedal
pass the calorie counter)
CAL: Gives the total calories amount
consumed from the exercise session.
TIME: Gives the total time of the exercise
session.
RMP: zobrazuje momentální frekvenci (počet
otáček za minutu).
MODE/RESET: mění zobrazenou hodnotu
(SCAN, CAL, TIME, RPM), pokud je tlačítko
MODE/RESET stisknuto déle než 4 sekundy,
vynuluje se časovač a vynulují se všechny
zobrazené parametry.
SCAN: pokud stisknutím tlačítka MODE/
RESET šipka ukazuje na možnost SCAN,
cvičení by mělo být zastaveno a počítadlo
připraví konečné výsledky. Po opětovném
stisknutí tlačítka MODE/RESET se zobrazí.
RMP: shows the momentary frequency
(number of rotations per minute).
MODE/RESET: changes displayed value
(SCAN, CAL, TIME, RPM), if the MODE /
RESET button is pressed for more than 4
seconds, it will reset the timer and reset all
parameters which were displayed .
SCAN: if by pressing MODE / RESET arrow
points to SCAN option, exercise should be
stopped and the computer will prepare the
final results. After the MODE / RESET button
is pressed again, they will be displayed.
Počítadlo kalorií zobrazuje hodnotu možnosti,
vedle které je zobrazena šipka ve tvaru
trojúhelníku.
Chcete-li přejít na jinou možnost, stiskněte
tlačítko MODE/RESET.
The calorie counter displays the value of the
option, near which features an triangle-shaped
arrow.
To move to other option, press the MODE /
RESET button.
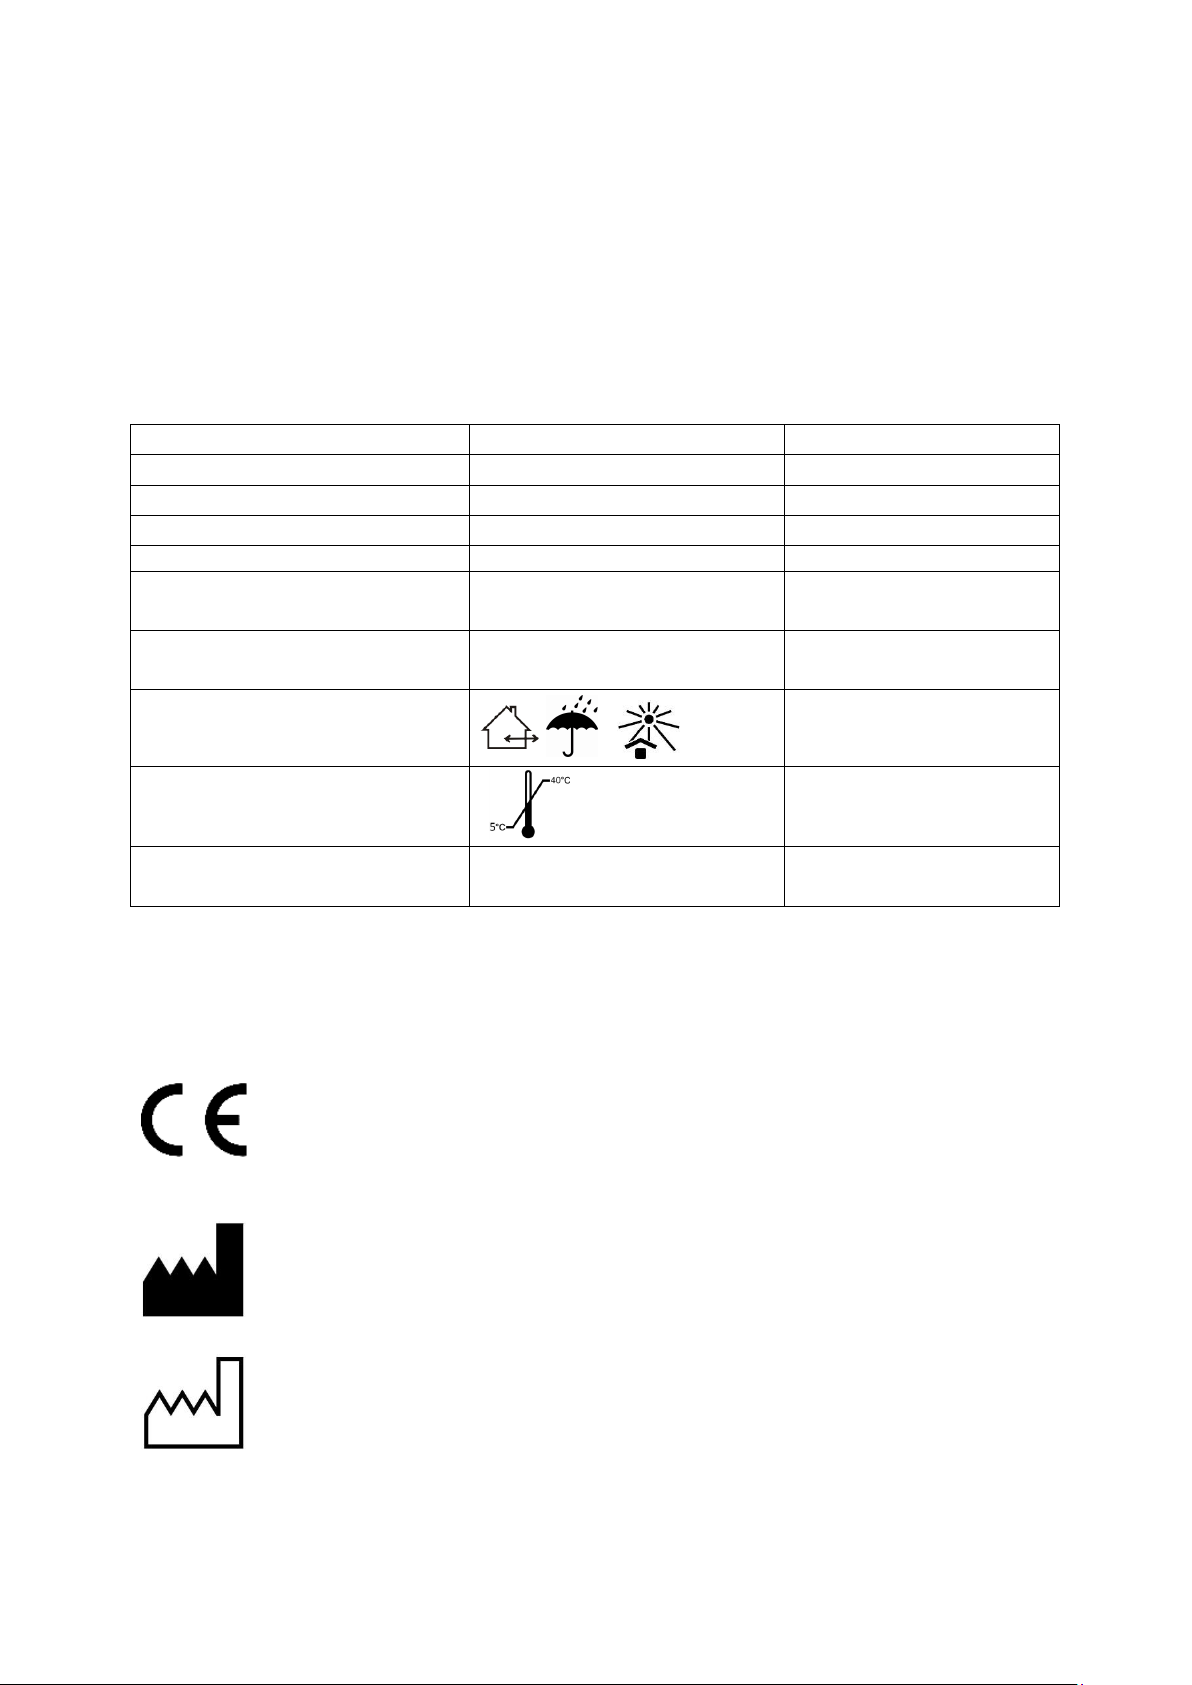
VÝMĚNA BATERIE BATTERY REPLACEMENT
Počítadlo kalorií je napájeno jednou baterií
AAA 1,5V.
Když je baterie vybitá, je třeba ji vyměnit.
The calorie counter is operated by one battery
AAA 1,5V.
When the battery is at the finish must be
replaced.
9
Obrázek / Illustration 6.
Chcete-li vyměnit baterii, vysuňte kryt baterie,
jak je znázorněno šipkou na obrázku 6.
Poté vyjměte starou baterii a vložte novou.
(Obrázek 7.)
To replace the battery, pull out the battery
closure flap. (illustration 6.)
Then remove the old battery and insert a new
one. (Illustration 7.)
Obrázek / Illustration 7.
KAŽDODENNÍ POUŽÍVÁNÍ A ÚDRŽBA EVERYDAY USE AND MAINTENANCE
Čistěte hlavní rám, ramena pedálů a pedály
vlhkým hadříkem.
Průběžně odstraňujte nečistoty z pohyblivých
prvků rotoru (šrouby, odporové mechanismy).
Clean the main frame, arms, pedal shoulders
with a wet cloth.
Systematically remove the dirt from the
movable elements of the rotor (screws,
resistance mechanisms).
Uzávěr umístění baterie
10
Udržování čistoty všech prvků trenažéru a
způsob skladování jsou velmi důležité pro
zachování funkčních vlastností výrobku.
Skladování v místnostech s velmi vysokou
vlhkostí (koupelny, prádelny apod.) nebo na
volném prostranství venku v kombinaci s
nedostatkem hygieny způsobí rychlou ztrátu
funkčních a estetických parametrů.
Maintaining all its elements clean and the
manner of storage are very important for
keeping functional parameters of the product.
Storing in rooms of very high humidity (baths,
laundries etc.) or in the open air, in the
combination with the lack of hygiene will
cause the fast loss of functional and aesthetic
parameters.
Nesmíte používat:
rozpouštědla,
WC čističe,
ostré kartáče a tvrdé předměty,
přípravky obsahující chlór,
korozivní čistící prostředky.
Nečistěte trenažér tlakovými nebo parními
agregáty!
Pro péči o leštěné a pochromované díly se
doporučuje používat na trhu běžně dostupné
čistící prostředky na leštěné předměty.
You must not use:
solvents,
toilet detergents,
sharp brushes and hard objects,
detergents that contain chlorine,
corrosive detergents,
Do not clean the exerciser with pressure or
steam aggregates!
For polished and chrome parts care it is
recommended to use detergents for polished
objects that are available on the market.
Četnost Předmět kontroly Komentář
Před první instalací Kontrola technického stavu a všech
součástí obsažených v dodávce. Zkontrolujte, zda není nějaký díl
viditelně mechanicky poškozený.
Každé dva týdny Kontrola šroubů a matiček a jejich
řádné utažení. Ujistěte se, že všechny šrouby jsou
řádně utaženy.
Každé dva měsíce Čistota a celkový stav. V případě mechanického poškození
kontaktujte neprodleně výrobce.
Frequency
Object of control
Comments
Before first
installation
Checking the technical condition and
all the elements within the
packaging.
Check if any elements have any
visible mechanical damage.
Every two weeks
Screw and nut control regarding their
correct fixing.
Make sure if all the screws and nuts
are fixed tightly.
Every two months
Cleanliness and general condition.
In case of mechanical damage
immediately contact the producer.
11
Oprava
V případě nutnosti opravy kontaktujte
výrobce.
Repair
In case of reparation needs contact the
producer.
Zákaznický servis Customer service
Should you have any questions or need help,
contact the producer.
V případě dotazů nebo potřeby pomoci
kontaktujte výrobce.
8. Technické údaje Technical parametres
Výška
380 mm
Height
Šířka
385 mm
Width
Délka
465 mm
Length
Hmotnost
2,3 kg
Weight
Maximální zatížení
50 kg
Maximum capacity
Materiál Ocel, polyetylen, guma / steel,
polyethylene, rubber
Material
Sériové číslo, datum výroby Vytištěno na výrobku /
On the product
Serial number, production
date
Popis prostředí, ve kterém bude
výrobek používán
Description of the
environment where the
product will be used
Rozsah teplot pro skladování
a používání
Storage and use temperature
Rozsah vlhkosti pro skladování
a používání
Od 30% do 70% /
From 30% to 70%
Air humidity for storage and
use
9. SymbolySymbols
Potvrzení splnění norem EU / Confirmation of compliance with EU standards
Výrobce / Manufacturer
Datum výroby / Date of production
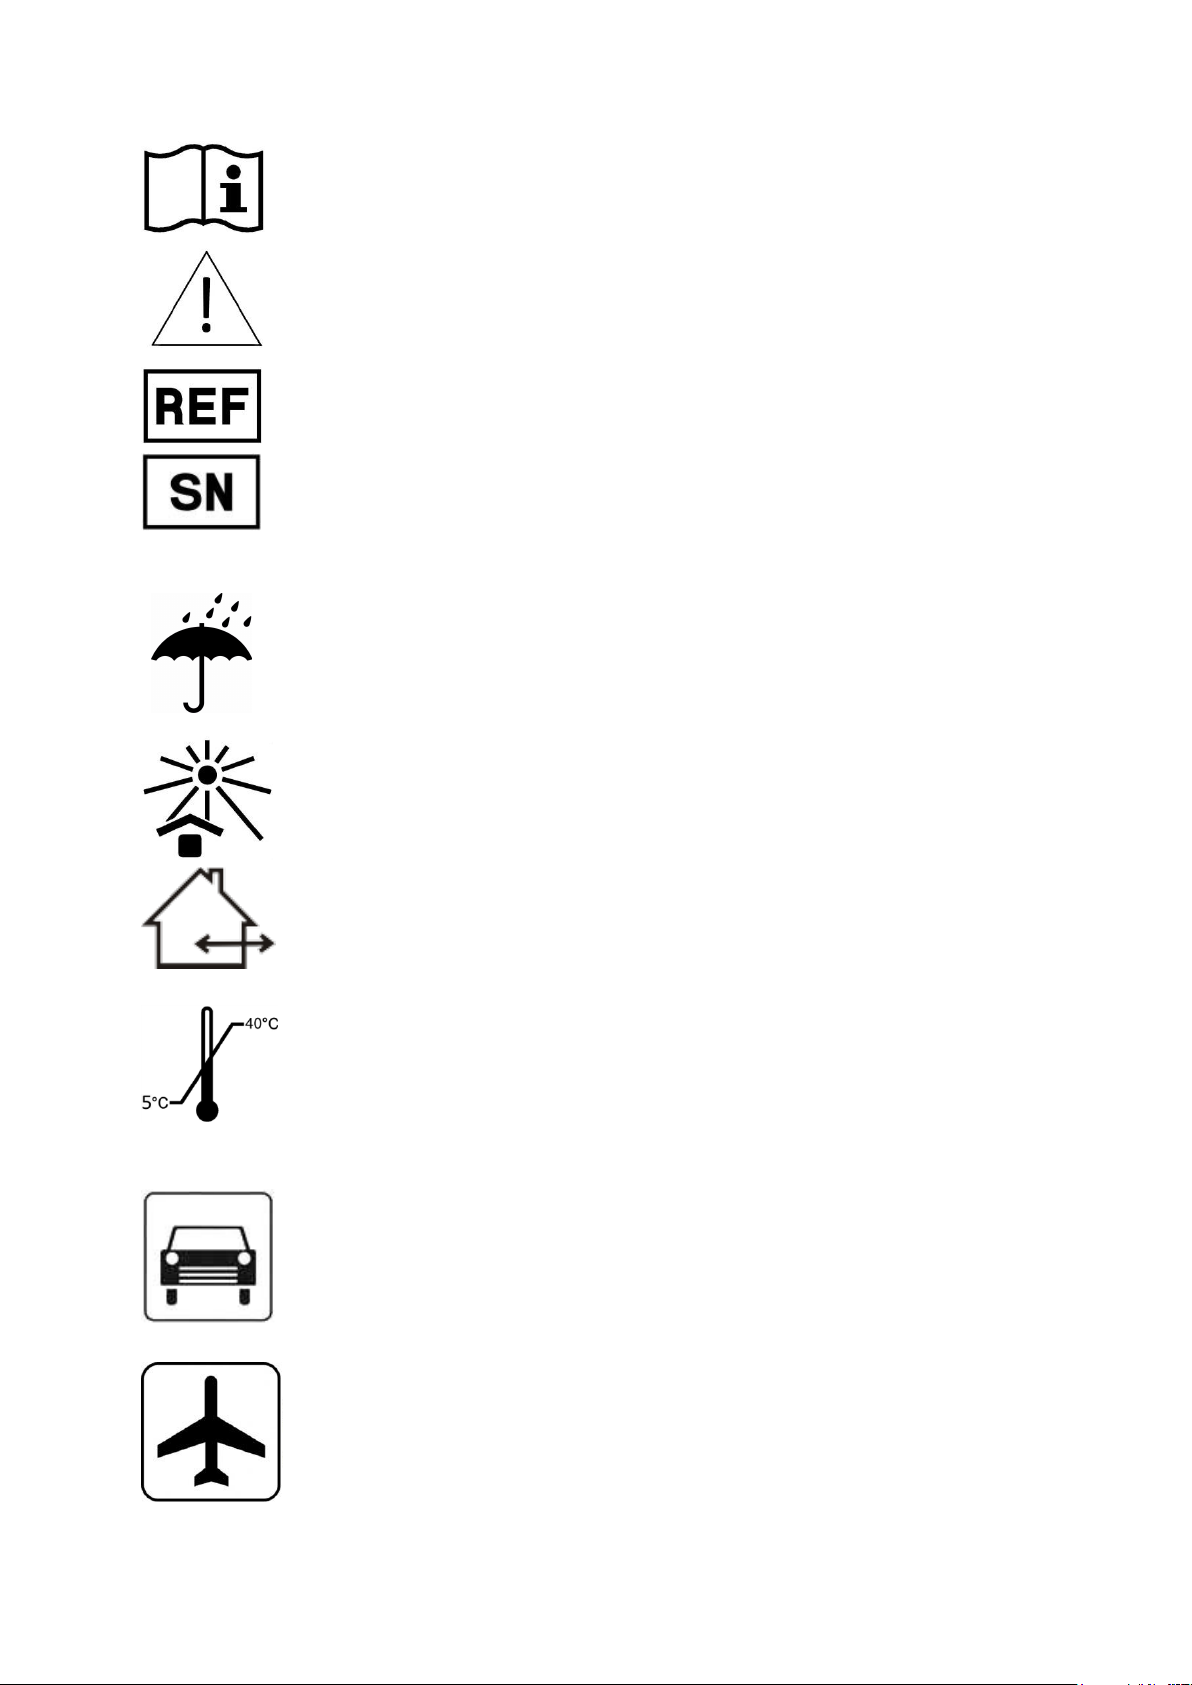
12
Čtěte návod k použití / Peek intothe user's manual
Varování / Warning
Katalogové číslo / Catalog number
Sériové číslo / Serial number
Chraňte před vlhkem / Protect from moisture
CChraňte před slunečním zářením / Protect from sunlight
Možnost použití v interiéru i exteriéru / Use inside and outside buildings
Rozsah přípustné teploty / Allowable temperature limit
Výrobek lze převážet autem / The product is intended to
transport by car,
Výrobek lze převážet v letadle / The product is intended for the
transport by plane.

Other manuals for Genesis
1
This manual suits for next models
1
Table of contents
Other Vitea Care Fitness Equipment manuals


Popular Fitness Equipment manuals by other brands


G-FITNESS
G-FITNESS AIR ROWER user manual

CAPITAL SPORTS
CAPITAL SPORTS Dominate Edition 10028796 manual

Martin System
Martin System TT4FK user guide

CIRCLE FITNESS
CIRCLE FITNESS E7 owner's manual

G-FITNESS
G-FITNESS TZ-6017 user manual

Accelerated Care Plus
Accelerated Care Plus OMNISTIM FX2 CYCLE/WALK user manual


