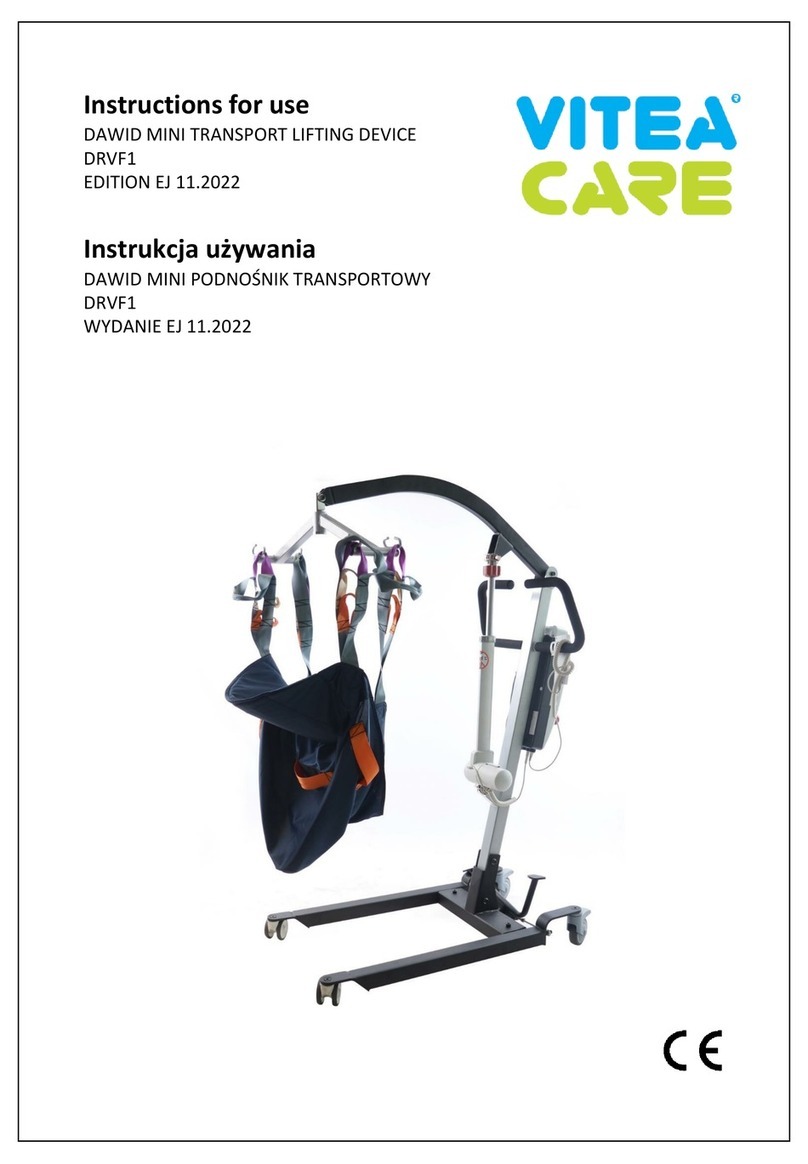
Vitea Care DAVID User manual

USER MANUAL
DAVID –MINI TRANSPORT LIFTING DEVICE
(DRVF123AL1XXP)
EDITION PK11.2019ENG
INSTRUKCJA UŻYTKOWNIKA
DAVID –MINI PODNOŚNIK TRANSPORTOWY
(DRVF123AL1XXP)
WYDANIE PK11.2019PL

USER MANUAL
Table of content
1. Introduction.....................................................................................................................2
2. Product description.........................................................................................................2
3. Application.......................................................................................................................3
4. Contradictions .................................................................................................................3
5. Usage...............................................................................................................................3
5.1. Assembly guide.................................................................................................4
5.2. Operation guide................................................................................................5
6. Safety of use....................................................................................................................9
7. Everyday use and maintenance ......................................................................................10
7.1. Patient lifting ....................................................................................................10
7.2. Maintenance and conservation........................................................................13
7.3. Troubleshooting ...............................................................................................13
8. Technical specifications...................................................................................................14
9. Symbols ...........................................................................................................................15
10. Contact details...............................................................................................................15
ATTENTION
Always follow the basic precautions according to the information included
below and regarding safety measures when using the device. Read the entire
instructions carefully before use. Keep this user manual for future reference.

USER MANUAL | DAWID MINI LIFTING TRANSPORT DEVICE
1 | page
1. Introduction
Thank you for choosing our product. We are deeply convinced that it will meet your expectations.
Please read this document before first use. This manual was made in order to provide the necessary
information on the safe use of the device. The correct application of the recommendations will
contribute significantly to extended durability and visual design of the product. We would like to to
highlight that to date we are constantly improving the quality of our products, which may result in
minor changes that are not included in this manual.
2. Product description
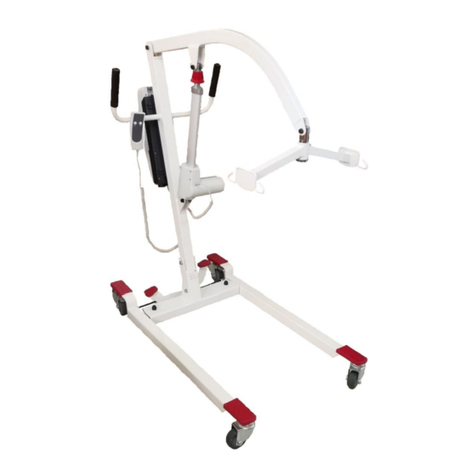
Fig. 1. Construction scheme of David mini transport lifting device. The letters are marked with
the following structure elements: A- base, B- frame, C- electric actuator, D- width adjusting
pedal, E- control box with battery, F- remote control, G- lifting arm, H- adjusting screw,
I- hanger, J- front castor without brake, K- rear castor with brake, L- base.

USER MANUAL | DAWID MINI LIFTING TRANSPORT DEVICE
2 | page
3. Application
David mini transport lifting device is designed to carry only one patient at a time. For safety
during lifting and transport, patient should be under supervision of trained caregiver. Each
time in order to maneuverer should use handle. Thanks to the solutions implemented from
the device can be used patients affected:
•Patients with paraplegia - including the lower limbs.
•Patients with paralysis.
•Patients with limb loss.
•Patients with cardiovascular failure.
•Patients with reduced joint mobility and muscle weakness.
•Elderly people requiring specialized home or professional care.
4. Contraindications
The mini transport lifting device David equipment is not a device used to transport patients
over long distances. Choose the sling recommended by the doctor for the patient. When
moving the patient while he is suspended from a carrier attached to the lift, do not move the
base wheels through items such as raised carpet frames, door sills, or any uneven surfaces
that may cause the lift to shake. If any undesirable effects occur, the patient's transport should
be stopped immediately.
5. Usage
•After unpacking check that it contains all the parts in accordance with the list of items
above (Fig. 1).
•Make sure that all components do not have visible mechanical damage. In case of
doubt, contact the manufacturer.
•Do not use the device until all components are properly connected.
•Maximum permissible user weight - 150 kg
•We are not responsible for any damages resulting from the use of a lift with a higher
weight than the permissible one.
•Please do not place the hoist on an inclined surface as it may fall down.
•Do not attempt to exceed any steps, curbs, or other obstacles that could cause injury
or injury when the product falls over.
•Do not attempt to repair the battery yourself

USER MANUAL | DAWID MINI LIFTING TRANSPORT DEVICE
3 | page
5.1. Assembly guide
Step 1. Install the column
Fig. 2. Scheme of mounting the lifting column.
Remove the device and spare parts from the package. Loosen the jam nut and bolt, then raise
the frame and align the holes in parallel. Tighten the screws and tighten the nut properly
(make sure there is no movement at the frame).
ATTENTION: When mounting the lifting column, avoid standing under it, failure to do so may
result in accidental fall of the column and risk of injury.
Step 2. Hoist Arm and Powered Actuator
Fig. 3. Installation of lift arm
Align the bracket with the mast mounting hole, screw in the bolt and washer, install the
bottom of the actuator and column in place, and finally install the electric actuator and
bracket, tighten all nuts.
Step 3. Install the Controller
Fig. 4. Controller installation scheme
Pozycja
zablokowana

USER MANUAL | DAWID MINI LIFTING TRANSPORT DEVICE
4 | page
Releasing: Press the release button and pull the battery out in the direction. Installation: Place
the battery in place and press the switch in the direction shown in the scheme (Fig. 4). Ensure
that the battery cannot be separated without pressing the switch.
Fig. 5. Installation scheme of hooks for the power cord.
Insert the hooks into the side holes of the battery box (Fig. 5) to facilitate storage of the power
cord. One end of the power cord should be connected to the control box, while the other end
should be connected to a wall outlet to charge the battery. To disassemble the David transport
lifting device, proceed in the opposite way than for assembly.
5.2. Operation guide
Electrical controller (remote control):
a) Emergency Stop Button (Emergency Stop)
The emergency stop button interrupts and turns the power on, causing the engine to stop
immediately in an emergency.
Fig. 6. Emergency Stop Button operation scheme, positions A and B.
Pressing the Emergency Stop button (red button) (Fig. 6A) will stop the engine. To restore the
engine to normal operation, turn the button (Fig. 6B) clockwise to unlock the device. Lifting
and lowering the boom are simple and is done using the above pilot / controller. Suspend the
remote control after using or adjusting the boom height in a safe and easily accessible place
near the driving handle.

USER MANUAL | DAWID MINI LIFTING TRANSPORT DEVICE
5 | page
NOTE: When the device is not used for more than 3 days, press the Emergency Stop Button to
maintain longer battery life.
b) Electrical failure - 'up' and 'down' buttons:
Fig. 7. Schemat położenia przycisków „w górę” i „w dół”.
Use the 'up' or 'down' arrow keys (Fig. 7) to bring the motor to its default position if the
controller fails or there is no controller handle.
c) Controller support:
Use the "up" and "down" buttons on the controller handle to control the lift and lowering the
lifting arm, after releasing the buttons it will stop moving. If the remote control does not work
properly, press the red Emergency Stop Button
d) LCD display:
Fig. 8. Scheme of controller information displayed, designations: A–Over duty on main lifting
actuator, B–Overload on actuator/s, C–Remind to replace main actuator, D–Battery lever
bars, E–Error code display.

USER MANUAL | DAWID MINI LIFTING TRANSPORT DEVICE
6 | page
The display can show tips and information on transport lifting device malfunctions. Battery
charge indicator - from the left: 100%, 75%, 50% and 25-0%.
e) Control device connection:
Fig. 9. Schemat portów sterownika skrzynki elektrycznej.
The device has 4 ports (Fig. 9), from left to right: Handset, lifting actuator (M1), Spread
actuator (Optional), Charging plug.
Installation: Insert 4 cables into four different ports one after the other, respectively.
Base width adjustment
Fig. 10. Scheme width adjustment of the base.
The width of the lift base is manually adjusted with a foot pedal. Press the left pedal to extend
the base. Press the right pedal to make the base narrower. It is possible to manually lock the
base width adjustment by turning the red sleeve (Fig. 10) counter clockwise.
Warning! Locking the wheel during hoist movement will increase the risk of falling down the
hoist.

USER MANUAL | DAWID MINI LIFTING TRANSPORT DEVICE
7 | page
Rear wheel opening and braking
Fig. 11. Hamulec nożny kół tylnych podnośnika
The rear wheels can be locked to prevent movement. Lock or unlock the rear wheels with your
feet. Use your foot to control the brake position. Press the longitudinal plastic element with
the foot to block the wheel (Fig. 10A), then press the shorter plastic element to resume
movement (Fig. 10B).
WARNING! Locking the rear wheels of the jack increases the risk of the machine tipping over
when lifting and lowering. Always keep the support perpendicular to the patient's center of
gravity when working.
Charging (power supply)
When the battery has only one line left, the control box emits 4 beeps and remind you to
immediately charge. The engine will not run without charging.
Battery charging procedure
When you hear a beep, turn off the emergency stop button and connect the control box.
When the battery is fully charged, the battery charge status shows 4 dashes (100%) and the
LED on the control panel does not flash.
WARNINGS:
1. Turn off the emergency stop button and do not use the elevator while charging.
2. Take out the control box and keep it in a shaded place when the lift will not be used for a
long time. Charge the battery once a month.
3. Do not charge the battery in a humid atmosphere.
4. In the event that the lift is not in daily use, it is recommended to disable the emergency
stop button to cut off the current flow and maintain the battery charge.
Note: During charging, the emergency stop button must be turned off and charge, the hoist
will be switched off during charging. When the jack is not used for a long time, it must be
A
B

USER MANUAL | DAWID MINI LIFTING TRANSPORT DEVICE
8 | page
reused to maintain the battery's Active Lock performance. Do not charge the lift in high
humidity.
6. Safety of use
a) Before using the lifting device refer to this manual and keep it for future reference.
b) The lifting device is designed to use indoors only on hard and even surfaces.
c) Using the lifting device on an unstable surface (covered with ice, wet, greasy, sandy) is
unacceptable- it causes risk of falling,
d) You can only use the lifting device on surfaces where all four wheels are touching the
ground.
e) Do not leave the lifting device with the user close to open sources of fire.
f) Be aware that the surface temperature of the frame parts may be increased after exposure
to the sun or other heat source. Furthermore, with low temperatures there is a danger of
overcooling metal parts of lifting device. It may cause burns or frostbite parts of the body. g)
In order to transfer lifting device, grab the frame. Never transfer the lifting device by grabbing
movable elements or control unit.
h) The lifting device is designed for people up to 150 kg.
i) Lifting device must be easy to fold and to unfold. In case of problems with folding, you should
re-read the instruction or contact the manufacturer.
j) Brakes cannot slow down the lifting device during ride, you should use them only to prevent
the unintended movements.
k) Oil, grease, water or other chemicals, may cause that brakes may have reduced
effectiveness.
l) It is extremely important to keep all lifting devices components clean in order to maintain
the product parameters.
m) Storing the lifting device in areas with very high humidity (baths, laundry, etc.) or in the
open air, also the lack of hygiene causes rapid loss of operating parameters and aesthetic of
the product.
n) It is unacceptable to use the lifting device after discovering any visible or detectable
damages or when the wear of some parts may cause an accident. All the repairs need to be
performed by skilled personnel and during the warranty period only by the manufacturer's
service.
o) During transport (e.g. In the trunk), do not burden lifting device elements, it may weaken
or damage its structure.
p) Keep out of the reach of children under five years of age. q) Should not insert fingers
between the lifting device components - risk of injury or entrapment.
r) Keep extreme caution while unfolding / folding the lifting device. Lack of attention may
result in finger entrapment.
s) Always maneuvers the lifting device with the handle provided.
t) Do not use a sling that is not recommended for the lift.
u) Only trained and qualified caregivers should transfer a person.

USER MANUAL | DAWID MINI LIFTING TRANSPORT DEVICE
9 | page
v) Lifting device is designed for transferring patients only. Do not use the lifting device for any
other purpose.
w) Before each patient lifting, make sure that base legs were blocked in maximum wide
position.
x) While moving the patient, should bypass obstacles at safe distance, which might cause the
lifting device to tip over.
y) Before each lifting device usage, make sure that slings are in good condition. Usage slings
showing signs of damage is forbidden.
z) Before using lifting device, should charge the battery for about 6 –8 hours. Make sure, the
red warming lights is off.
7. Everyday use and maintenance
7.1. Lifting the patient
•First, set the ride base in the maximum enlarged position. To do this, press the pedal
of the head adjusting the width of the transport lifting device.
•For easy and comfortable lifting of the patient should be prepared a transporter lifting
device, a sling with a leg separator, a sling with head stabilization and a wheelchair.
•The patient should lie in the middle of the bed, then turn he/she to the side, in the
opposite direction to the caregiver.
•The sling should be placed under the patient.
•Examples of slings are shown in the figures 12 & 13.
•Turn the patient towards the caregiver and place he/she in the middle of the sling so
that the back loops are in the upper back of the patient and the thigh loops be placed
within the patient’s thighs.
•Hanging loops should be hung on a four-point cradle.
•Loops have different colors to make it easier to put on slings at the same height.
Fig. 12. Sling with a leg separator
Back loop
Thigh loop

USER MANUAL | DAWID MINI LIFTING TRANSPORT DEVICE
10 | page
Fig. 13. Sling with head stabilization
•Make sure hanging loops are tight and make sure the patient is in a comfortable
position.
•Lock the rear wheel brakes and lift the patient by pressing the corresponding button
on the remote control.
•Should lift the patient until his feet are not touching the bed or the floor.
•Then unlock the rear wheel brake and carry the patient over the wheelchair.
•The brakes should be locked both in the transport lifting device and in the wheelchair.
•The next step is to press the "down" button on the remote control to gradually lower
the patient.
•When descending, help the patient to take a correct and a comfortable sitting position.
•After setting down the patient in a wheelchair, remove the sling loops from the four-
point cradle.
•If using a sling with a leg separator, make sure that the patient is properly dressed
before moving the lift towards the movable toilet chair.
•Make sure that the hanging loops are tight and that the patient is in a comfortable
position.
The patient can be placed on the sling in a sitting position, e.g. when transported from
a wheelchair or bed as follows.
•Place the sling around the back of the patient.
•Donning is easier if the patient bends slightly forward.
•Guide the sling carefully at the patient up on the height of the tailbone.
•Move the thigh belts forward at patient’s thighs until they are on both sides at the
same height.
•Be careful not to bend the material.
Back loop
Thigh loop

USER MANUAL | DAWID MINI LIFTING TRANSPORT DEVICE
11 | page
•Wear the seat belts under the patient's slightly parted legs.
•Donning is easier if the patient slightly raises thighs.
In order for the patient to sit comfortably on a wheelchair, it should be planted as deep as
possible.
•During the process, lowering the patient, lightly press the patient’s knee so that
his/her back is closest to the backrest of the wheelchair.
Slings:
Clean the seats with a damp cloth. Difficult dirt should be removed with a commercially
available mild cleaner. Stains can be removed with a cloth or a soft brush. Wash with a wet
cloth (with clean water) and allow to dry. Before washing, follow the instructions on the label
of the sling.
Sling cleaning instructions:
Do not use:
•Solvents.
•Toilet cleaners.
•Sharp brushes and hard objects.
•Caustic cleaners.
Washing instructions:
The belts can be machined washed at 30 ° C.
•Do not use chlorine based bleaching
agents.
•Do not tumble dry.
•Do not iron
Foldable and portable frame:
• Lower the control unit and then fully attach the lift frame.
• Remove the screw before folding the frame.
• Release and support the plate before raising the frame
• The scheme of folding the frame is shown in figure 14.
Fig. 14. Scheme of folding the elevator frame.

USER MANUAL | DAWID MINI LIFTING TRANSPORT DEVICE
12 | page
7.2. Maintenance and conservation
Routine inspection listed below shall be performed every day for the sake of safety.
1. Check if there is any damage or wear by visual inspection.
2. Make sure screws and nuts on lifting arm are secured.
3. Check if hook on lifting arm works properly.
4. Controller, actuator and base width adjustment verification.
5. Emergency descend function verification (both manually and electrically)
If needed, to clean the patient lift with warm water or alcohol. Make sure there is no dust and
hair on the wheels.
Attention: to clean the patient lift with chemicals with Phenol and chlorine is prohibited, which
may cause damage on plastic powder or plastic material.
Transportation and Storage:
Press the emergency stop button for transportation or not using the patient life for a certain
of time. Temperature for storage of patient life shall be higher than 0℃and relative
moisture≤60%.
Inspection:
Make a full inspection at least once a year. Pay close attention on those worn part such as
connection and screw bolt.
7.3. Troubleshooting
Issue description
Troubleshooting
Patient lift cannot work (ascend
and descend)
1. Check if the emergency stop button is
pressed down.
2. Verify the controller and cables from
actuator is properly connected.
3. Check the battery level from display
screen on the control box.
4. Verify if there is any problem or damage
on battery contact panel.
5. Ask for after-sale service if patient lift still
cannot work.

USER MANUAL | DAWID MINI LIFTING TRANSPORT DEVICE
13 | page
Charger cannot charge the
battery
1. Check if the charger fully plugs into socket.
2. Verify if there is any problem or damage
on battery contact panel.
3. Ask for after-sale service if patient lift still
cannot work.
Patient lift stops when
ascending
1. Check if the emergency stop button is
pressed down.
2. Employ the emergency descend device.
3. Ask for after-sale service if patient lift still
cannot work.
8. Technical specifications
Technical parameter
Parameter value
Frame
Steel, powder coating
Chassis length
950 mm
Chassis width
520-580 mm
Lifting height
1230 mm
Handle height
780-1870 mm
Castor height
115 mm
Motor
DC 24V 8000N
Battery
DC 24V 5AH, interchangeable battery
Approx. 60 lifts per full charge
Charger
24V-1A
Charging time
5 hours per time
Front castor
3'' solid tires
Rear castor
4" solid tires with locking
Push handle
Push handle with rounded corner
Max. user weight
150 kg
Addons
Standard sling
Standard Mode / Stand Aid Mode
Interchangeable
Package
1300x570x350 mm
G. / N. W.
46/40 KGS

USER MANUAL | DAWID MINI LIFTING TRANSPORT DEVICE
14 | page
9. Symbols
Confirmation of product compliance with EU standards
Production date
Manufacturer
See the instructions for use
WARNING
Catalogue number
Serial number
Protect from moisture
Protect from sunlight
Permissible user weight
Indoor use only
Possibility of fingers jamming
Temperature of storage and use
10. Contact details
mdh Co., Ltd. St. 22/24 Ks. W. Tymienieckiego,
90-349 Łódź, Poland
tel. +48 42 674 83 84, fax. +48 42 636 52 21 www.mdh.pl,www.viteacare.com

INSTRUKCJA UŻYTKOWNIKA
DAVID –MINI PODNOŚNIK TRANSPORTOWY
(DRVF123AL1XXP)
WYDANIE PK11.2019

INSTRUKCJA UŻYTKOWNIKA | DAWID PODNOŚNIK TRANSPORTOWY
1 | strona
INSTRUKCJA UŻYTKOWNIKA
Spis treści
1. Wstęp ..............................................................................................................................2
2. Opis produktu..................................................................................................................2
3. Zastosowanie...................................................................................................................3
4. Przeciwwskazania............................................................................................................3
5. Użytkowanie....................................................................................................................3
5.1. Montaż podnośnika..........................................................................................4
5.2. Obsługa podnośnika .........................................................................................5
6. Bezpieczeństwo użytkowania..........................................................................................9
7. Czynności obsługi i konserwacji ......................................................................................10
7.1. Podnoszenie pacjenta.......................................................................................10
7.2. Utrzymanie i konserwacja ................................................................................13
7.3. Rozwiązywanie problemów..............................................................................14
8. Parametry techniczne......................................................................................................15
9. Symbole...........................................................................................................................16
10. Dane kontaktowe ..........................................................................................................16
UWAGA
Zawsze przestrzegaj podstawowych środków ostrożności według informacji
podanych poniżej, dotyczących bezpieczeństwa podczas korzystania
z wyrobu. Przeczytaj dokładnie całą instrukcję przed rozpoczęciem
użytkowania. Zachowaj tę instrukcję obsługi do wykorzystania w przyszłości.

INSTRUKCJA UŻYTKOWNIKA | DAWID PODNOŚNIK TRANSPORTOWY
2 | strona
1. Wstęp
Dziękujemy Państwu za wybranie naszego produktu. Jesteśmy głęboko przekonani, że spełni on
Państwa oczekiwania. Prosimy o zapoznanie się z tym dokumentem przed pierwszym użytkowaniem.
Niniejsza instrukcja przekazana jest w celu przedstawienia niezbędnych informacji dotyczących
bezpiecznego korzystania z urządzenia. Prawidłowe zastosowanie się do zaleceń znacząco przyczyni się
do przedłużenia trwałości i estetyki wyrobu. Pragniemy zaznaczyć, że na bieżąco staramy się poprawiać
jakość naszych produktów, co może skutkować nieznacznymi zmianami, które nie są ujęte
w niniejszej instrukcji.
2. Opis produktu
Ryc. 1. Schemat budowy podnośnika transportowego David. Literami oznaczono następujące
elementy budowy: A–ramię podstawy jezdnej, B –maszt, C –siłownik elektryczny,
D –pedał regulacji szerokości, E–skrzynka kontrolna z akumulatorem, F –pilot,
G–ramię podnoszące, H–śruba regulująca, I–wieszak podnośnika, J–koła przednie bez
hamulców, K–koła tylne z hamulcami, L–podstawa podnośnika.

INSTRUKCJA UŻYTKOWNIKA | DAWID PODNOŚNIK TRANSPORTOWY
3 | strona
3. Zastosowanie
Mini podnośnik transportowy z wyposażeniem „David”przeznaczony jest do przenoszenia
jednorazowo tylko jednego pacjenta. Przy podnoszeniu i dla bezpieczeństwa podczas
transportu pacjent powinien znajdować się pod nadzorem przeszkolonego opiekuna.
Do manewrowania podnośnikiem każdorazowo służy uchwyt do pchania.
Dzięki zastosowanym rozwiązaniom podnośnik przeznaczony jest dla:
•Pacjentów z paraparezą –niedowładem kończyn dolnych.
•Pacjentów z paraplegią –obejmującą kończyny dolne.
•Pacjentów z paraliżem.
•Pacjentów z utratą kończyn.
•Pacjentów z niewydolnością układu krążenia.
•Pacjentów ze zmniejszeniem ruchomości stawów i osłabieniem siły mięśniowej.
•Osób starszych wymagających specjalistycznej opieki domowej lub profesjonalnej.
4. Przeciwwskazania
Mini podnośnik transportowy z wyposażeniem „David” nie jest urządzeniem służącym do
przewożenia pacjentów na znaczne odległości. Należy wybrać nosidło zalecane przez lekarza
dla danego pacjenta. Podczas przenoszenia pacjenta, gdy jest on zawieszony na nosidle
podłączonym do podnośnika, nie należy przesuwać kółek podstawy przez przedmioty takie jak
uniesione obramowania dywanów, progi drzwi, ani przez żadne nierówne powierzchnie, które
mogą spowodować zachwianie się podnośnika. W przypadku wystąpienia jakichkolwiek
niepożądanych objawów należy niezwłocznie przerwać transport pacjenta.
5. Użytkowanie
•Po rozpakowaniu opakowania należy sprawdzić czy zawiera ono wszystkie części
zgodnie z wykazem elementów zamieszczonym powyżej (Ryc. 1).
•Należy upewnić się, że wszystkie elementy nie posiadają widocznych uszkodzeń
mechanicznych. W przypadku wątpliwości należy skontaktować się z wytwórcą.
•Nie należy korzystać z urządzenia dopóki wszystkie elementy nie zostaną właściwie
połączone.
•Maksymalny dopuszczalny ciężar użytkownika – 150 kg
•Nie ponosimy odpowiedzialności za ewentualne szkody powstałe w wyniku korzystania
z podnośnika osób z wagą wyższą niż dopuszczalna.
•Proszę nie ustawiać wciągnika na pochyłych powierzchniach, ponieważ może to
spowodować upadek.
•Nie próbuj przekraczać żadnych stopni, krawężników ani innych przeszkód, które mogą
spowodować uszkodzenie ciała lub jego obrażenia ciała gdy produkt zostanie
przewrócony.
•Nie wolno dokonywać samodzielnych prób napraw baterii
This manual suits for next models
1
Table of contents
Languages:
Other Vitea Care Lifting System manuals
