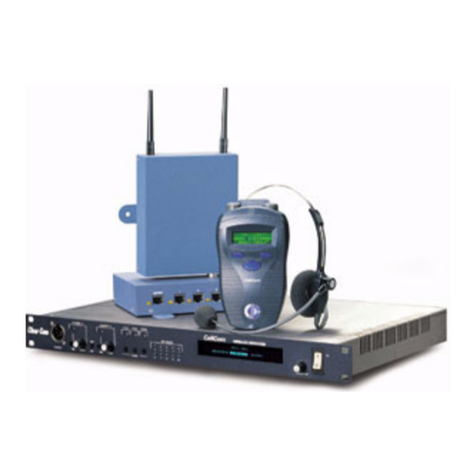
Vitec Multimedia ICS-102/62 User manual

INTERCOM STATIONS
INSTRUCTION MANUAL
ICS-102/62

ICS-102/62 Intercom Stations Instruction Manual
©1998, 2000, 2004, 2005 Vitec Group Communications, Inc.
All Rights Reserved
Part Number 810302 Rev. A
Vitec Group Communications, Inc.
4065 Hollis Street
Emeryville, CA 94608-3505
U.S.A
Clear-Com is a registered trademark of Vitec Group Communications, Inc.
The Clear-Com Logo is a registered trademark of Vitec Group Communications, Inc.
Eclipse is a registered trademark of Vitec Group Communications, Inc.
Windows is a registered trademark of Microsoft Corp.

ICS-102/62 INTERCOM STATION i
CONTENTS
IMPORTANT SAFETY INSTRUCTIONS v
OPERATION 1-1
Introduction . . . . . . . . . . . . . . . . . . . . . . . . . . . . . . . . . . . . . . . . . . . . . . . . . 1-1
Description . . . . . . . . . . . . . . . . . . . . . . . . . . . . . . . . . . . . . . . . . . . . . . . . . . 1-1
Front-Panel Controls and Indicators . . . . . . . . . . . . . . . . . . . . . . . . . . . . . . . 1-1
Communication-Error Indicator . . . . . . . . . . . . . . . . . . . . . . . . . . . . . . . . 1-2
Speaker/Headset Level Controls. . . . . . . . . . . . . . . . . . . . . . . . . . . . . . . . . 1-2
Intercom Volume Control . . . . . . . . . . . . . . . . . . . . . . . . . . . . . . . . . . . . . 1-2
Page Override . . . . . . . . . . . . . . . . . . . . . . . . . . . . . . . . . . . . . . . . . . . . . . 1-2
Mute Level . . . . . . . . . . . . . . . . . . . . . . . . . . . . . . . . . . . . . . . . . . . . . . . . 1-2
Listen Level Adjustment . . . . . . . . . . . . . . . . . . . . . . . . . . . . . . . . . . . . . . 1-2
Talk/Listen Selectors and Indicators. . . . . . . . . . . . . . . . . . . . . . . . . . . . . . . . 1-3
Selector Operation. . . . . . . . . . . . . . . . . . . . . . . . . . . . . . . . . . . . . . . . . . . 1-3
Talk and Listen Indicators . . . . . . . . . . . . . . . . . . . . . . . . . . . . . . . . . . . . . 1-3
Monitoring/Eavesdropping Indicators . . . . . . . . . . . . . . . . . . . . . . . . . . . . 1-3
Call-Waiting Indicator. . . . . . . . . . . . . . . . . . . . . . . . . . . . . . . . . . . . . . . . 1-3
In-Use Tally Indicator . . . . . . . . . . . . . . . . . . . . . . . . . . . . . . . . . . . . . . . . 1-3
Telephone Off-Hook Tally Indicator . . . . . . . . . . . . . . . . . . . . . . . . . . . . . 1-4
Radio Receiver Active Tally Indicator . . . . . . . . . . . . . . . . . . . . . . . . . . . . 1-4
Station Connected Tally Indicator . . . . . . . . . . . . . . . . . . . . . . . . . . . . . . . 1-4
Audio Presence Tally Indicator. . . . . . . . . . . . . . . . . . . . . . . . . . . . . . . . . . 1-4
Answer-Back Facility . . . . . . . . . . . . . . . . . . . . . . . . . . . . . . . . . . . . . . . . . . . 1-4
Answer Back Selector. . . . . . . . . . . . . . . . . . . . . . . . . . . . . . . . . . . . . . . . . 1-4
Answer-Back Label Selection . . . . . . . . . . . . . . . . . . . . . . . . . . . . . . . . . . . 1-5
Removing Labels from the Answer-Back Stack. . . . . . . . . . . . . . . . . . . . . . 1-5
Function Selectors . . . . . . . . . . . . . . . . . . . . . . . . . . . . . . . . . . . . . . . . . . . . . 1-5
Panel Mic Selector . . . . . . . . . . . . . . . . . . . . . . . . . . . . . . . . . . . . . . . . . . . 1-5
Speaker On Selector. . . . . . . . . . . . . . . . . . . . . . . . . . . . . . . . . . . . . . . . . . 1-5
Mic On Selector . . . . . . . . . . . . . . . . . . . . . . . . . . . . . . . . . . . . . . . . . . . . 1-5
Listen Level Selector . . . . . . . . . . . . . . . . . . . . . . . . . . . . . . . . . . . . . . . . . 1-6
Listen-Level Mode. . . . . . . . . . . . . . . . . . . . . . . . . . . . . . . . . . . . . . . . . 1-6
Listen Level Reset . . . . . . . . . . . . . . . . . . . . . . . . . . . . . . . . . . . . . . . . . 1-6
Call Signals . . . . . . . . . . . . . . . . . . . . . . . . . . . . . . . . . . . . . . . . . . . . . . 1-6
Remote Telephone Line Release . . . . . . . . . . . . . . . . . . . . . . . . . . . . . . 1-7
Rear-Panel Connectors . . . . . . . . . . . . . . . . . . . . . . . . . . . . . . . . . . . . . . . . . 1-7

ICS-102/62 INTERCOM STATION
ii
Miscellaneous Connector. . . . . . . . . . . . . . . . . . . . . . . . . . . . . . . . . . . . . . 1-7
Logic Inputs #1 and #2 . . . . . . . . . . . . . . . . . . . . . . . . . . . . . . . . . . . . . 1-7
Programmable Relay . . . . . . . . . . . . . . . . . . . . . . . . . . . . . . . . . . . . . . . 1-8
Mute Relay . . . . . . . . . . . . . . . . . . . . . . . . . . . . . . . . . . . . . . . . . . . . . . 1-8
OPT-100 Auxiliary Audio Option . . . . . . . . . . . . . . . . . . . . . . . . . . . . . . . 1-9
Hot Mic Output . . . . . . . . . . . . . . . . . . . . . . . . . . . . . . . . . . . . . . . . . . 1-9
Studio/Stage Announce Audio and Relay Outputs . . . . . . . . . . . . . . . . 1-9
Auxiliary Audio Line Level Output. . . . . . . . . . . . . . . . . . . . . . . . . . . . 1-9
Expansion Panel Operation . . . . . . . . . . . . . . . . . . . . . . . . . . . . . . . . . . . . . . 1-9
INSTALLATION 2-1
Introduction . . . . . . . . . . . . . . . . . . . . . . . . . . . . . . . . . . . . . . . . . . . . . . . . . 2-1
Mounting Stations. . . . . . . . . . . . . . . . . . . . . . . . . . . . . . . . . . . . . . . . . . . . . 2-1
Wiring. . . . . . . . . . . . . . . . . . . . . . . . . . . . . . . . . . . . . . . . . . . . . . . . . . . . . . 2-1
Analog Matrix Frame to Station Wiring. . . . . . . . . . . . . . . . . . . . . . . . . . . 2-2
Digital Matrix Frame to Station Wiring. . . . . . . . . . . . . . . . . . . . . . . . . . . 2-3
Single-Pair Digital . . . . . . . . . . . . . . . . . . . . . . . . . . . . . . . . . . . . . . . . . 2-3
Coax Digital . . . . . . . . . . . . . . . . . . . . . . . . . . . . . . . . . . . . . . . . . . . . . 2-3
Matrix Station Miscellaneous Connector Wiring . . . . . . . . . . . . . . . . . . . . 2-4
External Program Feed Input. . . . . . . . . . . . . . . . . . . . . . . . . . . . . . . . . 2-4
Logic Input #1 and #2. . . . . . . . . . . . . . . . . . . . . . . . . . . . . . . . . . . . . . 2-5
Mute Relay Contacts . . . . . . . . . . . . . . . . . . . . . . . . . . . . . . . . . . . . . . . 2-6
Programmable Relay Contacts . . . . . . . . . . . . . . . . . . . . . . . . . . . . . . . . 2-6
OPT-100 Auxiliary Audio I/O Option . . . . . . . . . . . . . . . . . . . . . . . . . . . 2-7
Hot Mic Output . . . . . . . . . . . . . . . . . . . . . . . . . . . . . . . . . . . . . . . . . . 2-7
Studio/Stage Announce Audio and Relay Outputs . . . . . . . . . . . . . . . . 2-7
Auxiliary Audio Line Level Output . . . . . . . . . . . . . . . . . . . . . . . . . . . . 2-8
Mains AC Power . . . . . . . . . . . . . . . . . . . . . . . . . . . . . . . . . . . . . . . . . . . . . . 2-8
Adjustments . . . . . . . . . . . . . . . . . . . . . . . . . . . . . . . . . . . . . . . . . . . . . . . . . 2-9
Headset Sidetone . . . . . . . . . . . . . . . . . . . . . . . . . . . . . . . . . . . . . . . . . . . . 2-9
Panel Microphone Gain. . . . . . . . . . . . . . . . . . . . . . . . . . . . . . . . . . . . . . . 2-9
Speaker Mute. . . . . . . . . . . . . . . . . . . . . . . . . . . . . . . . . . . . . . . . . . . . . . 2-10
Page Volume Level. . . . . . . . . . . . . . . . . . . . . . . . . . . . . . . . . . . . . . . . . . 2-10
Station-to-Matrix Card Baud Rate. . . . . . . . . . . . . . . . . . . . . . . . . . . . . . 2-10
MAINTENANCE 3-1
Introduction . . . . . . . . . . . . . . . . . . . . . . . . . . . . . . . . . . . . . . . . . . . . . . . . . 3-1
Station Reset . . . . . . . . . . . . . . . . . . . . . . . . . . . . . . . . . . . . . . . . . . . . . . . . . 3-1
Troubleshooting . . . . . . . . . . . . . . . . . . . . . . . . . . . . . . . . . . . . . . . . . . . . . . 3-1
Technical Reference (Bills of Materials, Component Drawings, Schematics) . 3-3

ICS-102/62 INTERCOM STATION iii
SPECIFICATIONS 4-1
ICS-102/62 . . . . . . . . . . . . . . . . . . . . . . . . . . . . . . . . . . . . . . . . . . . . . . . . . . 4-1
OPT-100 Auxiliary Audio I/O Option . . . . . . . . . . . . . . . . . . . . . . . . . . . . . 4-3
Accessory Panels . . . . . . . . . . . . . . . . . . . . . . . . . . . . . . . . . . . . . . . . . . . . . . 4-3
VITEC GROUP COMMUNICATIONS WARRANTY 5-1
Technical Support . . . . . . . . . . . . . . . . . . . . . . . . . . . . . . . . . . . . . . . . . . . . . 5-1
Exceptions. . . . . . . . . . . . . . . . . . . . . . . . . . . . . . . . . . . . . . . . . . . . . . . . . . . 5-1
Warranty Repairs. . . . . . . . . . . . . . . . . . . . . . . . . . . . . . . . . . . . . . . . . . . . . . 5-2
Non-Warranty Repairs. . . . . . . . . . . . . . . . . . . . . . . . . . . . . . . . . . . . . . . . . . 5-2

ICS-102/62 INTERCOM STATION
iv

ICS-102/62 INTERCOM STATION v
IMPORTANT SAFETY INSTRUCTIONS
For your safety, it is important to read and follow these instructions before
operating an ICS-102/62 intercom station:
(1) WARNING: To reduce the risk of fire or electric shock, do not expose an
ICS-102/62 intercom station to rain or moisture. Do not operate an ICS-102/62
intercom station near water, or place objects containing liquid on it. Do not
expose an ICS-102/62 intercom station to splashing or dripping water.
(2) For proper ventilation, make sure ventilation openings are not blocked.
Install the ICS-102/62 according to the directions in the Installation Chapter of
this manual.
(3) Do not install an ICS-102/62 intercom station near a heat source such as a
radiator, heat register, stove, or other apparatus (including amplifiers) that
produces heat. Do not place naked flame sources such as candles on or near an
i-station.
(4) Do not defeat the safety purpose of the polarized or grounding-type plug. A
polarized plug has two blades, with one blade wider than the other. A
grounding-type plug has two blades and a third grounding prong. The wide
blade or the third prong is provided for your safety. If the provided plug does not
fit into your outlet, consult an electrician for replacement of the obsolete outlet.
(5) Protect the power plug from being walked on or pinched particularly at
plugs, convenience receptacles, and the point where they exit from the i-station’s
chassis.
(6) Only use attachments/accessories specified by Clear-Com Communication
Systems.
(7) Unplug the ICS-102/62 station during lightning storms or when unused for
long periods of time.
(8) Refer all servicing to qualified service personnel. Servicing is required when:
•The ICS-102/62 station has been damaged in any way, such as when a
power-supply cord or plug is damaged.
•Liquid has been spilled or objects have fallen into the ICS-102/62 station’s
chassis.
•The ICS-102/62 station has been exposed to rain or moisture.
•The ICS-102/62 station does not operate normally.
•The ICS-102/62 station has been dropped.
Please familiarize yourself with the safety symbols in Figure 1. When you see
these symbols on an ICS-102/62 intercom station, they warn you of the
potential danger of electric shock if the station is used improperly. They also refer
you to important operating and maintenance instructions in the manual.
Please read and follow these
instructions before operating
an ICS-102/62 intercom
station.

ICS-102/62 INTERCOM STATION
vi
Figure 1: Safety Symbols
CAUTION
RISK OF ELECTRIC SHOCK
DO NOT OPEN
This symbol alerts you to the presence of uninsulated dangerous
voltage within the product's enclosure that might be of sufficient
magnitude to constitute a risk of electric shock. Do not open
the product's case.
This symbol informs you that important operating and main-
tenance instructions are included in the literature accompanying
this product.

ICS-102/62 INTERCOM STATION 1-1
OPERATION
INTRODUCTION
This booklet describes how to use the ICS-102 and ICS-62 intercom stations
and their digital equivalents, the ICS-102T and ICS-62T intercom stations.
Station operators can use this manual after the Eclipse System has been correctly
installed and configured.
DESCRIPTION
The ICS-102/102T and ICS-62/62T intercom stations are each assembled in a
small, 1-RU high (1.75 in. or 44.45 mm) chassis. The ICS-102/102T has ten
selectors while the ICS-62/62T has six. Each station has the following features:
• Individually adjustable listen levels
• Fits in one rack unit (1.75 inches or 44.45 mm) of a standard equipment rack
• Built-in speaker and optional plug-in panel microphone
• Front-panel headset connector
• Call signalling capability
• Answer Back facility
• Local program input without front-panel control
• Programmable relay
•Muterelay
• Two logic inputs for external control of selected station functions
The station can both be equipped with the following options:
• XPL-12 and XPL-22 Expansion Panels
• OPT-100 Auxiliary Audio Output.
FRONT-PANEL CONTROLS AND INDICATORS
The front-panel controls and indicators include:
• Communication-error indicator
• Talk/listen selectors and indicators
• Answer Back facility
• Function buttons
This chapter describes how
to operate the ICS-102 and
ICS-62 intercom stations
and the ICS-102T and
ICS-62T digital stations.
1

ICS-102/62 INTERCOM STATION
1-2
COMMUNICATION-ERROR INDICATOR
If the station should lose data communication with the matrix frame, all of the
red lights on the front of the station will flash slowly.
When data communication is restored, the station will automatically return to
normal operation.
SPEAKER/HEADSET LEVEL CONTROLS
To adjust the speaker or headset volume, use the knob labeled “intercom,” as
described below. The speaker volume can also be affected by three
software-controlled functions: Page Override, Mute Level, and Listen Level
Adjustment.
INTERCOM VOLUME CONTROL
The “intercom” volume control sets the overall level of all signals coming from
the matrix frame, except for the page mode, which is controlled by an internal
software function (see the next section “Page Override.”)
PAGE OVERRIDE
Page override is a special function in the station in which the intercom volume
defaults to a preset to a value when commanded to by the central matrix. Any
fixed group can be assigned the page-override function through the configuration
program.
The configuration program determines preset value for each station. If the preset
value is lower than the setting of the front-panel volume control, the volume will
be controlled by the front-panel control.
MUTE LEVEL
This turns down the speaker level when any talk is active at the station. The
amount of muting (measured in dB) is set by the configuration program for each
station. This function helps prevent possible feedback. The maximum amount of
muting is 15 dB below full volume. If the front panel control is set below that
level, then muting will have no effect.
LISTEN LEVEL ADJUSTMENT
The level of any active listen path can be adjusted individually. Refer to
“Listen-Level Mode” later in this chapter.

ICS-102/62 INTERCOM STATION 1-3
TALK/LISTEN SELECTORS AND INDICATORS
The following section describes the operation of the talk/listen selectors and their
associated indicators.
SELECTOR OPERATION
The selectors operate as both talk and listen selectors; they also work as volume
controls when the station is in listen-level mode (see “Listen Level Mode” later in
this chapter). Pressing a selector down accesses a talk label; pushing it up accesses
a listen label. Pushing the talk selector down and quickly releasing it will “latch”
the selector and the talk path will stay active until it is pressed again. Pressing and
holding a talk selector causes the talk path to stay active only for as long as it is
held down. Listen selectors operate in the same manner.
To prevent the selector on the station from latching in the talk position (local
latch disable), or to prevent any station from latching a talk to the station (global
latch disable) use the configuration program.
TALK AND LISTEN INDICATORS
When a talk path is active, the red LED above the selector lights continuously.
When a listen path is active, the green LED above the selector lights
continuously.
MONITORING/EAVESDROPPING INDICATORS
If any other station begins monitoring a station, a beep (the monitoring-alert
tone) will sound at the station.
To inhibit the monitoring-alert tone, use the configuration program.
CALL-WAITING INDICATOR
If a station calls another station with a selector programmed for that label, the
LED will rapidly flash red. This flashing is a call-waiting tally. To answer the
incoming call, push the indicated talk selector. The call-waiting tally clears when
the call is answered, or after the call is terminated and the answer-back time-out
lapses.
If another station calls a station without a button programmed for that label, it
will be placed in the answer-back stack (see “Removing Labels from the
Answer-Back Stack.”)
IN-USE TALLY INDICATOR
If a selector is assigned to a label and another station is currently using that label,
the LED will double-flash once per second to indicate the label is in use. This
tally must be enabled from the configuration software.

ICS-102/62 INTERCOM STATION
1-4
TELEPHONE OFF-HOOK TALLY INDICATOR
When a telephone interface is assigned to a talk selector, the talk LED will flash
once per second if that telephone is off the hook. This tally must be enabled from
the configuration program.
RADIO RECEIVER ACTIVE TALLY INDICATOR
When a two-way radio interface port is assigned to a talk selector, the LED will
flash once per second when that radio’s receiver is active. This tally must be
enabled from the configuration program.
STATION CONNECTED TALLY INDICATOR
This tally is used when a station is connected to the frame by a high-speed data
line (such as an ISDN or T1 line) that might be inactive periodically. The red
LED of any talk selector associated with that station will flash once per second
when the station is on-line. This tally must be enabled from the configuration
program.
AUDIO PRESENCE TALLY INDICATOR
When a label is assigned to a listen selector, the LED will flash once per second to
indicate someone is talking on that channel. This tally must be enabled from the
configuration program.
ANSWER-BACK FACILITY
The primary function of the answer-back facility is to answer calls from other
stations or interfaces not assigned to a station’s selectors.
The following sections describe the use of the answer-back facility.
ANSWER BACK SELECTOR
You use the Answer Back selector to answer calls from stations and interfaces that
are not assigned to your station.
When a call from a station or interface not assigned to the station arrives:
• The calling station’s label will be placed in the answer-back stack.
• The red LED will flash.
These two conditions will continue until the call is answered, or until the
answer-back time-out period lapses and the caller’s label is automatically
removed. To answer the call, push the Answer Back selector. The red LED will
turn off and the green LED will turn on, indicating an active talk path to the
caller. The talk path is active for as long as the selector is held.
Note: The Answer Back selector cannot be latched; it is a momentary-only function.
Calls from stations or interfaces assigned to station selectors will only be
indicated by their associated LEDs.

ICS-102/62 INTERCOM STATION 1-5
ANSWER-BACK LABEL SELECTION
If another call comes in while using the answer-back selector:
• The user will hear the caller’s voice.
• The label will be placed in the answer-back stack.
To answer the next caller:
1. Push up on the Answer Back selector to remove the current caller’s label.
2. Press down on the Answer Back selector to talk to the next caller.
REMOVING LABELS FROM THE ANSWER-BACK STACK
Any label will be automatically removed from the stack if it is not answered
within a certain time interval, which is set by the answer-back auto-clear time in
the configuration program.
To manually remove the current caller’s label from the answer-back stack, push
up on the Answer Back selector.
FUNCTION SELECTORS
Two dual-function toggle switches allow you to choose among the following four
functions:
•PanelMic
•SpeakerOn
•MicOn
•ListenLevel
PANEL MIC SELECTOR
This selector selects the panel or headset microphone. If a headset is plugged in,
the station will automatically switch to headset microphone operation. If the
headset is unplugged, the station will automatically switch back to panel
microphone operation. The LED will be on when the panel microphone is
active.
SPEAKER ON SELECTOR
This selector functions only when a headset is plugged into the station. To toggle
the speaker on and off, push the Speaker On selector. The LED indicates when
the speaker is on.
MIC ON SELECTOR
This selector activates the panel or headset microphone, whichever has been
selected. The LED indicates when the microphone is on. If a talk is activated
while the microphone is off, it will turn on.

ICS-102/62 INTERCOM STATION
1-6
LISTEN LEVEL SELECTOR
The Listen Level selector has four functions:
• Activating the listen-level mode
• Resetting the listen-level settings
• Sending call signals
• Releasing auto-answered telephone lines
Listen-Level Mode
To use the listen-level adjust mode, push (for less than 1 sec.) and quickly release
the Listen Level selector.
The LEDs of all active listen selectors will begin to flash to indicate the function
is on.
Note: Only active selectors can be adjusted in listen-level mode.
Use the selector associated with the intended label to increase (up) or decrease
(down) the volume.
To exit, push the Listen Level selector or wait for the 3 sec. time-out.
Note: If the active listen path is pushed higher than the maximum value, the other
paths will be driven down so that the desired path has more emphasis.
Listen Level Reset
To reset the Listen Level to default settings:
1. Press (for less than 1 sec.) and quickly release the Listen Level selector.
2. Press and hold the Listen Level selector for 3 sec.
3. Release the Listen Level selector.
Call Signals
To activate a call signal:
1. Push and hold (for at least 1 sec.) the Listen Level selector until the station
indicates it is in Call Signal mode.
2. Push down the talk selector with the desired label.
The call signal will be sent each time the selector with that label assignment is
pushed down and will remain so until the call-signal mode times out (about 5
sec.).
Call signals can be issued to any talk label assigned to a station’s talk/listen
selectors. If more than one label is assigned to a selector, all labels will receive the
signal. If a label is a fixed group, the entire group will receive the call signal. If the
label is a party line, then every station listening on the party line will receive the
call signal.

ICS-102/62 INTERCOM STATION 1-7
Remote Telephone Line Release
This function is available only if specifically enabled in the configuration
program.
To hang up a telephone interface left off the hook:
1. Push and hold the Listen Level selector for at least 1 sec. to activate the
call-signal mode.
2. While holding the Listen Level selector, press the talk selector of the desired
telephone’s label.
3. Release the Listen Level selector.
Note: In addition to hanging up the telephone interface, this will deactivate any
talk/listen selector set to the interface from anywhere in the system.
REAR-PANEL CONNECTORS
This section describes only those rear-panel functions directly affecting normal
station operation. These include the functions available through the
“Miscellaneous” connector and those added by the use of the “OPT-100
Auxiliary Audio” connector. The actual functions these inputs and outputs
perform depend on the installation of the individual station. This section only
describes the general use of these functions. For a more complete description, see
the Installation chapter.
MISCELLANEOUS CONNECTOR
The Miscellaneous connector includes the following functions:
• Logic input #1
• Logic input #2
• Programmable relay
•Muterelay
Logic Inputs #1 and #2
Each input can control one of several functions, determined through the
configuration program. Typically, these inputs are connected to an external foot
switch, a panel-mounted switch, or the logic output of another device.
The following functions are available:
• Mic On/Off—toggles the station’s microphone on and off.
• Mute Mic Output To Frame—turns off the audio from the station to the
frame. It does not turn off the Hot Mic output
• Mic Off —momentarily turns off the station’s microphone.
• Answer Back Talk/Clear—functions the same as the station’s “Answer Back”
selector. Holding down the switch activates a talk to a label in the answer-back
stack. To clear the label, quickly press and release the switch.

ICS-102/62 INTERCOM STATION
1-8
• Studio Announce—sends the output of the station’s selected microphone
(panel or headset) to the station’s Studio Announce (SA) audio output, and
activates the SA relay. The microphone output is not sent to the frame. The
SA output and relay are only present if the station has the OPT-100 Auxiliary
Audio I/O Option installed.
• Speaker OFF—turns off the station speaker, disabling all audible output from
the station.
• PTT: Activate All Talk Keys—implements a push-to-talk function for all talk
selectors. When the logic input is active, the station operates normally. When
the logic input is deactivated, all active talk selectors are disabled. Any controls
(relays, etc.) assigned to the labels are activated or deactivated along with their
assigned labels. The LED indicators associated with the active talk selectors
operate normally regardless of the PTT status. This input only controls
latched talks.
• Activate Talk Switch #1— equivalent to pressing the station’s first (leftmost)
talk selector; a momentary and latching activation.
• Activate Talk Switch #2—equivalent to pressing the station’s second talk
selector; a momentary and latching activation.
• Activate Listen Labels Button—equivalent to pressing the “Listen Labels”
button to display listen labels on any display expansion panel (XPL-12 or
XPL-22) connected to the station.
• PTT: Activate Two-Way Radio Keys—implements a push-to-talk function for
all two-way radio talk selectors. When the logic input is active, the station
operates normally. When the logic input is deactivated, all active two-way
radio talk selectors are disabled. Any controls (relays, etc.) assigned to the
labels are activated or deactivated along with their assigned labels. The LED
indicators associated with the active two-way radio talk selectors operate
normally regardless of the PTT status. This input only controls latched talks.
Programmable Relay
Each Eclipse system station includes a relay controlled by the system program
and independent of the local station function. This relay can be assigned to any
label(s) in the system, which will activate whenever a talk or listen is set to that
label(s). If activating the relay is the only action desired, assign the relay to a
“control” label. See the Eclipse Configuration System Manual for more details.
The relay can activate an external device, such as an applause light in a studio, a
cue light, or a security door lock. Any programmable relay in the system can be
activated from any station in the system, including a direct-inward-access caller.
Mute Relay
The mute relay is activated whenever any talk selector is activated at the station.
The mute relay is commonly wired such that whenever it is activated, the volume
of the monitor speaker in that room is decreased (muted).

ICS-102/62 INTERCOM STATION 1-9
OPT-100 AUXILIARY AUDIO OPTION
The OPT-100 Auxiliary Audio option provides the following features:
• Hot Mic output
• SA audio and relay outputs
• Auxiliary audio line level output.
Hot Mic Output
The Hot Mic output is a balanced, line-level, transformer-isolated feed of the
signal from the currently selected microphone (panel or headset). The Hot Mic
output is active regardless of whether the station has talk paths set and regardless
of the front-panel’s control settings.
Studio/Stage Announce Audio and Relay Outputs
The SA output is a balanced, line-level, transformer-isolated feed with the same
signal sent to the Hot Mic output, except it is only active when the SA button on
the station’s front panel is pressed or when activated by Logic Input #1 or #2,
which is configured for the Studio Announce Function.
Auxiliary Audio Line Level Output
The Auxiliary Audio Line Level output is a balanced, line-level,
transformer-isolated feed of the input to the station’s internal speaker. For
example, this output could be used to feed an external amplifier connected to
loudspeakers.
EXPANSION PANEL OPERATION
Optional expansion panels provide additional selectors that operate the same way
as a station’s selectors, including talk, listen, tally, and error indication.
The XPL-12 expansion panel provides 10 additional keys, while the XPL-22
provides 20 additional keys. Each expansion panel offers illuminated 5-character
labels for every key.
Only one rack unit (1RU) of a standard Electronics Industry Association
equipment rack is required for each expansion panel. The panels’ compact size
makes them ideal for use in TV control rooms, edit suites, mobile OB vans, and
any other location where many talk/listen keys are necessary but space it at a
premium.

ICS-102/62 INTERCOM STATION
1-10

ICS-102/62 INTERCOM STATION 2-1
INSTALLATION
INTRODUCTION
This chapter describes the installation of the ICS-102/ICS-102T and
ICS-62/62T intercom stations, including:
• Station placement
• Wiring
•MainsACpower
• Adjustments
• Configuration
• Accessory panels
MOUNTING STATIONS
Locate all intercom stations at comfortable heights for operation and leave at
least 2 inches (51 mm) of clearance behind the rear of the station’s chassis to
allow for cable connectors.
Accessory panels, that are intended to expand or enhance station operation, are
usually mounted next to or near the station with which they are associated. Leave
at least 2 inches (51 mm) of clearance behind the rear of the station to allow for
cable connectors.
Accessory panels can be located as far as 25 ft. (7.6 m) away from the station. A
6-ft. (1.8 m) cable is supplied to connect them.
WIRING
This section provides detailed wiring diagrams for all stations’ wiring systems.
Eclipse uses either a twisted, 4-pair transmission, a single-pair twisted, or a coax
scheme between the station and the frame using the industry standard RJ-45
connector. Refer to Installing an Eclipse Matrix System: An Overview for RJ-45
connector installation and use, and the type of cable needed for connection
between stations and frames.
Most stations have a DB-15M and an RJ-45 connector to connect them to the
frame. Stations with only a DB-15M connector include a kit containing one
DB-15F/RJ-45 adapter. The adapter allows the use of RJ-45 connectors on both
ends of the connection between the frame and the station.
Connections to external devices via the Miscellaneous connector, use the
included DB-15M connector to construct one or more cables to connect external
devices to the station.
2

ICS-102/62 INTERCOM STATION
2-2
The following sections describe connecting the station to the matrix frame, and
all the connections between the station and local devices. Each of the following
sections describes cable and station connector wiring:
• Analog matrix frame to station wiring
• Digital matrix frame to station wiring
• Matrix station Miscellaneous connector wiring
• OPT-100 Auxiliary Audio I/O option
• Binaural headset wiring
ANALOG MATRIX FRAME TO STATION WIRING
The analog audio RS-422 data communications module (COM-10) uses a 4-pair
wiring scheme between the frame and stations. This module requires an
MVX-A16 card in the frame.
Although some Matrix Stations have a DB-15M (male) connector for connection
to the Matrix frame, most have a built-in RJ-45 connector. For those stations
with a DB-15 male connector, Clear-Com provides a properly wired DB-15F
(female) to RJ-45 adapter for direct connection with RJ-45 terminated cables.
Additionally, stations configured for digital communication are equipped with a
BNC.
Four-pair analog wiring is typically wired with shielded CAT5 RJ-45 cable.
• Pair 1 transmits analog audio from the matrix port to the station.
• Pair 2 transmits RS-422 data from the station back to the matrix card port.
• Pair 3 transmits analog audio from the station to the matrix card port.
• Pair 4 transmits RS-422 data from the matrix port back to the station.
Figure 2: Matrix Frame to Station Wiring
1
2
3
4
5
6
7
8
1
2
3
4
5
6
7
8
Matrix Frame End
Pair 2
Pair 1
Pair 3
Pair 4
ATT-T568B (Modular Jumpers Wired One to One)
RS-422 Receive +
RS-422 Receive -
Audio Receive +
Audio Send +
Audio Send -
Audio Receive -
RS-422 Send +
RS-422 Send -
Station End
Table of contents
Other Vitec Multimedia Intercom System manuals
