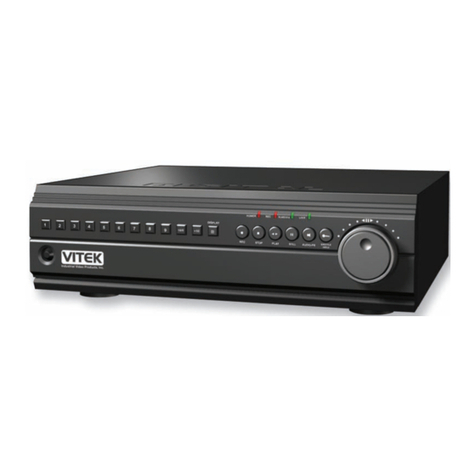
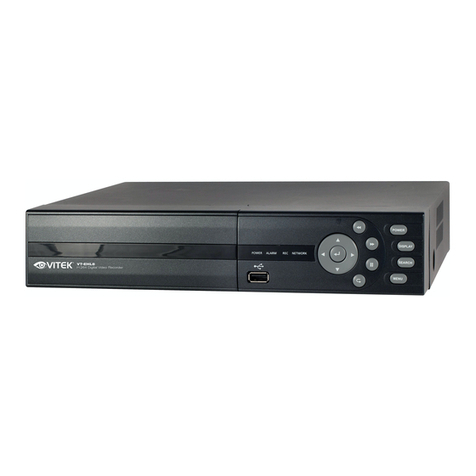
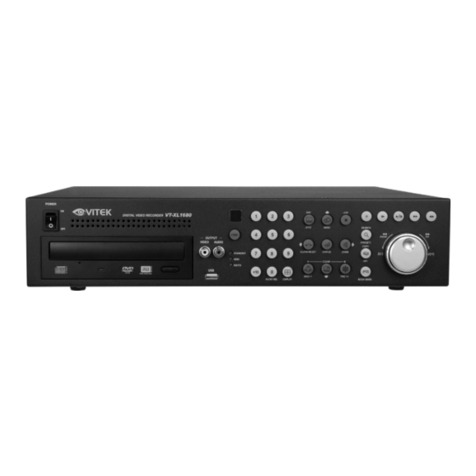
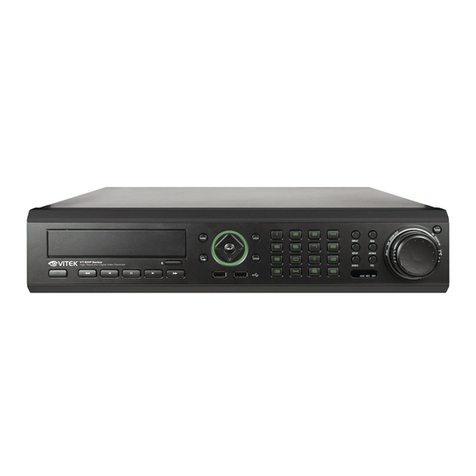
Vitek VT-16HD2A-NH User manual

FEATURES
• 16 Channel Stand-alone Real-time Hybrid [Network / HD over COAX] DVR
• 2560 ×1440 (4 MegaPixel), Real-time Recording (Up to 8MP [4K] on IP Cameras)
• Live Display - 1080p: 480fps, 1440p Real-time (2560 × 1440): 480fps,
1440p Half Real-time: 240fps
• IP Hybrid (up to 16 Cameras), H.265 Video Compression
• Plug & Play / Auto Configuration for Leading ONVIF Compliant IP Cameras
• Real-time Display w/ D1 / VGA 2nd Camera Stream
• IP Recording Performance: 480fps@4K, 2K+ 480fps@D1, VGA
• VGA Monitor Output: 1080p@30fps, HDMI: 4K@60fps
• Multi Channel View: 1, 4, 6, 7, 8, 9, 10, 13, 16 for Live and Playback
• Audio: 4 Ch. In / 1 Ch., Alarm: 16 Ch. In / 1 Ch. Out*
• Local Storage: 2 × SATA [up to 12TB each], 24TB Total
• Backup Devices: USB (HDD, Thumb Drive), NAS & Remote via Network
• Multi Channel Archive: Raw data format, Support with the Embedded Player
• AVI Archive: Embedded AVI formatting
• 2 ×USB2.0 (1 Rear + 1 Front), 1 ×RS485 (PTZ cntrl w/ CoC), USB Mouse
• User Privilege Set up: Live / Search & Copy / Network / PTZ / Camera
• Password Security: Periodic Password Refresh for All Users
• Recording Time Limit: 12 Hour, 1/2/3/4/5/6 Day, 1/2/3 Week, 1/2 Month
• Health Check/Report: Periodic E-mails (HDD & Recording Status + System Info.)
• Easy Network Setup: P2P Service-Based Network Setup Wizard
• Power Adaptor Included (12V / 5.0A)
• 3-Year Warranty
*Please research local, state and federal laws regarding
the implementation of audio surveillance.
VT-16HD2A-NH
1080P (8MP / 4K on IP) 16 Channel
OnCue Series Real-time
Hybrid (H.265 / HD over COAX)
Digital Video Recorder
Hybrid
Digital Video Recorder
INCLUDED ACCESSORIES

1
TABLE OF CONTENTS
1. BEFORE INSTALLING ............................................................................................................... 3
1.1 ACCESSORIES............................................................................................................. 4
1.2 FRONT PANEL ............................................................................................................. 6
1.3 DESCRIPTION OF REAR PANEL ................................................................................. 6
2. UPDATING SYSTEM F/W .......................................................................................................... 7
2.1 WITH THE USB THUMB DRIVE .................................................................................... 7
2.1.1 How to verify the F/W version ............................................................................... 7
2.1.2 Upgrading System from the System Menu ............................................................ 8
2.1.3 UPDATING FROM THE WEB MENU .................................................................... 9
3. GETTING STARTED ................................................................................................................ 12
3.1 CONNECT AND SWITCH ON ..................................................................................... 12
3.2 NETWORK AUTOMATIC SET UP for PC, Mobile App ................................................. 14
4. TOOL BAR ............................................................................................................................... 18
4.1 STATUS DISPLAY ....................................................................................................... 18
4.2 LOG OFF .................................................................................................................... 19
4.3 Main Menu POP-UP .................................................................................................... 20
4.4 SEARCH MENU POP-UP ........................................................................................... 20
4.5 PTZ POP-UP .............................................................................................................. 21
4.6 DIGITAL ZOOM ........................................................................................................... 22
4.7 LOG LIST .................................................................................................................... 23
5. SEARCH & PLAYBACK ............................................................................................................ 26
5.1 TIME / CALENDAR SEARCH(Analogue HD DVR)....................................................... 26
5.2 PANORAMA SEARCH ................................................................................................ 30
5.2.1 BASIC OPERATION ........................................................................................... 30
5.3 EVENT SEARCH ........................................................................................................ 31
5.4 SMART SEARCH ........................................................................................................ 31
5.5 COPY ......................................................................................................................... 32
6. HOW TO CONFIGURE ............................................................................................................. 34
6.1 CONFIGURING CAMERA ........................................................................................... 34
6.1.1 TITLE ................................................................................................................. 34
6.1.2 ADJUST ............................................................................................................. 35
6.1.3 PTZ .................................................................................................................... 36
6.1.4 MOTION ............................................................................................................. 36
6.1.5 PRIVACY ............................................................................................................ 37
6.1.6 CAM PORT ........................................................................................................ 39
6.2 CONFIGURING DISPLAY ........................................................................................... 42
6.2.1 OSD ................................................................................................................... 42
6.2.2 MONITOR .......................................................................................................... 43
6.2.3 SEQUENCE ....................................................................................................... 44
6.2.4 SPOT ................................................................................................................. 44
6.3 CONFIGURING STORAGE ......................................................................................... 46
6.3.1 SETUP ............................................................................................................... 46
6.3.2 FORMAT ............................................................................................................ 48
6.3.3 NAS / FTP .......................................................................................................... 48
6.4 CONFIGURING SYSTEM ........................................................................................... 51
6.4.1 DATE/TIME ........................................................................................................ 51
6.4.2 MANAGEMENT .................................................................................................. 52
6.4.3 SOUND .............................................................................................................. 54
6.4.4 RS-485 ............................................................................................................... 54
6.4.5 ADVANCED ........................................................................................................ 55
6.5 CONFIGURING EVENT / SENSOR............................................................................. 56
6.5.1 SENSOR INPUT ................................................................................................. 56
6.5.2 RELAY OUTPUT SETUP .................................................................................... 57
6.5.3 BUZZER OUTPUT SETUP ................................................................................. 58
6.5.4 E-MAIL SETUP ................................................................................................... 59
6.5.5 PTZ PRESET ..................................................................................................... 60
6.5.6 PUSH ALARM .................................................................................................... 60
6.5.7 POS ................................................................................................................... 61
6.6 CONFIGURING USER ................................................................................................ 63
6.6.1 USER REGISTER .............................................................................................. 63

2
6.6.2 USER AUTHORITY ............................................................................................ 64
6.6.3 LOG-OUT ........................................................................................................... 65
6.7 CONFIGURING RECORD ........................................................................................... 66
6.7.1 SETUP ............................................................................................................... 66
6.7.2 EVENT ............................................................................................................... 67
6.7.3 SCHEDULE ........................................................................................................ 67
6.7.4 OPTION ............................................................................................................. 69
6.8 CONFIGURING NETWORK ........................................................................................ 69
6.8.1 IP SETUP ........................................................................................................... 70
6.8.2 Local port ........................................................................................................... 71
6.8.3 DDNS ................................................................................................................. 71
8.8.4. E-MAIL ............................................................................................................... 73
7. REMOTE .................................................................................................................................. 75
7.1 WEB SERVER ............................................................................................................ 75
7.1.1 CONNECT TO WEB SERVER ............................................................................ 76
7.1.2 WEB CONFIGURATION PAGE........................................................................... 77
7.1.3 Initial Page of Web Configuration ........................................................................ 77
7.1.4 WEB VIEWER (Active-X) .................................................................................... 78
7.2 Android Viewer / iOS Viewer ........................................................................................ 89
7.2.1 How to use ......................................................................................................... 89
7.2.2 Quick Connect .................................................................................................... 89
7.3 DDNS SERVER .......................................................................................................... 91
7.3.1 HOW TO REGISTER .......................................................................................... 92
7.3.2 REGISTER ......................................................................................................... 92
7.3.3 Input DVR information......................................................................................... 93
7.4 DVR MANAGER ......................................................................................................... 94
9.1.1. INSTALLATION .................................................................................................. 94
9.1.2. EXECUTION ...................................................................................................... 95
7.4.1 LIVE VIDEO MONITORING ................................................................................ 95
7.4.2 CONNECTION MANAGER ................................................................................. 96
7.4.3 LIVE VIDEO WINDOW ....................................................................................... 98
7.4.4 DVR Information ............................................................................................... 102
7.4.5 PLAYER ........................................................................................................... 102
7.5 FILE PLAYER............................................................................................................ 109

3
1. BEFORE INSTALLING
• Installation should be carried out only by qualified personnel and in accordance with electrical regulations in
force.
• The DVR must be placed on a stable surface or mounted in an approved cabinet. Adequate ventilation must be
provided, taking particular care not to block any of the air vents on the DVR.
• Adequate protection against lightning strikes and power surges must be installed to prevent damage to the DVR.
• Any safety warnings on the DVR and in these instructions must be adhered to.
• If cleaning is necessary, shutdown the DVR and disconnect the power source first. Use a soft dry cloth only –
never use an abrasive cleaner.
• Do not attempt to service or repair the DVR as opening or removing covers may expose dangerous voltages or
other hazards. Refer all servicing to qualified service personnel.

4
1.1 ACCESSORIES
[Quick Guide]
[12V / 5A AC Adaptor 8&16Ch DVR]
[AC Power Cable]

5
[USB Mouse]
Hard Disk Screw x 8

6
1.2 FRONT PANEL
1.3 DESCRIPTION OF REAR PANEL
1 2 4 3
6 7 5 8 9
[Rear panel of 16ch Hybrid DVR]
1. Analog HD Camera Input
Analog HD Camera input (Analgoue HD / TVI /
CVI / 960H) for each camera
2. CVBS Monitor & Audio Output
Composite video output for the spot live
screen. (BNC)
RCA connectors for the audio signal outputs.
(Line out)
3.VGA Output (Video Graphic Array)
15-pin D-sub connector for the analogue VGA
output.
4.Audio Inputs
RCA connectors for the audio signal inputs. (Line
In)
5.RJ-45 Network Port
• 8ch : Ethernet port x 1(Internet + IP Camera)
• 16ch : Ethernet port x 1(Internet+ IP Camera) /
Local Port x 1 (IP Camera)
6.DIGITAL VIDEO OUT
HDMI Digital video output for the main monitor.
7.USB 2.0 ports
USB 2.0 ports. Provides functions like ‘Copy
to USB storage’, ‘F/W Upgrade’ and ‘mouse’
operation. (Second port is on panel front)
8. RS-485, Alarm In / Relay Out
RS-485 Signals. (D+: RX/TX + signal, D-:
RX/TX- signal)
9.Power In
12V DC Power socket.

7
2. UPDATING SYSTEM F/W
2.1 WITH THE USB THUMB DRIVE
User can upgrade the system firmware if required. F/W upgrading could be required to increase the stability and
the reliability or apply new updated features. The following steps are the process to upgrade the f/w.
2.1.1 How to verify the F/W version
You may need to check the F/W version provided and the F/W version currently used in the system. From the
Main Menu =>INFO, you can see the current version of F/W.
F/W version of new provided one: From the filename of the provided F/W file, you can see the
version number.
Preparing new F/W (Type *.tgz) in the USB thumb driver
1) Copy the released F/W *.tgz file into the root of the USB thumb drive.
Verify the current F/W version
Prepare new F/W in the USB thumb drive
Do the upgrading process

8
2.1.2 Upgrading System from the System Menu
Following steps will guide you how to upgrade the system with the new F/W.
1) Plug the prepared USB thumb drive into the USB port of DVR.
2) Open Setup=>SYSTEM=>MANAGEMENT menu.
3) Click ‘UPGRADE’ button.
4) Checking the Product code.
If the product code is different, the format will not proceed.
Click ‘OK button then process of firmware upgrade will begin.

9
The whole upgrading process may take about 1~5 minutes.
DO NOT remove the USB thumb drive during upgrading.
DO NOT turn off power to the system during upgrading.
5) If the firmware upgrade is finished, system will reboot automatically.
2.1.3 UPDATING FROM THE WEB MENU
The web menu service prepared in the DVR provides the way to update the system F/W remotely. The following
steps explain how to do this.
To know how to access the internal web menu service, refer the section 9.1, ‘WEB SERVER’ of this user’s guide.
1) Login the DVR through the web server.
2) Enter the ‘SYSTEM MANAGEMENT’ page under the ‘SYSTEM’ menu page. Refer to the below
picture.
3) Click the button ‘UPGRADE’ and open the update page.
4) In the update page, click the ‘BROWSE’ button.
5) Choose the provided F/W files which has the file extension ‘tar.gz or tgz’.

10
6) Click the ‘F/W UPLOAD’ button and let the system upload the F/W into the system.
7) When uploading is finished successfully, the system is going to be ready to update and wait to start.
Click the ‘START’ button triggers the updating processes.
If the product code is different, the format will be not processed.
All in One 16ch = H315N16C
8) While the update is on, the progress steps will appear such as below.
9) System shows [COMPLETE] when update finishes and reboots automatically.
10) When the whole update is completed, the DVR will restart.
The whole upgrading process may take about 5~10 minutes depends on network.

11
DO NOT disconnect the network during upgrading.
DO NOT turn off power to the system during upgrading.

12
3. GETTING STARTED
Controlling and setting DVR by remote control is limited to some of function, it’s recommended you use a mouse
for operation of the DVR for using all the functions.
3.1 CONNECT AND SWITCH ON
w Please Make sure power to the Cameras is turned on.
w Connect one or more monitors to DVR using HDMI, VGA and CVBS.
w After powering up the DVR the boot screen will show
[Logo Image]
Depending on the Monitor you connect to the DVR, initial logo may not display because your monitor does not
support low resolution, so it is not a defect.
Initial set resolution is 1920 x 1080, so you should use a monitor higher than 1920 x 1080.
[Loading….]
From loading screen display, recording starts according to pre-set condition.
When loading, screen could flash with odd colors while DVR is processing to optimize display.
Operation of DVR is ready, automatically log-in and shown as below screen.

13
When start-up diagnostics are completed, the operator must log-in to the system. You need to type the default
username “ADMIN” and the default password “1234” and click the “OK” button.
In case you do not use the automatic log in, select log-in account using mouse and type the pin code, then click
the “OK” button or confirm, then you can log in.
[Log-In]
Log in with remote control, operate as below.
Ø Using direction button, move to user’s selected menu, press “enter” on remote controller and
move to user account selection mode.
Ø Using Up/Down key, select account, and press “Enter” on remote controller for selecting user’s
account.
Ø Using numeric key and input pin code,
Ø If required, using direction key and move to virtual keyboard and input pin code.
Ø After inputting pin code, using direction key, move to ‘enter’ or ‘confirm’ over virtual keyboard
and press ‘enter’ ( ) to log-in.

14
[Live mode of 16 channels]
Logging in after inputting account and pin code.
Recommend you connect cameras first before starting DVR.
Bottom of screen will show the toolbox for operation. Toolbox has current time and date, network connection
status ( ), back up storage connection status ( ), automatic screen switch operation ( ), HDD installation
( ), currently working audio ( ). Also, toolbox includes log on/off for DVR operation ( ), Setup menu ( ),
easy copy button ( ), search ( ), Screen display selection ( ), Pan/tilt ( ), Digital zoom ( ), system log
(), Panic button ( )
3.2 NETWORK AUTOMATIC SET UP for PC, Mobile App
From the Toolbox select EASY NET

15
Step 1.
Ø 1. Mobile APP install.
You can install “OnCueviewer” for android phone, “OnCueviewer” for iPhone.
Ø 2. P2P connection activation.
Move to DVR registration menu on mobile app and activate P2P.
If you want to receive DVR event on mobile app, then activate push alarm.
Ø 3. QR code use
On mobile app, you can move to registration of P2P and take picture of the QR code.
Ø 4. Click Next in below
Step 2.
Ø 1. Email account registration
Network set up information, Self-Diagnosis result,
DVR event can be reported by email if you supply email address.
Ø 2. Password set up
Please fill in password for ADMIN to access remotely and locally.

16
Ø 3. Use above password when you register DVR to mobile APP.
Ø 4. Click below Next and start automatic set up.
Click Next, then you can receive report by email.
Network automatic setting report
Ø Device IP address: 192.168.123.174
Ø Global IP: 112.XXX.X.141
Ø Subnet mask: 255.255.255.0
Ø DNS server address:
Ø DVR port:
Ø Automatically assigned ddns address: xxxxxx.ns.dynamic.com
Step 3.
Ø 1. Setting up network automatically, it requires 1 to 2 minutes depending on network situation.
Ø 2. When success, you can check connection on mobile phone
Step 4.

17
Ø Network automatic set up completed.
Ø You can select newly registered DVR on mobile app and click “connect” button so you can confirm
connection.
Ø If you want to receive report by email, you can click marked email transmission button.
*Device IP Address: Displays the internal IP address of the network environment where the DVR is installed.
*Global IP Address: Displays the external IP address of the network environment where the DVR is installed.
*SUBNET MASK: Displays the SUBNET MASK of the network environment where the DVR is installed.
*DNS Server: Displays the DNS Server of the network environment where the DVR is installed.
*DVR Port: Displays DVR port
*Automatic DDNS Address: Displays of DVR DDNS
*Web browser address: DVR address when access web browser
*PUSH ALARM: Ready for Push Alarm
*P2P Connection: Ready for P2P
*DHCP (Automatic IP Allocation): Ready for DHCP

18
4. TOOL BAR
You can view following Tool Bar when you move the mouse to the bottom of screen.
The Toolbox displays when the mouse pointer moves to bottom of screen, disappears after pre-defined menu
setting time or exit with exit button ( ). In the menu you can set to display all the time.
Current date, Time
Network connection
Backup device
HDD Location
Time setup
Camera color
adjust
Main Menu
(Setup)
Display
PTZ
Search/Copy
Bookmark
IP Camera Scan
PIP playback dis
play on the live
screen
Network Wizard Log List
Log off / Power
off
4.1 STATUS DISPLAY
You can check current time / Network connection/ USB storage connection/ Auto sequence/ HDD location
currently recorded / Audio.

19
: Display current time. (Year / Mouth / Day / Hour / Minute / Second)
: Shows Network connection.
: Shows USB Storage connection
: Shows HDD location which is currently recorded.
4.2 LOG OFF
There are two ways to log off. One is manual log off and the other one is automatic log off after configured time
passed.
User manually log off or in the menu you can set automatic log off after certain time.
[Log-Off by using TOOL BAR]
Once Log off selected as above, current account can be log off.
Log Off: After log off, the login window like the initial screen will be displayed after booting the
DVR, and the login method is the same as the initial login.
Once you log off, you will not be able to operate the DVR until you log in again.
[How to log off automatically using menu settings]
Under Main Setting Menu, user-> log out, you can set up automatic log off time.
RESTART: Reboot the DVR
You need to enter the password to reboot.
SHUTDOWN: To turn off the power of the DVR
Table of contents
Other Vitek DVR manuals

Vitek
Vitek VT-EH Series User manual

Vitek
Vitek SAGA VT-ST1620 User manual

Vitek
Vitek VT-TNR818P User manual

Vitek
Vitek VT-DVR04 User manual

Vitek
Vitek Transcendent Series User manual

Vitek
Vitek VT-E4 User manual

Vitek
Vitek Transcendent VT-TR8NHA Series User manual

Vitek
Vitek SpireHD Series User manual

Vitek
Vitek VT-EH Series User manual

Vitek
Vitek VT-SRL User manual

Vitek
Vitek SAGA "ST" Series User manual

Vitek
Vitek Vt-SRL908 User manual

Vitek
Vitek VT-TNR Series User manual

Vitek
Vitek VT-TNR414PL User manual

Vitek
Vitek VT-EHL Series User manual

Vitek
Vitek VT-HD2x8 User manual

Vitek
Vitek CHRONO - User manual

Vitek
Vitek VT-H40 - User manual

Vitek
Vitek SAGA ST-H User manual

Vitek
Vitek Transcedent VT-TNR Series User manual