Vivitar WT-06 User manual

WT-06
Wi-Fi Door Sensor
User Manual
© 2009-2018 Sakar International, Inc. All rights reserved.
Windows and the Windows logo are registered trademarks of Microsoft Corporation.
All other trademarks are the property of their respective companies.

1
TABLE OF CONTENTS
Introduction .................................................................................................................................. 2
Features ....................................................................................................................................... 2
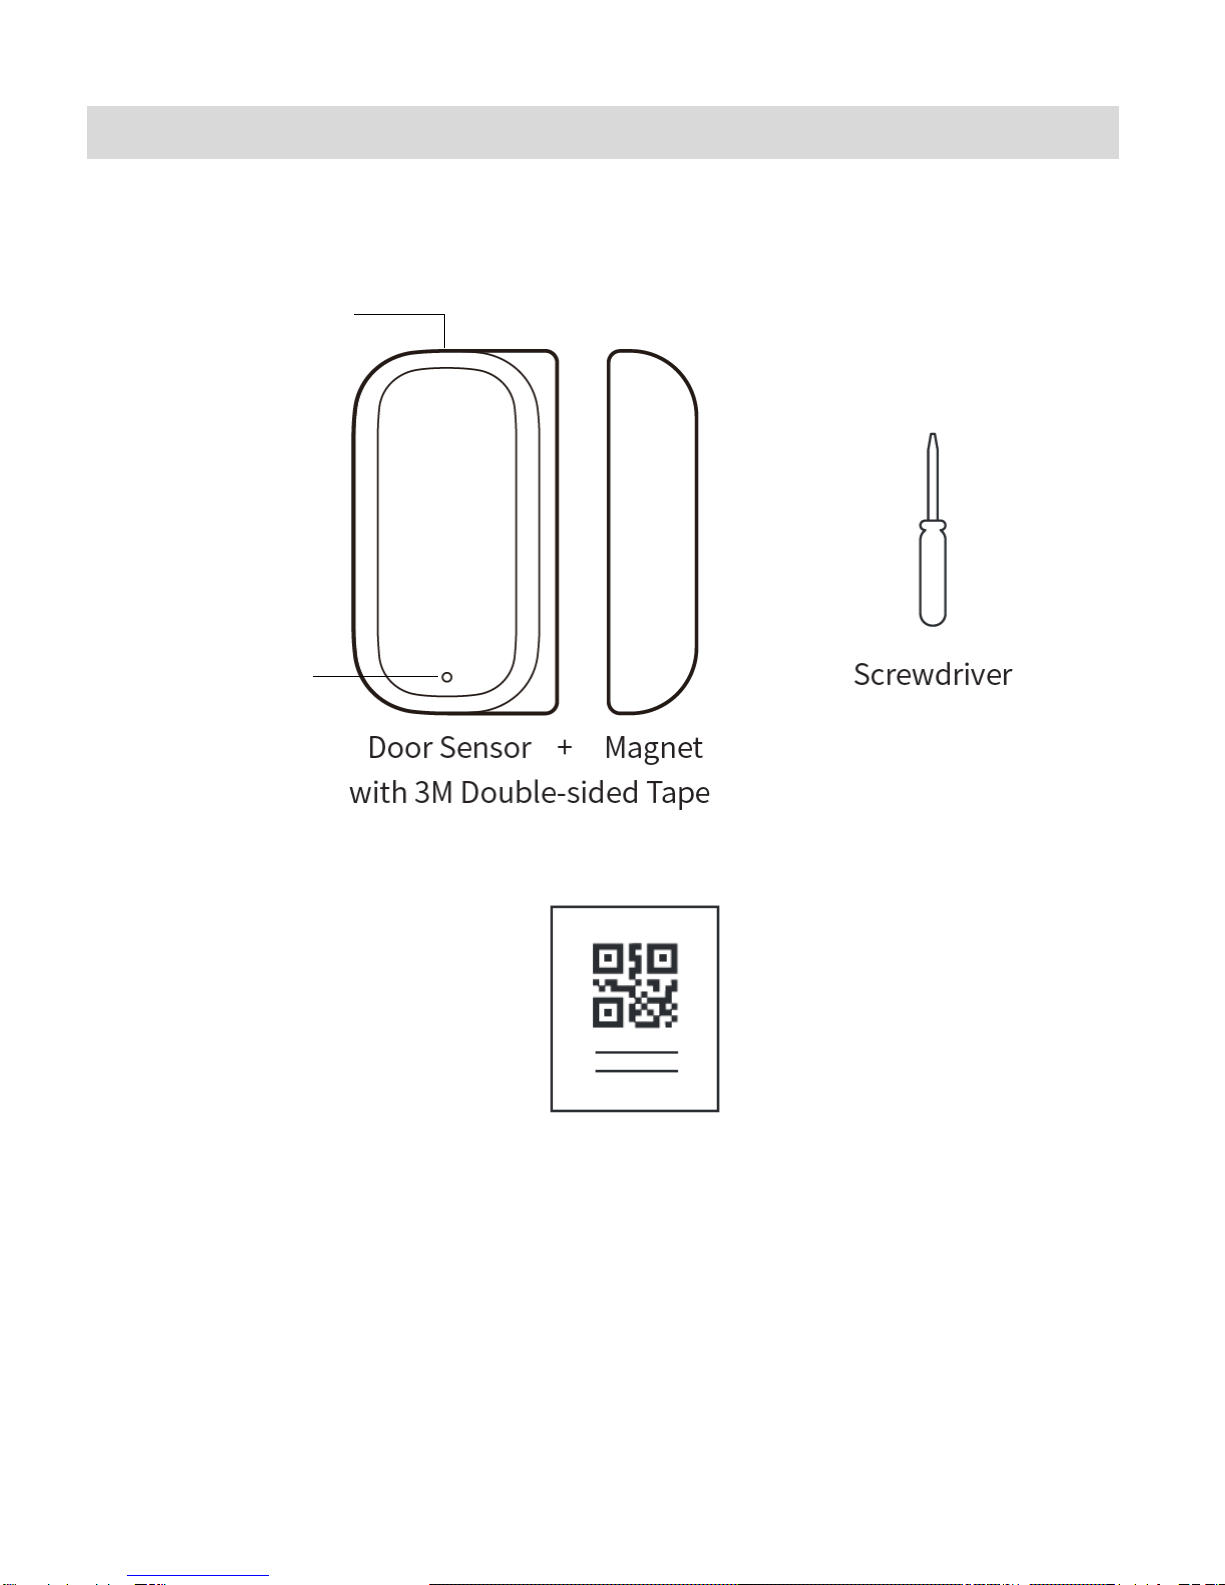
What’s Included............................................................................................................................ 3
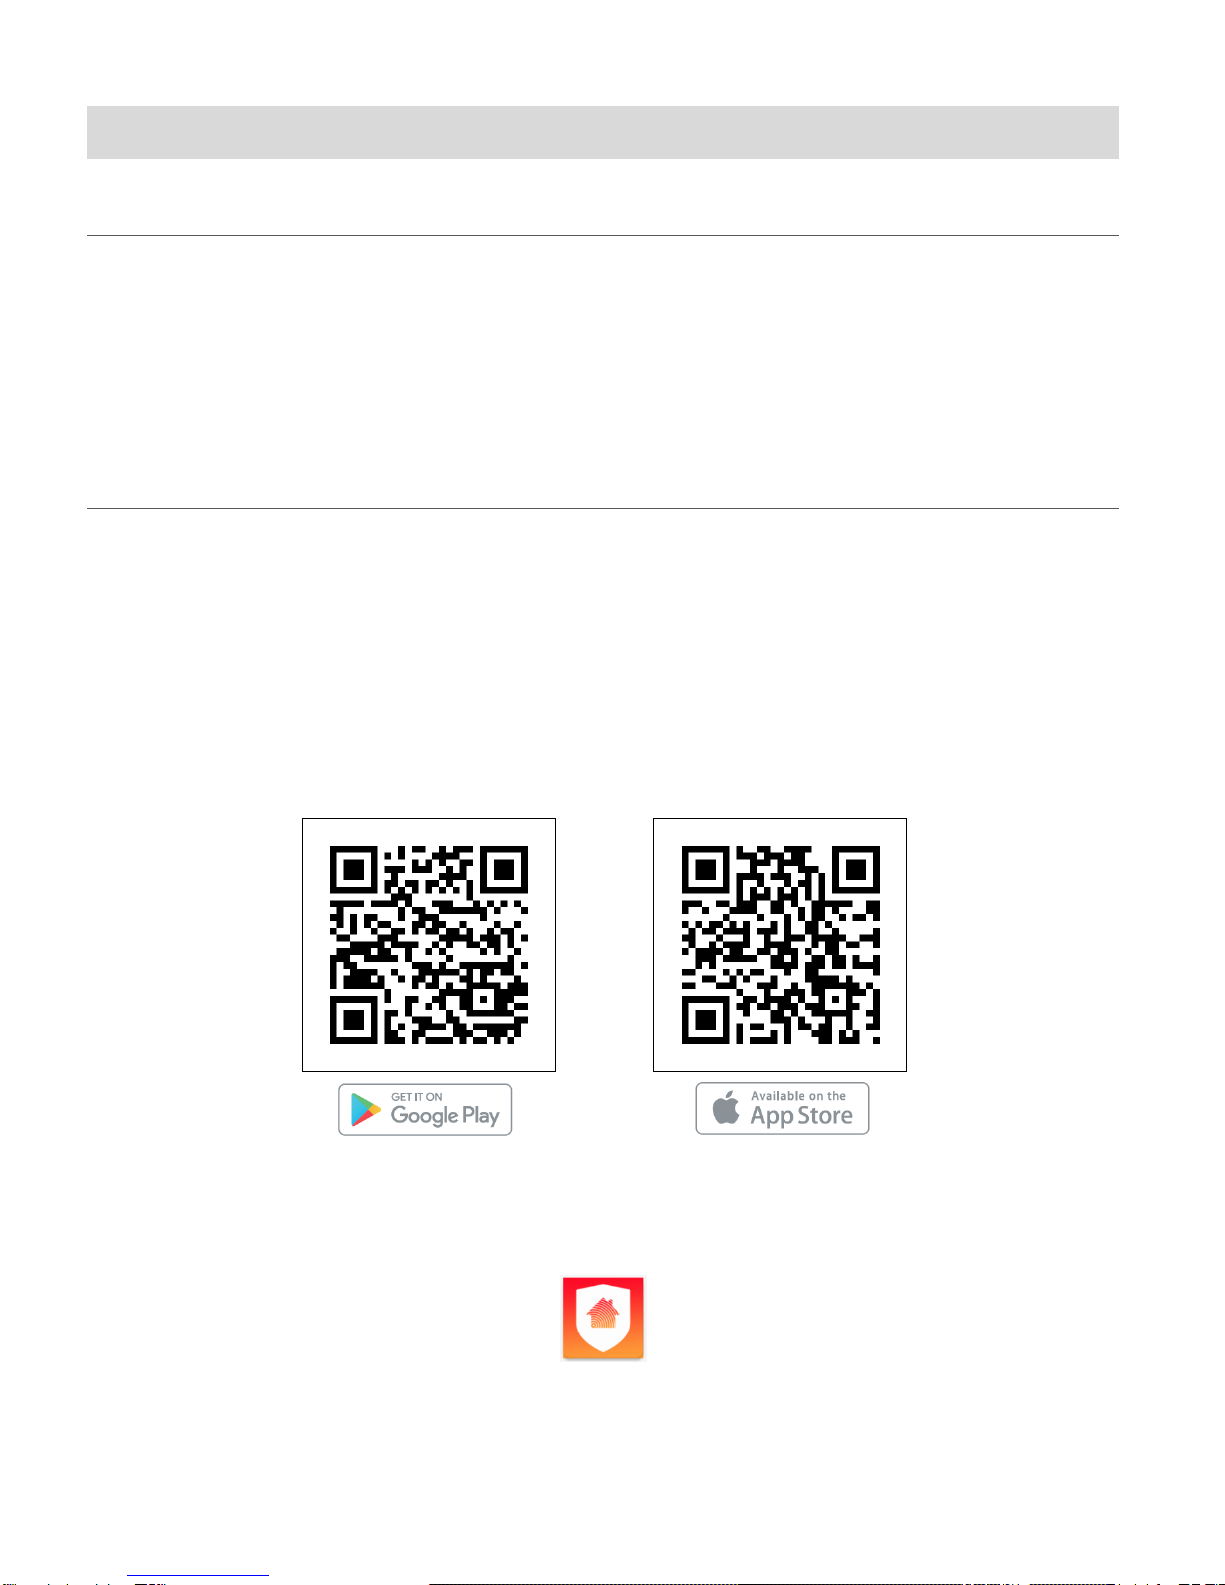
How to Install the Application ....................................................................................................... 3
MOBILE DEVICE – ANDROID AND IOS SYSTEM REQUIREMENTS ..................................................................................................................4
VIVITAR SMART HOME SECURITY – INSTALL AND LAUNCH..........................................................................................................................4
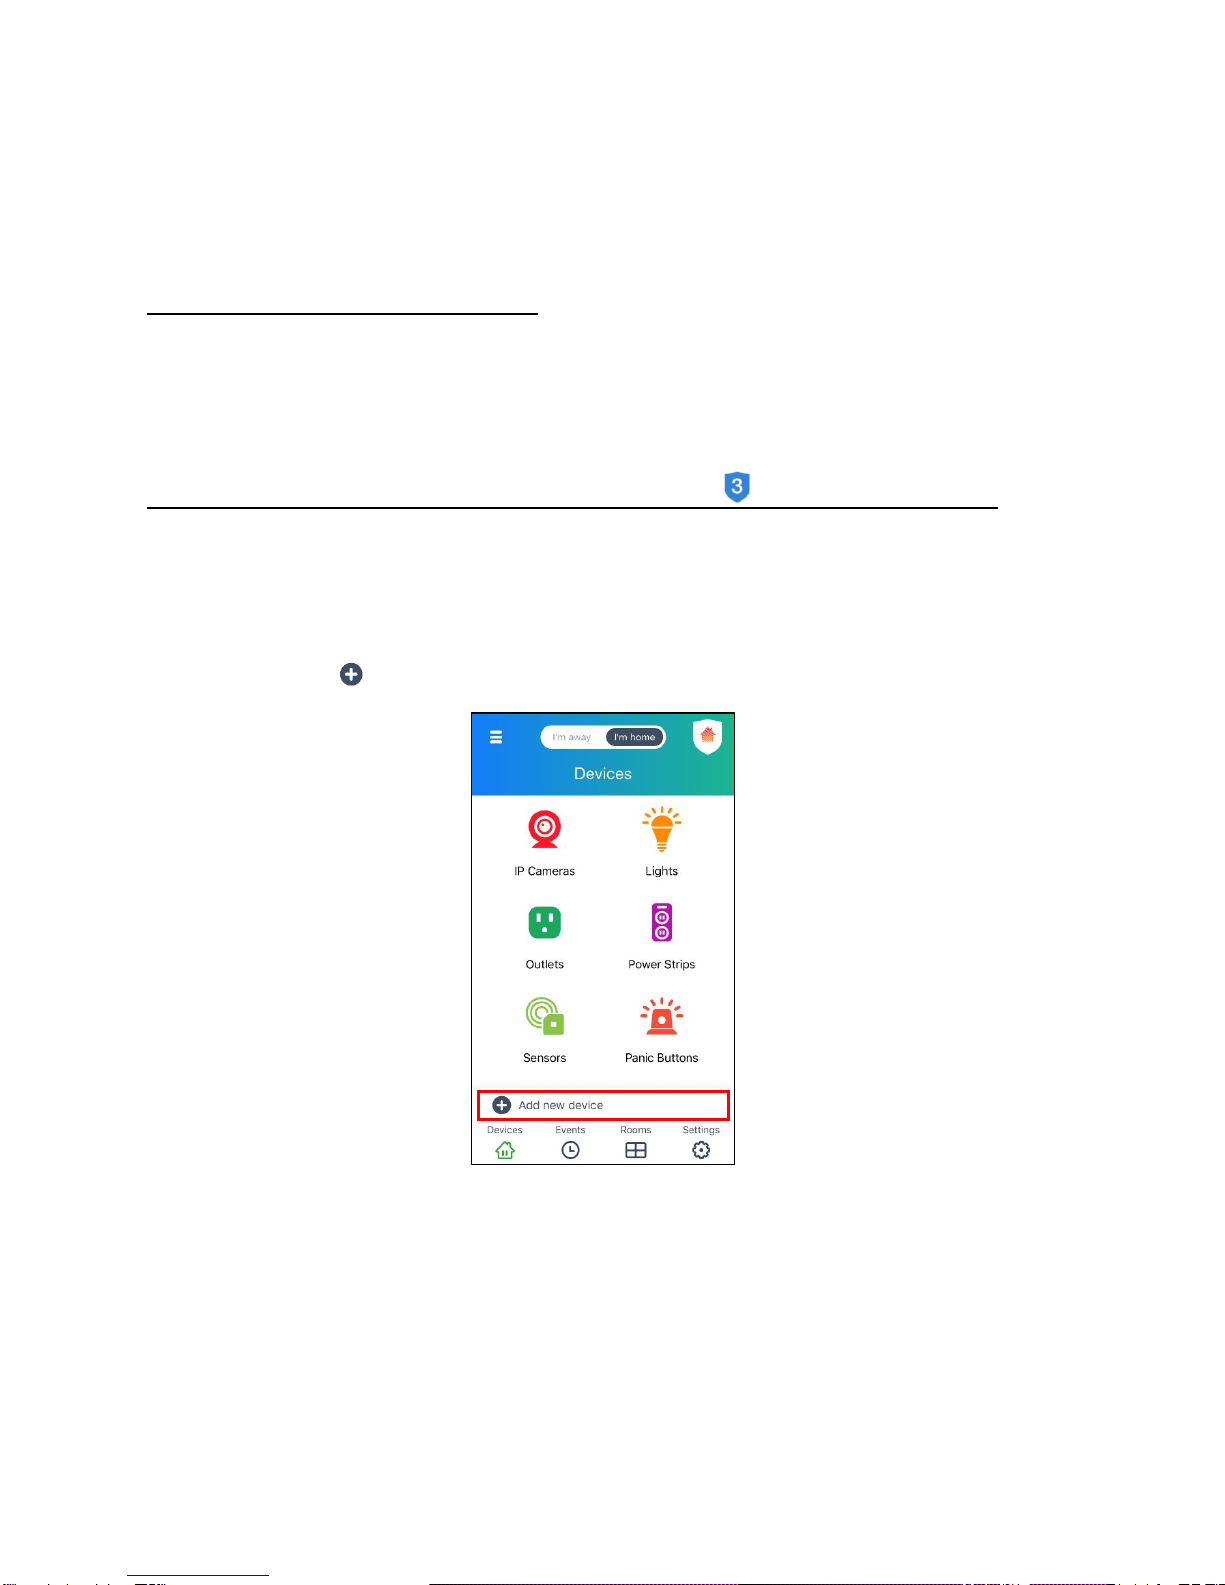
Connecting Your Device with the App........................................................................................... 5
INTRODUCTION.................................................................................................................................................................................5
QUICK OVERVIEW .............................................................................................................................................................................5
INITIAL SETUP...................................................................................................................................................................................6
Using Vivitar Smart Home Security ............................................................................................ 15
DASHBOARD ..................................................................................................................................................................................15
MAIN MENU..................................................................................................................................................................................18
NAVIGATION BAR ............................................................................................................................................................................35
SENSORS SCREEN ............................................................................................................................................................................36
DEVICES ........................................................................................................................................................................................39
SHARING DEVICES ...........................................................................................................................................................................41
RECONNECTING DEVICES ..................................................................................................................................................................43
HOME AND AWAY MODES ................................................................................................................................................................45
Technical Support....................................................................................................................... 47
Vivitar Warranty Card ................................................................................................................. 47

2
Introduction
Thank you for purchasing your Vivitar Smart Home Security Wi-Fi Door Sensor, the WT-06.
Everything you need to control your Wireless Wi-Fi Door Sensor is included with your Smart
Door Sensor and the accompanying online Vivitar Smart Home Security application.
You can use the app to control what is going on inside and outside your home via any mobile
device from anywhere. In addition, you can use the Vivitar Smart Home Security app to control
your IP cameras, lighting, electrical outlets and more.
Please read this manual carefully first to get the most out of your Vivitar Smart Home Security
Wi-Fi Door Sensor.
Features
•Sends alerts to your smartphone when it detects that your doors or windows have been
opened or closed.
•App records activation times and dates
•Label and manage several sensors with the free Vivitar Smart Home Security app
•Minimum energy consumption: works with 2 AAA batteries
•Integrated Wi-Fi – simple Wi-Fi connection set up with the app
•Automatic Wi-Fi network settings from the app
•Combine your Wi-Fi Door Sensor with other Vivitar Smart Home Security devices

3
What’s Included
Device QR Code Card
LED Light
Battery cover
with screw

4
How to Install the Application
MOBILE DEVICE – ANDROID AND IOS SYSTEM REQUIREMENTS
•Android cellphone/tablet with OS 4.4 or higher
•iPhone/iPad with iOS 9.0 or higher
VIVITAR SMART HOME SECURITY – INSTALL AND LAUNCH
1. Make sure your mobile device is connected to a Wi-Fi Network via the Settings of your
mobile phone or tablet.
2. Use your mobile phone or tablet to search for Vivitar Smart Home Security in the Google
Play Store (for Android OS) or the Apple App Store (for iOS).
Alternatively, scan the application QR codes below to find the application.
Android OS iOS
3. Install the application according to the instructions as seen on your mobile device.
4. After successfully installing Vivitar Smart Home Security, tap the icon to launch the
application.

5
Connecting Your Device with the App
IMPORTANT: Your device is supported only on a 2.4GHz Wi-Fi network. Before setup, make
sure your mobile device is connected to a 2.4GHz Wi-Fi network.
INTRODUCTION
The Vivitar Smart Home Security application allows you to easily connect and control your
lighting, indoor and outdoor IP Cameras, electric outlets, power strips, sensors and more via any
mobile device from anywhere.
With Vivitar Smart Home Security, you can see what is going on in and outside your home 24
hours a day, 7 days a week. Receive automatic alerts upon detection by the device. Set on/off
schedules for each smart light bulb, power strip or outlet and more with automatic adjustments
for sunrise/sunset.
Home Mode: Set on/off schedules for devices that include adjustments for Sunrise/Sunset.
Away Mode: Set devices to turn on or off while you are away from home.
QUICK OVERVIEW
ADD NEW VIVITAR
SMART HOME DEVICES
Tap the ‘Add new device’
button on the Home screen
and follow the instructions
to add your new device.
CONTROLS ALL VIVITAR SMART
HOME DEVICES
Tap the ‘Main Menu’ button to easily
navigate to all the main functions of the
app. Tap ‘Devices’ to control your smart
lights, indoor and outdoor IP cameras,
electric outlets and more.
HOME & AWAY MODES
Switch the Home & Away modes when
you leave your home and when you
come back to automatically adjust all the
devices’ security settings in your home.

6
INITIAL SETUP
NOTE:
•Your Smart device is supported only on a 2.4GHz Wi-Fi Network. Before setup, please make
sure your mobile device is connected to a 2.4GHz Wi-Fi Network.
•Please follow the steps below to create your User Account. You must be logged into your
User Account to register and use your Vivitar Smart device.
INITIAL DEVICE AND APP SETUP:
1. ENABLE MOBILE DEVICE WI-FI
Make sure to enable Wi-Fi on your smartphone or tablet via the settings of your mobile
device.
2. BATTERIES:
Make sure to have 2 new AAA batteries ready to be installed in the device during the app
setup.
3. LAUNCH MOBILE APP
Before installing the batteries, if you have not already launched the app, tap the
Vivitar Smart Home Security application icon on your smartphone or tablet to launch the
installed app.
NOTE: Please check that your Vivitar Smart Home Security app is up to date with the latest
version.
4. TUTORIAL
A quick overview through the app appears.
Scroll through the pages to view the tutorial then tap Start or tap Skip to continue the initial
setup without viewing the tutorial.
NOTE: Some notification windows appear during the initial setup’s quick overview
regarding the permission of receiving Notifications such as sounds, icon badges, alerts as
well as allowing the app to access your location to adjust sunrise & sunset time. Tap Allow

7
to permit the “Smart Home Security” app to send you notifications and to adjust the time for
the sunrise and sunset feature. This can be configured later via your mobile device’s
settings.
5. END USER LICENSE AGREEMENT
The End User License Agreement screen appears. Tap Agree & Continue to enter the
‘Devices’ Home screen and continue to the initial registration and adding your device.
6. INITIAL REGISTERATION – SENSORS ACCOUNT - GROUP 3 ACCOUNT
You must create an account or sign in to your existing account to use your device. To
register and add a new Smart Sensor:
1) On the ‘Devices’ Home screen, the list of Vivitar Smart Home Security devices
appears. Tap Add New Device to enter the ‘Add new device’ screen.

8
2) Tap Sensors to enter the list of Vivitar Smart Sensors.
NOTE: Alternatively, you can scan your device’s barcode. Tap the Scan Barcode
button located on the bottom of the first ‘Add new device’ screen. This screen lists the
Smart Home devices, and then continue to the registration.
3) Tap WT-06 Wi-Fi Door Sensor to select and register your device.

9
4) The ‘Register a new device’ screen appears.
You can create a new account or if you have already created an account, you can sign
in to your existing account.
NOTE: If you select ‘Cancel’ without signing in or creating a new account, you will not
be able to access your device via the app.
a) Create a New Account - Group 3 – Sensors:
- Tap Register to create a new Smart Home Security account for your selected
device.
- You will be prompted to enter your email and a password for this account.
- Tap Create Account.
- A ‘Registration complete’ window appears showing that your account has been
created successfully. Tap OK to continue.

10
b) Sign in to Existing Account - Group 3 – Sensors:
- To sign in to your existing Smart Home Security account, tap Sign In from the
‘Register a new device’ screen.
- Enter your email, your account password and then tap Sign In.
NOTE: If you have forgotten your password, tap ‘Forgot password?’.
7. ADD NEW DEVICE: CONNECT TO APP
The ‘Add new device’ connect instruction screen then appears.
PREPARE YOUR DEVICE
•Loosen the screw on the battery cover by using the supplied screwdriver to open the
battery compartment.
•Insert 2 new AAA batteries. Make sure the batteries are placed correctly as per the
polarity symbols shown inside the battery compartment.
•Do not close the battery compartment. Check that the blue LED indicator light is blinking.
•When you see the Wi-Fi indicator light flashing, tap Continue.

11
If the Wi-Fi indicator light is not flashing, then reset your device as follows:
- Take out the batteries and put them back again.
- The light indicator should start flashing, representing that the device is ready to pair.
- Make sure that your mobile device is connected to the Wi-Fi network to which you want to
connect the new device.
- Then, tap the Continue button.
8. ADD NEW DEVICE: DEVICE UID
Please scan the Barcode that is on the device or on the device’s hang tag.
NOTE: If a message window appears to allow ‘Smart Home Security’ to access the device’s
camera, please tap on OK to allow access to be able to scan the Barcode.
Alternatively, you can enter the devices UID number as seen by the Barcode, then tap Continue.

12
9. ADD NEW DEVICE: CONFIGURE NETWORK
Please enter your Wi-Fi password and then tap Continue to connect your device.
10.ADD NEW DEVICE: CONNECTING STATUS
The ‘Connecting’ screen appears displaying the connection progress. Please wait for the
indication that the Smart Sensor has successfully been found and connected.
NOTE: The blue LED light stops blinking once the connection is successful.

13
11.ADD NEW DEVICE: ADD DEVICE NAME AND LOCATION
The ‘Add to Account’ screen then appears displaying the device image along with the model
name and UID number.
Enter the following details for your device:
Set Name: Enter a name for your device.
Set Room: Tap to view the list of room names and select the appropriate room.

14
12.SETUP COMPLETE
After setting your device name and selecting a room, tap Done.
- A ‘Success’ window then appears, showing that your device has been successfully added
to your account.
- Tap OK to complete the setup and open the ‘Devices’ screen. (iOS)
- Tap Sensors to open your Wi-Fi Smart Sensor’s Dashboard control screen.
- Place the battery compartment cover back on the device and tighten the screw with the
supplied screwdriver to securely close the cover.

15
Using Vivitar Smart Home Security
DASHBOARD
•Once you have successfully registered and added your device, the ‘Devices’ screen appears.
•To access the Smart Sensor Dashboard:
Tap Sensors on the ‘Devices’ screen to open the screen displaying your device’s
Dashboard controls.
NOTE: If you have added numerous sensors, when tapping Sensors from the ‘Devices’
screen, the ‘Sensors’ screen appears with the list of your registered or shared devices. Tap
the device name to select it and open the Dashboard for the selected device.
The Sensor Dashboard screen displays the status and options for your selected Vivitar Smart
Home Security device.
NOTE: You must be registered and logged in to your account in order to view your device’s
dashboard.

16
The connected Smart Sensor displays the following:
ITEM
NAME
FUNCTION
1
Main Menu
Displays the Main Menu options: Devices, Events, Rooms,
Settings, Messages, Share, Accounts, Help
See Main Menu for further information.
2
Back Button
Tap to go back to the previously viewed screen.
3
Battery Status
Displays the battery status – either full or almost empty.
When the battery icon is shown in red, this means the battery is
almost empty. Please replace the batteries.
NOTE: Battery status is updated every 6 hours.
4
Device Status
Displays if the device is online or offline.
5
Refresh Screen
Tap to refresh the screen and display the current device status.
6
Settings
Tap to open the device and app ‘Settings’ screen.
See Settings for further information.
7
Away / Home
Mode
Tap to toggle between the Away and Home Modes.
See Home and Away Modes for further information.
8
Device
Location:
Device Name
Displays the device name and room name you entered during the
setup.
NOTE: You can change the names at any time via the ‘Settings’.
9
Door Status
Displays the current status of the door: ‘Door Closed’ or ‘Door
Opened’. The time and date of the door status change is also shown.
10
Alerts History
Tap to view the history of the detected door status changes.
See Alerts History for further information.
3. Device Battery Status
4. Device On/Off Status
5. Refresh Screen
6. Settings
1. Main Menu
8. Device Location:
Device Name
7. Home / Away Mode
Control
2. Back Button
10. Alerts History
9. Current Door Status

17
DASHBOARD FEATURES
•Settings
Tap to open the device ‘Settings’ screen. See Settings for further information.
•Alerts History
Once a change to the door status is detected, your mobile device receives a Smart Home
Security notification.
- If the door is opened: ‘Door Name @@ Door Location : Opened’
- If the door is closed: ‘Door Name @@ Door Location : Closed’
Tap Alerts History to view the history of your device’s alerts.
NOTE: The last alert appears on the Dashboard. In order to receive alert notifications, please
make sure that you have allowed your mobile device to receive push notifications for the
Vivitar Smart Home Security app in your phone ‘Notifications’ settings.
•Refresh
Tap to refresh the screen. This will refresh the Sensor’s status.
•Battery
The battery icon displays the battery status.
NOTE: The battery status is updated every 6 hours. If the batteries run out, a ‘Connection
Lost’ message appears. Please place fresh batteries in the device when needed.

18
MAIN MENU
Tap the Main Menu button to view the following menu options:
Devices +, Events, Rooms, Settings, Messages, Share, Accounts +, Help
Tap on one of the menu items to view the selected menu’s options.
NOTE: All menu options that appear with a + plus symbol can be expanded when tapping on
the + plus symbol. The menu option can be minimized by tapping on the - minus symbol.

19
1. DEVICES +
The Devices main menu option lists the device types that are included in the app.
Once you have added devices, these devices are also listed under the appropriate device type
which enables you to easily access and control each device.
A. ACCESSING YOUR DEVICES
There are two ways to access your devices via the Main Menu – Compact Menu / Expanded
Menu:
Devices: Compact Menu
1. Tap the Main Menu button.
2. Then tap the Devices menu option to open the ‘Devices’ screen.
3. From the ‘Devices’ Home screen, tap Sensors.
4. The Dashboard screen or the ‘Sensors’ screen opens.
a) ONE REGISTERED DEVICE:
Enter the Sensor Dashboard screen (if you have only one registered device).
b) MULTIPLE REGISTERED DEVICES:
Enter the ‘Sensors’ screen displaying the list of registered Sensors. This displays when
you have added to the app more than one Vivitar Smart Home Security Sensor. Tap one
of the listed sensors to select it and display it in Dashboard view.
NOTE:
- Connected devices appear with an ON icon.
- Disconnected devices appear with an OFF icon.
Table of contents
Other Vivitar Accessories manuals
Popular Accessories manuals by other brands

Banner
Banner Q5X quick start guide

Vynco
Vynco VMOSS Quick user guide

Brookstone
Brookstone Tablet Pen Set manual

VOLTCRAFT
VOLTCRAFT VC-SL16000 operating instructions

MAMAC SYSTEMS
MAMAC SYSTEMS Maverick IP-PC-101-44-VDC Installation & operating instructions

Ericsson
Ericsson RBS 2106 Hardware reference manual