5
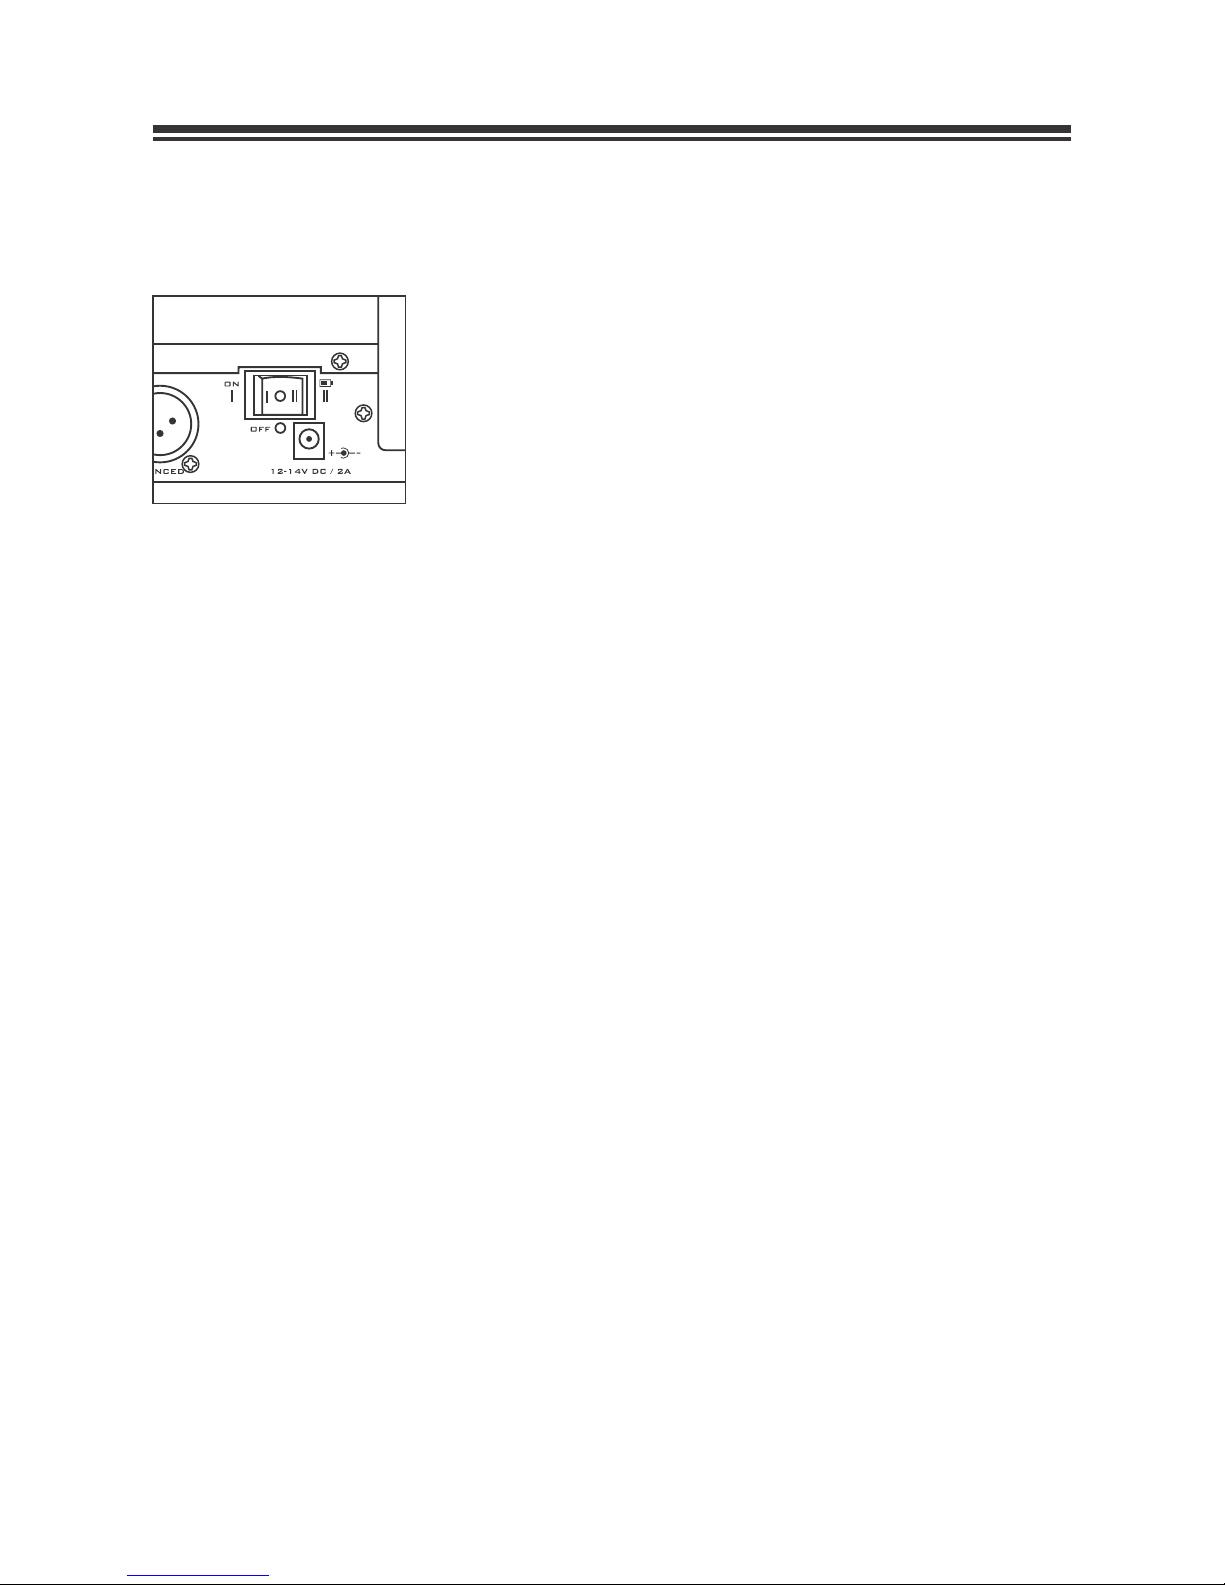
1 - Connect the AC power adapter to the power outlet and insert the plug into the
receiver's power input. Connect the audio cable to the desired audio output (XLR or ¼”
jack). Turn the receiver ON and put the antennas in an upward position.
Note that the ON/OFF switch has 3 positions (Picture 5), being:
“ I ” to turn the receiver ON and charge the batteries at the same time;
“ O ” to turn the receiver OFF completely;
“ II ” to turn OFF the system reception, but keeping the USB ports active to recharge
the Lithium batteries.
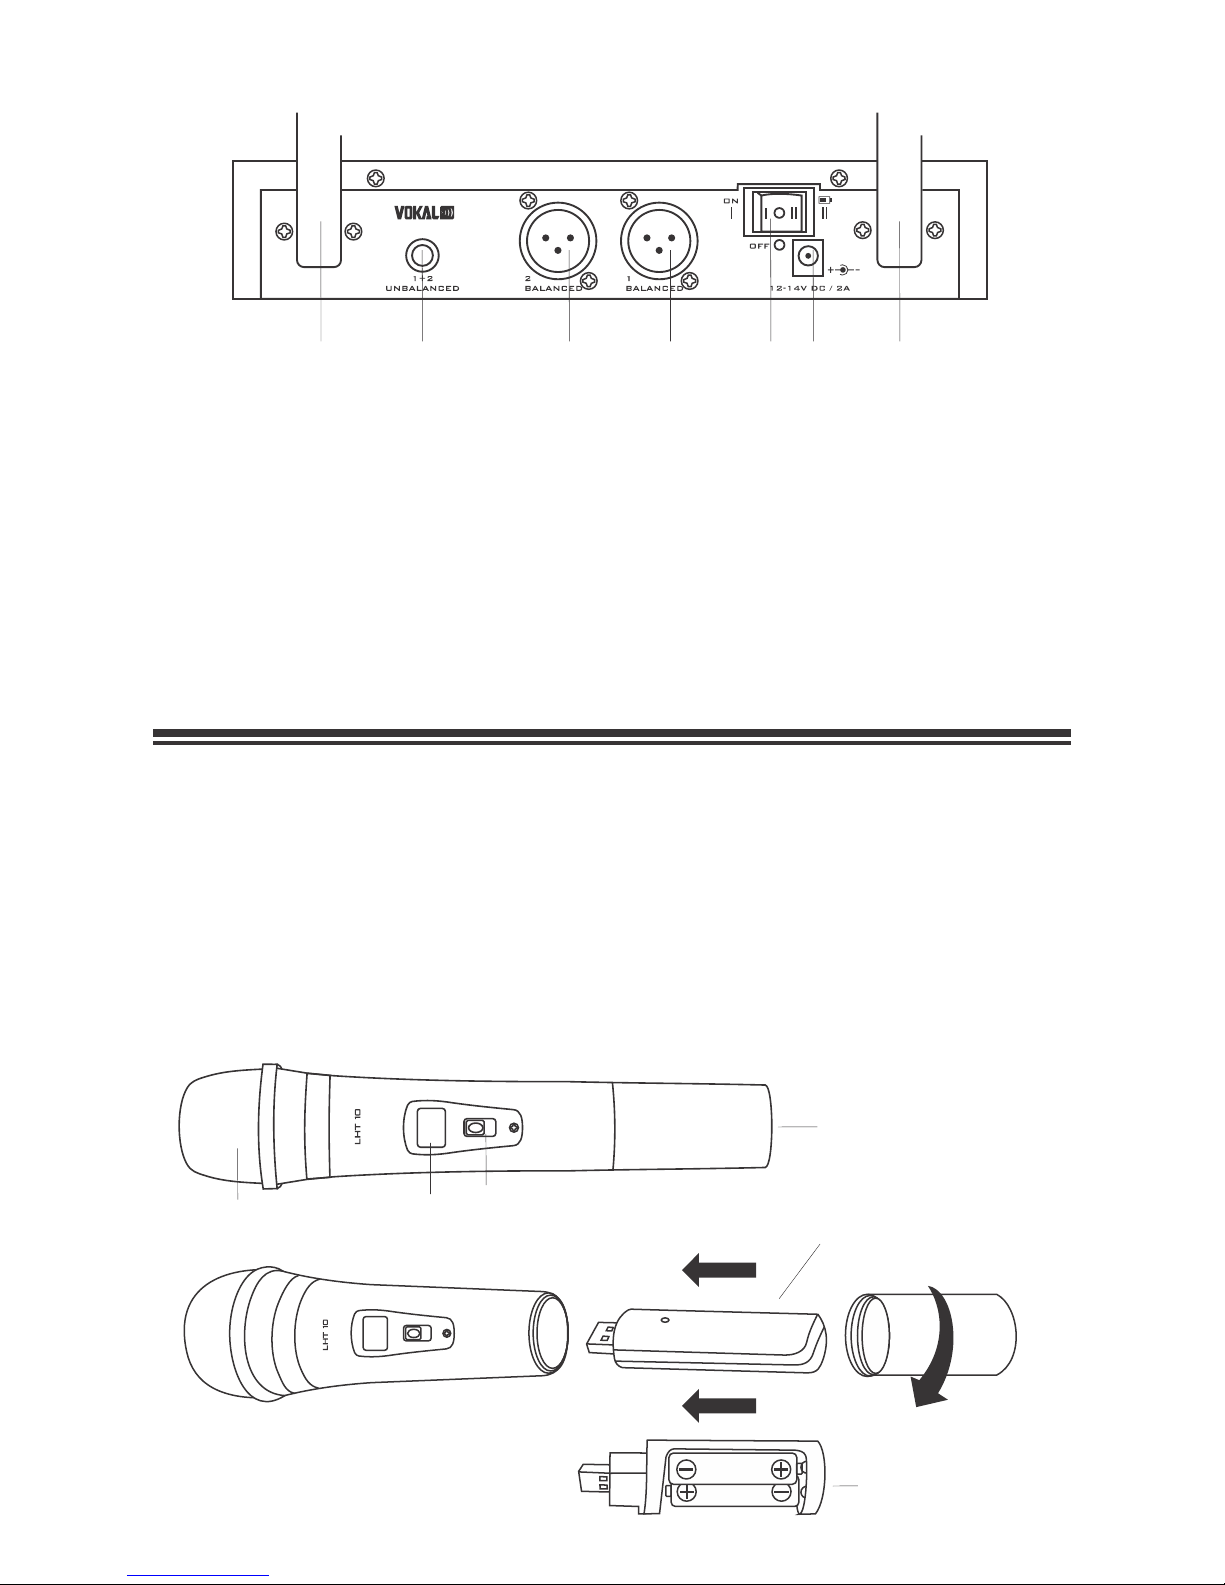
1 - Insert the charged Lithium batteries correctly into the battery compartment. To use the
AA battery adapter, insert 2x 1.5V AA batteries following the correct polarity orientation
(+/-) on the adapter and in the compartment. Remember to connect the Lithium batteries
into the USB ports for recharging.
2 - Turn-on the microphone (transmitter) and the display will show the channel number
and the UHF frequency, the RF LED indicator on the receiver will turn ON showing that the
system is ready for use. Adjust the volume on the receiver, mixer and/or amplifier.
3 - If the audio or RF signals start failing, the most likely cause is low the battery charge.
Exchange the batteries for new ones and recharge the Lithium batteries. If you need to
use regular AA batteries, connect them through the AA batteries adapter, observing the
correct +/- polarity.
4 - When speaking or singing through the microphone, keep a distance from 4cm to 8cm
between the mouth and the microphone wire screen.
Operating the system
Picture 5
(Rear Panel)