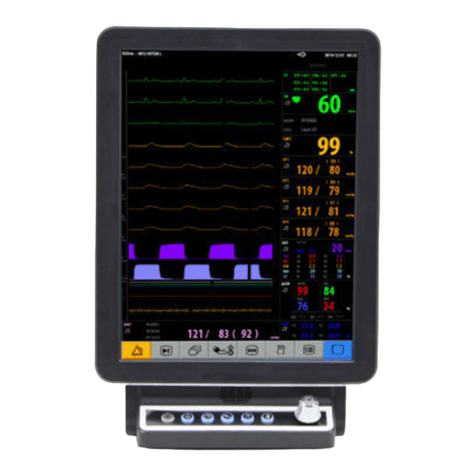
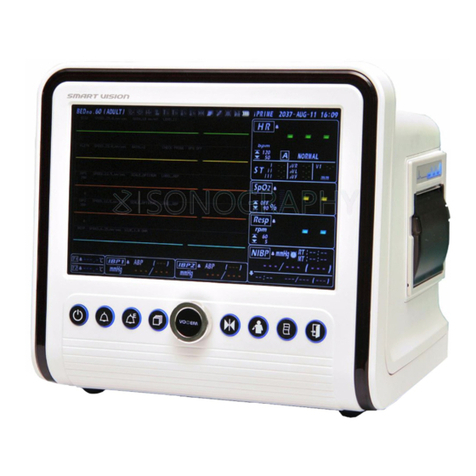
VOTEM VO-100 User manual

1.64 (2018. 09. 10)

User Manual
VO-100
1
Contents
◆Preface
2
▶Product Ver. / SD Card Checking
21
◆Warranty
3
▶Main Screen Select
22
◆Warnings
4
◆APG?
23
◆Safety Precaution
5
◆VO-100 Measuring
24
◆Electrical safety precautions
7
▶Measuring of SpO2
24
◆System Overview
9
◆
VO-100 Adapter & Battery Spec
25
◆Composition of VO-100
10
◆Simple Problem Solution
27
◆Names of Each Part
11
◆VO-100 Specification
29
▶Parts and Functions
11
◆Safety
30
▶Reset Button
12
▶MAIN Screen Mode
13
▶Description of Equipment Symbols
14
◆VO-100 Before & After Check
15
◆VO-100 Settings
16
▶About the Alarm / Alarm Off
16
▶Alarm Setting
17
▶Sound Setting
18
▶Date & Time Setting
19
▶Trend Data Checking
20
▶Brightness Setting
21

User Manual
VO-100
2
Preface
Thank you for purchasing the VO-100 (Hand Held Pulse Oximeter)
⚫To ensure safety operating and long-term performance stability, it is essential
that you fully understand the functions, operating and maintenance.
Read operating manual carefully before using.
⚫Please keep this manual in a place where it is easy to find and check its
function.
This device is intended for use under the direct supervision of a licensed health care
practitioner. The intended use of this device is to measure Arterial Blood Oxygen
Saturation and Pulse Rate for determining patient’s abnormalities. To ensure patient
safety, use only parts and accessories that fit manufacturers’ requirements
recommend by VOTEM.
Parts used which are not authorized by the manufacturer may cause damage to
the product, Warranty may not be covered.
You may contact us at our telephone number of sales, services, and supplies.
Sales Office Tel : +82-33-910-0701
E-mail: sales@votem.kr
* Please give us the Model name, Serial Number, Purchasing date and when trouble
occurred and service needed.
How to reach
us

User Manual
VO-100
3
Warranty …
⚫VOTEM warrants to the purchaser that VO-100 will be free from defects in
material and/or workmanship for one year from the date of delivery but In
case of consumable items (ex: LCD, battery, printer, NIBP valve etc.) and
accessories will be free from defects in material and /or workmanship for 6
months from the date of purchasing or the date of first operation. (This
warranty is not including disposable item)
⚫This warranty applies only to failures from operating the equipment under
conditions for which it was designed. Warranted equipment is to be used
only for the intended and labeled indications presented in the literature
accompanying the equipment.
⚫This warranty does not cover loss or damage resulting from external
causes, such as, but not limited to, fire, flood, windstorm, hail, lightning,
earthquake, theft, misuse, or abuse. Damage caused by equipment
relocation is not covered.
⚫Product has been damaged as a result of an accident, misuse, abuse,
dropping, abnormal operating conditions, or attempts to modify or alter any
part or assembly.
⚫Cosmetic defects or deterioration will not be refinished or replaced. The
costs of training materials or supplies are not covered.
⚫VOTEM will not be responsible for any loss, damage, or injury resulting
from delay in rendering service under this warranty.

User Manual
VO-100
4
Warnings
Please Check before operation
⚫Particular attention must be made to all warnings, cautions and notes incorporate
herein. Incorrect operation or failure of the user to maintain the equipment
relieves the manufacturer or his agent of the system’s noncompliance with
specifications or of responsibility for any damage or injury.
⚫The following conventions are used throughout the manual to denote information
of special emphasis.
WARNING
“WARNING” is used to indicate the presence of a hazard which can cause
severe personal injury, death or substantial property damage if the warning
is ignored.
CAUTION
“CAUTION” is used to indicate the presence of a hazard which will or can
cause minor personal injury damage if the caution is ignored.
NOTE
“Note” is used to notify the user of installation, operation, or maintenance
information which is important but not hazard related.
WARNING
◼Do not use VO-100 and it’s transducer during MRI scanning because induced currents could
potentially cause burns.
◼The equipment can interfere with the proper performance of MRI, and MRI is can interfere with
the measurement accuracy of the Product.
◼The result of measuring may not be the only determining factor of patient treatment.
◼Don’t use longtime if ambient temperature is higher than 35℃(95℉).
◼Avoiding placing the probe on any extremity with an arterial catheter, or intravascular venous
infusion line.
◼Don’t use disposable sensor again to the other patient.

User Manual
VO-100
5
Safety Precaution
Please keep precaution for safety
⚫Avoid the following from environments operation or storage
Avoid placing in an area exposed to
moisture. Do not touch the equipment with
wet- hand.
Avoid exposure to direct sunlight
Avoid placing in an area where there is a
high variation of temperature. Operating
temperature ranges from 10C to 35C.
Operating humidity ranges from 30% to 85%.
Avoid in the vicinity of Electric heater
Avoid placing in an area where there is an
excessive humidity rise or ventilation
problem.
Avoid placing in an area where there is an
excessive shock or vibration.

User Manual
VO-100
6
▶Normal Operation Condition is as below
-Temperature : 10℃~ 35℃(50 ~ 95℉)
-Pressure : 700 ~ 1060Kpa
-Humidity : 30 ~ 85%
▶Normal Storage Condition is as below
-Temperature : -10℃~ 50℃(14 ~ 122℉)
-Pressure : 700 ~ 1060Kpa
-Humidity : 20 ~ 95%
Avoid placing in an area where chemicals are
stored or where there is in danger of gas
leakage.
Avoid dust and especially metal material into
the equipment
Do not disjoint or disassemble the
equipment.
Votem takes no responsibility of it
Power off when the equipment is not fully
installed.
Otherwise, equipment could be damaged.
Pull out the power cord with holding
the plug, not the cord.

User Manual
VO-100
7
Electrical safety precautions
CAUTION
◼VO-100 has to be used under the ambient temperature of 10℃∼45℃and
humidity of 30%∼85%.
◼Please read operating manual carefully before using. It may cause incorrect
result of measuring or skin problem, if you use unsuitable sensor, band the
tape too tight, without regular checking.
◼Premature neonates and patients with chronic pulmonary disease should be
checked for oxygenation levels before starting treatment.
◼Please check the sensor every 4 hours when it is being used (Finger probe
for Adult-Reusable is every 2 hours); Sensor connection, skin condition. It is
cause abnormal result if there is manicure or hardened skin. Special care is
required for patients with poor blood flow. If the sensor attachment status is
not checked periodically, it may lead to skin injury by extended contact and
necrosis from the pressure. Patients with weak blood flow should be
checked every 2 hours
◼Please follow instruction below:
⚫Do not use any battery which is not recommended.
⚫Do not disassemble the battery. Keep away from fire and heat.
⚫Dispose the used/discharged battery and do not use different kind of
battery, different brand battery.
⚫Please check positive and negative polarity of the battery when you
install.
◼Please remove battery when it is not use for longtime.
◼Please handle with care all the accessories before moving to avoid any
harmful damage, fire, electric shock.
NOTE
◼Please follow all of warning and caution instructions to install proper finger
probe for measuring. Intense illumination, such as surgical lamps
(especially ones with a xenon light source), bilirubin lamps, fluorescent
lights, infrared heating lamps, or direct sunlight (exposure to intense
illumination can be corrected by covering the sensor with a dark material)
◼Please check below when the result is abnormal or no signal.
⚫Please change Finger probe connection. (finger or toe)
⚫Please check Finger Probe connection.
◼Please keep finger probe away from electronic operation device or cable.

User Manual
VO-100
8
Electrical safety precautions
NOTE
◼Try to place the system far from power generators, X-ray machines,
broadcasting stations, and transmission lines to avoid electrical noise during
scanning. Close proximity to such items may result in abnormal output. An
independent circuit and a safely grounded outlet are strongly recommended
for the VO-100. Poor or abnormal output may occur if the system shares a
power source with other electrical or electronic equipment.
NOTE
VO-100 is classified as ;.
◼Equipment not suitable for use in presence of a flammable anesthetic
mixture
◼Continuous operation by standard of IEC / EN 60601-1 (Safety of Electric
Medical Equipment). Moreover, VO-100 is complied with Class B for Noise-
Emission, Criteria Level B for Noise- immunity, by standard of IEC/EN
60601-1-2 (Electromagnetic Compatibility Requirements).
◼IPX 0 ACCORDING TO IEC 529.

User Manual
VO-100
9
System Overview
The handheld VO-100 is an electronic pulse oximeter for measuring oxygen saturation of
arterial blood(SpO2), pulse rate of patient.
Data and detected wave are displayed on the front LCD.
There are two principles that pulse oximeter is based on. Oxyhemoglobin and
deoxyhemoglobin differ in their absorption of red and infrared light, and that the volume
of arterial blood in tissue (and hence, light absorption by that blood) changes during the
pulsatile cycle. A pulse oximeter measures the oxygen saturation of arterial
hemoglobin(SpO2) by passing red and infrared light emitting diodes (LEDs) in the
oximeter sensor serve as light sources (red nominally 665 nm and infrared nominally 885
nm); a photodiode serves as the photo detector.
Because oxyhemoglobin and deoxyhemoglobin differ in spectral absorption, the relative
absorption of red and infrared light by blood reflects hemoglobin oxygen saturation. To
identify arterial hemoglobin oxygen saturation, the monitor relies on the pulsatile nature
of arterial flow. At systole - as a new pulse of arterial blood enters the vascular bed -
blood volume, and hence light absorption, increases. During diastole, blood volume and
light absorption between minimum and maximum absorbers (that is, tissue, bone and
venous blood) are eliminated. Red absorption and infrared that are attributable to the
pulsatile arterial blood are thus made distinct.
The resultant pulse rates and arterial blood oxygen saturation are displayed on a LCD
display in real time. Users can determine the alarm settings and volume as needed via
control key panel on the front.
The VO-100 pulse oximeter gives the operator the ability to measure patient basic vital
abnormality.

User Manual
VO-100
10
Composition of VO-100
Kindly check all the items inside
the package before installation.
Standard
Acc.
SpO2 Finger Probe
(1 pcs)
9V, 1.5Adc Adapter
(1 pcs)
Cradle
User Manual
Option
SpO2 Extension Probe
SpO2 Y- Probe
SpO2 Probe
(Thimble Type)
Finger Probe
(Disposable)
SD CARD
SD CARD READER
Software CD
NOTE
◼To buy Part or accessory to any agency, you may contact to agency

User Manual
VO-100
11
Names of Each Part
◆Parts and Functions
NOTE
◼VO-100 support “SD CARD” (Maximum 2G, optional).
1
Event: The function is realtime data saving when it is measuring of SpO2.
1
Finger Probe Connector
2
Memory Card (SD CARD) Input
3
LCD Screen
4
UP Button, ESC Button, Alarm Off Button
5
Left Button, Trend Button
6
Down Button, Menu Button, Select OK Button
7
Power On / Off Button
8
Right Button, Event1Button
9
Adapter 9V 2A Input

User Manual
VO-100
12
Names of Each Part
◆Reset Button
NOTE
◼In case screen is frozen due to malfunction, the “Reset Button” turns off the device by
compulsion.
1
: Reset Button

User Manual
VO-100
13
Names of Each Part
Check setting information on LCD
◆MAIN Screen Mode
1
: SpO2 Waveform display
6
: Time display
2
: Alarm On/Off display
7
: Pulse Rate display
3
: Sound display
8
: SpO2 Saturation display
4
: SD Card Display
9
: APG Wave display
5
: Power / Battery Display
10
: APG display
◆MENU Screen Mode
11
: Alarm setting
14
: Screen Select
12
: Sound & LCD Brightness setting
15
: System Information
13
: Date and time setting
16
: Language

User Manual
VO-100
14
◆Description of Equipment Symbols
Symbol
Description
Type BF Equipment
This symbol means attention during operation
Power switch
Adapter input
NOTE
◼To turn on or turn off the power, press power switch ” ” button for 2
second .

User Manual
VO-100
15
VO-100 Before & After Check
◆While installing VO-100, observe the following points
➢VO-100 has to be used under the ambient temperature of 10℃∼35℃and
humidity of 30%∼85%.
➢Please use only adapter which we supply, when you connect the power
and don’t plug several cord in one electric outlet.
➢Please check the parts before installation
➢If the probe length is not enough, use extension Cable.
➢Handle the equipment with care, because the equipment can be easily
damaged by sudden impacts.
➢Please keep away from dust and explosive material when you use cradle.
◆Checkpoints Before Use
Check the following points before measuring the patient’s condition.
➢
Make sure there is no mechanical risk.
➢
Check the lead, power plug, and accessories connected on the outside.
◆Maintenance and clean after operating
➢Keep the product clean by cleaning it using a soft cloth at least once a
month. Do not use thinner, ethylene, oxidant or lacquer since these may
damage the product.
➢Keep the accessories clean of dust or foreign materials. For cleaning,
use a soft cloth and clinical alcohol.
➢Do not soak the accessories in liquid or detergents. Keep the product and
accessories out of any liquid.

User Manual
VO-100
16
VO-100 Settings
t is essential that you fully understand the
functions before using.
◆About the Alarm
Vo-100 is designed to provide various kinds of alarm for user’s convenience. Users
must read following carefully and treat proper manner in the situation of alarm
occurrence.
NOTE
◼You are recommended to hear the each alarm sound with your own ears before use
the equipment.
➢High Alarm
A) High alarm set off only when a measured value is extremely abnormal.
B) High alarm is beeping 5 times for 2 seconds. And it is beeping
continuously every 8 second.
➢Information Alarm
A) Information Alarm informs the matters which the user should keep or the
abnormality occurrence during measuring by alarming.
B)
Information Alarm sound is ‘ding-dong’ and it is beeping continuously
every
10 second.
C) Information Alarm is beeping as following case.
-Low Battery
◆Alarm Off
The VO-100 is getting the 2 kinds of ‘Alarm Off’ If you press “ESC” button, the
Alarm Off is like below.
Icon
Features
In case of press the “ESC” button one time, maintain the Alarm
Off during 2 minutes and the remove automatically.
In case of press the ‘ESC” button two times, maintain the Alarm
Off until remove. How to remove is that press the ‘ESC’ button
one time.

User Manual
VO-100
17
VO-100 Settings
it is essential that you fully understand the
functions before using
◆ALARM Setting
1
Press the ”MENU” button on VO-100.
2
Use “◀, ▶” Button and move to cursor to
alarm icon.
Press “MENU” button.
3
Use “◀, ▶” button and select the menu.
Press “MENU” button.
4
Use “◀, ▶” button and increase or
decrease the level.
Press “MENU” button.
5
Use “◀, ▶” button and move to cursor to
exit icon.
Press “MENU” button.
<Alarm setting range>
Setting
Range
HIGH
LOW
SpO2
1 ~ 100, Off
Off, 0 ~ 99
Pulse Rate
5 ~ 300, Off
Off, 0 ~ 295

User Manual
VO-100
18
VO-100 Settings
it is essential that you fully understand the
functions before using
◆Sound Setting
1
Press the ”MENU” button on VO-100
2
Use “◀, ▶” Button and move to cursor to
SETUP icon.
Press “MENU” button.
3
Use “◀, ▶” Button and move to cursor to
Sound icon.
Press “MENU” button.
4
1
Alarm Sound
2
Beep Sound
3
Information Alarm Sound
4
Exit
5
1) Alarm Sound Volume Setting
Use “◀, ▶” Button and move to cursor to
“Alarm Sound” icon.
Press “MENU” button
6
Use “◀, ▶” button and increase or
decrease the level.
Press “MENU” button.
7
2) Beep Sound Volume Setting
Use “◀, ▶” Button and move to cursor to
“Beep Sound” icon.
Press “MENU” button
8
Use “◀, ▶” button and increase or
decrease the level.
Press “MENU” button.
1
2
3
4

User Manual
VO-100
19
VO-100 Settings
it is essential that you fully understand the
functions before using
9
3) Information Alarm Sound
Volume Setting
Use “◀, ▶” Button and move to cursor to
“Information Alarm Sound” icon.
Press “MENU” button
10
Use “◀, ▶” button and increase or decrease
the level.
Press “MENU” button.
NOTE
◼The i-con ( ) on LCD is displayed simultaneously with
the beep sound of volume.
◆Date & Time Setting
1
Press the ”MENU” button on VO-100
2
Use “◀, ▶” Button and move to cursor to
Date & Time icon.
Press “MENU” button.
3
Use “◀, ▶” button and select date or
time. Press “MENU” button. Adjust date
and time.
Press “MENU” button.
Table of contents
Other VOTEM Medical Equipment manuals
Popular Medical Equipment manuals by other brands

Gainsborough
Gainsborough KENT 1800 Series 2 Information manual

LED Technologies
LED Technologies DPL II User Guide & Operating Instructions

Canon
Canon Omnera 500A Operator's manual

Vatech
Vatech EzRay Air Wall user manual

Ossur
Ossur i-limb access hand Instructions for use

laerdal
laerdal ShockLink user guide

Nasco
Nasco Life/form LF00994U instruction manual

Invacare
Invacare Pronto M71 Base Owner's operator and maintenance manual

Planmeca
Planmeca ProOne installation manual

medi
medi protect.Leva strap Instructions for use

Gima
Gima DMS 300-BTT02 user manual

ORTHO NOV
ORTHO NOV Excell ICE ORT40PACK-P Notice Instructions