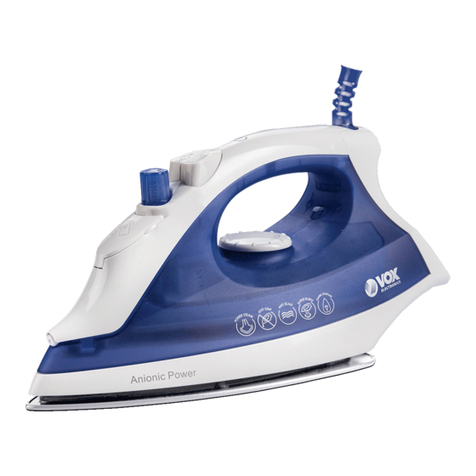
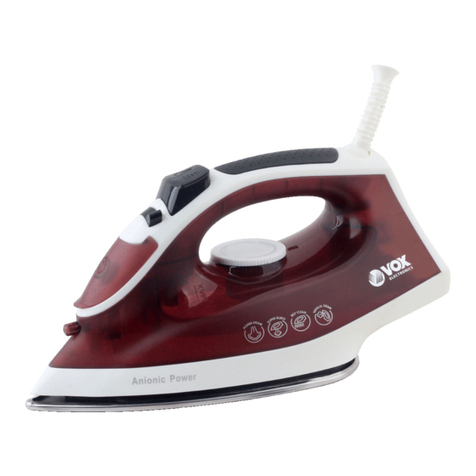
VOX electronics DBL-7003 User manual

OPERATING INSTRUCTIONS STEAM IRON DBL-7003
UPUTTO A UPOTRU PGLA NA PARU DBL-7003
MANUAL DE USUARIO PLANCHA A VAPOR DBL-7003
MANUAL DO USUÁRIO FERRO A VAPOR DBL-7003
ЕГХЕIРIΔI0 ХРНΣТН ΣΙΔΕΡΟ ΑΤΜΟΥ DBL-7003
NAVODILA ZA UPORABO PARNI LIKALNIK DBL-7003
UPUTE ZA UPORABU GLAČALO NA PARU DBL-7003
UPUTSTVO ZA UPOTREBU PEGLA NA PARU DBL-7003
УПАTСТВА ЗА РАКУВАЊЕ ПЕГЛА НА ПАРЕА DBL-7003
MANUALI I PERDORUESIT HEKURI ME AVULL DBL-7003
GBR
ESP
PRT
GRC
SVN
HRV
I
MNE
MKD
ALB

GBR
LET’S LIVE TOGETHER
INSTRUCTION MANUAL
Steam Iron
Model: DBL-7003
For household use only
Before operating this iron, please read this instruction manual carefully

Instruction Manual
Please read this instruction manual carefully and familianze yourself with your new
steam iron. Before using the first time please retain this manual for future reference.
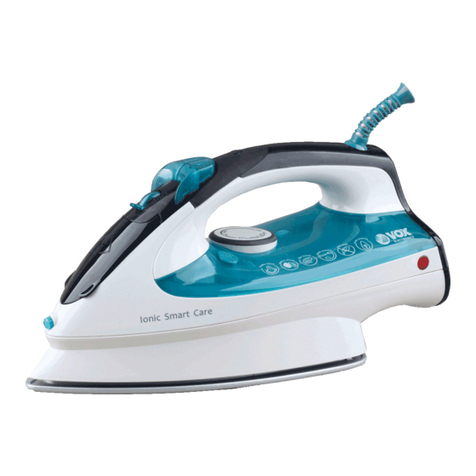
Know your Iron
A. Spray Nozzle
C.Steam control turning knob
E.Spray Button
G.Indicator light
I. Electronic temperature control
K. Soleplate
M. Measuring cup
B.Water filling inlet
D. Burst of steam button
F.Soft touch grip
H.Power cord protector
J.Water tank
L. Self-cleaning button
1

IMPORTANT SAFEGUARDS
When using your iron basic safety precautions should always be followed:
• Make sure the power used corresponds with the one indicated on the
rating label.
• Use this appliance only for its intended use as described in this manual.
• Close supervision is necessary when the appliance is used near children.
Do not leave the iron unattended while connected or on an ironing board.
Burns can occur from touching hot metal parts hot water or steam.
• Keep the iron out of reach of children.
• The iron should never be left unattended while it is connected to the
mains supply.
• The plug must be removed from the sock-outlet before the water
reservoir is filled with water.
• Unplug the iron from the mains electrical supply before:
1) Cleaning
2) Filling with water or emptying the water tank
3) Immediately after use
• Never operate the iron with a damaged power cord or plug or after it has
fallen or been damaged in any way. To avoid the risk of electric shock
do not disassemble the iron take it to a qualified service center for
examination and repair.
• Keep the cord away from heated surfaces.
• To protect against a risk of electric hazards do not place in or drop into
water or any other liquid.
• The iron must be used and rested on a stable surface.
• When placing the iron on its stand ensure that the surface on which the
stand is placed is stable.
• The iron is not to be used if it has been dropped if there are visible signs
of damage or if it is leaking.
BEFORE FIRST USE
• A small amount of smoke is normal to be produced when used the first
time this will quickly disappear.
• When using the steam function for the first time do not direct the steam
towards the laundry as there could be debris from the steam vents.
2
FILLING WITH WATER
• We recommend distilled water use.
• Make sure that both the Steam Control turning Knob and
Temperature Control Dial are in “OFF” position.
• Hold the iron upright so that the water-filling inlet is in a horizontal
position.
• Fill with water through Water Filling Inlet until the water reach the
“MAX” mark indicated on the side of the iron and never fill above
this mark.
SETTING TEMPERATURE
Follow the ironing instructions on the garment label. If there is no
instruction but you do know the kind of fabric please consult the
following table.
Note: If the fabric consists of various kinds of fabrics always select the
temperature required by the most delicate fabrics.
Fabric Temperature control Temperautre
requirement
Silk •Low temperature
Wool ·· Medium temperature
Cotton linen · · · MAX High temperature
3

STEAM IRONING
• Place the iron in a vertical position and set the temperature control
dial at the minimum/low heat setting.
• Insert the plug into the socket and then turn the temperature
control dial to the “high heat” marking. The pilot light will come on
indicating that the iron is heating up.
• When the pilot light turns off the set temperature has been
reached and the iron is ready to use.
• During ironing the pilot light on the iron automatically switches
on/off as the thermostat maintains the set temperature(you may
continue ironing during this process).
• Turn the steam control turning knob to the required position.
• Steam is produced as soon as the iron is held horizontally.
SPRAYING
• Press the spray button to spray water on clothes as often as
required.
Note: When using the water spray function ensure that there is
enough water in the water tank and you may have to pump the spray
button several times the first time you use the iron in order to start the
spraying function.
BURST OR VERTICAL STEAM IRONING
• Press the burst of Steam button to generate a powerful burst of
steam that can penetrate the fabrics and smooth the most difficult
and tough creases. Wait for a few seconds before pressing again.
• By pressing the Burst of Steam Button at intervals you can also
iron vertically (curtain hung garments etc.)
Note: The burst steam function can only be used at high temperature.
Stop the emission when the pilot light turns on and then start ironing
again only after the pilot light has turned off.
DRY IRONING
For ironing without steam follow the instruction in section “steam
ironing” however the steam control turning knob should remain in
position “O” (no steam).
4

ANTI-CALC SYSTEM
A special filter inside the water tank softens the water and prevents scale
build-up in the soleplate. The filter is permanent and does not need
replacing.
ANTI-DRIPPING SYSTEM
This iron is equipped with drip stop function: the iron automatically stops
steaming when the temperature is too low to prevent water from dripping
out of the soleplate.
With the anti-dripping system you can perfectly iron even the most
delicate fabrics.
SELF-CLEANING
The self-cleaning feature cleans inside the soleplate removing
impurities. We recommend using it every 10-15 days.
• Set the steam control turning knob to position O (no steam)
• Fill the water tank to the maximum level.
• Set the temperature control dial to MAX and wait for the pilot light to
turn off.
• Pull the plug out of the socket and press the self-cleaning button until
the boiling water steam impurities come out.
• When the soleplate has cooled down you can clean it with a damp
cloth.
HOW TO CLEAN AND STORE
• After using lift the iron with the filling hole downwards to empty the
remaining water from the Water tank.
• Insert the plug into the socket and set the Temperature Control Dial
to “MAX” for 1-2 minutes to evaporate the remaining water and then
unplug the iron and let it cool down before storing it.
5

ATTENTION:
When the plug connecting with the power socket the user is not
allowed to leave.
When the power cord is damaged contact your sellers or the
authorized service center for repair.
In case of any repairs replacement of the cord or plug or adjustment
please consult a qualified technician or take appliance to an
authorized service center.
1. This appliance is not intended for use by persons (including
children) with reduced physical sensory or mental capabilities or
lack of experience and knowledge unless they have been given
supervision or instruction concerning use of the appliance by a
person responsible for their safety.
2. Children should be supervised to ensure that they do not play with
the appliance.
3. The iron must not be left unattended while it is connected to the
supply mains;
4. The plug must be removed from the socket-outlet before the water
reservoir is filled with water (for steam irons and iron incorporating
means for spraying water);
5. The filling aperture must not be opened during use. Instructions for
the safe refilling of the water reservoir shall be given (for
pressurized steam irons);
6. The iron must only be used with the stand provided (for cordless
irons);
7. The iron is not intended for regular use (for travel iron);
8. The iron must be used and rested on a stable surface;
9. When placing the iron on its stand ensure that the stand is placed
on the stable surface;
10. The iron is not be used if it has been dropped if there are visible
signs of damage or if it is leaking.
NOTE:
6

SRB
UPUTSTVO ZA UPOTREBU
PEGLA NA PARU
Model: DBL-7003
Samo za kućnu upotrebu.
Pažljivo pročitajte ovo uputstvo pre korišćenja i sačuvajte ga za kasniju upotrebu

Uputstvo za upotrebu
Molimo vas da pažljivo pročitate ovo uputstvo i upoznate se sa Vašom novom peglom pre prve
upotrebe. Sačuvajte ovo uputstvo za kasniju upotrebu.
UPOZNAJTE VAŠU PEGLU
A. Prskalica
C. Regulator jačine pare
E. Dugme za prskanje
G. Kontrolna lampica
I. Regulator temperature
K. Grejna ploča
M. Merilica za sipanje vode
B. Otvor za sipanje vode
D. Dugme za izbacivanje parnog mlaza
F. Mekana ručka
H. Štitnik kabla za napajanje
J. Rezervoar za vodu
L. Dugme za samočišćenje
1

VAŽNA BEZBEDNOSNA UPUTSTVA
Prilikom korišćenja pegle važno je da se ispoštuju sledeća osnovna
bezbednosna pravila:
• Proverite da li napon u vašoj utičnici odgovara naponu uređaja koji je
naznačen na natpisnoj tablici na samom uređaju.
• Koristite peglu samo za predviđenu namenu koja je opisana u ovom
uputstvu za upotrebu.
• Neophodan je blizak nadzor kad se bilo koji uređaj koristi u blizini dece.
Ne ostavljajte peglu bez nadzora dok je priključena u struju ili odloženu
na dasci za peglanje. Može doći do opekotina izazvanih dodirivanjem
vrućih metalnih delova vruće vode ili pare.
• Držite peglu van domašaja dece.
• Peglu nikada ne treba ostavljati uključenu i bez nadzora.
Kabl za napajanje mora biti izvađen iz utičnice pre sipanja vode u
rezervoar.
• Isključite kabl za napajanje pegle pre:
■ Čišćenja
■ Dodavanja vode ili pražnjenja rezervoara od preostale vode
■ Odmah nakon upotrebe
• Nikad ne uključujte peglu s oštećenim kablom za napajanje nakon pada
ili bilo kakvog drugog oštećenja. Kako biste izbegli rizik od strujnog
udara ne pokušavajte sami da popravljate oštećenu peglu već je
odnesite ovlašćenom serviseru na pregled i popravku.
• Ne dozvolite da kabal za napajanje dotiče vruće površine.
• Ako želite da izbegnete rizik od električnog oštećenja uređaja ne
potapajte peglu u vodu niti bilo koju drugu tečnost.
• Pegla se mora koristiti i odlagati tokom rada isključivo na stabilnoj
površini.
• Kada postavljate peglu na dasku proverite da je površina na kojoj ste
postavili dasku stabilna.
• Peglu ne smete koristiti ako je došlo do pada i ako postoje vidljivi znaci
oštećenja ili ako iz nje curi tečnost.
• Uređaj mogu koristiti deca starija od 8 godina kao i osobe sa smanjenim
fizičkim senzornim i mentalnim sposobnostima ili osobe sa nedostatkom
iskustva i znanja ako su pod nazdorom ili im je objašnjeno od strane
odgovorne osobe kako uređaj treba bezbedno da funkcioniše i ako
razumeju koje su sve potencijalne opasnosti vezane za rukovanje ovim
uređajem. Deca se ne smeju igrati sa ovim uređajem. Deca ne smeju
čistiti niti održavati ovaj uređaj bez nadzora.
• Deca moraju biti pod nadzorom kako bi bili sigurni da se ne igraju sa
uređajem 92

• Držite peglu i njen kabal za napajanje van domašaja dece mlađe od 8
godina dok je u funkciji ili dok se hladi.
PRE PRVE UPOTREBE
• Prilikom prvog uključivanja pegle normalno je da se pojavi manja količina
dima koji će vrlo brzo nestati.
• Kad prvi put koristite funkciju peglanja sa parom ne usmeravajte paru
direktno ka vešu za peglanje jer se može desiti da pegla ispusti manju
količinu taloga koji se nakupio u kanalima za paru.
PUNJENJE VODOM
• Preporučujemo korišćenje destilovane vode.
• Proverite da li su regulator jačine pare i regulator temperature u OFF poziciji.
• Držite peglu na gore tako da otvor za sipanje vode bude u horizontalnom
položaju.
• Napunite rezervoar sa vodom kroz otvor za sipanje vode dok voda ne
dođe do indikatora za maksimalni nivo vode i nikad ne punite rezervoar
vodom preko ove granice.
PODEŠAVANJE TEMPERATURE
Pratite uputstva za peglanje koje se nalazi na deklaraciji vaše odeće.
Ukoliko deklaracija ne postoji a znate o kojoj vrsti tkanine je reč molimo
vas da konsultujete sledeću tabelu.
Napomena: ukoliko je određeni materijal mešovitog sirovinskog sastava
temperaturu peglanja uvek birajte prema najnežnijem materijalu.
Tkanina Kontrola temperature Neophodna temperatura
Sintetika •Niska temperature
Svila vuna • mSrednja temperature
Pamuk lan · · · MAX Visoka temperature
10 3

PEGLANJE PAROM
— Postavite peglu u vertikalan položaj a zatim podesite regulator temperature
na minimalnu vrednost/blago zagrevanje.
— Ubacite kabal za napajanje u utičnicu a zatim podesite regulator temperature na
najvišu temperaturu. Signalna lampica temperature će se upaliti kao znak da je
pegla počela da se greje.
— Kada se lampica temperature isključi to je znak da je pegla dostigla
zadatu temperaturu i daje spremna za korišćenje.
— Dok traje peglanje lampica - indikator temperature na pegli će nastaviti da se
sama uključuje i isključuje dok termostatski prekidač održava zadatu temperaturu
(dok ovaj proces traje možete neometano da nastavite sa peglanjem).
— Postavite regulator jačine pare u željeni položaj.
— Pegla će početi da ispušta paru čim se postavi u vodoravan položaj.
PRSKANJE (FAJTANJE)
— Pritisnite dugme koje aktivira ispuštanje mlaza sitnih kapljica vode.
Koristite ovaj mlaz za kvašenje odeće koja se pegla po potrebi.
Napomena: Kada se koristi funkcija prskanja vodom proverite da li u
rezervoaru ima dovoljno vode. Kod prvog korišćenja vodenog mlaza možda
ćete morati nekoliko puta uzastopno da pritisnete dugme za prskanje dok ne
pokrenete funkciju prskanja.
PEGLANJE PARNIM MLAZOM ILI
VERTIKALNO PEGLANJE PAROM
— Pritisnite dugme za izbacivanje parnog mlaza i pegla će izbaciti snažan
mlaz vodene pare koji prodire duboko u platno i pomaže da se ispeglaju
i najzahtevniji prevoji i izgužvani delovi na tkanini. Sačekajte nekoliko
sekundi pre nego što ponovo pritisnete dugme za parni mlaz.
— Povremenim pritiskom na dugme za parni mlaz možete takođe da peglate
držeći peglu u uspravnom položaju (zavese garderobu koju ste prethodno
okačili da visi itd).
Napomena: Funkcija parnog mlaza se isključivo može koristiti na visokoj
temperaturi. Kada se indikator temperature ugasi prekinite ispuštanje parnog
mlaza - nastavite sa pritiskanjem dugmeta i peglanjem kada se signalna
lampica ponovo upali.
PEGLANJE ’NA SUVO’
Za peglanje bez korišćenja vodene pare postupite prema uputstvima u
odjeljku PEGLANJE PAROM s tim izuzetkom što regulator jačine pare mora
da ostane u položaju OFF (koji označava da se para ne koristi).
4

SISTEM ZA SUZBIJANJE KAMENCA
Poseban filter unutar rezervoara omekšava vodu i sprečava gomilanje kamenca na
prohromskoj ploči za peglanje. Filter je permanentan I ne zahteva zamenu.
SISTEM ZA SUZBIJANJE KAPANJA
Ova pegla je opremljena posebnom funkcijom za suzbijanje kapanja: pegla
automatski prestaje da izbacuje paru kada temperatura postane preniska da spriječi
vodu da kaplje kroz rupice na prohromskoj ploči.
Sa ovim sistemom za suzbijanje kapanja možete savršeno opeglati i najosjetljivije
tkanine.
SAMOČIŠĆENJE
Samočlšćenje unutrašnjosti grejne ploče otklanja nečistoću. Preporučujemo da
koristite ovu opciju svakih 10-15 dana.
• Podesite kontrolor pare na poziciju 0 (bez pare)
• Napunite rezervoar za vodu do maksimalnog nivoa.
• Podesite regulator temperature na MAX i sačekajte da se ugasi kontrolna
lampica.
• Izvucite utikač iz utičnice zatim pritisnite dugme za samočlšćenje do ključale
vode držite pritisnuto dok para I nečistoća ne Izađu Iz uređaja.
• Kada se grejna ploča ohladi možete je očistiti vlažnom krpom.
ČIŠĆENJE I ODLAGANJE PEGLE
— Po završetku korlšćenja podignite peglu okrenuvšl otvor za punjenje
rezervoara sa vodom na dole kako bi Iz rezervoara Ispraznili preostalu vodu.
— Utaknlte kabl za napajanje u utičnicu a zatim postavite regulator temperature u
maksimalan položaj (“MAX") i ostavite ga uključenog 1-2 minuta kako bi isparila
sva zaostala voda. Nakon toga isključite peglu i izvucite kabl Iz utičnice I ostavite
peglu da se ohladi pre nego što je odložite na mesto predviđeno za njeno čuvanje.
12
5

PAŽNJA:
Kada je pegla povezana sa izvorom napajanja korisnik je ne sme ostaviti bez
nadzora.
Ukoliko je kabl za napajanje oštećen obratite se svom prodavcu ili
ovlašćenom servisu radi popravke. Za bilo kakve popravke zamene delova
uključujući i zamenu kabla za napajanje ili utikača kao i za bilo kakva
podešavanja obavezno se obratite ovlašćenom stručnom licu ili odnesite
uređaj u ovlašćeni servis.
NOTE:
1. Ovaj uređaj nije namenjen za upotrebu od strane osoba (uključujući
decu) sa smanjenim fizičkim senzornim ili metalnim sposobnostima
ili sa nedostatkom iskustva i znanja osim ukoliko nisu pod nadzorom
ili su dobili instrukcije za upotrebu uređaja od strane osoba
odgovornih za njihovu bezbednost.
2. Deca moraju biti pod nadzorom kako bi se osigurali da se ne igraju s
uređajem.
3. Pegla ne sme biti ostavljena bez nadzora ukoliko je preključena na
električnu mrežu.
4. Utikač mora biti isključen iz utičnice pre nego što se rezervoar napuni
s vodom (zbog pegle na paru i delova iz kojih izlazi voda).
5. Otvor za vodu ne sme biti otvoren tokom upotrebe. Uputstvo za
bezbednu dopunu rezervoara vodom mora biti dato (za pegle sa
parom na pritisak).
6. Pegla se mora koristiti samo sa isporučenim postoljem (kod modela
bežičnih pegla).
7. Pegla nije namenjena za regularnu upotrebu (kod pegla za
putovanja);
8. Pegla se mora koristiti i držati na ravnoj i stabilnoj površini.
9. Kada stavljate peglu na njeno postolje uverite se da je postolje
stavljeno na ravnu i stabilnu površinu.
10. Pegla se ne sme potrebljavati ukoliko je pala kada postoje vidljivi
znaci oštećenja ili ukoliko iz nje curi tečnost.
136

ESP
VIVIMOS JUNTOS
MANUAL DE INSTRUCCIONES
Plancha a vapor
Model: DBL-7003
Sόlo para uso doméstico
Antes de utilizar la plancha, lea detenidamente este manual de instrucciones

Manual de instrucciones
Por favor lea detenidamente este manual de instrucciones y familianzase con su
nueva plancha a vapor. Antes de usarla por primera vez por favor conserve este
manual para futuras referencias.
Conoce su plancha
A. Boquilla de pulverización
C. Dial de control de vapor
E. Botón pulverizador
G. Luz de control
I. Dial de control de temperatura
K. Placa de solera
M. Taza de medir
B. Entrada de llenado de agua
D. Botón de vapor
F. Suave manilla
H. Protector de cable de poder
J. Tanque de agua
L. Botón de autolimpieza
37
1

MEDIDAS DE SEGURIDAD
Cuando use esta plancha observe las siguientes medidas de seguridad:
• Asegúerese que la fuente de poder a usar corresponde al voltaje
indicado en la etiqueta de especificación de la plancha.
• Utilice esta plancha solamente cuando la necesite siguiendo las
instrucciones dadas en este manual.
• Ejerza una supervisión cuidadosa al usar esta plancha en presencia de
niños. No deje la plancha desatendida mientras se halle encendida o
sobre la mesa de planchar. Pueden occurir quemaduras si se tocan las
partes metálicas calientes o por contacto con el agua caliente o vapor
de agua.
• Mantenga esta plancha fuera del alcance de los niños.
• Nunca deje esta plancha desatendida mientras se halle conectada a
la fuente de poder.
• El enchufe debe ser retirado del calcetín de salida antes de que el
depósito de agua se llena de agua.
• Desconecte esta plancha de la fuente de poder antes de:
a. Limpiarla
b. De llenar o vaciar el tanque de agua
c. Inmediatamente después de usarla
• No utilizar el hierro con el cable de alimentación o el enchufe dañado
o después de que se ha caído o ha sido dañado de alguna manera.
Para evitar el riesgo de descarga eléctrica no desarme la plancha
llevarlo a un técnico cualificado para su revisión y reparación.
• No permitaque el cable toque superficies calientes.
• Para evitar el riesgo de peligros eléctricos no sumerja la plancha en
agua o cualquier otro líquido.
• La plancha debe ser utilizada y apoyada sobre una superficie estable.
• La plancha no debe ser utilizada si se ha caído si hay signos
visibles de daños o si tiene fugas.
• Este aparato puede ser utilizado por niños de 8 años o más y las
personas con capacidades físicas sensoriales o mentales reducidas o
falta de experiencia y conocimiento si se les ha dado la supervisión o
instrucciones relativas al uso del aparato de una manera segura y
entender los riesgos involucrados.
• Los niños no deben jugar con el aparato.
• Limpieza y mantenimiento del usuario no serán hechos por los niños
sin supervisión.
• Mantenga la plancha y el cable fuera del alcance de los niños
menores de 8 años de edad cuando está energizado o enfriamiento.
38
2

ANTES DE PRIMER USO
- Es normal que la pequeña cantidad de humo que se produce la primera
vez esto va a desaparecer rápidamente.
- Cuando se utiliza la función de vapor por primera vez no dirija el vapor
hacia la lavandería ya que puede haber residuos de los orificios de
vapor
RELLENO CON AGUA
- Se recomienda el uso de agua destilada.
- Asegúrese de que tanto el botón de control de vapor de giro y control de
temperatura están en posición "OFF".
- Mantenga la plancha en posición vertical de modo que la entrada de
llenado de agua se encuentra en una posición horizontal.
- Rellenar con agua a través de la entrada de agua de llenado hasta que el
agua alcance el nivel "MAX" indicado en el lado de la plancha y nunca
llene más allá de esta marca.
AJUSTAR LA TEMPERATURA
Siga las instrucciones de planchado en la etiqueta de la ropa. Si no hay
instrucciones pero conoce el tipo de tela por favor consulte la siguiente
table.
Nota: Si la tela se compone de diversos tipos de tejidos seleccione
siempre la temperatura requerida para los tejidos más delicados.
Tipo de tela Control de Temperatura Temperatura requerida
Sintético •Temperatura baja
Seda lana • · Temperatura media
Algodón lino ··· MAX Temperatura alta
39 3

PLANCHADO CON VAPOR
- Coloque la plancha en posición vertical y ajuste la perilla de control de
temperatura en el ajuste mínimo/temperatura baja.
- Conecte el cable de energía y luego gire la perilla de control de
temperatura a la posición " temperatura alta". El indicador luminoso se
encenderá para indicar que la plancha se está calentando.
- Cuando el indicador luminoso se apaga esto indica que se ha alcanzado la
temperatura adecuada y la plancha está lista para usar.
- Durante el planchado el indicador luminoso de la plancha cambia
automáticamente de encendido / apagado ya que el termostato mantiene la
temperatura establecida (usted puede continuar planchando cuando esto
suceda).
- Encienda el control del vapor girando la perilla hasta la posición deseada.
- El vapor se produce tan pronto como la plancha este en posición horizontal.
PULVERIZACIÓN
- Pulse la tecla de pulverización para pulverizar agua sobre la ropa tan a
menudo como sea necesario.
Nota: Cuando se utiliza la función de pulverización de agua asegúrese de
que haya suficiente agua en el depósito de agua y puede que tenga que
bombear el botón pulverizador varias veces a primera vez que utilice la
plancha con el fin de iniciar la función de pulverización.
USO DE RÁFAGA DE VAPOR O PLANCHADO VERTICAL
- Pulse el botón activador de ráfaga de vapor para generar un potente golpe
de vapor que puede penetrar en los tejidos y suavizar las arrugas más
difíciles y duras. Espere unos segundos antes de pulsar de nuevo.
- Al pulsar el botón de vapor explosión de intervalos también se puede
planchar verticalmente (cortinas prendas colgadas etc.)
Nota: La función de ráfaga de vapor sólo se puede usar a alta temperatura.
Detener la emisión cuando la luz piloto se enciende a continuación
empezar a planchar de nuevo sólo después de que el piloto se ha
apagado.
PLANCHADO AL SECO
Para el planchado al seco sig alas instrucciones dadas en la sección de
planchado al vapo. De cualquier modo la manilla giratoria de control de
vapor deberá estar en posición “O” (no vapor).
40 4
This manual suits for next models
1
Table of contents
Languages:
Other VOX electronics Iron manuals

VOX electronics
VOX electronics DBL-5026 User manual

VOX electronics
VOX electronics DPS-6220 User manual

VOX electronics
VOX electronics DBL-5077 User manual

VOX electronics
VOX electronics DPS-7220 User manual

VOX electronics
VOX electronics DBL-5030 User manual

VOX electronics
VOX electronics DBL-5003 User manual

VOX electronics
VOX electronics DBL-5071 User manual

VOX electronics
VOX electronics DBL-5077 User manual

VOX electronics
VOX electronics DBL-5069 User manual

VOX electronics
VOX electronics DBL-5025 User manual