manuals.online logo
Brands
  1. Home
  2. •
  3. Brands
  4. •
  5. WAC Lighting
  6. •
  7. Outdoor Light
  8. •
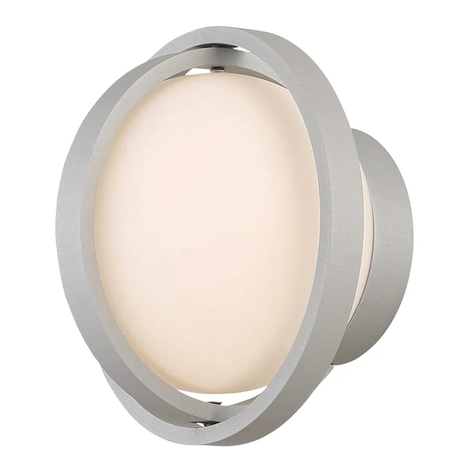
  9. WAC Lighting dweLED 578 Series User manual

WAC Lighting dweLED 578 Series User manual


EXF-&%.com
Phone (800) 526.2588
Fax (800) 526.2585
Headquarters/Eastern Distribution Center
44 Harbor Park Drive
Port Washington, NY 11050
Central Distribution Center
1600 Distribution Ct
Lithia Springs, GA 30122
Western Distribution Center
1750 Archibald Avenue
Ontario, CA 91760
WAC Lighting retains the right to modify the design of our products at any time as part of the company's continuous improvement program.
INSTALLATION INSTRUCTION
758 – LED Wall Sconce
WS-75818
HARDWARE
A B C D E
Wire Connector
Qty: 3pcs+1 Extra
7EAC112201
Junction Box Screw
Qty: 2pcs+1 Extra
7MPF0820C1
#8-32x13/16
Nickel Plating
Wood Screw
Qty: 2pcs+1 Extra
7MPF2204J2
Ф4X22
Plastic Anchor
Qty: 2pcs+1 Extra
7TDD082401
Mounting Screw
Qty: 1 Extra
7MPF0412S1(AL)
5/32-32x1/2
Nickel Plating
PD-87741
877-LED Pendant
WAC Lighting retains the right to modify the design of our products at any time as part of the company's continuous improvement program. 'FC
G0
Screw
Qty:1 Extra
1/8"-40×1/2
Chrome Plating
Optional Metal Cap
Qty:1 Extra
Chrome Plating
Wire Connector
Qty: 3pcs+1 Extra
P3
Junction Box Screw
Qty: 2pcs+1 Extra
8#-32×13/16
Nickel Plating
Mounting Screw
Qty:1 Extra
5/32"-32×1/2
Chrome Plating
ADE
BC
PD-27802
278-LED Pendant
Wire Connector
Qty: 3pcs+1 Extra
P3
Junction Box Screw
Qty: 2pcs+1 Extra
8#-32×13/16
Nickel Plating
Mounting Screw
Qty:1 Extra
5/32"-32×1/2
Chrome
Plating
ABC
FM-W57806(F)/ FM-W57809(F)/ FM-W57812(F)
578 – LED Outdoor
$OOHQ6FUHZ
4W\([WUD
03)1,
;
ABC D
$OOHQ:UHQFK
4W\SF
03(
FM-W57806/ FM-W57809/ FM-W57812/FM-W57806F/
FM-W57809F/ FM-W57812F
578 – LED Outdoor
INSTALLATION INSTRUCTION4
$"65*0/5013&7&/5&-&$53*$"-4)0$,&/463&&-&$53*$*5:)"4#&&/563/&%0''"55)&$*3$6*5#3&",&3#&'03&#&(*//*/(
 3FBEBMMJOTUSVDUJPOTCFGPSFJOTUBMMJOH
 4ZTUFNJTJOUFOEFEGPSJOTUBMMBUJPOCZBMJDFOTFEFMFDUSJDJBOJOBDDPSEBODFXJUIUIF/BUJPOBM&MFDUSJDBM$PEF/&$BOEMPDBMSFHVMBUJPOT
 8IFOIBOEMJOHUIFGJYUVSFEPOPUBQQMZQSFTTVSFUPUIF-&%T)PMEUIFGJYUVSFCZUIFCBTFPOMZ
 3FUBJOJOTUBMMBUJPOJOTUSVDUJPOTGPSGVUVSFNBJOUFOBODFSFGFSFODF
8"3/*/("MMQBSUTNVTUCFVTFEBTJOEJDBUFEJOUIFTFJOTUSVDUJPOT5IJTQSPEVDUJTEFTJHOFEGPSVTFPOMZXJUIUIFTVQQMJFEQBSUTBOEPSBDDFTTPSJFT
EFTJHOBUFEGPSVTFCZEXF-&%4VCTUJUVUJPOPGQBSUTPSBDDFTTPSJFTOPUEFTJHOBUFEGPSVTFXJUIUIJTQSPEVDUCZEXF-&%DPVMESFTVMUJOQFSTPOBMJOKVSZPS
QSPQFSUZEBNBHFBOEXJMMWPJEUIFXBSSBOUZ$POUBDUBOBVUIPSJ[FEEFBMFSPSUIFNBOVGBDUVSFSJGBOZQBSUTBSFEBNBHFEPSNJTTJOH
."*/5&/"/$&/05&$PBTUBMDPOEJUJPOTNBZDBVTFNJOFSBMBOESFTJEVFCVJMEVQPOUIFGJYUVSF8FSFDPNNFOEUIBUDVTUPNFSTJODPBTUBMBSFBTDMFBO
BMMFYUFSOBMTVSGBDFTPGUIFGJYUVSFPODFFWFSZUXPXFFLTXJUIBXFUDMPUI
.*4&&/("3%&1PVSÏWJUFSUPVUDIPDÏMFDUSJRVFBTTVSF[WPVTRVFMFEJTKPODUFVSTPJUNJTIPSTUFOTJPOBWBOUEFDPNNFODFS
 -JTF[UPVUFTMFTJOTUSVDUJPOTBWBOUMJOTUBMMBUJPO
 -FTZTUÒNFEPJUÐUSFJOTUBMMÏQBSVOÏMFDUSJDJFOMJDFOTJÏDPOGPSNÏNFOUBVDPEFOBUJPOBMEFMÏMFDUSJDJUÏ/&$FUÏHBMFNFOUBVYSÒHMFNFOUT
MPDBVY
 -PSTEFMBNBOJQVMBUJPOEVMVNJOBJSFOBQQVZF[QBTTVSMFT-&%5FOF[MFVOJRVFNFOUQBSMBCBTF
"55&/5*0/5PVUFTMFTQJÒDFTEPJWFOUÐUSFVUJMJTÏFTDPNNFJOEJRVÏEBOTDFTJOTUSVDUJPOT$FQSPEVJUFTUDPOÎVQPVSÐUSFVUJMJTÏTFVMFNFOUBWFDMFT
QJÒDFTFUPVBDDFTTPJSFTGPVSOJTQPVSÐUSFVUJMJTÏTBWFDMFTQSPEVJUTEXF-&%3FNQMBDFSEFTQJÒDFTPVBDDFTTPJSFTOPODPOÎVTQPVSDFQSPEVJUEXF-&%
QPVSSBJUDBVTFSEFTEPNNBHFTDPSQPSFMTPVNBUÏSJFMTFUQPVSSBJUÏHBMFNFOUDBVTFSMBOOVMBUJPOEFMBHBSBOUJF7FVJMMF[DPOUBDUFSVOSFWFOEFVSBVUPSJTÏ
PVMFGBCSJDBOUTJEFTQJÒDFTNBORVFOUPVTPOUFOEPNNBHÏFT
/05&%&/53&5*&/-FTDPOEJUJPOTDÙUJÒSFTQFVUDBVTFSVOFBDDVNVMBUJPOEFNJOÏSBVYFUEFSÏTJEVFTVSMFMVNJOBJSF/PVTSFDPNNFOEPOTBVYDMJFOUT
RVJSFTJEFOUEBOTMFT[POFTDÙUJÒSFTEFOFUUPZFSUPVUFTMFTTVSGBDFTFYUFSOFTEVMVNJOBJSFVOFGPJTUPVUFTMFTEFVYTFNBJOFTBWFDVODIJGGPOIVNJEF

waclighting.com
Phone (800) 526.2588
Fax (800) 526.2585
Headquarters/Eastern Distribution Center
44 Harbor Park Drive
Port Washington, NY 11050
Central Distribution Center
1600 Distribution Ct
Lithia Springs, GA 30122
Western Distribution Center
1750 Archibald Avenue
Ontario, CA 91760
WAC Lighting retains the right to modify the design of our products at any time as part of the company's continuous improvement program.
PREPARATION
1. Shut o the power at the circuit breaker and remove existing xture, including the crossbar.
2. Carefully unpack your new xture and lay out all the parts on a clear area. Be careful not to lose any sm
all parts necessary for
installation.
MOUNTING THE FIXTURE (Fig. 1)
3. Remove the mounting screw (E) from the mounting back plate.
4. Drill holes in the wall aligned with the key holes located in the mounting back plate, insert the plastic anchors (D).
5. Secure the mounting plate to the junction box using junction box screws (B), fasten it to the wall using wood screws (C). The side of
the mounting back plate marked“GND”must face out.
CONNECTING THE WIRES (Fig. 2)
6. Connect the driver input/output wires to junction box wires as shown in
Fig. 2, making sure that all wire connectors (A) are secured. If your outlet
box has a green or bare copper ground wire, connect the xture’s ground
wire to it. Otherwise, connect the xture’s ground wire directly to the
back plate using the green screw provided. After wires are connected,
tuck them carefully inside the junction box.
* Requires Driver to be recessed within the junction box.
COMPLETING THE INSTALLATION (Fig. 1)
7. Secure the xture to the mounting back plate using the mounting screw (E).
4 1/8”
1 3/4”
Fixture Wires
Black or
Smooth
Fixture Wires
White or
Ribbed
Fixture Wires
Bare wire
(Ground)
House Wires
Black
(Hot)
House Wires
White
(Neutral)
House Wires
Green or Bare Copper
(Ground)
Fig.2 Wiring
Junction Box
Wire Connector
Driverw-Yw8Yw)
Plastic Anchor
Mounting #BDLPlate
Wood Screw
Mounting Screw
'JYUVSF
A
D
C
E
WAC Lighting retains the right to modify the design of our products at any time as part of the company's continuous improvement program.
G0
Ground Wire Screw
/;:;+'ULYHU
3. Remove the mounting screw (C) from the fixture.
5.Secure the mounting back plate to the junction box using junction box
screws (B).The side of the mounting back plate marked “GND”must face out.
6.Secure the canopy to the mounting plate using the mounting screw (C).
4.Connect the Driver’s input wires to junction box wires as shown in Fig. 2,making sure that all wire connectors (A) are secured.
If your outlet box has agreen or bare copper ground wire, connect the fixture’s ground wire to it. Otherwise, connect the fixture’s
ground wire directlyto the back plate using the green screw provided. After wires are connected, tuck them carefullyinside the junction box.
CONNECTING THE WIRES (Fig. 2)
1.
Shut o
ff the power at the circuit breaker and rem
ove existing fixture, including the crossbar.
2. Carefullyunpack your new fixture and lay out all the parts on aclear area. Be careful not lose any small parts necessary for installation.
PREPARATION
MOUNTING THE FIXTURE(Fig.1)
7.There is optional metal clip in hardware bag, remove the screw (D) to
replace the plastic clip, secure the metal clip with screw (D).
Fixture Wires
Black or
Smooth
Fixture Wires
White or
Ribbed
Fixture Wires
Bare wire
(Ground)
House Wires
Black
(Hot)
House Wires
White
(Neutral)
House Wires
Green or Bare Copper
(Ground)
Fig.2 Wiring
10 5/16"
3. Remove the mounting screw (C) from the canopy.
6.Secure the mounting back plate to the junction box using junction box
screws (B).The side of the mounting back plate marked “GND”must face out.
4.Adjust the fixture wire length by pushing the cablegripper on the canopy and pulling the wire as desired. Make sure the wires are the
same length.
5.Connect the Driver’s input wires to junction box wires as shown in Fig. 2,making sure that all wire connectors (A) are secured. If your
outlet box has agreen or bare copper ground wire, connect the fixture’s
ground wire to it. Otherwise, connect the fixture’s ground wire directlyto
the back plate using the green screw provided. After wires are connected,
tuck them carefullyinside the junction box.
CONNECTING THE WIRES (Fig. 2)
1.
Shut o
ff the power at the circuit breaker and rem
ove existing fixture, including the crossbar.
2. Carefullyunpack your new fixture and lay out all the parts on aclear area. Be careful not lose any small parts necessary for installation.
PREPARATION
MOUNTING THE FIXTURE(Fig.1)
Fixture Wires
Black or
Smooth
Fixture Wires
White or
Ribbed
Fixture Wires
Bare wire
(Ground)
House Wires
Black
(Hot)
House Wires
White
(Neutral)
House Wires
Green or Bare Copper
(Ground)
Fig.2 Wiring
Ground Wire Screw
Plate
7.Hook the safety cord to the mounting plate.
8.Secure the canopy to the mounting plate using the mounting screw (C).
Junction Box
Wire Connector
$
0RXQWLQJ3ODWH
&
$OOHQ6FUHZ
Canopy
Junction Box Screw
Mounting Screw
Input Wires
%
'
$OOHQ :UHQFK
4.Secure mounting plate to the junction box using junction box screws (B).The side of the mounting plate marked “GND”must face out.
5.Place the canopy over the mounting plate and secure with mounting screws.
3. Connect the fixture wires with supplywires as shown in Fig. 2,making sure all wire connector(A) are secured. If your outlet box has a
green or bare copper ground wire, connect the fixture’s ground wire to it. Otherwise, connect the fixture’s ground wire directlyto the
mounting plate using the green screw provided. After all wires are connected, tuck them carefullyinside the junction box.
CONNECTING THE WIRES (Fig. 2)
1. Shut off the power at the circuit breaker and remove existing fixture, including the crossbar.
2. Carefullyunpack your new fixture and lay out all the parts on aclear area. Be careful not lose any small parts necessary for installation.
PREPARATION
MOUNTING THE FIXTURE (Fig. 1)
6.Twist lock the acrylic shade into the canopy, then lock it with allen screw (C) using allen wench (D).
Fixture Wires
Black or
Smooth
Fixture Wires
White or
Ribbed
Fixture Wires
Bare wire
(Ground)
House Wires
Black
(Hot)
House Wires
White
(Neutral)
House Wires
Green or Bare Copper
(Ground)
Fig.2 Wiring
Ø4"
Mounting Plate Dimensions
7MBC101501
1 3/4”
1 3/8”
FIG.1
INSTALLATION INSTRUCTIONS
578 - LED Outdoor
FM-W57806/FM-W57809/FM-57812/FM-W57906F
/FM-W57809F/FM-57812F
1
EXF-&%.com
Phone (800) 526.2588
Fax (800) 526.2585
Headquarters/Eastern Distribution Center
44 Harbor Park Drive
Port Washington, NY 11050
Central Distribution Center
1600 Distribution Ct
Lithia Springs, GA 30122
Western Distribution Center
1750 Archibald Avenue
Ontario, CA 91760
HARDWARE
INSTALLATION INSTRUCTION4
578 - LED Outdoor
FM-W57815'.8'
Wire Connector
Qty: 3 pcs +1 Extra
7EAC112201
P3
A
Junction Box Screw
Qty: 2 pcs + 1 Extra
7MPF0$
#8-32×
/JDLFM1MBUJOH
B
Allen Screw
Qty: 1pc &xtra
.1'/*44
.1'#,#,
5/32”-32 x
Nickel Plating
C
Allen Wrench
Qty: 1 pc
7MPE205001
D
G0
$"65*0/5013&7&/5&-&$53*$"-4)0$,&/463&&-&$53*$*5:)"4#&&/563/&%0''"55)&$*3$6*5#3&",&3#&'03&
#&(*//*/(
 3FBEBMMJOTUSVDUJPOTCFGPSFJOTUBMMJOH
 4ZTUFNJTJOUFOEFEGPSJOTUBMMBUJPOCZBMJDFOTFEFMFDUSJDJBOJOBDDPSEBODFXJUIUIF/BUJPOBM&MFDUSJDBM$PEF/&$BOEMPDBMSFHVMBUJPOT
 8IFOIBOEMJOHUIFGJYUVSFEPOPUBQQMZQSFTTVSFUPUIF-&%T)PMEUIFGJYUVSFCZUIFCBTFPOMZ
 3FUBJOJOTUBMMBUJPOJOTUSVDUJPOTGPSGVUVSFNBJOUFOBODFSFGFSFODF
8"3/*/("MMQBSUTNVTUCFVTFEBTJOEJDBUFEJOUIFTFJOTUSVDUJPOT5IJTQSPEVDUJTEFTJHOFEGPSVTFPOMZXJUIUIFTVQQMJFEQBSUTBOEPS
BDDFTTPSJFTEFTJHOBUFEGPSVTFCZEXF-&%4VCTUJUVUJPOPGQBSUTPSBDDFTTPSJFTOPUEFTJHOBUFEGPSVTFXJUIUIJTQSPEVDUCZEXF-&%DPVMESFTVMU
JOQFSTPOBMJOKVSZPSQSPQFSUZEBNBHFBOEXJMMWPJEUIFXBSSBOUZ$POUBDUBOBVUIPSJ[FEEFBMFSPSUIFNBOVGBDUVSFSJGBOZQBSUTBSFEBNBHFEPS
NJTTJOH
."*/5&/"/$&/05&$PBTUBMDPOEJUJPOTNBZDBVTFNJOFSBMBOESFTJEVFCVJMEVQPOUIFGJYUVSF8FSFDPNNFOEUIBUDVTUPNFSTJODPBTUBM
BSFBTDMFBOBMMFYUFSOBMTVSGBDFTPGUIFGJYUVSFPODFFWFSZUXPXFFLTXJUIBXFUDMPUI
.*4&&/("3%&1PVSÏWJUFSUPVUDIPDÏMFDUSJRVFBTTVSF[WPVTRVFMFEJTKPODUFVSTPJUNJTIPSTUFOTJPOBWBOUEFDPNNFODFS
 -JTF[UPVUFTMFTJOTUSVDUJPOTBWBOUMJOTUBMMBUJPO
 -FTZTUÒNFEPJUÐUSFJOTUBMMÏQBSVOÏMFDUSJDJFOMJDFOTJÏDPOGPSNÏNFOUBVDPEFOBUJPOBMEFMÏMFDUSJDJUÏ/&$FUÏHBMFNFOUBVY
SÒHMFNFOUTMPDBVY
 -PSTEFMBNBOJQVMBUJPOEVMVNJOBJSFOBQQVZF[QBTTVSMFT-&%5FOF[MFVOJRVFNFOUQBSMBCBTF
"55&/5*0/5PVUFTMFTQJÒDFTEPJWFOUÐUSFVUJMJTÏFTDPNNFJOEJRVÏEBOTDFTJOTUSVDUJPOT$FQSPEVJUFTUDPOÎVQPVSÐUSFVUJMJTÏTFVMFNFOU
BWFDMFTQJÒDFTFUPVBDDFTTPJSFTGPVSOJTQPVSÐUSFVUJMJTÏTBWFDMFTQSPEVJUTEXF-&%3FNQMBDFSEFTQJÒDFTPVBDDFTTPJSFTOPODPOÎVTQPVSDF
QSPEVJUEXF-&%QPVSSBJUDBVTFSEFTEPNNBHFTDPSQPSFMTPVNBUÏSJFMTFUQPVSSBJUÏHBMFNFOUDBVTFSMBOOVMBUJPOEFMBHBSBOUJF7FVJMMF[
DPOUBDUFSVOSFWFOEFVSBVUPSJTÏPVMFGBCSJDBOUTJEFTQJÒDFTNBORVFOUPVTPOUFOEPNNBHÏFT
/05&%&/53&5*&/-FTDPOEJUJPOTDÙUJÒSFTQFVUDBVTFSVOFBDDVNVMBUJPOEFNJOÏSBVYFUEFSÏTJEVFTVSMFMVNJOBJSF/PVTSFDPNNFOEPOT
BVYDMJFOUTRVJSFTJEFOUEBOTMFT[POFTDÙUJÒSFTEFOFUUPZFSUPVUFTMFTTVSGBDFTFYUFSOFTEVMVNJOBJSFVOFGPJTUPVUFTMFTEFVYTFNBJOFTBWFDVO
DIJGGPOIVNJEF
EXF-&%
2
EXF-&%.com
Phone (800) 526.2588
Fax (800) 526.2585
Headquarters/Eastern Distribution Center
44 Harbor Park Drive
Port Washington, NY 11050
Central Distribution Center
1600 Distribution Ct
Lithia Springs, GA 30122
Western Distribution Center
1750 Archibald Avenue
Ontario, CA 91760
INSTALLATION INSTRUCTION4
578 - LED Outdoor
FM-W57815
FIG. 1
Ø
4"
13/8"
13/4"
Wire Connector
Allen Wrench
Allen Screw
Junction Box Screw
Canopy
Mounting Screw
Acrylic Lampshade
(Included inside Lampshade)
Mounting Plate
Input Wires
Junction Box
A
D
C
B
Fixture Wires
Black or
Smooth
Fixture Wires
White or
Ribbed
Fixture Wires
Bare wire
(Ground)
House Wires
Black
(Hot)
House Wires
White
(Neutral)
House Wires
Green or Bare Copper
(Ground)
Fig. 2 Wiring
PREPARATION
1. Shut o the power at the circuit breaker and remove existing xture, including the crossbar.
2. Carefully unpack your new xture and lay out all the parts on a clear area. Be careful not to lose any small parts necessary for installation.
CONNECTING THE WIRES (Fig. 2)
3. Connect the fixture wires with supply wires as shownFig. 2.BLF sure all wire connectorT(A) are secure. If your outlet box has a green
or bare copper ground wire, connect the xture’s ground wire to it. Otherwise, connect the xture’s ground wire directly to the mounting
plate using the green screw provided. After all wires are connected, tuck them carefully inside the junction box.
MOUNTING THE FIXTURE (Fig. 1)
 Secure mounting plate to the junction box using junction box screws (B).
/05&The side of the mounting plate marked“GND” must face out.
 Place the canopy over the mounting plate and secure with mounting screws.
 Twist lock the glass into the canopy, then lock it with "llen screw (C) using "llen wench (D).
G0
Mounting Plate Dimensions
7MBC101501

This manual suits for next models

6

Other WAC Lighting Outdoor Light manuals

WAC Lighting MODERN FORMS 716 Series User manual

WAC Lighting

WAC Lighting MODERN FORMS 716 Series User manual

WAC Lighting 4011 User manual

WAC Lighting

WAC Lighting 4011 User manual

WAC Lighting InvisiLED Classic Outdoor 24V User manual

WAC Lighting

WAC Lighting InvisiLED Classic Outdoor 24V User manual

WAC Lighting Grand Accent 5212 User manual

WAC Lighting

WAC Lighting Grand Accent 5212 User manual

WAC Lighting dweled 486 Series User manual

WAC Lighting

WAC Lighting dweled 486 Series User manual

WAC Lighting dweLED 689 Series User manual

WAC Lighting

WAC Lighting dweLED 689 Series User manual

WAC Lighting WS-W20506 User manual

WAC Lighting

WAC Lighting WS-W20506 User manual

WAC Lighting DS-WS05 User manual

WAC Lighting

WAC Lighting DS-WS05 User manual

WAC Lighting 5222 User manual

WAC Lighting

WAC Lighting 5222 User manual

WAC Lighting Endurance WP-LED415 User manual

WAC Lighting

WAC Lighting Endurance WP-LED415 User manual

WAC Lighting dweLED WS-W37612 User manual

WAC Lighting

WAC Lighting dweLED WS-W37612 User manual

WAC Lighting dweLED 911 Series User manual

WAC Lighting

WAC Lighting dweLED 911 Series User manual

WAC Lighting Responsible Lighting Axis User manual

WAC Lighting

WAC Lighting Responsible Lighting Axis User manual

WAC Lighting Accent Color Changing User manual

WAC Lighting

WAC Lighting Accent Color Changing User manual

WAC Lighting InvisiLED PRO Outdoor 24V User manual

WAC Lighting

WAC Lighting InvisiLED PRO Outdoor 24V User manual

WAC Lighting SCOOP series User manual

WAC Lighting

WAC Lighting SCOOP series User manual

WAC Lighting Modern Forms FL-1850 User manual

WAC Lighting

WAC Lighting Modern Forms FL-1850 User manual

WAC Lighting WS-W2505 User manual

WAC Lighting

WAC Lighting WS-W2505 User manual

WAC Lighting dweLED 139 Series User manual

WAC Lighting

WAC Lighting dweLED 139 Series User manual

WAC Lighting 5031-CCBBR User manual

WAC Lighting

WAC Lighting 5031-CCBBR User manual

WAC Lighting dweLED 649 Series User manual

WAC Lighting

WAC Lighting dweLED 649 Series User manual

WAC Lighting Modern Forms 488 Series User manual

WAC Lighting

WAC Lighting Modern Forms 488 Series User manual

WAC Lighting MODERN FORMS TL-1810 User manual

WAC Lighting

WAC Lighting MODERN FORMS TL-1810 User manual

Popular Outdoor Light manuals by other brands

Vaxcel T0698 Assembly and installation instructions

Vaxcel

Vaxcel T0698 Assembly and installation instructions

SIGNIFY RoadFocus PLUS Security installation instructions

SIGNIFY

SIGNIFY RoadFocus PLUS Security installation instructions

Intermatic CS110TA instructions

Intermatic

Intermatic CS110TA instructions

EuroLite MIK UV user manual

EuroLite

EuroLite MIK UV user manual

Renkforce Elda GU10 operating instructions

Renkforce

Renkforce Elda GU10 operating instructions

Gama Sonic GS-97-SP instruction manual

Gama Sonic

Gama Sonic GS-97-SP instruction manual

Urban Electric ADGER’S WHARF Assembly and mounting instructions

Urban Electric

Urban Electric ADGER’S WHARF Assembly and mounting instructions

Daintree GE current Evolve ERHM Series installation guide

Daintree

Daintree GE current Evolve ERHM Series installation guide

DELTA DORE TYXIA 4600 Connection and Adjustments

DELTA DORE

DELTA DORE TYXIA 4600 Connection and Adjustments

Gainsborough K546 Assembly instructions

Gainsborough

Gainsborough K546 Assembly instructions

Vista 1447 installation instructions

Vista

Vista 1447 installation instructions

John Lewis HARMONY user guide

John Lewis

John Lewis HARMONY user guide

AmazonBasics FG-03568 quick start guide

AmazonBasics

AmazonBasics FG-03568 quick start guide

XanLite PR2T2800D user manual

XanLite

XanLite PR2T2800D user manual

Safavieh TBL4138A quick start guide

Safavieh

Safavieh TBL4138A quick start guide

New Works Ware ASSEMBLY  & CARE GUIDE

New Works

New Works Ware ASSEMBLY & CARE GUIDE

Endon YG-3004 instruction manual

Endon

Endon YG-3004 instruction manual

Gardco PureForm P26 Quick Strat Guide

Gardco

Gardco PureForm P26 Quick Strat Guide

manuals.online logo
manuals.online logoBrands
  • About & Mission
  • Contact us
  • Privacy Policy
  • Terms and Conditions

Copyright 2025 Manuals.Online. All Rights Reserved.