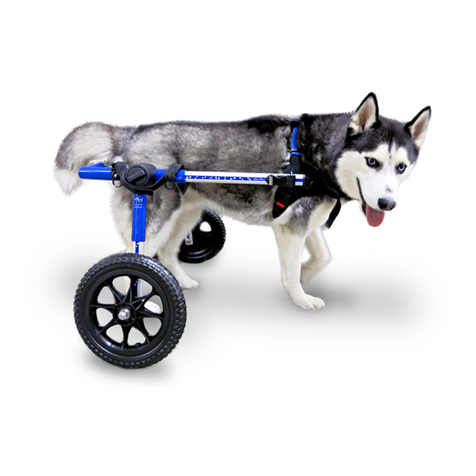
Walkin’ Pets Walkin' Wheels MINI User manual

Luna
THE PROVEN LEADER IN PET MOBILITY
Owner's Manual
MINI FRAME

2www.WalkinPets.com
Thank you for purchasing Walkin’ Wheels®MINI wheelchair.
Questions or comments?
Call us at: (603) 577-8854 or Email us at: HelpMe@WalkinPets.com
Contents
The Walkin' Wheels MINI: 3 Sizes ..........................................................3
Parts of the Walkin’ Wheels® MINI.........................................................3
Teach Your Pet to Use the Walkin’ Wheels® ............................................4
Quick Start Guide ................................................................................5
Attaching the Leg Rings and Clamps.......................................................7
Stirrups...............................................................................................8
Wheel Sizes ........................................................................................8
Ready to Start Rolling?..........................................................................8
Walkin’ Wheels Mini Front Wheel Attachment .........................................9
Set-up for Rear Mini Walkin' Wheels ..................................................... 10
Installing the Front Wheels to the Frame................................................ 10
Is the Wheelcahir Adjusted Properly? ................................................... 12
What's in the BF1 Package? ................................................................. 13
Questions or Fitting Evaluation?........................................................... 13
Maintenance, Liability, and Guarantee .................................................. 13
Return/Exchange Policy...................................................................... 14
Optional Items and Accessories ........................................................... 14

Attached
3
(888) 253-0777
The Walkin’ Wheels®MINI: 3 Sizes
Depending on your pet's measurements you were sent one of
the following wheelchairs.
MINI B1: MINI B2
or
MINI B3:
2" wheel
4" wheel
Front harness Front
harness
Side
extender
Side
extender
Leg strut Leg strut
Back connector
Knuckle
Knuckle
Angle piece
Back connector
Adjustment
knobs
Adjustment
knobs
Parts of the Walkin’ Wheels®MINI
Extra Fastener Set Leg Ring Clamps
MINI B1
Wheelchair frame with
Width Connector,
Extenders, Struts,
and 2" Wheels installed
MINI B2
Wheelchair frame with
Width Connector,
Extenders, Struts, and
4" Wheels installed
MINI B3
Wheelchair frame with
Width Connector,
Extenders, Struts, and
4" Wheels installed
Leg Rings for
(seat) support.
Front Harness with comfort
sleeves (attached to frame.)
Stirrups to keep paws from
dragging; use if needed.
Attached

4www.WalkinPets.com
Teach Your Pet to Use the Walkin’ Wheels®
We created the Walkin’ Wheels®with the intention that you will adjust the
wheelchair, put your pet in it, and in a few moments watch him/her run-
ning and playing again. It can happen that way, but it doesn’t always.
A wheelchair can be an adjustment for an animal. To some, there is a
strange device following him/her around making odd noises and
getting caught on furniture and doorways. They will adapt to these chang-
es, but need a little time.
We recommend you be calm, quiet, and slow when putting on the wheel-
chair for the first time. Give your pet lots of stroking and
reassurance. Treats help, too!
1. When starting this process we suggest that you use really good
treats to reward your pet for positive reinforcement/behavior.
Dog biscuits are usually not good enough for him/her to get
excited about. You won't need to keep using extra special treats
every day, just in the beginning of the training process.
A hungry pet is a motivated pet! Work with your pet before you
have fed him/her a meal. She/he will be more eager to pay atten-
tion and earn the food reward if he is hungry.
2. Do not immediately put your pet in the wheelchair. Assemble
the wheelchair and leave it in an area where your pet can see it,
smell it, and touch it.
3. Use Quick Start Guide on next page.
4. Aer your pet is in the wheelchair hold the food reward right at his/
her nose level, and feed several pieces. Then you can move one
foot backwards, again holding the food reward in front of you.
She/he should then walk toward you to get the treat. Before you
know it, she/he is walking in the Walkin' Wheels! Again, give him/
her a treat and positive praise, along with when you see him/her
pee or poo outside in wheelchair.
5. Work in very short (5-10) minute sessions, several times a day to
start off. Give your pet rest periods between each session.
Note: Please do not leave your pet unattended in the wheelchair. Do not
leave your pet in it all day. One hour is recommended.
5
(888) 253-0777
Length
Height
Width
Quick Start Guide
Your Walkin’ Wheels MINI box contains everything you need to get your pet
rolling.
1. Take wheelchair out of box. Front harness red strap will be on the bottom
and blue strap on the top. Release the two clips on the blue and black
strap so they hang down, keeping it attached to the wheelchair.
2. Releasing the wheels on knuckle. Turn the knob on the knuckle counter
clockwise 2 turns to loosen it up. Move the strut perpendicular to the
wheelchair frame with the red harness strap on bottom. Adjust the
height according to your fold of flank measurement (see p.6).
3. Length: While the knob is still loose, adjust the length to your dog's armpit
to rump measurement (see p.6).
4. Knuckle Adjustment: Tighten the round black knuckle so the teeth are
engaged tightly.
5. Leg Rings: Attach all four wires around the frame to form a seat. The wires
should be wrapped on each side of knuckle tightly. If you push the piece
in the middle, it should hang down 1-2" to form a cradle (see p.7).
6. Width: Unscrew the knobs in back and adjust to your dog's widest area,
which is usually the chest width (see p.7).
7. Stirrups: Attach stirrups around the two black knobs in the rear. Secure the
top part around the knobs, and adjust the length of
the stirrups (see p.8).
8. Install clamps on each side of the knuckle and then leg ring seat pg. 8
9. Ready to start rolling: See p.8 to get your pet in the wheelchair.
Watch this:
www.WalkinPets.com/mini-dog-wheelchair-instructional-videos

6www.WalkinPets.com
Note: The knuckle should be at the center of your pet's hip. The front of the
extender should be at shoulder blade. You should have a few inches in back
of the rump for elimination (pee and poop).
Adjust to your pet's
measurement
Measure your pet from
armpit to rump
Width
To set the width of the wheelchair frame to the correct size, measure your pet’s
chest, and then add 1/2 inch to this measurement; the width of the wheelchair
frame should be set to this size.
If the width needs to be adjusted, unscrew the rear knobs counterclockwise
until the back connector comes off, being careful not to lose the small washers
that are inside the knobs.
Line up the back connector with whichever holes will give
you the width measurement you need. Make sure the back
connector is installed on the outside (behind) the wheel-
chair frame.
Screw the knobs onto the outside of the back connector,
making sure to put each washer in between the knob and
the back connector. Tighten the knobs.
Height
Take your pet’s leg measurement (rear leg height); this should match the
measurement from 2 inches below the frame to the ground. Adjust your
strut to match your pet's measurement.
You can make this adjustment by unscrewing the knob on each knuckle a
few turns, and then sliding the blue strut up to reduce the height, or down to
increase the height. Then tighten each knob.
Note: Put your palm on the inside, over the knuckle, for easy movement of struts.
Length
The knobs that are located on the
knuckle hold the struts and side
extenders in place. Measure your
pet from armpit to rump. Make that
measurement match the measure-
ment from an inch behind knuckle
to the front end of each side
extender, as shown below.
Adjust to
your pet's
measurement.
Take your
pet's rear leg
measurement
L
L
Rear Leg
Height
W

7
(888) 253-0777
Attaching the Leg Rings and Clamps
Aer you have the wheelchair adjusted for your pet, you can now install the
Leg Ring Clamps. These will prevent the leg rings from sliding forward. You
will attach 4 Leg Ring Clamps to the frame, 2 on each side of the knuckle.
1. Determine if you need the double wide or the single clamp. One bar
requires single, two requires the double. (See photos below.)
2. Place clamp over frame with hole on outside of frame.
3. Rock the clip back and forth with a downward motion. Make sure the
lip on the outside of the clip is under the frame.
4. Slide le or right to lock into place. The (4) clamps should be close to
the knuckle.
5. Feed the wire of the leg rings through the top of the hole then wrap
the wire securely around the frame. The leg rings are the rear support
system for your pet. The coated wires need to be positioned on either
side of each knuckle, making sure the foam leg rings look like two
back-to-back letter Cs.
Note: The Leg Rings should hang 2-3” below the wheelchair frame,
making sure the piece in the middle is connected to the foam tubes.
DoubleSingle
Leg placed inside each ring

8www.WalkinPets.com
Stirrups
If your pet's legs are paralyzed, use the stirrups to hold his/her legs off the
ground. The top end of each stirrup is secured around each back knob. The top
ball lock is used to hold each stirrup in place, and the bottom lock ball is secured
above the hock.
Ready to Start Rolling?
1. Leg Rings: Pick up your pet and set him/her into the Leg Rings. Each leg
goes inside the ring. The abdomen will rest on the middle Velcro piece
holding the rings together. The rear toe pads should touch the ground.
Use stirrups if pet's legs are paralyzed.
2. Front Harness: Unclick the blue and black strap,
and leave the harness attached to the front knobs.
Set pet’s front legs in front of the red strap on the front
harness. Take the blue strap over the back and clip in
place. Put the black strap in front of the chest and clip in
place. Adjust all three straps so they are snug. Tuck the
excess strapping into the black comfort sleeves.
3. For intact male dogs, we want the center connector to
be just in front of the testicles and behind the penis. This will give him full
support while keeping him comfortable and allowing him to go to
the bathroom.
Watch video starting at 6:20 minutes/seconds for putting your pet into wheel-
chair: https://youtu.be/6bppcizle3s
Note: If you need to wash the harness at some point, you can remove it by un-
screwing the knobs on each side, and then removing the screws and washers.
Wheel Sizes
Your wheelchair will come with either 2” or 4” wheels attached to the struts.
The wheels are all-terrain and will not puncture. If they eventually wear out,
you can buy replacements: www.WalkinPets.com/spare-parts
Blue top
red bottom
black
front

9
(888) 253-0777
black
front
Walkin’ Wheels Mini Front Wheel Attachment
Purchased Separately
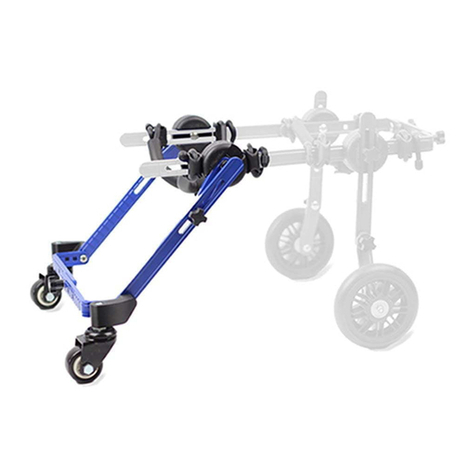
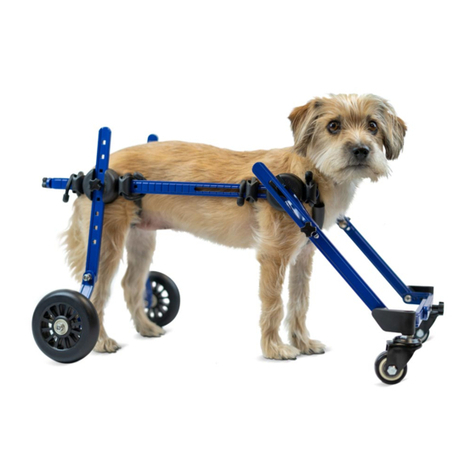
The Walkin’ Wheels Front Wheel Attachment gives mobility to dogs with front
leg weakness or weakness in all four legs. It is ideal for helping disabled pets
get exercise and for rehabilitation while they are healing. Like the rest of the
Walkin’ Wheels products, the Front Wheel Attachment is adjustable, so it will
fit the Walkin’ Wheels wheelchair for any size dog from 2 to 10 pounds and
can easily be removed at any time.
Note: Your dog’s rear leg height measurement determined the Front
Wheel Attachment size you received.
What's in the B2 or B3 Front Attachment Box:
Front
leg rings
Extra set
of side
extenders
(B2 only)
Knuckle
Adjustment knob
Adjustment knob
Strut
Stabilization bar:
for B2/B3 only
Clamps for
leg rings
Caster wheels
Caster mount

10 www.WalkinPets.com
Before
Line
Indicators
Aer
Insert bolt
thru square hole
F
l
i
p
s
i
d
e
e
x
t
e
n
d
e
r
6. Insert the bolt through the middle square hole on the frame and through the
side extender square hole.
7. Reinstall the knuckle by placing half of it over the bolt. Make sure the arrow
is pointing to front of the wheelchair, teeth on the outside.
8. Attach outside half of knuckle making sure the arrow is pointing upsards,
teeth on inside.
9. Insert strut in knuckle at correct height for your dog.
10. Replace washer and adjustment now and tighten
Installing the Front Wheels on to the Frame
Note: You won't be using the front harness that came with the rear wheelchair.
On top of the caster wheels you will see the letter "R" or "L", the "R" is for the
dog's right leg, and the "L" is for the dog's le leg.
Knuckle tips:
Inside arrow points forward. Outside arrow points upward at an angel
1. Remove the rear clamps, leg rings, and front harness.
2. Remove adjustment knob and small washer from the knuckle.
3. Pull out the strut/wheel assembly.
4. Remove both sides of the black round knuckle.
5. Remove the two side extenders and B2 Only - replace with extra set in
front wheel kit. Rotate them so that the square hole is now attached to
the rear knuckle on each side. (Make sure the line indicators on the side
extenders still face outward on each side.) (See illustration below) Please
watch instructional video here: www.handicappedpets.com/instruc-
tional-videos-mini-dog-wheelchair-front-attachment/
Set-up for Rear Mini Walkin' Wheels (This must be done first):

11
(888) 253-0777
The knuckles come bonded together
for proper angle setting
Flat washer
Lock washer
Loosen to adjust
height on both sides
(Do not remove knob
completely)
Right hand
strut assembly
Le hand
strut assembly
Adjustment
knob
Adjustment knob
Flat
washer
Knuckle Knuckle
Carriage
bolts
Side Extender
Carriage bolt
1. Remove the adjustment knob on the knuckle, holding the bonded knuckle to-
gether in one piece, remove bolt and washer. Keeping the knuckle together
in one piece, should insure the correct angle for caster mount and wheel.
(caster mount should always be parallel to ground).
2. Insert bolt going through the middle slot of the side extender, then insert
through bonded knuckle, angle piece hole, washer, adjustment knob tightened
up securely.
3. Do the same for the other front
wheel. If you have the B1,
continue to step 5.
4. Connect both the right and le
sides of the front stabilization bar.
Make sure that both sides are
aligned, insert bolt through
square hole (bolt should sit flush
against bar), put on flat washer
then lock washer, attach adjust-
ment knob and screw on tightly
(the center of the stabilization bar
should not move). Some move-
ment of the stabilization bar at
the caster mount screws is normal.
5. Attach the single clamps on each side of the knuckle (like the rear) (from the
knuckle to the end on side bar, there should be 2")
6. Attach the front and rear leg rings by threading the leg ring wire down through
each of the leg ring clamp channels, and then wrapping the wire up and around
the frame. Front leg rings should hang slightly lower than rear leg rings to accom-
modate the chest. (See image on page 12)
Steps to Install the Front Wheels to the Frame

12 www.WalkinPets.com
WIDTH: Adjust the width in the back from your pet’s widest body part(usually
the chest). There are several square holes to select from.• Make sure the knobs
are tightened and secure.
HEIGHT: Adjust the height so that the side extender frame is positioned in the
middle of your pet’s body.
• The paws should be touching the ground
• Knobs should be tightened to secure the strut to the frame.
• The leg rings should hang down about 3” below the blue frame like a seat,
with the connector piece holding the two so tubes together. Front leg ring will
be slightly lower than the rear one.
LENGTH: Adjust the length by loosening the knob on the front knuckle and
sliding the knuckle to the correct position. Each leg ring wire will be close to the
black knuckle on each side.
• Your pet’s front legs will be lined up with the black knuckles in the front and
rear.
STIRRUPS: If your dog’s rear legs are paralyzed, you will need to use the stirrups
to hold the feet up so they don’t drag on the ground.
• Secure the end with the knot over the adjustable knob and tighten with the
push button to hold it tightly. (see diagram above)
If you are still unsure about the fit, please email rear and side view photographs
of your pet in the wheelchair to: helpme@WalkinPets.com. Remember to put
your order number in the subject line!
Rear knuckle
should be at
pets’ hip
Width is set
to pet’s widest
part of body
Place each
leg in
leg ring
Front knuckle should be
at pets’ shoulder blade
Rear toe pads are
touching the ground and
then attach stirrups if needed
Front struts are angled
so the wheels are in front
of pets’ legs
Caster mount
should be
parallel
to ground
Knot
Stirrups
Push
ball
Is the Wheelcahir Adjusted Properly?

Maintenance, Liability, and Guarantee
Maintenance:
With proper use and maintenance, the wheelchair is designed to last a
lifetime. When you need replacement parts for the wheels, harnesses, and
other wear-and-tear items, they may be purchased at www.WalkinPets.
com/spare-parts. The wheelchair frame will not rust. All components can
be removed and cleaned. Oiling is not necessary.
Limited Liability:
Walkin’ Wheels®is provided as a walking aid for animals that are under the
care of a veterinarian and for which a wheelchair has been recommended.
Wheels for Pets, LLC, and its affiliates, agents, and distributors make no rep-
resentation to the effectiveness or appropriateness of this product.
Guarantee:
The Walkin’ Wheels®wheelchair frame is guaranteed by the manufacturer,
Wheels for Pets, LLC, for five years from the date of purchase against defects
in material or workmanship. If the frame breaks under normal usage, please
let us know and we will repair or replace the wheelchair at our option. You
are responsible for all shipping charges. Warranty is non-transferable.
Questions or Fitting Evaluation?
Call: (888) 253-0777 Or email: [email protected]
If you need a fitting evaluation, we are here to assist you. Email us side and
rear view photos of your pet in the wheelchair. Make sure that you put your
sales receipt number on the subject line, so we can identify who sent it. Or
you may call us during business hours.
13
(888) 253-0777
Front
leg rings
Clamps for
leg rings (4)
Caster
wheels
Adjustment
knobs
Knuckle Knuckle Side extender
Knuckle
Adjustable
knob
Flat
washer
The knuckles come
bonded together
for proper angle setting
Strut
wheel
assembly
Bolts
What's in the BF1 Package
(Follow the same instructions for assembling the BF2)
The BF1 package
contains:
Installing the BF1 Front Wheels
on to the Frame:

Optional Items and Accessories
Wheelchair Accessories
Walkin’®Mini Wheelchair Vest
www.WalkinPets.com/mini-wheelchair-vest
This vest is a comfy harness perfect for Miniature Dachs-
hunds and toy dogs with a broad chest. This wheelchair
compatible vest is made of a durable neoprene mate-
rial and may improve fit of a pet’s Walkin’ Wheels Mini
Wheelchair.
Amputee Cover
www.WalkinPets.com/amputee-leg-ring-cover
The amputee cover is for pets with a smooth amputation
and designed to slip over the leg rings to close off one
side for your pet’s comfort.
Walkin’®Belly Support
www.WalkinPets.com/walkin-belly-support
The Walkin’ Belly Support helps provide additional sup-
port for your pet’s back while using the Walkin’ Wheels
wheelchair. Made of lightweight but strong neoprene
fabric, the Belly Support helps raise the center of the pet
pet’s body to relieve stress on the spine.
Return/Exchange Policy
We accept returns and exchanges for all of our products as long as they are
returned within 30 days of receiving them in like new condition with all parts
and pieces included. What does "like new" mean? It means that you return the
product exactly as you received it. Use a lint roller and remove the hair before
shipping it back to us. Try the product on indoors to avoid dirt. Package the
product with care. Protect all parts from rubbing against each other or from
potential shipping damage.
What happens if the product is returned dirty, missing parts or damaged? Our
returns department will need to clean/buff/fix/replace if necessary. That re-
quires resources, so you may be charged a restocking fee. If the return is refused
due to its condition, we will contact you to discuss and provide photos. If you're
not sure about how to use, re-package or how the policy applies to the product,
please reach out to us and we can help!
www.WalkinPets.com/returns
For spare wheelchair parts go to: www.WalkinPets.com/spareparts
14 www.WalkinPets.com

Walkin’
®
Ski Attachment
www.WalkinPets.com/walkin-ski-attachment
The Walkin’ Ski Attachment glides through snow and
keeps your pet active all winter long. Easily interchange
your dog’s standard wheels/struts for skis to help your
dog have fun playing or trekking through the snow.
Indoor Mobility Solutions
Paw Protection
Walkin’®Scooter
www.WalkinPets.com/walkin-scooter
The Walkin’ Scooter for pets is designed to keep your
pet comfortable and active all day long! The scooter
allows pets to easily move around the house and
glides easily across hardwood, tile, linoleum, and
carpet flooring.
Walkin’®Drag Bag
www.WalkinPets.com/walkin-drag-bag
The Walkin’ Drag Bag is designed for pets to use in
the home when they are not in their chair. Great for
protecting the chest and limbs to prevent abrasions
caused by dragging across rough surfaces.
Walkin’® Pet Boots
www.WalkinPets.com/walkin-pet-boots-for-dogs-and-
cats
High quality, stay-on boots keep dogs from tracking
dirt, mud, or snow into the house. Helps pets that
drag their paws and provides confidence on slippery
surfaces like hardwood floors.
Ideal for pets with cuts, bruises, or sensitive paws.
Front and Rear No-Knuckling Training Socks
www.WalkinPets.com/no-knuckling-training-sock
A temporary training tool to
help correct paw placement. It’s
intended for short-term, multiple
use to help correct gait and train
pets to pick up their paw while
walking.
15
(888) 253-0777

Peg
Tinker
Piper
Ritchie
105 Rt 101A, Suite 18 • Amherst, NH 03031 • (888) 253-0777
www.WalkinPets.com
Patents: US 7549398 • Japan 5385584 • Canada 2641092 • EPO 2 050 418
Trademarks: Walkin’ Wheels®4,765,026 • 4,882,354 • 3,725,405 • 4,765,026
Other patents pending and trademarks pending.
Walkin’ Wheels® is a registered trademark of Wheels for Pets, LLC
BE MOVING BE HAPPY
BE AMAZED BE TOGETHER
MIRACLES IN MOTION
06/20
Table of contents
Other Walkin’ Pets Pet Care Product manuals

Walkin’ Pets
Walkin’ Pets Large User manual

Walkin’ Pets
Walkin’ Pets Front Wheel Attachment User manual

Walkin’ Pets
Walkin’ Pets Dont Let the Dogs Out User manual

Walkin’ Pets
Walkin’ Pets Walkin' Wheels Rear User manual

Walkin’ Pets
Walkin’ Pets B1 User manual

Walkin’ Pets
Walkin’ Pets Mini Front Wheel Attachment B2 User manual

Walkin’ Pets
Walkin’ Pets Walkin' Wheels Rear Medium Wheelchair User manual

Walkin’ Pets
Walkin’ Pets Walkin' Wheels Rear User manual

Walkin’ Pets
Walkin’ Pets Wheels Medium User manual