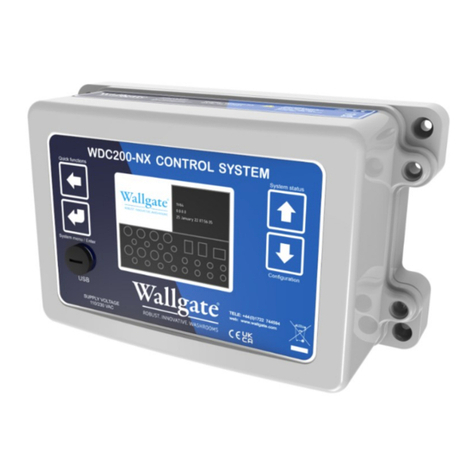
Wallgate WDC200 User manual

Product Manual
WDC200 Electronic Control
For Basins/Baths, Showers and WCs

2
Product Manual WDC200 Electronic Control
Revision 18
AS 1172
Certificate No
23167
RCM Mark
Australia

3
Product Manual WDC200 Electronic Control
Revision 18
Table of Contents
1. Disclaimer & Copyright Notice...............................................................................................4
2. Conventions ...........................................................................................................................5
2.1. Warning...............................................................................................................................5
2.2. Note ....................................................................................................................................5
2.3. Numbered procedures .......................................................................................................5
2.4. Bullet lists............................................................................................................................5
2.5. Tick Bullet lists ....................................................................................................................5
2.6. Menu items.........................................................................................................................5
3. Glossary..................................................................................................................................6
4. Product summary...................................................................................................................8
5. Installation and Commissioning.............................................................................................9
5.1. Package Contents ...............................................................................................................9
5.2. Site Preparation..................................................................................................................9
5.2.1. Advice on attaching the unit............................................................................................9
5.2.2. Electrical connections ......................................................................................................9
5.3 Attach the Controller Unit................................................................................................10
5.4. Connect the Input and Output Cables..............................................................................11
5.5. Connect the 3-pin output connector................................................................................13
5.6. Connect the 3.5mm input connector ...............................................................................13
5.7. Connect the Electrical Supply...........................................................................................13
5.8. Commission the Unit ........................................................................................................14
5.9. Purge Cycle function.........................................................................................................14
5.10. Lockout function .............................................................................................................15
5.11. Piezo touch button and infrared sensor controls...........................................................16
5.12. System Test function.......................................................................................................17
5.13. Product Time Slots ..........................................................................................................18
5.14. Hygiene Purge.................................................................................................................18
5.15. Data Logging....................................................................................................................18
5.16. Auto-Run .........................................................................................................................19
5.17. Technical Specifications..................................................................................................19
6. User and Maintenance Instructions.....................................................................................20
6.1. Operation..........................................................................................................................20
6.2. Maintenance.....................................................................................................................22
7. WDC200 Menu Settings.......................................................................................................22
8. Related Documentation.......................................................................................................30
9. Model Variations..................................................................................................................31

4
Product Manual WDC200 Electronic Control
Revision 18
9.1. WDC200-1.........................................................................................................................31
9.2. WDC200-2.........................................................................................................................31
9.3. WDC200-3.........................................................................................................................32
1. Disclaimer & Copyright Notice
Every effort has been made to supply information within this manual which is correct.
Wallgate Limited will not be liable for any damage or loss that arises if the person
installing, operating or maintaining the unit has not read or not complied with the
manual
In any event, and without prejudice to any warranties in Wallgate Limited’s terms and
conditions of sale, Wallgate Limited’s liability for all damages and losses (including
negligence) shall not in any circumstances exceed the amount paid by the customer
for the unit.
Wallgate reserves the right to alter, update or improve its product specification at any
time without prior notice. This manual is specific to the product that it has been
supplied with at the date of supply.
Without prejudice to any warranties in Wallgate Limited’s terms and conditions of
sale, any warranty will be invalidated if the equipment is installed or serviced by
unqualified personnel.
No part of this publication and the information contained may be reproduced,
transmitted, stored in a retrieval system, used or disclosed wholly or partly without
prior written permission from Wallgate Limited.
For full warranty details please see Wallgate Limited Terms and Conditions.
Please ensure this manual is passed to the end user. The manual forms an integral
part of the product and should be kept for its working life. Additional copies of this
and other supporting documents are available by contacting Wallgate Limited or by
visiting www.wallgate.com

5
Product Manual WDC200 Electronic Control
Revision 18
2. Conventions
Certain conventions are used in this manual to make it easier to read and
understand. They are given in the sections below.
2.1. Warning
A warning with red text on a white background is used to give information about
hazards that can cause injury or death. Read and understand the warnings before
you install and commission the WDC200. Failure to heed these warnings can have
serious consequences.
WARNING! This is a warning!
2.2. Note
A note with amber text on a white background is used to draw your attention to
important and useful information.
NOTE: This is a note.
2.3. Numbered procedures
Steps in procedures are numbered, starting from 1.
1. This is step 1.
2. This is step 2 etc.
2.4 Bullet lists
2.4. Bullet lists
•A bullet list is used to give information that is not sequential.
2.5. Tick Bullet lists
✓A tick bullet list is used to imply a checklist of components or actions (not
sequential).
2.6. Menu items
Menu items, submenu items and settings, where available, are given in bold.

6
Product Manual WDC200 Electronic Control
Revision 18
3. Glossary
The glossary lists all words, abbreviations and technical terminology used in this
manual, along with a short description of these terms.
Table 1. Glossary
Term
Description
Auto-run
The outputs to the water valves for basin, shower and
WC can be set to automatically operate at a set time
every day. The water valve will operate for the cycle set
run time as per a user activation. The Auto-run feature
can be used for maintaining hygiene standards similar to
the Hygiene Purge function detailed below, note that
only the Auto-run or Hygiene Purge would be utilized
and not both together.
Building Management
System
BMS
A Building Management System is a computer-based
control system installed in buildings that controls and
monitors the building’s mechanical and electrical
equipment such as ventilation, lighting, power systems,
fire systems, and security systems.
WDCMS
The WDCMS Wallgate system is use for standalone
networking of the WDC control units to a dedicated PC
or laptop computer. You can manage the WDC units
through the network. You can also adjust time cycle
settings, lockout settings, remote water isolation on
individual units or groups, RTC settings, etc. You can
also view the unit status in real time and log data.
Data Logging
Activations of the Hygiene Purge function detailed below
are logged in memory and then using additional software
the logs can be downloaded from the WDC200 and
imported into a spreadsheet report.
Dual Flush
This option is used when both full and half flush options
must be provided, using either one or two inputs.
Exclusivity
This feature prevents more than one water outlet from
being operated at a time.
Full Flush
This feature uses a 6 litre or 4.5 litre flush.
Reduced & Half Flush
The reduced flush is ⅔ of a full flush and the half flush ½
of a full flush.
Hygiene Purge
This feature operates services unused for a specified
number of days. This avoids water stagnation when the
services are unused for longer periods.
Latching
A latching switch is a switch that maintains its state after
being activated.

7
Product Manual WDC200 Electronic Control
Revision 18
Term
Description
Lockout
The term Lockout refers to regulating services by
restricting the number of usage cycles.
Momentary
A momentary switch returns to its normal OFF position
when released.
Piezo touch button
A piezoelectric touch button converts the force applied to
the face of the touch button into an electrical signal.
Power Rating
The power rating of a device is a guideline set by the
manufacturer as a maximum power to be used with that
device.
Purge Cycle
This feature is used to assist in removing air trapped in
the plumbing system.
Remote Lockouts
The term Remote Lockout refers to isolating water
services from a remote location.
RJ45 connection
The RJ-45 connectors are used to connect the WDC unit
to a PC or laptop.
RTC
Real Time Clock. This is a 24 hour 7 day clock used by
the WDC200 for program features such as Time Slots
and Hygiene Purge.
System Test
The System Test is a feature that allows you to operate
switches and touch buttons and make sure that these
operate the necessary outputs such as lights or valve
solenoids.
Time Slots
Usage of services such as basins, showers and WC
pans can be controlled using preset time slots. For
example, this feature can be used to prevent all the
showers in a facility being operated simultaneously
during peak periods, straining the capacity of the water
supply. The day is divided into 4 time slots, normally set
at 00:00 to 06:00, 06:00 to 12:00, 12:00 to 18:00 and
18:00 to 00.00.
Toggle type switch
A toggle switch is a class of electrical switches that are
actuated by a mechanical lever, handle, or rocking
mechanism.
Water Lockouts
Water Lockout means regulating water services by
restricting the number of usage cycles.

8
Product Manual WDC200 Electronic Control
Revision 18
4. Product summary
The WDC200 electronic control units are designed to operate the water outlets to a
wash basin* (x2) (Hot & Cold), a shower (x2) (premixed warm water) and the flush
for toilet water closet pan (x2) (WC). The WDC200 therefore has the capacity to
control two suites of products and can be located between two rooms.
*The WDC200 can be set to operate with a bath instead of a basin if required. This
would entail the installer or client adjusting water run times to 180 seconds for hot
and cold, or as preferred.
The WDCA200 model based upon the WDC200 is for 120v 60Hz electrical supply
operation using an external power adapter (UL/CSA approved) to connect to the
12VDC input socket on the WDCA200 control unit.
The control unit comprises of a microprocessor that is programmed with a software
program that has the following operational features:
•User friendly Software menu system with security controlled access.
•Independent control of multiple outlets.
•Fully programmable precise time control of water valve operation that is fully
adjustable in situ by the installer / customer.
•“LOCKOUT” function to prevent product misuse that is fully adjustable for the
number of user operations, operations period, lockout period, and the
“LOCKOUT” function can be ENABLED or DISABLED to suit the individual
requirements.
•Single or dual flush for WC control.
•Piezo touch button or infrared sensor capable inputs.
•Auxiliary inputs for remote operation of:
•Remote lockouts (Room 1 / Room 2).
•WC remote flush.
•WC reduced flush using a second touch button.
•Clear lockouts.
•Purge function.
•Not used
•Flow sensor for hygiene purge data logging.
•Multiple outlet control feature (COMMUNAL mode setting), so that one unit can
be used to operate up to eight water valves instead of default pre-sets for basins
and WC pans.
•Diagnostic test routine to assist with fault finding.
•Networking units to remotely control from a central PC desk position(s).
•Data logging of hygiene purges.

9
Product Manual WDC200 Electronic Control
Revision 18
5. Installation and Commissioning
5.1. Package Contents
Before you begin the installation, make sure that you have the following items:
✓1 WDC200 Electronic control unit
✓1 Product manual.
5.2. Site Preparation
5.2.1. Advice on attaching the unit
•Attached the unit to a vertical surface that is able to support the weight of the unit.
•Attach the unit in dry surroundings above pipes carrying water, away from any
possible plumbing leaks.
•Attach the electronic control unit where there is easy access. Attach the unit so
that the keypad and display on the unit are readily visible and accessible.
WARNING! Do not mount the unit upside down
The control box has four feet with holes for attaching the unit to the wall using four
round head screws, No 8 x 30mm (1.25 inch). For the location of the mounting feet,
refer to Figure 1 on page 10.
5.2.2. Electrical connections
•All cables must be connected to the unit using the sockets at the bottom of the
unit enclosure.
•The power cable must be connected to the unit through the cable gland.
•The control unit requires an electrical supply of 115-230V AC (Fuse 2 Amp) 50Hz
60 Watts.
•The mains supply cable from the unit must be terminated into a double pole fused
spur connection unit with a contact separation of at least 3mm. Use a 2 Amp fuse
in the connection unit.
•Place the connection unit near the controller unit.
•Position all electrical fittings such that water cannot drip on the electrical fittings if
a leak occurs, or a pipe bursts.
WARNING! The controller unit must be earthed using the earth lead in the
power cable.

10
Product Manual WDC200 Electronic Control
Revision 18
5.3 Attach the Controller Unit
To attach the control unit to the wall, do the following:
Mark the attachment points for the control unit on the wall. Make sure the cables
from the solenoid valves and Piezo touch buttons are of sufficient length to reach
the control unit. Refer to figure 1 for the location of the mounting feet.
Drill four mounting holes using a suitable drill bit.
Use suitable wall plugs if necessary.
Attach the unit to the wall using four round head screws.
NOTE: When mounting the unit, make sure the cable sockets at the bottom of
the unit point downwards.
Figure 1.WDC200 Lower Panel
Table 2. Legend for Figure 1
Item number
Description
Function
1
Water Valve Cable
Sockets Room 1
Output to washbasin, WC and shower
valves in Room 1
2
Water Valve Cable
Sockets Room 2
Output to washbasin, WC and shower
valves in Room 2
3
Input Device Sockets
Room 1
Input from Piezo touch button or
infrared sensors Room 1
4
Input Device sockets
Room 2
Input from Piezo touch button or
infrared sensors Room 2
5
Auxiliary Inputs
Inputs for optional remote controls
6
Network Link Sockets
Input and output sockets for Ethernet
connection
7
Mounting feet
Use the feet to mount the control unit
to the wall
8
Power cable
Electrical power supply cable 1 metre
in length

11
Product Manual WDC200 Electronic Control
Revision 18
5.4. Connect the Input and Output Cables
The control unit has input and output sockets in the lower panel of the unit. Refer to
Figure 2 for the illustration of the lower panel.
Figure 2. Connectors in the WDC200 control unit
Table 3. Legend for Figure 2
Item number
Description
Function
1
Output to WC Flush
Valve
Opens WC Flush Valve in Room 1
2
Output to Shower Valve
Opens Shower Valve in Cell 1
3
Output to Basin Valve
Cold
Opens Basin Valve Cold in Room 1
4
Output to Basin Valve Hot
Opens Basin Valve Hot in Room 1
5
Output to WC Flush
Valve
Opens WC Flush Valve in Room 2
6
Output to Shower Valve
Opens Shower Valve in Room 2
7
Output to Basin Valve
Cold
Opens Basin Valve Cold in Room 2
8
Output to Basin Valve Hot
Opens Basin Valve Hot in Room 2
A
Input from WC Flush
Piezo touch button /
sensor
User input (Piezo touch button or
IR sensor) for WC Flush Room 1
B
Input from Shower Piezo
touch button / sensor
User input (Piezo touch button or
IR sensor) for Shower Room 1
C
Input from Basin Cold
Piezo touch button /
sensor
User input (Piezo touch button or
IR sensor) for Basin Cold Room 1
D
Input from Basin Hot
Piezo touch button /
sensor
User input (Piezo touch button or
IR sensor) for Basin Hot Room 1

12
Product Manual WDC200 Electronic Control
Revision 18
Item number
Description
Function
E
Input from WC Flush
Piezo touch button /
sensor
User input (Piezo touch button or
IR sensor) for WC Flush Room 2
F
Input from Shower Piezo
touch button / sensor
User input (Piezo touch button or
IR sensor) for Shower Room 2
G
Input from Basin Cold
Piezo touch button /
sensor
User input (Piezo touch button or
IR sensor) for Basin Cold Room 2
H
Input from Basin Hot
Piezo touch button /
sensor
User input (Piezo touch button or
IR sensor) for Basin Hot Room 2
I
Remote Lockout 1
(default)
Auxiliary input
J
Remote Lockout 2
(default)
Auxiliary input
K
WC Remote Flush
1(default)
Auxiliary input
L
WC Remote Flush 2
(default)
Auxiliary input
M
WC Half Flush1 (default)
Auxiliary input
N
WC Half Flush 2 (default)
Auxiliary input
IN
Left RJ45 Socket
Ethernet Input
OUT
Right RJ45 Socket
Ethernet Output
Optional Inputs, I, J, K, L, M, and N are used when it is necessary to:
•Lockout or disable the basin shower and WC from a remote switch.
•Remotely flush the WC pans.
•Provide the half flush option.
•Clear room lockouts
•Purge all outlets
•Connect a hygiene purge water flow sensor.
There are four types of sockets in the control unit:
•Eight 3 pin female sockets, to connect the unit to the solenoid valves. These
sockets are used to connect the water valve solenoids, 2 sockets for the WC
flush valves, 4 for the wash basin control valves and 2 for the shower control
valves.
•Eight 3.5 mm female sockets, to connect the unit to the Piezo touch buttons.
•Six 3.5 mm female sockets, to connect the unit to optional remote controls.
•Two RJ45 connectors are provided to connect the control unit to an Ethernet
network.
The socket assignments are given on the front of the unit. Refer to the label on the
front of the unit. Also see Figure 2 on page 11 and
Table 3 for the socket assignment.

13
Product Manual WDC200 Electronic Control
Revision 18
5.5. Connect the 3-pin output connector
To connect the 3-pin type connector to the socket in the unit, carry out these steps:
The cable plug has a raised key that must be aligned with the slot in the socket,
for it to fit correctly. Push the connector fully into the socket and pull it back out
slightly to check the latch on the front of the plug has engaged the socket. To
remove the plug, the press the latch button down firmly with your thumb and pull
out the plug.
All 3pin outputs are 12vdc.
5.6. Connect the 3.5mm input connector
To connect the 3.5 mm type connector to the socket in the unit, carry out these
steps:
Push the plug firmly into the socket until the black plastic casing of the plug firmly
contacts the unit. Make sure the plug is fully inserted into the socket.
All inputs are volt free normally open contacts. Close input to activate the
function.
a. +12v is available to power the infrared sensors on the middle (ring)
contact.
Input switch cables with fitted 3.5mm stereo jack plugs are available from
Wallgate, please contact sales if required
5.7. Connect the Electrical Supply
To make the electrical connections to the control unit:
WARNING! The electrical connections must be made by a qualified electrical
engineer in accordance with the present nationally approved IEE Regulations.
Terminate the supply cable from the control unit into the spur connection outlet
and fit a 2 amp fuse.
Connect an earth conductor to the water supply pipes on the basin and shower
nozzles. The other end of the earth conductor must be connected to an
approved earth facility.
NOTE: The water pipes connected to the basin taps and shower nozzles must
be bonded to earth.

14
Product Manual WDC200 Electronic Control
Revision 18
Make sure that the input leads from the basin tap, shower and WC are plugged
into the correct sockets on the base of the control unit. Refer to section 5.4 or the
label on the front of the unit.
Complete electrical testing of the installation.
5.8. Commission the Unit
All the switches and the menu display is located on the front panel of the WDC200
control unit.
Refer to figure 3 below for an illustration of the WDC200 front panel.
Figure 3. Front Panel WDC200
5.9. Purge Cycle function
The control unit has a Purge Cycle function you can use when commissioning the
installation of the basins, showers and WC sanitary ware.
The Purge Cycle function opens all water valves for the basins, showers and WC
pans in an automatic sequence. This can help release any air trapped in the
plumbing system.
Valve sockets
Legend
Menu
Key
Up Arrow
Key
LCD
Display
Down Arrow
Key
Return /
Accept Key
Input Sockets
Legend
2 Amp
Fuse

15
Product Manual WDC200 Electronic Control
Revision 18
The Purge Cycle sequence does the following:
•Runs the basin hot and cold water for 3 minutes.
•Runs the showers for 3 minutes.
•Flushes the WC pan in Room 1 twice (2 x Full flush with cistern refill time of 30
seconds between each flush).
•Flushes the WC pan in Room 2 twice (2 x Full flush with cistern refill time of 30
seconds between each flush).
To start the Purge Cycle function:
Fully open the isolating taps to the water supply.
Carefully check the system for leaks.
Switch ON the electrical supply.
Start the Purge Cycle by pressing and holding down the and keys
simultaneously for five seconds. Refer to figure 3 on page 14 for a picture of the
front panel.
The words Chlorine Purge are displayed along with the countdown clock.
Make sure that water flows freely from each basin, shower and WC cistern.
To stop the cycle, switch off the electrical supply to the electronic control unit.
Correct any problems such as blockages before you run the purge cycle again.
The control unit has various function settings that can be enabled or disabled.
The settings are given in section 7, WDC200 Menu Settings.
5.10. Lockout function
The Lockout function restricts the number of usages for the basin/bath, shower and
WC. The Lockout feature is disabled by default.
The default Lockout settings are as follows; these can be reconfigured as required:
•10 cycles for the basin/bath.
•4 cycles for the shower.
•4 cycles for the WC.
When the set permitted usage is exceeded, the item is locked from use for a period
of time. The lockout time starts from the first illegal attempt to activate a function but
if it is preferred that the time should start from the expiry of the last legal operation,

16
Product Manual WDC200 Electronic Control
Revision 18
then this can be adjusted by amending the Lockout Mode setting from 1 to 2, see
section 7 for menu list.
Default settings are as follows. These can be reconfigured as required.
•1 hour for basin/bath and shower.
•15 minutes for the WC pan.
To cancel the Lockout function when it has been activated due to excessive
operations and allow the unit to operate normally again, carry out the following steps:
Switch off the power to the control unit for 5 seconds.
Switch on the power to the control unit.
–or–
Activate the ‘clear lockout’ function via an auxiliary input.
Check that the basin, showers and WC are operating correctly.
5.11. Piezo touch button and infrared sensor controls
Piezo touch buttons and infrared sensors can be connected to the control unit to
operate the basins, showers and WCs. You can connect either Piezo touch buttons
or infrared sensors to the control unit.
The control unit is set for use with Piezo touch buttons by default.
If you connect infrared sensors to the control unit, you must modify the applicable
setting. For instructions on how to do this, refer to Table 6 on page 23. You do not
have to modify this setting if the control unit is factory set for operation with infrared
sensors.
The Piezo touch buttons do not have any moving parts.
To operate the Piezo touch button:
Press the centre of the button to start the operation.
Press the centre of the button to stop the operation (for basin hot and cold only).
To operate the infrared sensor:
Hold your hand within 50mm of the infrared sensor.
NOTE: Infrared sensors cannot stop or interrupt an operation until the
operation is complete. Piezo pushbuttons can interrupt or stop an operation.
For example, you can interrupt a basin operation by pressing the piezo button
again. You cannot interrupt a basin operation by operating the infrared sensor
again.

17
Product Manual WDC200 Electronic Control
Revision 18
To test the operation of the piezo and infrared sensors:
Operate each touch button or sensor and observe that they work correctly.
The hot and cold basin valves are set to open for 10 seconds each.
The shower valves are set to open for 60 seconds each.
The WC flush valve is set to deliver a 6 litres flush. The default cistern refill time is 30
seconds, after which the WC is ready to flush again. The WC control can be set for
dual flush, refer to section 6.1 for instructions.
5.12. System Test function
The control unit includes a System Test function to test the inputs (Piezo touch
buttons or infrared sensors) and the outputs (water valves). This is useful for fault
finding if any of the valves fail to operate. You can also use this function to make
sure that the Piezo touch buttons and valves have been connected to the correct
sockets on the control unit.
To start the System Test function:
Press and hold down the and keys for five seconds.
The firmware version appears.
Press the key once.
The System Settings Management menu item appears.
Press the key once.
The words System Test Disabled appear in the display.
Press the key once.
Press the key once to choose Enable.
Press the key once to save the setting.
The words System Test appear in the display.
Operate each touch button or sensor connected to the control unit, one at a time.

18
Product Manual WDC200 Electronic Control
Revision 18
The display in the control unit momentarily displays the letter assigned to the input.
For a list of letters assigned to the inputs, refer to the front panel of the control unit.
The applicable valve connected to the related output also opens momentarily.
When the input letter appears, make sure that the correct valve opens.
To stop the System Test, switch off the control unit.
-OR-
Press and hold down the and keys for 5 seconds.
The firmware version appears.
Press the key once.
NOTE: The control unit cannot set the water temperature for pre- mixed supplies
or showers. For these applications, seek advice from the plumbing contractor or
architect. TMV3 thermostatic valves are usually used in these applications.
5.13. Product Time Slots
The control unit can assign up to 4 configurable periods of the day when outputs are
allowed to operate. The default setting allows full operation of all outputs over a 24-
hour period (assuming no lockouts are active). Each output (WC, Shower and
basins) can be assigned to a configurable timeslot and when activated the assigned
output will only become active if within the allowed ‘time slot’. This function can be
used to manage when sanitary ware is allowed to operate, for instance the showers
may become inactive during night time periods. See pages 28-29 for Time Slot
setting information.
5.14. Hygiene Purge
The control unit can purge an output following pre-set periods of inactivity, this is a
hygiene function that can be used to reduce the possibility of water stagnating in the
pipe work and the associated risks, it will also reduce the possibility of waste traps
drying / evaporating following periods of inactivity. The inactivity period, duration of
purge and time of day when the purge takes place are all configurable for each
output. See page 27 and 28 for Hygiene Purge setting information.
5.15. Data Logging
Data logging records the events of the hygiene purge operations. The data log
records can then be downloaded from the WDC200 to a PC or laptop. The download
data is in the form of a csv file. Additional software is required from Wallgate to
perform the download and create data log reports. For additional information and
assistance with data logging, contact the Wallgate sales office.

19
Product Manual WDC200 Electronic Control
Revision 18
5.16. Auto-Run
The Auto-Run function allows any output to automatically open at a set time every
day. There are 48 half hourly time activations settings available for each output.
Refer to section 7 to view the available time settings. When an output operates at the
set time, it is ON for the preset cycle run time as set in “Cell Water Settings” of the
WDC200 menu.
5.17. Technical Specifications
Table 4. Technical specifications
Power supply
115-230V AC (Fuse 2 Amp), 50Hz Single phase, (UK, Europe,
Australasia)
Maximum Rating 60 Watts. (Refer to model WDCA200 for
North America).
Enclosure IP
Rating
IP55
Weight
1.7 Kg.
Dimensions
W200 x H120 x 90mm depth.

20
Product Manual WDC200 Electronic Control
Revision 18
6. User and Maintenance Instructions
The electronic control unit has been designed and manufactured from good quality
materials. If these instructions are followed, the unit will give reliable, efficient
service. If you need any further information or advice, please contact Wallgate
customer services.
6.1. Operation
Use the main isolation switch provided by the installer to switch the unit on or off.
The main isolation switch is located near to the electronic control box. If unit is faulty,
switch off the control unit until the fault is repaired by a qualified engineer.
WARNING! Risk of electric shock, serious injury and death. Only trained and
qualified personnel should remove the cover of the electronic control box.
The basin, shower and WC are fitted with either Piezo type stainless steel touch
buttons or infrared sensors.
Press the button face to operate a Piezo touch button. Once an operation cycle
starts, it will continue for a fixed period and stop unless the touch button is pressed
again, which will cancel the operation. The shower and WC cycles, however, cannot
be interrupted in this way.
Hold your hand within 50mm of the infrared sensor to operate an infrared sensor.
The operation cannot be interrupted or stopped when infrared sensors are fitted.
•The hot and cold basin valves are opened for 10 seconds each.
•The hot, warm and cold shower valves are opened for 60 seconds each.
•The WC flush valve is opened to deliver a 6 litre flush. The cistern refill time is 30
seconds, after which the WC is ready to flush again.
If the WC is not a cistern type flush, but is flushed directly from the water mains or a
central tank system, the flush time may have been set with a different cycle time to
suit the system flow performance.
•A dual flush option is available, either using one touch button or sensor, or using
two independent buttons or sensors. One of the two buttons or sensors is used to
operate a full flush the other for a half flush. Figure 2 on page 11 gives the
location of the half flush input sockets. Refer to Table 6 on page 23 for
instructions on setting a dual flush using one Piezo touch button or sensor
connected to sockets A and E.
The controller has various function settings that are described in Table 6 on page 23.
A few important settings and their default states are given in Table 5.
Table of contents
Other Wallgate Controllers manuals
Popular Controllers manuals by other brands

Viessmann
Viessmann 5216 Operation manual

Auber
Auber WS-1500FXL Operation & instruction manual

STG-BEIKIRCH
STG-BEIKIRCH MZ 4A-1RG-1LG Technical information and operating instruction

YGE
YGE 200 HV FAI manual

Honeywell
Honeywell VBN2 installation instructions

Sentera Controls
Sentera Controls STVS1 Series Mounting and operating instructions