manuals.online logo
Brands
  1. Home
  2. •
  3. Brands
  4. •
  5. Waltons
  6. •
  7. Outdoor Furnishing
  8. •
  9. Waltons 05ARBT0502-V1 User manual

Waltons 05ARBT0502-V1 User manual

05ARBT0502-V1 & 05ARBO0502-V1 15/11/2011
Overall Dimensions:
Length = 736m
Width = 1669cm
Height = 1876cm
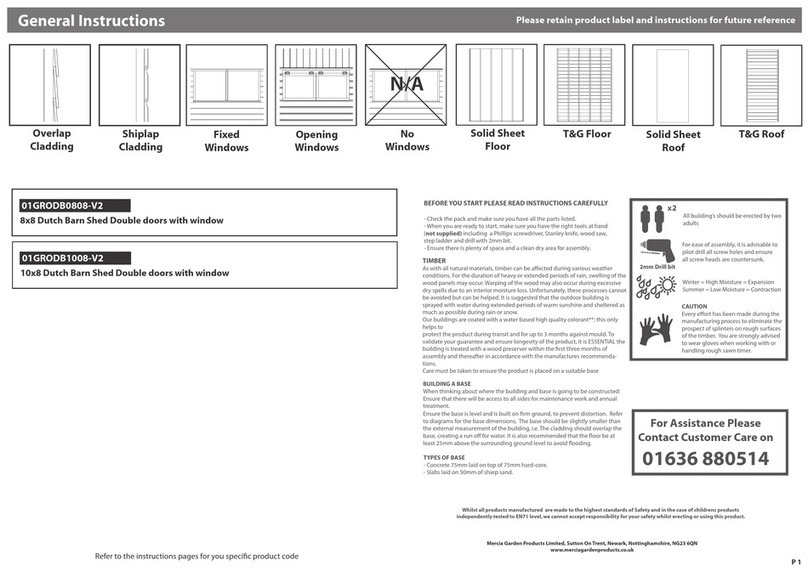
For Assistance Please
Contact Customer Care on
01636 880514
2mm Drill bit
x2
Winter = High Moisture = Expansion
Summer = Low Moisture = Contraction
This building should be erected by
two people.
For ease of assembly, it is advisable to
pilot drill all screw holes and ensure
all screw heads are countersunk.
BEFORE YOU START PLEASE READ INSTRUCTIONS CAREFULLY
- Check the pack and make sure you have all the parts listed.
- When you are ready to start, make sure you have the right tools at hand
(not supplied) including a Phillips screwdriver, Stanley knife, wood saw,
step ladder and drill with 2mm bit.
- Ensure there is plenty of space and a clean dry area for assembly.
TIMBER
As with all natural materials, timber can be aected during various weather
conditions. For the duration of heavy or extended periods of rain, swelling of the
wood panels may occur. Warping of the wood may also occur during excessive
dry spells due to an interior moisture loss. Unfortunately, these processes cannot
be avoided but can be helped. It is suggested that the outdoor building is
sprayed with water during extended periods of warm sunshine and sheltered as
much as possible during rain or snow.
Our buildings are delivered pre-treated with a water based timber treatment
however this only helps to protect during transit of your garden item. To
validate your guarantee and for better protection against weathering it is
ESSENTIAL that you treat the garden building with a wood preserver within 3
months of assembly. This will need to be re-applied annually to ensure longevity
of your building. Care must be taken when constructing the garden building
that it is not touching the ground and is on a suitable base.
BUILDING A BASE
When thinking about where the building and base is going to be constructed: Ensure that there will be access to all sides for maintenance
work and annual treatment.
TYPES OF BASE
- Concrete 75mm laid on top of 75mm hard-core.
- Slabs laid on 50mm of sharp sand.
Ensure the base is level and is built on rm ground, to prevent distortion. Refer to diagrams for the base dimensions, The base should be
slightly smaller than the external measurement of the building, i.e. The cladding should overlap the base, creating a run o for water. It is also
recommended that the oor be at least 25mm above the surrounding ground level to avoid ooding.
Whilst all products manufactured are made to the highest standards of Safety and in the case of childrens products independently tested to EN71
level,we cannot accept responsibility for your safety whilst erecting or using this product.
Please retain product label and instructions for future reference
Before assembly
please make sure you have a
suitable base ready to erect your
building
MADE IN GREAT BRITAIN
05ARBT0502-V1 Content
Roof Qty 2 Seat Qty 1 Side Qty 2
Seat Back Qty 1
1
23
4
05ARBO0502-V1 Content
Roof Qty 2
Seat Qty 1 Side Qty 2
Seat Back Qty 1
123
4
Fixing Kit for both 02ARBT0502-V1 & 05ARBO0502-V1
5
6
7
8
9
10
11
12
13
Post - 75x75x1500mm Qty 4
Back Supports - 22x75x1500mm Qty 2
Seat Joining Batton - 27x44x1350mm Qty 1
Fascia - 22x75x972mm Qty 4
Roof Support Bar - 47x75x970mm Qty 4
Roof Capping Strip - 16x40x692mm Qty 1
Side Supports - 16x75x600mm Qty 2
Arm Rest - 22x95x525mm Qty 2
Seat Support - 47x75x400mm Qty 1
Corner
Bracing
Qty 4
14
15 Finial
Qty 1
Nail Bag
50mm Screw x 14
40mm Screw x 34
20mm Screw x 12
70mm Screw x 22
60mm Screw x 16
100mm Screw x 7
80mm Screw x 3
Place the side onto the two
posts making sure that the two
edges are flush with the post.
Place the side 65mm from the
end of the posts, secure using
6x60mm screws.
Do this twice using both sides
and all four posts.
Step 1
6
5
m
m
6 x 60mm Screws
3
55
We strongly recommend pre drilling
holes before xing screws.
2 x 100mm Screws
Attach the Seat support as
show in the illustration to the
seat using 2x100mm screws.
Step 2
2
13
We strongly recommend pre drilling
holes before xing screws.
8 x 70mm Screws
Before attaching the seat to
the posts ensure that the seat
is level at all four posts and
400mm from the floor.
Once level, screw through the
seat framing into the posts
using 2x70mm screws per post.
Step 3 We strongly recommend pre drilling
holes before xing screws.
400mm
400mm
400mm
4 x 70mm Screws
Place the seat back ontop of
the seat with the edge of the
seat backs framing sitting flush
with the posts, secure to the
posts using 2x70mm screws on
each side.
Secure the seat back to the
seat using 80mm screws, one
at each end screw through the
bottom of the seat into the
seat back framing.
Step 4
We strongly recommend pre drilling
holes before xing screws.
2 x 80mm Screws
4
6 x 40mm Screws
Attach the seat joining batton
in the gap between the seat
and the seat back, using 40mm
screws as shown in the
illustration.
Step 5 We strongly recommend pre drilling
holes before xing screws.
7
9 x 60mm Screws
Place one of the back supports
so that it is flush with the
bottom of the seat framing
and attach using 5x60mm
screws.
Place the remaining back
support so that it is flush with
the top of the seat backs
framing and secure using
4x60mm screws.
Step 6 We strongly recommend pre drilling
holes before xing screws.
6
6
BUILDING A BASE
When thinking about where the building and base is going to be constructed: Ensure that there will be access to all sides for maintenance
work and annual treatment.
TYPES OF BASE
- Concrete 75mm laid on top of 75mm hard-core.
- Slabs laid on 50mm of sharp sand.
Ensure the base is level and is built on rm ground, to prevent distortion. Refer to diagrams for the base dimensions, The base should be
slightly smaller than the external measurement of the building, i.e. The cladding should overlap the base, creating a run o for water. It is also
recommended that the oor be at least 25mm above the surrounding ground level to avoid ooding.
8 x 40mm Screws
Attach the arm rest to the
posts with corner braces as
shown in the illustration. Use
20mm screws going into the
arm rest and 40mm screws
going into the post.
Attach all four corner braces in
the same way on all four posts.
Step 7 We strongly recommend pre drilling
holes before xing screws.
8x 20mm Screws
12
14
12
Attach two roof support bars
together using 100mm screws
ensuring not to hit the other
screw when fixing. Do this
twice, for all four roof support
bars.
Attach the assembled parts to
the posts flush with the top of
the posts as shown with
2x70mm screws per post.
Step 8 We strongly recommend pre drilling
holes before xing screws.
4 x 100mm Screws
8 x 70mm Screws
9
The illustrations below show
two different roof systems, use
the illustration relevant to your
product.
The process is still the same,
attach both roofs ontop of the
roof supports and fix using
6x50mm screws per roof.
Step 9
We strongly recommend pre drilling
holes before xing screws.
12 x 50mm Screws
11
1
1
Attach the side supports to the
posts flush to the roofs on
both sides of the arbour seat
and fix using 40mm screws.
Step 10
We strongly recommend pre drilling
holes before xing screws.
05ARBT0502-V1 HAS BEEN USED FOR ILLUSTRATION
PURPOSES ONLY THE STEPS REMAIN THE SAME.
4 x 40mm Screws
11
11
Attach the fascias to the front
and back of the arbour seat
flush with the roof support
bars using 40mm screws.
Step 11 We strongly recommend pre drilling
holes before xing screws.
88
8
8
12 x 40mm Screws
Attach the roof capping strip
ontop of the roofs and fix
using 3x20mm screws.
Attach the finial to the fascias
with 2x40mm screws.
Step 12
We strongly recommend pre drilling
holes before xing screws.
3 x 20mm Screws
2 x 40mm Screws
10
15

This manual suits for next models

1

Other Waltons Outdoor Furnishing manuals

Waltons 01GRODB0808-V2 Instruction manual

Waltons

Waltons 01GRODB0808-V2 Instruction manual

Waltons 03COR0707-V4 Instruction manual

Waltons

Waltons 03COR0707-V4 Instruction manual

Waltons 01GRO0606-V1 Instruction manual

Waltons

Waltons 01GRO0606-V1 Instruction manual

Waltons 01GRO1208DD-V1 User manual

Waltons

Waltons 01GRO1208DD-V1 User manual

Waltons 01OVLPA1006DDFW-V1 Instruction manual

Waltons

Waltons 01OVLPA1006DDFW-V1 Instruction manual

Popular Outdoor Furnishing manuals by other brands

Grange Fencing Elite Arch Assembly instructions

Grange Fencing

Grange Fencing Elite Arch Assembly instructions

Country Living WT-TJ01 Assembly instruction

Country Living

Country Living WT-TJ01 Assembly instruction

Uberhaus GAZEBO MINI 38115203 user manual

Uberhaus

Uberhaus GAZEBO MINI 38115203 user manual

leco 37400102 quick start guide

leco

leco 37400102 quick start guide

Anova L1392S Assembly instructions

Anova

Anova L1392S Assembly instructions

Sunjoy A103000106 manual

Sunjoy

Sunjoy A103000106 manual

CAZEBOO BAHIA 300S300 Assembly instructions

CAZEBOO

CAZEBOO BAHIA 300S300 Assembly instructions

Belson Outdoors R8HA-P instruction sheet

Belson Outdoors

Belson Outdoors R8HA-P instruction sheet

Outsunny 84C-145 Assembly instruction

Outsunny

Outsunny 84C-145 Assembly instruction

Courtyard Creations KUS128D-WM Assembly instructions

Courtyard Creations

Courtyard Creations KUS128D-WM Assembly instructions

Harol VZ720 Mounting instruction

Harol

Harol VZ720 Mounting instruction

John Lewis RYE 820 89409 quick start guide

John Lewis

John Lewis RYE 820 89409 quick start guide

Dunster House P5-3030CORGAZ installation manual

Dunster House

Dunster House P5-3030CORGAZ installation manual

Crosley CO7141 Assembly instructions

Crosley

Crosley CO7141 Assembly instructions

Gazebo penguin 41218 Assembly instructions

Gazebo penguin

Gazebo penguin 41218 Assembly instructions

Konifera SNAC-BW8 Assembly instructions

Konifera

Konifera SNAC-BW8 Assembly instructions

Naterial PORTO Assembly instructions

Naterial

Naterial PORTO Assembly instructions

BRITISH RECYCLED PLASTIC Adult Picnic Table Assembly instructions

BRITISH RECYCLED PLASTIC

BRITISH RECYCLED PLASTIC Adult Picnic Table Assembly instructions

manuals.online logo
manuals.online logoBrands
  • About & Mission
  • Contact us
  • Privacy Policy
  • Terms and Conditions

Copyright 2025 Manuals.Online. All Rights Reserved.