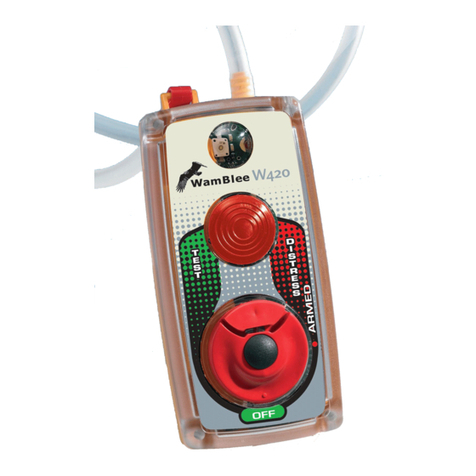
WamBlee W400 MOB User manual

W400 Rescue-MeTM
Service Manual
Ed. 1.00.0
4/2010

2

Index
1 Introduction........................................................................................................................................5
2 Recommended list of test equipment to service the W400................................................................7
3 To return the W400 M B to Wamblee s.r.l........................................................................................9
4 Verifying W400 M B performance.................................................................................................11
4.1 Verify the test mode functionality.............................................................................................11
4.2 Verify the alarm operation mode (manual activation)..............................................................12
4.3 Verify the alarm operation mode (sea sensor activation)..........................................................13
4.4 Instrumental verification...........................................................................................................14
4.5 Verify the modulation signal.....................................................................................................14
4.6 Verify the beeper loudspeaker...................................................................................................15
4.7 Verify the sea sensor switch......................................................................................................15
4.8 scillator circuit.......................................................................................................................16
4.9 Verify the power amplifier circuit.............................................................................................16
4.10 Power supply circuit...............................................................................................................17
4.11 Microprocessor unit................................................................................................................17
5 Schematic diagrams..........................................................................................................................19
5.1 Introduction...............................................................................................................................19
6 Mechanical diagrams........................................................................................................................29
6.1 Introduction...............................................................................................................................29
6.2 Mechanical components list.....................................................................................................33
7 Instrument waveform pictures..........................................................................................................35
7.1 Introductions.............................................................................................................................35
Pictures
Figure 1: Schematic diagram................................................................................................................21
Figure 2: PCB Layout top view............................................................................................................23
Figure 3: Mechanical layout exploded.................................................................................................31
Figure 4: Modulation signal described in Chapter 4.5.........................................................................35
Figure 5: Beeper tone...........................................................................................................................36
Figure 6: Flash light strobe signal........................................................................................................37
Figure 7: RF emission in TEST mode..................................................................................................38
Figure 8: RF emission in ARMED mode.............................................................................................39
Figure 9: Magnete position for ARMED activation.............................................................................40
Tables
Table 1: Recommended list of test equipment to service the W400 M B............................................7
Table 2: Electronics component list.....................................................................................................27
Table 3: Mechanical component list.....................................................................................................33
3

4

1 Introduction
If the W400 MOB is under warranty, you must return it to Wamblee s.r.l. or service dealer
available on www.wamblee.it , for all service work covered by the warranty. See To return the
W400 MOB to Wamblee s.r.l. on page 9. If the warranty period has expired, you can still return
the device to Wamblee s.r.l. for all service work. Contact your nearest Wamblee Sales Office for
additional details on service work.
If the warranty period has expired and you decide to service the device yourself, the instructions
in this chapter can help you keep the W400 operating at optimum performance.
This chapter is divided into the following four sections:
•Verifying W400 performance on page 11-17.
Schematic diagram on page 21-23
•Replacing Parts in the W400 on page 31-33.
Service should be performed by trained service personnel only.
5

6

2 Recommended list of test equipment to service the W400
Equipment Critical specification Recommended model / Part Use1
Digital multimeter 0.1 mV resolution, better than 0.01% accuracy. Agilent 34401A P,T
Oscilloscope 300 MHz, 1 M ,Ω 10:1 Probe Agilent P,T
Power supply From 3 to 10 Volts, 0.1 Volts resolution , 1 A
continuous.
Agilent P
Power meter and sensor 1 to 500 MHz , ±3% accuracy Agilent P,T
Frequency meter 1 to 300 Mhz , 10 Hz resolution Agilent P,T,A
Spectrum analyzer 1 to 1000 MHz, 100 dB dynamic range Agilent P,T,A
Coaxial BNC connector plus
50Ω coaxial cable, 1
meter.
Loss less than 20 dB / 100 meters Not defined P,T,A
50ΩDummy load
attenuator
1 Watt minimum, 10 dB loss Not defined P
Table 1: Recommended list of test equipment to service the W400 MOB
1P = Use for performance verification.
A = Use for adjustment verification.
T = Use for troubleshooting.
7

8

To return the W400 MOB to Wamblee s.r.l.
Before shipping the W400 MOB to Wamblee s.r.l., contact your nearest Wamblee s.r.l. Sales
Office for additional details.
Write the following information on a tag and attach it to the W400 MOB:
•Name and address of owner
•Model number
•Serial number (if any)
•Description of service required or failure indications
•Remove all battery from the W400 MOB.
•Pack the W400 MOB in the original ackaging or use other ackaging solution with
styrofoam or other shock-absorbing material.
•Seal the shi ing container securely.
•Mark the shi ing container as FRAGILE.
9

10

4 Verifying W400 MOB performance
To verify the W400 MOB performance, is necessary to :
•Remove Top cover using phillips screw driver (remove the 4 x M3 screw on the yellow
back cover).
•Remove the 3 Lithium battery
•Remove the antenna connection using phillips screw driver (remove the M3 screw near
the output antenna).
•Replace the antenna connection with the 1 meter coaxial cable using a iron solder (less
than 50 Watt, with SMD tool tips).
•Connect the DC Power supply with adequate wire connection and set the voltage set to 9
Volts DC and current limit at 1A; take care about polarity.
4.1 Verify the test mode functionality
The test mode functionality (Main switch in OFF position) is a standard operation performed from
the user before to wear the W400 MOB. The test mode functionality do these checks:
•Check the battery status
•Show the battery status using beeper and green led.
•Check (make) a single flash light
•Send radio signal using low power mode
To proceed to the test mode verification, please:
•Connect the coaxial cable placed on the W400 instead of the wipe antenna to a Dummy
load attenuator, then connect the Dummy load attenuator to the Spectrum Analyzer. If
spectrum analyzer can manage more that +20 dBm, you can connect the W400 MOB
direct without Dummy load attenuator.
•Set the Spectrum analyzer parameters as:
◦Center frequency : 121.5 Mhz
◦Span frequency : 20 Mhz
◦Level : +20 dBm
◦Scale : 10 dB /div
◦Resolution Bandwith : 1 or 3 Mhz
◦Sweep time : auto mode (best performance)
•Put the Power supply active
11

Press then TEST button on W400 board and verify this sequence:
•Check the red led on W400 board go ON.
•Check the green led on W400 board go ON.
•Hear the beeper make 4 beep in short sequence, follow a pause and repeat 3 times.
•At the first beep sequence, the white led flashing one time.
•During the complete test sequence (10 seconds), the radio signal output must be
satisfied these items:
▪Frequency : 121.5 Mhz (nominal frequency, for more accurate measurement see
next chapter).
▪Power emission : Top level almost -40 dBm.
▪Modulation level: The modulation index (level variation) shall be more than 30 dB.
•After 10 seconds and / or 3 times short beep sequence, the W400 MOB shall go in OFF
mode; all led's go OFF , no beeper and no radio emission.
4.2 Verify the alarm operation mode (manual activation)
The alarm operation mode (Main switch in ARMED position – manual activation) is a standard
operation performed when then W400 MOB is activated via TEST button. The alarm operation
mode do:
•Check the battery status.
•Show the battery status using green led.
•Make white lighting flash every 3 seconds.
•Send radio signal using high power mode.
To switch off the W400 MOB, its necessary to:
•Move the main switch from ARMED to OFF position.
To proceed to the ARMED mode verification, please:
•Place a magnet rod in the same axis of the magnetic switch (see Figure 9)
•Press the TEST button for almost 1 seconds.
12

Then proceed with instrumental verification:
•Check the red led on W400 board go ON.
•Check the green led on W400 board go ON.
•Hear the beeper (continuous beep sequence, 2 beeps / seconds circa).
•Check flashing light, one flash every 3 seconds.
•Continuous radio transmission, with these parameters:
▪Frequency : 121.5 Mhz (nominal frequency, for more accurate measurement see
next chapter).
▪Power emission : Top level almost +17 dBm.
▪Modulation level: The modulation index (level variation) shall be more than 30 dB.
•To put the W400 MOB in OFF mode, remove the magnetic rod form the sensor axis.
4. Verify the alarm operation mode (sea sensor activation)
The alarm operation mode (Main switch in ARMED position – sea sensor activation) is a standard
operation performed when then W400 MOB is activated via Man Over Board situation. The alarm
operation mode do:
•Check the battery status.
•Show the battery status using green led.
•Make white lighting flash every 3 seconds.
•Send radio signal using high power mode.
To switch off the W400 MOB, its necessary to:
•Move the main switch from ARMED to OFF position.
To proceed to the ARMED mode verification (sea sensor mode), please:
•Place a magnet rod in the same axis of the magnetic switch (see Figure 9)
•Use a small piece of wet cotton and touch together the two gold plated sea sensor (see
picture).
•After 5/6 seconds, the W400 MOB start operation (check red led goes ON). Remove the
cotton piece.
13

Then proceed with instrumental verification:
•Check the red led on W400 board go ON.
•Check the green led on W400 board go ON.
•Hear the beeper (continuous beep sequence, 2 beeps / seconds circa).
•Check flashing light, one flash every 3 seconds.
•Continuous radio transmission, with these parameters:
▪Frequency : 121.5 Mhz (nominal frequency, for more accurate measurement see
next chapter).
▪Power emission : Top level almost +17 dBm.
▪Modulation level: The modulation index (level variation) shall be more than 30 dB.
•To put the W400 MOB in OFF mode, remove the magnetic rod form the sensor axis.
4.4 Instrumental verification
All instrumental verification , if not specified, shall be conducted in these condition:
•DC power supply : 9 Volts, 1 A capacibility
•Device on dummy load
•Usually in TEST mode (no magnetic rod on reed sensor).
Different setup test shall be defined during specified measurements.
4.5 Verify the modulation signal
The modulation signal is generated via microprocessor with clock divider operation and value
reload. There are non tools or adjustment required to set or calibrate the tone frequency and
level, but its possible to verify some hardware point if performance in the previous chapters are
not satisfied.
To verify the tone modulation signal, set the oscilloscope with these parameters:
•Amplitude = 2 Volts / div.
•DC Coupling
•Time Base = 2 ms / div
•Probe Hi Z 10:1
Connect the probe to ground and the tip on C39 && R30 node (see TP1 on Figure 2) and press
the TEST pushbutton (you can leave the W400 MOB in TEST mode). For 10 seconds shall be
14

visible the graphics as figure 5, with a minimum performance of:
•Voltage peak-peak = min 7 Volts (symmetric to 0 Volts)
•DC voltage = 0 Volts
•Frequency shall be variable according sweep mode.
4.6 Verify the beeper loudspeaker
The beeper loudspeaker signal is generated via microprocessor with clock divider operation and
value reload. There are non tools or adjustment required to set or calibrate the tone frequency
and level, but its possible to verify some hardware point if performance in the previous chapters
are not satisfied.
To verify the beeper loudspeaker signal, set the oscilloscope with these parameters:
•Amplitude = 2 Volts / div.
•Offset level = 6 Volts
•DC Coupling
•Time Base = 2 ms / div
•Probe Hi Z 10:1
Connect the probe to ground and the tip on Q1 base node (see TP2 on Figure 2) and press the
TEST pushbutton (you can leave the W400 MOB in TEST mode). For 10 seconds shall be visible
the graphics as figure 5, with a minimum performance of:
•Voltage peak-peak = min 8 Volts
•DC voltage ref. = 0 Volts
•Frequency shall be variable according beep sequence.
4.7 Verify the sea sensor switch
The sea sensor activation is a standard operation performed when then W400 MOB is activated
via Man Over Board situation. The sea sensor do:
•Maintaining polarized a PNP transistor (Q3) inside PCB board.
•When wather touch then sea sensor, a small current flow outside the PNP base.
•A RC net (R18/C6) charge a N-FET circuit (Q4).
•A positive reaction is made from Q5 to maintaining Q4 close until power is removed
(moving the main knob to OFF position).
To verify the sea sensor circuit, please:
15

•Place a magnet rod in the same axis of the magnetic switch (see Figure 9)
•Use a small piece of wet cotton and touch together the two gold plated sea sensor (see
picture).
•Place a voltmeter with negative tip to ground an positive tip to TP4 (R18 & C6 net, see
Figure 2) and check the voltage move from 0 to 3 Volts in 5 seconds.
•Then check the Drain pin of Q4 ; shall be move to 0 Volts (close condition) when the
complete RC delay time is occur.
4.8 Oscillator circuit
The oscillator circuit is a Butler oscillator; the residual capacitances of the crystal X1 is tuned at
121.5 Mhz using L5. The voltage across X1 is pumped via C11 and C15 as voltage elevator, then
the second inductor L3 is tuned with C11//C15 at the same crystal frequency. C8 is used only as
DC coupler. The Butler oscillator is made using a cascode amplifier U6.
4.9 Verify the power amplifier circuit
To verify the functionality of the PA stage, shall be connected a coaxial cable with a BNC
terminal to the TP3 (see figure 2), than connect the BNC connector to a spectrum analyzer and
set the instrument as:
•Frequency (central) = 121.5 MHZ
•Span = 5 Mhz
•Resolution Bandwidth = 50 Khz
•Video Bandwidth = 3 Mhz
•Top level = 0 dBm
•Scale = 10 dB / div.
Press the TEST button and check the level emission (as Figure 7); the peak level shall be almost
-40 dBm and the modulation index (level variation from top to bottom level ) shall be almost 30
dB range.
Change the spectrum analyzer top level (or connect a dummy load attenuator in series to the
W400 MOB and the instrument) to:
•Top level = +25 dBm
And :
•Place a magnet rod in the same axis of the magnetic switch(see Figure 9)
Press the TEST button and check the level emission (as Figure 6); the peak level shall be almost
+17 dBm and the modulation index (level variation from top to bottom level ) shall be almost 30
16

dB range.
4.10 Power supply circuit
The power supply system is assembled by:
•Q10 is the main switch device and is controlled by R24 and R25. Ground the resistor R25,
the switch Q10 go closed. The R25 may be grounded via D6 (from the sea sensor)and
from Q9 (under microprocessor control).
When the W400 MOB is under TEST mode, the power supply control is under microprocessor
using Q9, instead when the unit is under ARMED mode, the power is controlled via D6. Follow
the Q10 switch, is placed a linear voltage regulator U10 , a 3.3 Volts regulator for logic supply.
4.11 Microprocessor unit
The microprocessor unit is U1; all operation are made from this unit and all clock signal are
generated using a internal oscillator (no external clock signal). Reset operation and Brown
voltage detection are inside. The software can be upgraded using the P5 connector.
17

18

5 Schematic diagrams
5.1 Introduction
Follow are reported schematic diagram and layout of the W400 MOB. Please take note that
some parts are designed but not installed because are optional items for different product
design.
19

20
Table of contents
Other WamBlee Security System manuals