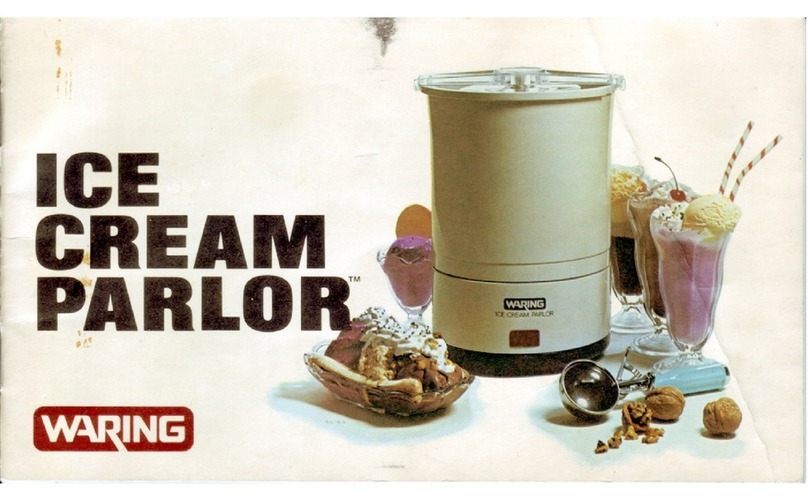
Waring PARLOR User manual


1
Waring Ice Cream Parlor manual
Waring Corporation
1970s
Exported from Wikisource on June 8, 2022

3
IMPORTANT
SAFEGUARDS
When using electrical appliances, basic safety precautions
should always be followed including the following:
1. READ ALL INSTRUCTIONS.
2. To protect against electrical hazards do not immerse
motor and base assembly in water or other liquid.
3. Close supervision is necessary when any appliance is
used by or near children.
4. Unplug from outlet when not in use, before putting on or
taking off parts, and before cleaning.
5. Avoid contacting moving parts.
6. Do not operate any appliance with a damaged cord or
plug or after the appliance malfunctions, or is dropped or
damaged in any manner. Return appliance to the nearest
authorized service facility for examination, repair or
electrical or mechanical adjustment.
7. The use of attachments not recommended or sold by the
appliance manufacturer may cause hazards.
8. Do not use outdoors.
9. Do not let cord hang over edge of table or counter, or
touch hot surfaces.

4
SAVE THESE
INSTRUCTIONS
Congratulations on acquiring this exciting new frozen dessert appliance!
You and your family will enjoy making and eating your own favorite
recipes as often as you wish for years.
INDEX
7
10
12
16
17
19
20
21
Caring For Your Waring Ice Cream Parlor™ 1
Making Frozen Desserts the Waring Way 2
Special Tips 6
Recipes
Plain Ice Cream
French Ice Cream (Uncooked)
French Ice Cream (Cooked)
Fruit Ice Cream
Ice Milk
Fruit Sherbet
Fruit Ice
Frozen Yogurt

6
Fig. 1
CARING FOR YOUR
WARING ICE CREAM
PARLOR™
The Waring Ice Cream
Parlor™ should be used for
household purposes only.
Proper care of your appliance
is very simple...mostly a
matter of keeping it clean and
free of salt residue. Following
the directions below will
ensure trouble-free enjoyment of your Waring Ice Cream
Parlor™ for years to come.
Wash the cream can, dasher, can lid, and support arm in
very hot, soapy water before each use. ONCE THE
CREAM CAN HAS BEEN EMPTIED AFTER USE, BE
SURE TO WASH IT IN VERY HOT, SOAPY WATER,
RINSE AND DRY THOROUGHLY. Remember that the
plastic parts are not dishwasher safe and must be hand-
washed.
After each use, empty salt-water brine and ice mixture from
ice bucket and rinse inside, outside, and bottom of ice

7
bucket thoroughly with hot water until all trace of salt
residue is gone.
Clean the outside surface of the motor and base assembly
with a damp cloth after each use.
NEVER IMMERSE MOTOR AND BASE ASSEMBLY IN
WATER OR OTHER LIQUID.

8
MAKING FROZEN DESSERTS THE WARING WAY
Whether you are going to make a classic rich vanilla ice
cream, a light fruit ice or low-calorie frozen yogurt, the
same simple steps outlined below will always apply.
Aside from the Waring Ice Cream Parlor™ itself and the
mixture to be processed the only things you need to make
perfect frozen desserts are:
Four trays of ice cubes from your refrigerator
One standard 26-ounce box of ordinary table salt
Two cups of cold water
BASIC STEPS FOR MAKING FROZEN DESSERTS IN
THE WARING ICE CREAM PARLOR™
1. PRELIMINARIES
Select the mixture to be processed, choosing one of the
recipes in this booklet, or using your own recipe. (See
Special Tips)
Have the box of table salt, four trays of ice cubes and
the two cups of cold water handy and ready to use.
2. GETTING THE WARING ICE CREAM PARLOR™
READY
Place the ICE BUCKET onto the MOTOR AND
BASE ASSEMBLY so that the DRIVE SOCKET

9
located on the underside of the ice bucket engages with
the DRIVE SHAFT protruding from the top of the
base assembly. (Refer to Fig. 1) Rotate the ice bucket
until it drops down over the raised STOP LUGS on the
base assembly and seats firmly.
Pour ingredients to be processed into the cream can.
For most desserts, the liquid level should be below the
FILL LINE stamped into the can wall. This is so that
the mixture will have sufficient room to expand during
processing without overflowing the cream can. Some
desserts, however, such as sherbets and fruit ices,
expand less than others, and with these it is
permissible to exceed the FILL LINE. Stir the mixture
thoroughly if required by the recipe, using only a
wooden spoon or a plastic or rubber spatula to avoid
scratching the interior of the cream can.
Insert DASHER into CREAM CAN. Be sure that the
ROUNDED BALL-END of the dasher's center shaft
seats into the matching indentation in the bottom of the
cream can. (Refer to Fig. 1)
Place the transparent plastic CAN LID over the top
end of the dasher shaft and snap it firmly into place
over the rim of the cream can.
Place the loaded cream can into the ice bucket, making
sure that the drive socket indentation in the bottom of
the cream can engages with the drive shaft protruding
from the bottom of the ice bucket.
Fit the socket located on the underside of the

10
SUPPORT ARM onto the hexagonal tip of the dasher
shaft extending up through the can lid. Grasp both
ends of the support arm, and rotate it until the ends
drop into the cutouts in the rim of the ice bucket. Press
downward lightly on the ends of the support arm and
rotate the support arm counterclockwise until it stops
and is securely locked into place.
3. PROCESSING
You are now ready to fill the space between the cream
can and the ice bucket with a mixture of ice, salt, and
water, which will lower the temperature of the contents
of the cream can to its freezing point.
Start the motor by inserting the plug into a regular 120
volt AC household receptacle. The cream can and
attached cover will rotate in a counterclockwise
direction. The dasher, prevented from rotating by the
support arm, will remain stationary.
With the motor running, begin building the freezing
mixture by pouring 1 cup of the cold water into the ice
bucket. Follow with a layer of ice cubes, one cube
deep. Sprinkle about 6 level tablespoons of table salt
evenly over the top of the ice cubes. Continue building
up the ice/salt mixture, layer by layer, until the ice
bucket is full. Sprinkle on any remaining salt and
slowly pour the remaining cup of water evenly over
the top layer so that the water uniformly "wets down"
the entire ice/salt load in the ice bucket.
The processing time and volume of the finished

11
product are influenced by a number of variable factors,
including:
1. Initial temperature of mix being processed.
2. Variations in the composition of mix ingredients.
3. Amount of salt, ice and water used in the freezing
mixture. (See Section 5 — Special Tips)
Because of these factors, processing time will vary
between 20 and 50 minutes, and the finished product
may or may not completely fill the cream can.
As the mixture begins to freeze and thicken and
expand to its proper consistency, the motor will begin
to labor and slow down, normally coming to a near or
complete stall indicating that processing has been
completed.
(Occasionally, the motor may not stop or slow down
appreciably even though processing is complete. If this
occurs, The Waring Ice Cream Parlor™ should be
allowed to operate for no more than 50 minutes in all
before unplugging. Most of the ice will have melted by
this time, and little additional freezing would take
place if it were run longer.)
The motor of your Waring Ice Cream Parlor™ is
equipped with a device to prevent overheating should
the appliance be running unattended when a stall
occurs. If this happens, the motor will automatically
shut itself off after an interval, and the ready light on
the base assembly will come on, giving a visual
indication that processing has been completed.

12
CAUTION
The automatic motor shut-off will reset itself after a
sufficient time interval has elapsed. If the appliance is
still plugged in at this time, the ready light will go out
and the motor will start again. You should, therefore:
ALWAYS UNPLUG APPLIANCE BEFORE
REMOVING ANY PARTS.
When processing has been completed, unplug Waring
Ice Cream Parlor.™ Remove ice bucket from base
assembly and set it on the counter. Remove support
arm from ice bucket by pushing down gently on both
ends, rotating clockwise, and lifting off. Wipe any ice
or salt from can lid, and lift can out of ice bucket with
cover and dasher still in place. Remove cover and
dasher. The processed mixture will be of a soft, creamy
consistency at this point, and should be served
immediately unless additional hardening is desired.
4. HARDENING
If you wish to harden or "ripen" the processed mixture,
follow these tips:
Using a wooden spoon, or a plastic or rubber spatula,
stir the processed mixture to blend together the firm
and soft portions. Pack mixture down to exclude air
pockets. Place a piece of waxed paper or plastic wrap
over the mouth of the cream can, and snap can lid back
into place. If you prefer, mixture may be spooned into

13
plastic freezer containers with tight fitting lids,
allowing about 1/2" for additional expansion.
Place covered can or containers into refrigerator
freezing compartment for 1-2 hours. It may be
necessary to temporarily adjust your refrigerator's
temperature control to a lower than normal setting in
order to get the processed mixture to set up firmly.
ONCE THE CREAM CAN HAS BEEN EMPTIED
AFTER USE, BE SURE TO WASH IT IN VERY
HOT, SOAPY WATER. RINSE AND DRY
THOROUGHLY.

14
SPECIAL TIPS
If you use your own recipe, remember to adjust the
ingredient quantities for a maximum 2 quart yield.
If you make up your mixture well ahead of time, and
prechill for an hour or two in your refrigerator's milk
storage area, the subsequent processing time will be
reduced. This is not an absolute necessity, however, except
in cases where the recipe calls for boiling or cooking, in
which case the mixture must be cooled before attempting to
process.
The texture of the finished product depends largely on how
fast it is processed. The slower the freezing process, the
smoother the texture. You can easily control the processing
rate, and hence the finished texture, by varying the amount
of salt you use in the "freezing mixture." Using about three-
fourths of a standard 26-ounce box of salt will result in a
reasonably fast-acting freezing mixture, and produce a
relatively smooth-textured finished product. Use of more
salt, up to a full box, will shorten the processing time and
produce a coarser, more granular, "icy" texture. Use of less
salt, down to one-half box, will lengthen the processing
time and produce a finer, smoother texture. The directions
given in this booklet are based on the use of 3/4 box of salt,

15
and it is recommended that you try this quantity the first
time you use your Waring Ice Cream Parlor.™
Remember that:
MORE SALT (UP TO A FULL BOX) — FASTER
PROCESSING, COARSER TEXTURE
LESS SALT (DOWN TO 1/2 BOX) — SLOWER
PROCESSING, FINER TEXTURE

16
RECIPES
The wide variety of frozen desserts that can be made in
your Waring Ice Cream Parlor™ all stem from just a few
basic types characterized by the main ingredients of the
mixture to be frozen.
Following are brief descriptions of the basic types, along
with typical two-quart-yield recipes for each.
Index (not listed in original)
Plain Ice Cream
French Ice Cream
Fruit Ice Cream
Ice Milk
Sherbet
Fruit Ice
Frozen Yogurt

17
PLAIN ICE CREAM
PLAIN ICE CREAM refers to any ice cream made without
eggs and which contains relatively small amounts of
flavoring ingredients in the form of extracts, powders or
syrups. Examples are: Vanilla, Chocolate, Maple, Coffee,
Pistachio, etc.
RECIPE FOR PLAIN VANILLA ICE CREAM
Pour cream directly into cream can. Add sugar, vanilla, and
salt. Stir with wooden spoon or plastic spatula until sugar
dissolves.
RECIPE FOR CHOCOLATE ICE CREAM
2 cups heavy cream (1 pint)
2 cups light cream (1 pint)
1 cup sugar
1-1/2 tsp. pure vanilla extract
1/8 tsp. salt

18
Pour cream directly into cream can. Add sugar, chocolate
flavoring, vanilla, cinnamon, and salt. Stir with wooden
spoon or plastic spatula until sugar dissolves.
RECIPE FOR MAPLE WALNUT ICE CREAM
Pour cream directly into cream can. Add sugar, maple
extract, and salt. Stir with wooden spoon or plastic spatula
2 cups heavy cream (1 pint)
2 cups light cream (1 pint)
1 cup sugar
1/2 cup Hershey's Chocolate Syrup
or 6 Tbsp. Hershey's Cocoa
1-1/2 tsp. pure vanilla extract
1/4 tsp. ground cinnamon
1/8 tsp. salt
2 cups heavy cream (1 pint)
2 cups light cream (1 pint)
1 cup sugar
1 Tbsp. maple extract
1/8 tsp. salt
1/2 to 1 cup chopped walnuts (as desired)

19
until sugar dissolves. Fold walnuts into the mixture after
processing but before hardening.
RECIPE FOR COFFEE ICE CREAM
Pour cream directly into cream can. Add instant coffee and
stir to blend. Add sugar and salt. Stir with wooden spoon or
plastic spatula until sugar dissolves.
RECIPE FOR PISTACHIO ICE CREAM
2 cups heavy cream (1 pint)
2 cups light cream (1 pint)
3 Tbsp. instant powdered coffee
1 cup sugar
1/8 tsp. salt
2 cups heavy cream (1 pint)
2 cups light cream (1 pint)
1 cup sugar
1 Tbsp. almond extract
1/8 tsp. salt
3 drops green food coloring
Table of contents
Other Waring Ice Cream Maker manuals