WARRIOR 56434 User manual

Visit our website at: http://www.harborfreight.com
1500 WATT DUAL TEMPERATURE
HEAT GUN
56434
Owner’s Manual & Safety Instructions
Save This Manual Keep this manual for the safety warnings and precautions, assembly,
operating, inspection, maintenance and cleaning procedures. Write the product’s serial number in the back
of the manual (or month and year of purchase if product has no number). Keep this manual and the receipt
in a safe and dry place for future reference. 23g
When unpacking, make sure that the product is intact
and undamaged. If any parts are missing or broken,
please call 1-888-866-5797 as soon as possible.
Copyright©2020 by Harbor Freight Tools®. All rights reserved.
No portion of this manual or any artwork contained herein may be reproduced in
any shape or form without the express written consent of Harbor Freight Tools.
Diagrams within this manual may not be drawn proportionally. Due to continuing
improvements, actual product may differ slightly from the product described herein.
Tools required for assembly and service may not be included.
Read this material before using this product.
Failure to do so can result in serious injury.
SAVE THIS MANUAL.

Page 2 For technical questions, please call 1-888-866-5797. Item 56434
SAFETY OPERATION MAINTENANCESETUP
Table of Contents
Safety ......................................................... 2
Specifications ............................................. 8
Setup .......................................................... 8
Operation.................................................... 9
Maintenance.............................................. 10
Warranty .................................................... 12
WARNING SYMBOLS AND DEFINITIONS
This is the safety alert symbol. It is used to alert you to potential
personal injury hazards. Obey all safety messages that
follow this symbol to avoid possible injury or death.
Indicates a hazardous situation which, if not avoided,
will result in death or serious injury.
Indicates a hazardous situation which, if not avoided,
could result in death or serious injury.
Indicates a hazardous situation which, if not avoided,
could result in minor or moderate injury.
Addresses practices not related to personal injury.
IMPORTANT SAFETY INSTRUCTIONS
READ THESE INSTRUCTIONS
Heat Gun Safety Warnings
WARNING: Extreme care should be taken when
stripping paint. The peelings, residue and vapors
of paint may contain lead, which is poisonous.
Any pre-1977 paint may contain lead and paint
applied to homes prior to 1950 is likely to contain
lead. Once deposited on surfaces, hand-to-mouth
contact can result in the ingestion of lead. Exposure
to even low levels of lead can cause irreversible
brain and nervous system damage; young and
unborn children are particularly vulnerable. Before
beginning any paint removal process you should
determine whether the paint you are removing
contains lead. This can be done by your local health
department or by a professional who uses a paint
analyzer to check the lead content of the paint to be
removed. LEAD-BASED PAINT SHOULD ONLY BE
REMOVED BY A PROFESSIONAL AND SHOULD
NOT BE REMOVED BY USING A HEAT GUN.
Persons removing paint should follow these guidelines:
1. Move the work piece outdoors.
If this is not possible, keep the work area well
ventilated. Open the windows and put an
exhaust fan in one of them. Be sure the fan
is moving the air from inside to outside.
2. Remove or cover any carpets, rugs, furniture,
clothing, cooking utensils and air ducts.
3. Place drop cloths in the work area to catch any
paint chips or peelings. Wear protective clothing
such as extra work shirts, overalls and hats.
4. Work in one room at a time. Furnishings should be
removed or placed in the center of the
room and covered. Work areas should
be sealed off from the rest of the dwelling
by sealed doorways with drop cloths.

Page 3For technical questions, please call 1-888-866-5797.Item 56434
SAFETYOPERATIONMAINTENANCE SETUP
5. Children, pregnant or potentially pregnant
women, and nursing mothers should not
be present in the work area until the work
is done and all clean up is complete.
6. Wear a dust respirator mask or a dual filter
(dust and fume) respirator mask which has been
approved by the Occupational Safety and Health
Administration (OSHA), the National Institute
of Safety and Health (NIOSH), or the United
States Bureau of Mines. These masks and
replaceable filters are readily available at major
hardware stores. Make sure the mask fits. Beards
and facial hair may keep masks from sealing
properly. Change filters often. DISPOSABLE
PAPER MASKS ARE NOT ADEQUATE.
7. Use caution when operating the Heat Gun.
Keep the Heat Gun moving as excessive
heat will generate fumes which can
be inhaled by the operator.
8. Keep food and drink out of the work area.
Wash hands, arms and face and
rinse mouth before eating or drinking.
Do not smoke or chew tobacco in the work area.
9. Clean up all removed paint and
dust by wet mopping the floors.
Use a wet cloth to clean all walls, sills and any
other surface where paint or dust is clinging.
DO NOT SWEEP, DRY DUST OR VACUUM.
Use a high phosphate detergent or trisodium
phosphate (TSP) to wash and mop areas.
10. At the end of each work session put the paint
chips and debris in a double plastic bag, close it
with tape or twist ties and dispose of properly.
11. Remove protective clothing and work shoes in
the work area to avoid carrying dust into the rest
of the dwelling. Wash work clothes separately.
Wipe shoes off with a wet rag that is then
washed with the work clothes. Wash hair
and body thoroughly with soap and water.
12. Hidden areas behind walls, ceilings, floors, soffit
boards, and other panels may contain flammable
materials that could be ignited by the heat gun
when working in these locations. The ignition
of these materials may not be readily apparent
and could result in property damage and injury
to persons. When working in these locations,
keep the heat gun moving in a back-and-forth
motion. Lingering or pausing in one spot could
ignite the panel or the material behind it.
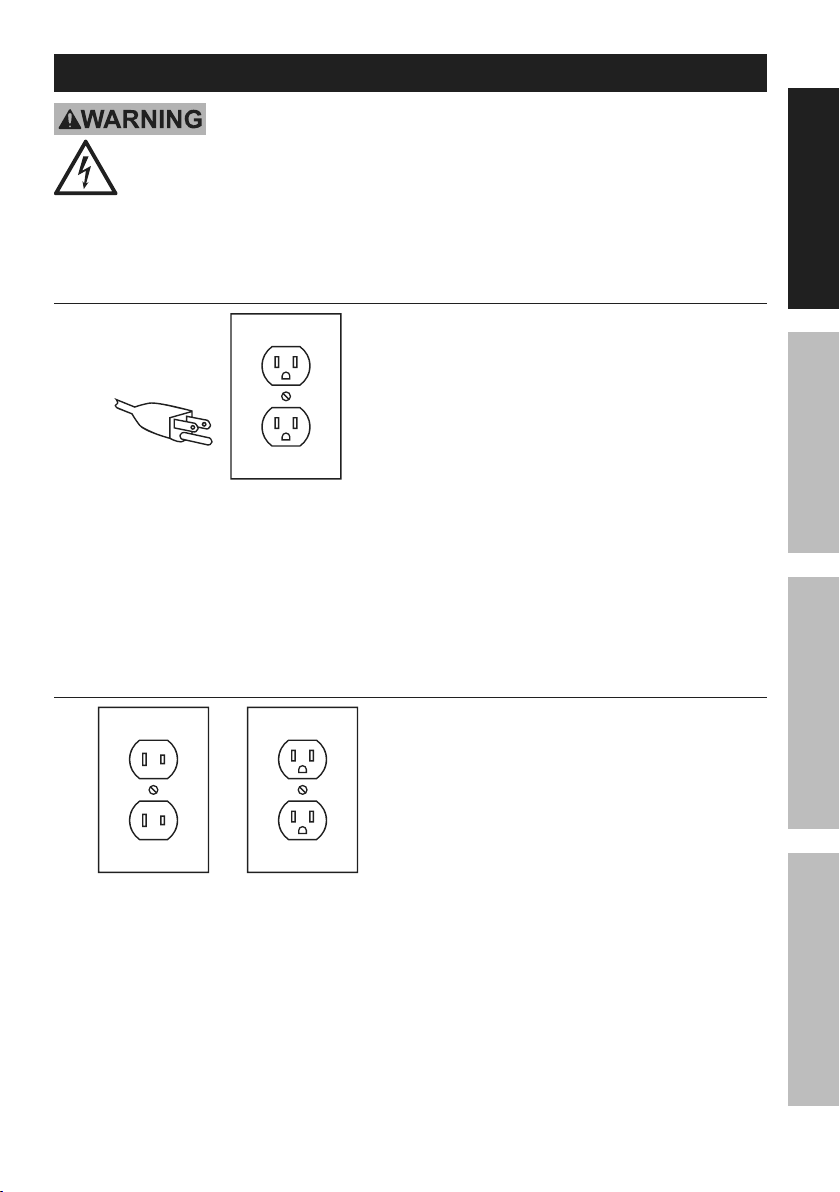
13. CAUTION – To reduce the risk of
electric shock, keep extension cord
connection dry and off the ground.
14. When working with plastics, varnish, or
similar materials, gases develop that are
easily flammable and can lead to explosions.
Be prepared for flames to develop and keep
suitable fire extinguishing means at hand.
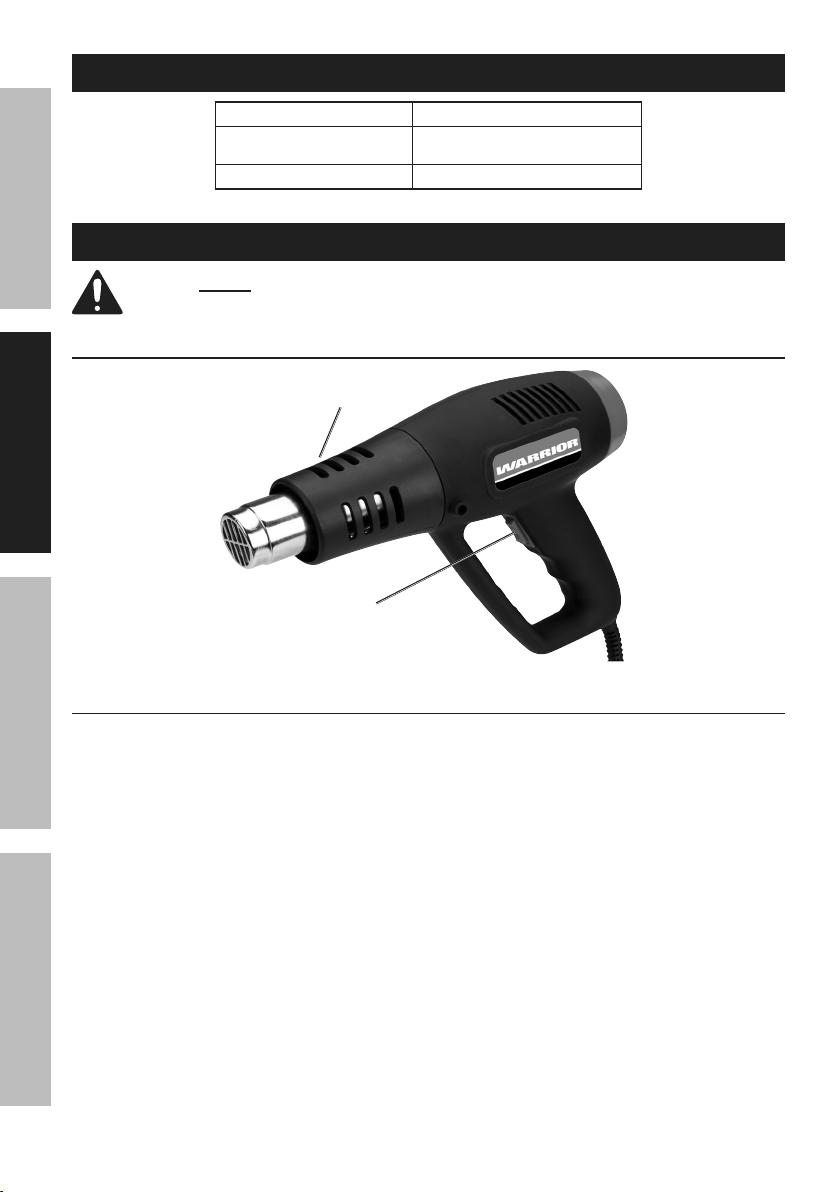
15. The Nozzle becomes very hot. Do not lay the
Heat Gun on flammable surfaces when operating
the Gun or immediately after turning the Gun off.
Always set the Heat Gun on a flat, level surface
so that the Nozzle tip is directed upwards
and away from the supporting surface.
16. Do not use the Heat Gun near flammable materials.
17. Do not point the Heat Gun at people or
animals. The intense heat can injure them.
18. Do not touch the tube of the heating
element or the Nozzle when they are hot.
They will be hot enough to cause burns
during use and for some time afterwards.
19. Do not use the Heat Gun on glass.
20. Do not use the Heat Gun as a hair dryer.
21. Do not heat up materials that can be
damaged by high temperatures.
Personal safety
1. Only use safety equipment that has been approved
by an appropriate standards agency. Unapproved
safety equipment may not provide adequate
protection. Eye protection must be ANSI-approved
and breathing protection must be NIOSH-approved
for the specific hazards in the work area.
2. Avoid unintentional starting.
Prepare to begin work before turning on the tool.
3. Do not leave the tool unattended when it is plugged
into an electrical outlet. Turn off the tool, and
unplug it from its electrical outlet before leaving.
4. This product is not a toy.
Keep it out of reach of children.
5. People with pacemakers should consult their
physician(s) before use. Electromagnetic fields in
close proximity to heart pacemaker could cause
pacemaker interference or pacemaker failure.
In addition, people with pacemakers should:
• Avoid operating alone.
• Do not use with Power Switch locked on.
• Properly maintain and inspect to avoid
electrical shock.
• Properly ground power cord.
Ground Fault Circuit Interrupter (GFCI)
should also be implemented – it prevents
sustained electrical shock.

Page 4 For technical questions, please call 1-888-866-5797. Item 56434
SAFETY OPERATION MAINTENANCESETUP
6. The warnings, precautions, and instructions
discussed in this instruction manual cannot
cover all possible conditions and situations
that may occur. It must be understood by the
operator that common sense and caution are
factors which cannot be built into this product,
but must be supplied by the operator.
Service
1. Have your power tool serviced by a
qualified repair person using only identical
replacement parts. This will ensure that
the safety of the power tool is maintained.
2. Maintain labels and nameplates on
the tool. These carry important safety
information. If unreadable or missing, contact
Harbor Freight Tools for a replacement.
SAVE THESE INSTRUCTIONS.

Page 5For technical questions, please call 1-888-866-5797.Item 56434
SAFETYOPERATIONMAINTENANCE SETUP
Grounding
TO PREVENT ELECTRIC SHOCK AND DEATH FROM
INCORRECT GROUNDING WIRE CONNECTION:
Check with a qualified electrician if you are in doubt as to whether the outlet is properly
grounded. Do not modify the power cord plug provided with the tool. Never remove the
grounding prong from the plug. Do not use the tool if the power cord or plug is damaged. If damaged,
have it repaired by a service facility before use. If the plug will not fit the outlet, have a proper outlet
installed by a qualified electrician.
Grounded Tools: Tools with Three Prong Plugs
3-Prong Plug and Outlet
1. Tools marked with “Grounding Required” have
a three wire cord and three prong grounding
plug. The plug must be connected to a properly
grounded outlet. If the tool should electrically
malfunction or break down, grounding provides
a low resistance path to carry electricity
away from the user, reducing the risk of
electric shock. (See 3-Prong Plug and Outlet.)
2. The grounding prong in the plug is connected
through the green wire inside the cord to the
grounding system in the tool. The green wire
in the cord must be the only wire connected to
the tool’s grounding system and must never
be attached to an electrically “live” terminal.
(See 3-Prong Plug and Outlet.)
3. The tool must be plugged into an appropriate outlet,
properly installed and grounded in accordance
with all codes and ordinances. The plug and outlet
should look like those in the preceding illustration.
(See 3-Prong Plug and Outlet.)
Double Insulated Tools: Tools with Two Prong Plugs
Outlets for 2-Prong Plug
1. Tools marked “Double Insulated” do not
require grounding. They have a special
double insulation system which satisfies
OSHA requirements and complies with
the applicable standards of Underwriters
Laboratories, Inc., the Canadian Standard
Association, and the National Electrical Code.
2. Double insulated tools may be used in either of the
120 volt outlets shown in the preceding illustration.
(See Outlets for 2-Prong Plug.)

Page 6 For technical questions, please call 1-888-866-5797. Item 56434
SAFETY OPERATION MAINTENANCESETUP
Extension Cords
1. Grounded tools require a three
wire extension cord. Double Insulated tools can
use either a two or three wire extension cord.
2. As the distance from the supply outlet increases,
you must use a heavier gauge extension cord.
Using extension cords with inadequately sized wire
causes a serious drop in voltage, resulting in loss
of power and possible tool damage. (See Table A.)
3. The smaller the gauge number of the wire, the
greater the capacity of the cord. For example,
a 14 gauge cord can carry a higher current
than a 16 gauge cord. (See Table A.)
4. When using more than one extension cord
to make up the total length, make sure
each cord contains at least the minimum
wire size required. (See Table A.)
5. If you are using one extension cord for more
than one tool, add the nameplate amperes
and use the sum to determine the required
minimum cord size. (See Table A.)
6. If you are using an extension cord outdoors, make
sure it is marked with the suffix “W-A” (“W” in
Canada) to indicate it is acceptable for outdoor use.
7. Make sure the extension cord is properly wired
and in good electrical condition. Always replace
a damaged extension cord or have it repaired
by a qualified electrician before using it.
8. Protect the extension cords from sharp objects,
excessive heat, and damp or wet areas.
TABLE A: RECOMMENDED MINIMUM WIRE
GAUGE FOR EXTENSION CORDS* (120/240 VOLT)
NAMEPLATE
AMPERES
(at full load)
EXTENSION CORD
LENGTH
25´ 50´ 75´ 100´ 150´
0 – 2.0 18 18 18 18 16
2.1 – 3.4 18 18 18 16 14
3.5 – 5.0 18 18 16 14 12
5.1 – 7.0 18 16 14 12 12
7.1 – 12.0 18 14 12 10 -
12.1 – 16.0 14 12 10 - -
16.1 – 20.0 12 10 - - -
* Based on limiting the line voltage drop to five volts at
150% of the rated amperes.

Page 7For technical questions, please call 1-888-866-5797.Item 56434
SAFETYOPERATIONMAINTENANCE SETUP
Symbology
Double Insulated
VVolts
~Alternating Current
AAmperes
n0xxxx/min. No Load Revolutions
per Minute (RPM)
WARNING marking concerning Risk
of Eye Injury. Wear ANSI-approved
safety goggles with side shields.
Read the manual before
set-up and/or use.
WARNING marking
concerning Risk of Fire.
Do not cover ventilation ducts.
Keep flammable objects away.
WARNING marking concerning
Risk of Electric Shock.
Properly connect power cord
to appropriate outlet.

Page 8 For technical questions, please call 1-888-866-5797. Item 56434
SAFETY OPERATION MAINTENANCESETUP
Specifications
Electrical Rating 120V~/ 60Hz / 1500W / Class II
Heat Temperature Low Setting: 700° F (Maximum)
High Setting: 1000° F (Maximum)
Adjustable Heat Setting Type Three-Way Rocker Switch
Setup - Before Use:
Read the ENTIRE IMPORTANT SAFETY INSTRUCTIONS section at the beginning of this
manual including all text under subheadings therein before set up or use of this product.
Functions
Barrel
Cover
Power Switch
I – LOW
0 – OFF
II – HIGH
Product Applications
When observing safety rules, Heat Gun is designed
for applications with hot air listed below:
1. Shrinking of heat shrink tubing, solder connectors
and solder terminals, packaging and electrical
components.
2. Deforming of articles made from acrylic, PVC, and
polystyrene tubing, plates, and profiles as well as
most woods.
3. Welding of thermoplastic polymer, flooring materials
of PVC and linoleum, PVC-coated fabric, tarpaulins
and foils.
4. Soldering of tin, special silver solder, SMD
elements, cable lugs, and for loosening soldered
connections.
5. Paint removal. Removal of old and even thick
coatings of oil paint, varnish, and synthetic plaster.
6. Drying color shade samples, filter, adhesives,
construction joints and stucco forms.
7. Joining adhesives. Large surface gluing with
contact adhesives, activation of pressure sensitive
adhesives, acceleration of bonding processes,
releasing of bonding points (releasing or bonding
edge bond or veneer).
8. Defrosting of icy stairs and steps, door locks,
trunk lids, car doors or water pipes, as well as
for defrosting refrigerators and ice boxes.
9. Disinfection. With the tool set at 1000° Fahrenheit,
animal sites/stables may be disinfected.
Woodworm infestation may be controlled.
CAUTION! TO PREVENT INJURY: Danger
of fire. Do not overheat the wood.

Page 9For technical questions, please call 1-888-866-5797.Item 56434
SAFETYOPERATIONMAINTENANCE SETUP
Operating Instructions
Read the ENTIRE IMPORTANT SAFETY INSTRUCTIONS section at the beginning of this
manual including all text under subheadings therein before set up or use of this product.
TO PREVENT SERIOUS INJURY FROM ACCIDENTAL OPERATION:
Make sure that the Power Switch is in the off-position and unplug the tool from
its electrical outlet before performing any procedure in this section.
Workpiece and Work Area Set Up
1. Designate a work area that is clean and well lit.
The work area must not allow access by children
or pets to prevent distraction and injury.
2. Route the power cord along a safe route to reach
the work area without creating a tripping hazard or
exposing the power cord to possible damage. The
power cord must reach the work area with enough
extra length to allow free movement while working.
3. Secure loose workpieces using a vise or clamps
(not included) to prevent movement while working.
4. There must not be objects, such as utility lines,
nearby that will present a hazard while working.
5. Remove all flammable and heat sensitive
materials from the work area.
6. Plan an insulated, non-flammable surface
for the gun to cool down on after use.
7. Keep multiple class ABC fire extinguishers
readily accessible while working
and while workpiece cools.
General Instructions for Use
1. Make sure Power Switch is in the “0”
off-position, then plug in tool.
2. To turn on Heat Gun, set Power Switch to “l”or “lI”.
• Switch “l” - Low temperature position (700°
Fahrenheit maximum). Use for mild heating
applications, e.g., heat shrink tube, heat
shrink bag, plastic bending, shaping and
welding, and removing old paint coating.
• Switch “lI” - High temperature position
(1000° Fahrenheit maximum). Use for intense
heating applications, e.g., frozen water pipe,
defrosting refrigerator, and metal welding.
3. Allow Heat Gun one minute to build
up to the desired heat level.
WARNING! TO PREVENT SERIOUS INJURY:
Do not leave the Heat Gun unattended
while pointed at surfaces or objects.
WARNING! TO PREVENT SERIOUS
INJURY: Do not touch work area with the
Heat Gun; it could scorch or ignite.
3. To turn off Heat Gun, set Power Switch
to “l”, then set Power Switch to “0”(This
method cools down the Heating Element
properly to extend Heat Gun life).
4. To prevent accidents, unplug tool after
use. Allow Heat Gun to cool down on an
insulated, non-flammable surface.
WARNING! TO PREVENT SERIOUS INJURY: Do
not leave work area until workpiece has cooled.
Be alert for indications of concealed fire.
5. Clean, then store the tool indoors
out of children’s reach.

Page 10 For technical questions, please call 1-888-866-5797. Item 56434
SAFETY OPERATION MAINTENANCESETUP
Maintenance and Servicing Instructions
Procedures not specifically explained in this manual must
be performed only by a qualified technician.
TO PREVENT SERIOUS INJURY FROM ACCIDENTAL OPERATION:
Make sure that the Power Switch is in the off-position and unplug the tool from
its electrical outlet before performing any procedure in this section.
TO PREVENT SERIOUS INJURY FROM TOOL FAILURE:
Do not use damaged equipment. If abnormal noise or vibration
occurs, have the problem corrected before further use.
Cleaning, Maintenance, and Lubrication
1. CONFIRM tool is disconnected from power
outlet and has completely cooled.
2. BEFORE EACH USE, inspect the general
condition of the tool. Check for:
• loose hardware,
• misalignment or binding of moving parts,
• damaged cord/electrical wiring,
• cracked or broken parts, and
• any other condition that may
affect its safe operation.
3. AFTER USE, wipe external surfaces of the
tool with clean cloth. Do not use solvents.
4. CAUTION! TO PREVENT INJURY:All
maintenance, service, and repairs not
mentioned in this manual must only be
performed by a qualified service technician.
5. WARNING! TO PREVENT SERIOUS
INJURY: If the plug or the supply cord of this
power tool is damaged, it must be replaced
only by a qualified service technician.

Page 11For technical questions, please call 1-888-866-5797.Item 56434
SAFETYOPERATIONMAINTENANCE SETUP
Troubleshooting
Problem Possible Causes Likely Solutions
Heat Gun will
not turn ON
1. Power Switch set at “0”.
2. No power at outlet.
3. Cord not connected.
4. Internal damage or failure.
1. Turn Power Switch to “l” or “ll”.
2. Check power at outlet.
3. Check that cord is plugged in.
4. Have technician service tool.
Unsatisfactory results 1. Improper heat setting
2. Improper extension cord.
1. Adjust heat setting (“l” or “ll”) for correct application.
2. Eliminate use of extension cord. If an extension
cord is needed, use one with the proper diameter
for its length and load. See Extension Cords
in Grounding section on page 5.
Follow all safety precautions whenever diagnosing or servicing the tool.
Disconnect power supply before service.
Record Product’s Serial Number Here:
Note: If product has no serial number, record month and year of purchase instead.
Note: Replacement parts may be available for this item.
Visit harborfreight.com/parts for a list of in stock parts. Reference UPC 193175516930.

26677 Agoura Road • Calabasas, CA 91302 • 1-888-866-5797
Limited 90 Day Warranty
Harbor Freight Tools Co. makes every effort to assure that its products meet high quality and durability
standards, and warrants to the original purchaser that this product is free from defects in materials
and workmanship for the period of 90 days from the date of purchase. This warranty does not apply to
damage due directly or indirectly, to misuse, abuse, negligence or accidents, repairs or alterations outside
our facilities, criminal activity, improper installation, normal wear and tear, or to lack of maintenance.
We shall in no event be liable for death, injuries to persons or property, or for incidental, contingent,
special or consequential damages arising from the use of our product. Some states do not allow the
exclusion or limitation of incidental or consequential damages, so the above limitation of exclusion
may not apply to you. THIS WARRANTY IS EXPRESSLY IN LIEU OF ALL OTHER WARRANTIES,
EXPRESS OR IMPLIED, INCLUDING THE WARRANTIES OF MERCHANTABILITY AND FITNESS.
To take advantage of this warranty, the product or part must be returned to us with transportation charges
prepaid. Proof of purchase date and an explanation of the complaint must accompany the merchandise.
If our inspection verifies the defect, we will either repair or replace the product at our election or we may
elect to refund the purchase price if we cannot readily and quickly provide you with a replacement. We will
return repaired products at our expense, but if we determine there is no defect, or that the defect resulted
from causes not within the scope of our warranty, then you must bear the cost of returning the product.
This warranty gives you specific legal rights and you may also have other rights which vary from state to state.
Other manuals for 56434
1
Table of contents
Other WARRIOR Power Tools manuals
Popular Power Tools manuals by other brands

Vynckier
Vynckier HOLZCRAFT DKS 530 Vario operating manual

Stanley
Stanley Fatmax FMC608 Original instructions

Garden Gear
Garden Gear D2939 instruction manual

West Industries
West Industries LaserLine instruction manual

Stanley
Stanley STRR1200 Original instructions

Hilti
Hilti TE 30-A36 Original operating instructions