Wasp wdt60 User manual

06/14
© 2014 Wasp Barcode Technologies. All rights reserved.
Logo of Wasp and Wasp ‘bug’ are registered
trademarks.
WDT60™
User’s Manual
Personal Digital Assistant (PDA)
1400 10th Street
Plano, TX 75074
Telephone: 866-547-9277
Fax: 214-547-4101
Wasp Barcode Technologies S.r.l.

Wasp Barcode Technologies
1400 10th Street
Plano, TX 75074
Telephone: 866-547-9277
Fax: 214-547-4101
©2013-2014 Wasp Barcode Technologies
An Unpublished Work - All rights reserved. No part of the contents of this documentation or
the procedures described therein may be reproduced or transmitted in any form or by any
means without prior written permission of Wasp Barcode Technologies or its subsidiaries or
affiliates ("Wasp”). Owners of Wasp products are hereby granted a non-exclusive, revocable
license to reproduce and transmit this documentation for the purchaser's own internal
business purposes. Purchaser shall not remove or alter any proprietary notices, including
copyright notices, contained in this documentation and shall ensure that all notices appear
on any reproductions of the documentation. Should future revisions of this manual be
published, you can acquire printed versions by contacting your Wasp representative.
Electronic versions may either be downloadable from the Wasp Barcode Technologies
website (www.waspbarcode.com) or provided on appropriate media. If you visit our website
and would like to make comments or suggestions about this or other Wasp publications,
please let us know via the "Contact " page.
Disclaimer
Wasp Barcode Technologies (“Wasp”) reserves all rights with respect to its trademarks,
service marks, logos, and other indicia ("Marks"). Any unauthorized use of any Wasp-owned
Mark, or any use of a mark that is confusingly similar to, or likely to cause confusion with, an
Wasp-owned Mark, would constitute infringement of Wasp’s exclusive trademark rights.
Logo of Wasp and Wasp ‘bug’ are registered trademarks.
WDT60 and the WDT60 logo are registered trademarks of Wasp Barcode Technologies. All
other brand and product names mentioned herein are for identification purposes only and
may be trademarks or registered trademarks of their respective owners.
Patents
This product is covered by one or more of the following patents:
Design patents: EP001711946, USD633502, ZL201030189483.7
Utility patents: EP0681257B1.

iii
CONTENTS
REFERENCES .............................................................................................v
Conventions.................................................................................................. v
Reference Documentation ............................................................................ v
Services and Support.................................................................................... v
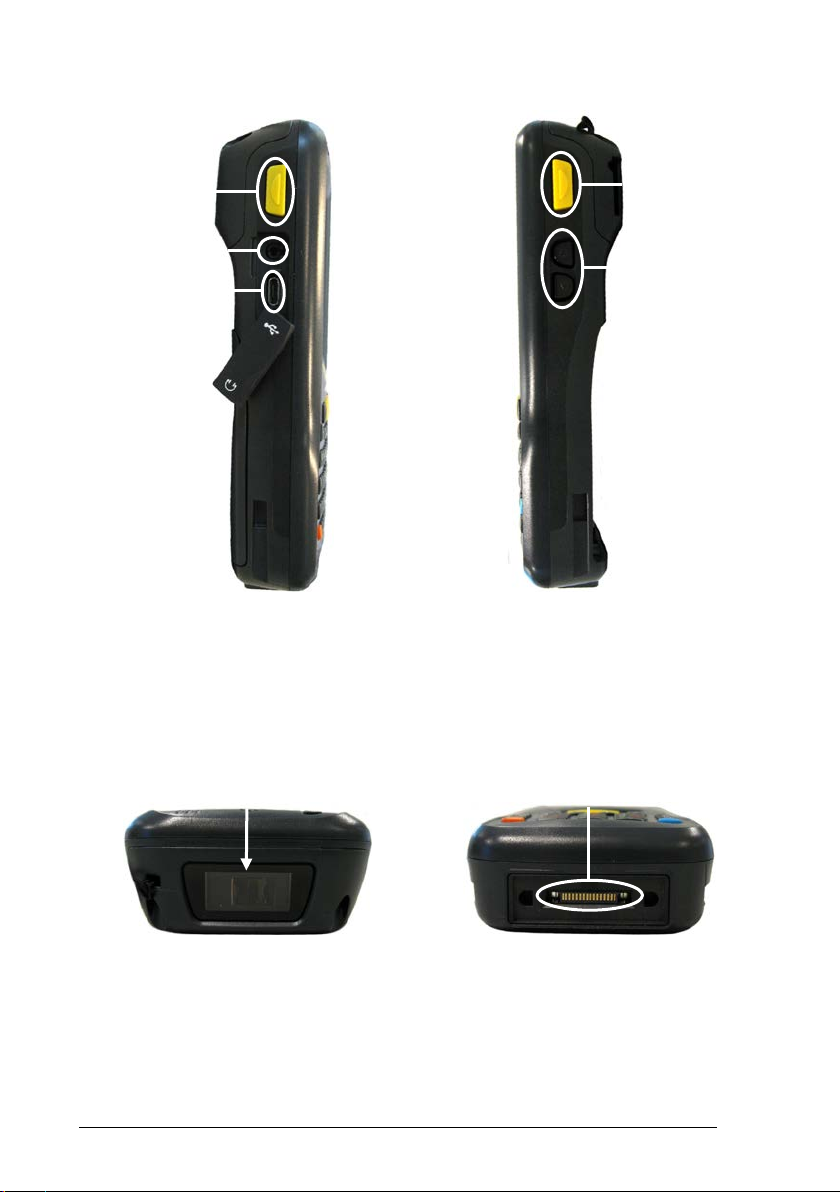
GENERAL VIEW .........................................................................................vi
1INTRODUCTION ..........................................................................................1
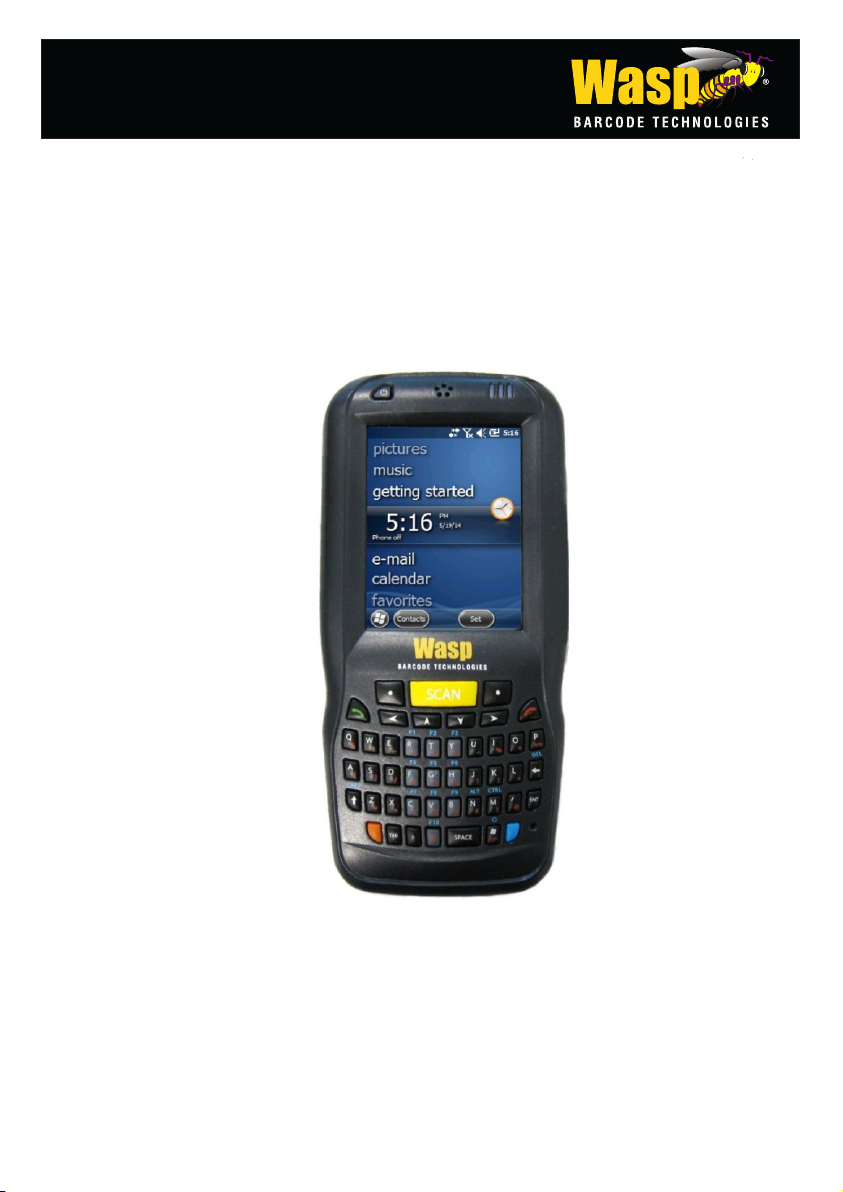
1.1 WDT60 Description.......................................................................................1
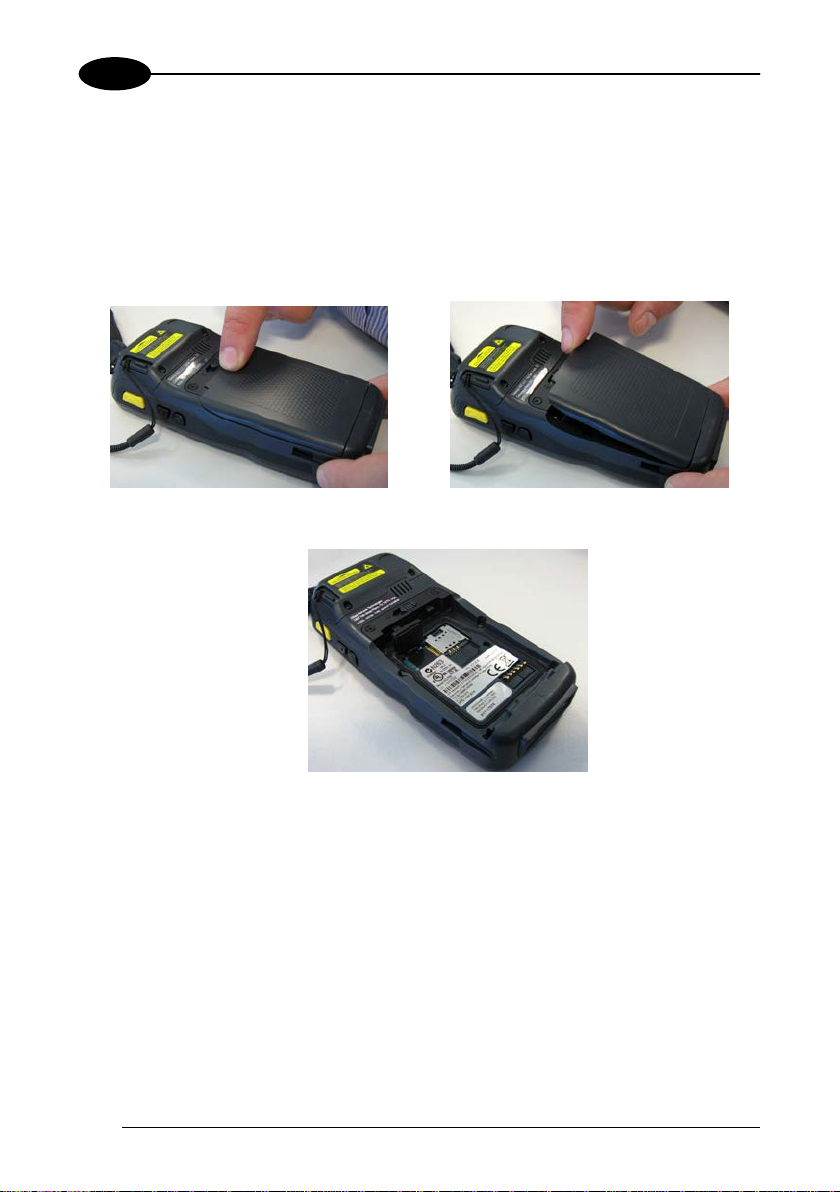
1.2 Inserting a MicroSD Card..............................................................................2
1.2.1 Removing the MicroSD Card ........................................................................4
2BATTERIES AND MAINTENANCE .............................................................5
2.1 Charging the Battery Pack............................................................................5
2.2 Replacing the Battery Pack...........................................................................8
2.3 Cleaning the PDA .......................................................................................11
3CONNECTIONS .........................................................................................12
3.1 USB Connection .........................................................................................12
3.2 Connection to USB peripherals...................................................................14
3.3RS232 Connection......................................................................................17
3.4 WLAN Connection ......................................................................................19
3.5 WPAN Connections ....................................................................................21
3.6 Wireless and Radio Frequencies Warnings................................................23
4USE AND FUNCTIONING..........................................................................25
4.1 Startup ........................................................................................................25
4.1.1 Using the Stylus..........................................................................................26
4.2 Windows Embedded Handheld Welcome Wizard.......................................27
4.3 Data Capture...............................................................................................28
4.3.1 Laser Data Capture.....................................................................................29
4.4 Description of the Keys...............................................................................30
4.4.1 Alphanumeric Keyboard..............................................................................30
4.4.2 Numeric Keyboard......................................................................................31
4.4.3 Resetting the WDT60..................................................................................33
4.5 Status Indicators.........................................................................................35
4.5.1 LED Status..................................................................................................35
4.5.2 Taskbar.......................................................................................................36
4.6 Settings....................................................................................................... 37
4.6.1 Data Capture Configuration........................................................................38
Decoding Configuration Pages ...................................................................38
4.6.2 Buttons........................................................................................................46
4.6.3 Quick Buttons..............................................................................................47
4.6.4 Triggers.......................................................................................................49

iv
4.6.5 Application Switcher....................................................................................50
4.6.6 Wireless Communications...........................................................................51
4.6.7 Stylus Calibration........................................................................................56
4.6.8 Audio Settings.............................................................................................58
4.7 Connecting to Other Computers .................................................................61
4.7.1 Windows Mobile® Device Center................................................................61
4.7.2 Bluetooth® Manager Device Setup.............................................................62
4.8 WASP Desktop Utility..................................................................................70
4.8.1 Administrative Options (Admin tab).............................................................71
4.8.2 Locked Web Browser Options (LockedWeb tab) ........................................74
4.8.3 Status Icons Options (Status Tab)..............................................................79
4.8.4 Windows Controls.......................................................................................80
4.8.5 AppSelector Options (AppSelect tab)..........................................................82
4.9 AppSelector (Application Selector) .............................................................86
4.10 Locked Web Browser..................................................................................87
4.10.1 Locked Web Browser Special Meta-tags ....................................................89
4.11 Autostart......................................................................................................93
4.11.1 Installing CAB Files..................................................................................... 93
4.11.2 How AutoStart Uses Wceload.....................................................................94
4.11.3 Interactive CAB Install.................................................................................95
4.11.4 Autostart.ini................................................................................................. 95
5TECHNICAL FEATURES.........................................................................101
5.1 Technical Data..........................................................................................101
5.2 Reading Diagrams....................................................................................105
6TEST CODES........................................................................................... 106
SAFETY REGULATIONS......................................................................... 110
General Safety Rules................................................................................110
Power Supply............................................................................................110
Laser Safety..............................................................................................111
LED Class................................................................................................. 117
Radio Compliance.....................................................................................118
Bluetooth® Approval.................................................................................118
FCC Compliance.......................................................................................120
RF Exposure Information (SAR) ...............................................................121
Industry Canada Compliance....................................................................122
SAR Compliance.......................................................................................123
WEEE Compliance ...................................................................................124
GLOSSARY..............................................................................................126
INDEX.......................................................................................................130

v
REFERENCES
CONVENTIONS
This manual uses the following conventions:
“User” refers to anyone using an WDT60 PDA.
“PDA” and "WDT60" refer to WDT60 PDA.
“You” refers to the System Administrator or Technical Support person using this
manual to install, configure, operate, maintain or troubleshoot an WDT60 PDA.
“Single Dock” refers to the WDT60 Single Slot Dock.
The label artworks may be only a draft. Refer to the product labels for more precise
information.
REFERENCE DOCUMENTATION
For further information regarding WDT60 refer to the SDK Help on-Line.
SERVICES AND SUPPORT
Wasp provides several services as well as technical support through its website.
Please check our website at: www.waspbarcode.com.

1
vi
GENERAL VIEW
A) Color Display
B) ON/OFF Power Key
C) Receiver
D) LEDs
E) Front Scan Key
F) Keyboard
G) Microphone
H) Telescope Stylus (not included in
the box, please order it separately)
I) Laser Safety Label
J) Loudspeaker
K) Product Label
L) MicroSD Card Slot (under battery)
M) Reset Key (under battery)
N) Guitar Pick
H
A
E
F
C
B
D
G
N
I
J
L
K
M

vii
O) Side Scan Key (left)
P) Headset Connector
Q) Micro-USB Port for supplying power
and data transfer (host/slave)
R) Side Scan Key (right)
S) Up/down Volume Keys
T) Data Capture Window U) Handylink™ Connector (host/slave)
T
U
O
P
Q
R
S

1
This page intentionally left blank

INTRODUCTION
1
1
1 INTRODUCTION
1.1 WDT60 DESCRIPTION
The WDT60 contains the most innovative technical features, providing them to the
user in an ergonomic and elegant form factor. The accelerometer, the vibrator alert
and the 3 LEDs help to not waste time in the configuration and usage of the product.
Working with the WDT60 becomes an easy pleasure.
Great aesthetics do not put the robustness on a second level. The WDT60 has been
designed for survival in the industrial environmental, outside or inside the four walls.
The reliability of the product continues with the architecture chosen: an 806MHz
processor working with 256 MB of RAM and 512 MB of Flash. A Micro SD card slot
supporting micro SDHC storage cards provides for virtually unlimited storage space.
The WDT60 has been equipped with a 1D laser scanner.
The WDT60 wireless technology provides two radios with internal antennas:
Bluetooth® EDR for fast and close data connections and 802.11 b/g/n Cisco CCX v4
certified Wi-Fi for quick wireless network access.
The WDT60 integrates the latest Windows Embedded Handheld 6.5, tailored for
mobile devices.
Rechargeable battery packs are not initially fully charged. Therefore
the first operation to perform is to charge them. See paragraph 2.1.
NOTE

1WDT60™
2
1
1.2 INSERTING A MICROSD CARD
WDT60 supports microSD memory cards. To access the microSD card slot and
insert the card, proceed as follows:
1. Turn off the WDT60.
2. Shift the battery latch to the left and remove the battery pack:
3. Open the card slot and insert the microSD card with the written part downward:

INTRODUCTION
3
1
4. Shift the card to the right to lock it into the cardholder; close the card slot:
5. First insert the bottom (contacts) and then the upper side of the battery pack into
the slot. Press until the battery latch clicks.

1WDT60™
4
1
1.2.1 Removing the MicroSD Card
To remove the microSD card, follow the steps above to access the microSD card
cage under the battery, and remove it from the microSD slot.
Follow proper ESD pr
ecautions to avoid damaging the
microprocessors in the WDT60 or the microSD card itself.
Proper ESD precautions include, but are not limited to, working on
an ESD mat and ensuring that the operator is properly grounded.
Do not force the card. If you feel resistance, remove the card, check
the orientation, and reinsert it.
Do not use the microSD card slot for any other accessories.
CAUTION

BATTERIES AND MAINTENANCE
5
2
2 BATTERIES AND MAINTENANCE
Rechargeable backup batteries and battery packs are not initially
fully charged. Therefore the initial operation to perform is to charge
them. See below.
NOTE
Annual replacement of rechargeable battery pack avoids possible
risks or abnormalities and ensures maximum performance.
CAUTION
2.1 CHARGING THE BATTERY PACK
The battery pack autonomy varies according to many factors, such
as the frequency of barcode scanning, RF usage, battery life,
storage, environmental conditions, etc.
NOTE
The battery icon on the Taskbar indicates when the battery pack is low.
It is possible to recharge the battery pack by connecting the power supply directly to
the WDT60.
Alternatively, it is also possible to recharge the battery pack by using a Single Cradle.

1WDT60™
6
2
Moreover recharging is possible by USB direct connection with the host computer,
but with longer charging times.
Insert the micro-USB cable output plug into the micro-USB connector
of the WDT60, making sure that the arrow on the plug faces upwards:
NOTE
During the charging process the LED positioned at the right side of the display glows
red constantly. Once the charging process has been completed this LED glows green
constantly.
If the battery pack is removed from the PDA, it can be recharged by inserting it into
the rear slot of a Single Cradle.
Do not use the WDT60 until standard batteries are charged for
minimum 4 hours and extended batteries are charged for minimum 6
hours.
CAUTION
Even if the storage temperature range is wider, in order to achieve
the longest battery life, store the terminal and the spare batteries
between 20 to 30 ºC (68 to 86 ºF).
In order to achieve the maximum charging rate the WDT60 should be
charged beetween 0-40 °C.
Never charge the main device or spare batteries in a closed space
where excessive heat can build up.
NOTE

BATTERIES AND MAINTENANCE
7
2
The battery level may not be displayed correctly for some minutes
after the disconnection if the WDT60 is disconnected from power
supply before the charging cycle is completed.
NOTE
The WDT60 may get warm during charging; this is normal and does
not mean a malfunction.
NOTE
Use only a USB-IF compliant USB port as a charging source.
NOTE

1WDT60™
8
2
2.2 REPLACING THE BATTERY PACK
To correctly replace the battery pack, proceed as follows.
1. Turn off the WDT60.
2. Shift the battery latch to the left and remove the battery pack:
3. Install the new battery pack, first insert the bottom (contacts) and then the upper
side of the battery pack into the slot. Press until the battery latch clicks.

BATTERIES AND MAINTENANCE
9
2
WARNING
Installing, charging and/or any other action should be done by
authorized personnel and following this manual.
The battery pack may get hot, explode, ignite, and/or cause serious
injury if exposed to abusive conditions.
If the battery pack is replaced with an improper type, there is risk of
explosion and/or fire.
Do not place the battery pack in or near a fire or other heat source;
do not place the battery pack in direct sunlight, or use or store the
battery pack inside unventilated areas in hot weather; do not place
the battery pack in microwave ovens, in clothes dryers, in high
pressure containers, on induction cook surfaces or similar devices.
Doing so may cause the battery pack to generate heat, explode or
ignite. Using the battery pack in this manner may also result in a loss
of performance and a shortened life expectancy.
Use only a Wasp approved power supply. The use of an alternative
power supply will void the product warranty, may cause product
damage and may cause heat, an explosion, or fire.
The area in which the units are charged should be clear of debris
and combustible materials or chemicals.
Do not use the battery pack of this terminal to power devices other
than this PDA.
Immediately discontinue use of the battery pack if, while using,
charging or storing the battery pack, the battery pack emits an
unusual smell, feels hot, changes colour or shape, or appears
abnormal in any other way.
Do not short-circuit the battery pack contacts connecting the positive
terminal and negative terminal. This might happen, for example,
when you carry a spare battery pack in your pocket or purse;
accidental short–circuiting can occur when a metallic object such as
a coin, clip, or pen causes direct connection of the contacts of the
battery pack (these look like metal strips on the battery pack). Short–
circuiting the terminals may damage the battery pack or the
connecting object.
Do not apply voltages to the battery pack contacts.
Do not pierce the battery pack with nails, strike it with a hammer,
step on it or otherwise subject it to strong impacts, pressures, or
shocks.

1WDT60™
10
2
WARNING
Do not disassemble or modify (i.e. bend, crush or deform) the battery
pack. The battery pack contains safety and protection devices,
which, if damaged, may cause the battery pack to generate heat,
explode or ignite.
In case of leakage of liquid from the battery, avoid contact with liquid
the skin or eyes. If the contact occurs, immediately wash the affected
area with water and consult a doctor.
Do not solder directly onto the battery pack.
Do not expose the battery pack to liquids.
Avoid any knocks or excessive vibrations. If the device or the battery
is dropped, especially on a hard surface, you should take it to the
nearest Authorised Repair Centre for inspection before continuing to
use it.
Do not replace the battery pack when the device is turned on.
Do not remove or damage the battery pack’s label.
Do not use the battery pack if it is damaged in any part.
Battery pack usage by children should be supervised.
Collect and recycle waste batteries separately from the device in
compliance with European Directive 2006/66/EC, 2011/65,
2002/96/EC and subsequent modifications, with US and China
regulatory laws and regulations about the environment.
In order to guarantee an adequate operating autonomy, when
replacing the battery pack the PDA checks the battery energy level.
If the battery is not sufficiently charged, the WDT60 does not turn on
(when pressing the ON/OFF key).
In this case, either substitute the battery pack with a charged one
(sufficiently charged) or insert the WDT60 into a powered cradle or
plug it into the direct power supply.
NOTE
To maximize battery life, turn off radios when they are not needed.
NOTE

BATTERIES AND MAINTENANCE
11
2
2.3 CLEANING THE PDA
Periodically clean the WDT60 with a slightly dampened cloth.
Do not use alcohol, corrosive products or solvents.

1WDT60™
12
3
3 CONNECTIONS
3.1 USB CONNECTION
You can use a standard micro USB cable or a HandyLink™ cable to directly connect
the WDT60 to a host computer to transfer data through the USB interface.
Key:
A Host computer C WDT60
B Standard Micro USB cable/
HandyLink™ USB Client Cable
Connection through the cable complies to the USB 1.1 standard.
NOTE
Insert the micro-USB cable output plug into the micro-USB connector
of the WDT60, making sure that the arrow on the plug faces upwards:
NOTE
A
B
C
Table of contents
Other Wasp Handheld manuals

Wasp
Wasp WPA1200 User manual

Wasp
Wasp WDT2200 Product information sheet

Wasp
Wasp WPA206 Installation and operation manual

Wasp
Wasp WDT2200 User manual

Wasp
Wasp WPA 1000II User manual

Wasp
Wasp DR4 User manual

Wasp
Wasp DR2 User manual

Wasp
Wasp WDT950 User manual

Wasp
Wasp WDT92 User manual

Wasp
Wasp HC1 User manual