Waspper WR67160 Installation manual

Operation Manuals
WR67160
141cc Petrol Pressure Washer
Donotoperatethisunituntilyouhavereadowner’s
manual.

2
Table of Contents
Important Safety Instruction………………………………………………....Pg.3
Washer specification…………………………………………………………Pg.7
Assembly Instruction…………………………………………………………Pg.7
Operating Instruction…………………………………………………………Pg.7
Explanation…………………………………………………………………...Pg.9
Maintenance…………………………………………………………………..Pg.10
Storage………………………………………………………………………...Pg.10
Trouble Shooting Guide………………………………………………………Pg.11

3
Important Safety Instruction
Safety Symbol Instruction
This manual must be read before beginning installation of the
unit
High Pressure water jets are potentially dangerous if used
incorrectly. In particular, do not direct the water jet towards
people or animals, electrical equipment of the unit itself.
Hazard
Danger Risk of injury or property damage when transporting or storing
What can happen How to prevent it
Fuel or oil can leak or spill and could
result in fire or breathing hazard, serious
injury or death. Fuel or oil leak will
damage carpet, paint or other surfaces in
vehicles or trailers
If pressure washer equipped with fuel shut off
valve, turn the valve to the off position before
transportation to avoid fuel leaks. If pressure
washer is not equipped with a fuel shut-off
valve, drain the fuel from tank before
transportation, only transport fuel in an approved
container, always place pressure washer on a
protective mat when transporting to protect
against damage to vehicle from leaks, remove
pressure washer from vehicle immediately upon
arrival at your destination.
Hazard
Danger Risk of surfaces
What can happen How to prevent it
Contact with hot surfaces, such as engines
exhaust components. Could result in
serious burn.
During operation. Touch only the control
surfaces of the washer pump. Persons under 16
years of age and persons who are not familiar
with the washer must not use the machine. Keep
children away from the washer at all times.

4
Hazard
Danger risk of explosion or fire
What can happen How to prevent it
Spilled petrol and its vapors can become ignited
from cigarette sparks, electrical arcing, exhaust
gases, and hot engine components such as the
silencer.
Heat will expand fuel in the tank which could
result in spillage and possible fire explosion.
Operating the washer pump in an explosive
environment could result in a fire
Inhaling exhaust fumes will cause serious injury
even death!
Silencer exhaust heat can damage painted
surfaces, melt any material sensitive to heat (such
as siding, plastic, rubber, or vinyl) and damage
live plants.
Improperly stored fuel could lead to accidental
ignition; improperly secured fuel could get into
the hands of children or other unqualified
persons.
Use of acid, toxic or corrosive chemical, poisons,
insecticides, or any kind of flammable solvent
with this product could result in serious injury or
death.
Shut off engine and allow it to cool before adding fuel to
the tank.
Move washer pump away from fueling area before
starting engine.
Keep maximum fuel level 10mm below top of tank to
allow for expansion
Operate and fuel equipment in well ventilated zones free
from obstructions, equip zone with fire extinguisher
suitable for gasoline fires.
Operate washer pump in a well ventilated area
Do not use washer in enclosed areas
Never operate unit in a location occupied by humans or
animals.
Always keep washer pump a minimum of five feet away
from surfaces (such as houses, automobiles, or live
plants) that could be damaged from muffler exhaust heat
Store fuel in an approved container in a secure location
away from work area
Do not spray flammable liquids

5
Hazard
Danger Risk of Electrical Shock
What can happen How to prevent it
Spray directed at electrical outlets or
switch, or objects connected to an
electrical circuit, could result in a fatal
electrical shock
Unplug any electrically operated product before
attempting to clean it. Direct spray away from
electric outlets and switches.
Hazard
Danger Risk of fluid injection
What can happen How to prevent it
Your washer operates at fluid pressures and
velocity high enough to penetrate human
and animal flesh, which could result in
amputation or other serious injury. Leaks
caused by loose fittings or damaged hoses
can result in injection injuries. Do no treat
fluid injection as a simple cut! See a
physician immediately
Injuries can result if system pressure is not
reduced before attempting maintenance or
disassembly.
Never place hands in front of nozzle
Direct spray away from self or others
Make sure hose and fittings are tightened and in
good condition. Never hold onto the hose or
fittings during operation.
Do not allow hose to contact muffler
Never attach or remove lance or hose fittings
during while system is pressurized.
To relive system pressure, shut off engine. Turn
off water supply. and pull gun trigger until water
stops flowing.
Use only hose and accessories rated for pressure
higher than your pressure washer’s PSI
Hazard
Danger Risk of injuries from spray
What can happen How to prevent it
High Velocity fluid spray can cause objects
to break. Propelling particles at high speed.
Light or unsecured objects can become
hazardous projectiles.
Always wear approved safety glasses.
Wear protective clothing to protect against
accidental spraying.
Never point lance at people or animals.
Always secure trigger lock when lance is not in
service to protect accidental operation

6
Hazard
Danger Risk of chemical burns
What can happen How to prevent it
Use of acid toxic or corrosive chemical,
poisons, insecticides, or any kind of
flammable solvent with this product could
result in serious injury or death
Do not use acids, petrol kerosene, or any other
flammable materials in this product. Use only
household detergents. Cleaners and degreasers
recommended for use in pressure washer
Hazard
Danger Risk of unsafe operation
What can happen How to prevent it
Unsafe operation of your washer pump
could lead to serious injury or death to you
or others.
Reactive force of spray will cause
gun/wand to move, and could cause the
operator to slip or fall. Or misdirect the
spray. Improper control of gun/lance can
result in injury to self and others
The gun/lance is a powerful cleaning tool
that could look like a toy to a child
Do not use chlorine bleach or any other corrosive
compound
Become familiar with the operation and control
of the pressure washer
Keep operating area clear of all persons, pets and
obstacles
Do not operate the product when fatigued or
under the influence of alcohol or drugs, stay alert
at all times.
Never defeat the safety features of this product
Do not operate machine with missing, broken, or
unauthorized parts.
Never leave lance unattended while unit is
running.
Do not overreach or stand on an unstable
support. Grip gun/lance firmly with both hands.
Expect the gun to kick when triggered.
Keep children away from the washer pump at all
times

7
Washer Specification
Max. Pressure
(PSI/Mpa)
2200/155
Flow (L/min) 7.5L/min
R.P.M. 3200
Power(HP) 3.5
Displacement (CC) 141
Fuel Capacity (L) 0.8L
Dimension (cm) 65*52*53
Assembly Instruction
Step 1. Installing handle assembly
Attach handle assembly to the frame by using two bolts M6x40 and two nuts M6
The engine on this machine is delivered without oil. Add 0.55ltr of Oil before
starting the engine. Operating Instruction
Surface preparation
Before starting any cleaning task, it is important to inspect the area for objects which could create a hazard. Remove
any objects from the area which could be tripped over, such as toys or outdoor furniture. Ensure that all doors and
windows are closed.
Caution:
★ Dirt in the feed water will damage the unit. To avoid this risk, we recommend checking the water filter (located
inside the water inlet)
★ To prolong the life of the unit, it is recommended to rest the unit 5 minutes after every 30 minutes of use.
Water Supply (Cold Water Only)
★ Flow rate of water supply must not fall below 19 LPM (liters per minute) at 20PSI.
★ Flow rate can be determined by running the water for one minute into an empty container.
The water supply temperature must not exceed 40℃(104°F)
Starting Procedure
Step 1. Insert the lance into spray gun, and twist it. Tighten Securely
Step2. Connect hose to spray gun. Tighten securely

8
Step 3. Add fresh, high quality, unleaded petrol with a pump octane rating of 86 or higher in a well ventilated outdoor
area. Do not overfill. Wipe up spilled fuel before starting the engine. Refer to engine manual for correct
procedure.
Step 4. Check engine oil level. See engine manual for correct procedure.
Step 5. Check the screen is in water inlet of pump.
Step 6. Connect water source to pump inlet
Step 7. Turn water source on.
Note: Failure to do so could cause damage to the pump.
Step 8. Depress trigger on gun to start water flow.
Step 9. Start engine. See engine manual for correct procedure.
Note: If the engine does not start after two pulls, pull the trigger on gun to relieve the pressure.
Step 10. Release the trigger on gun to stop water flow.
Step 11. Adjust spray for the task being performed by changing quick fix-up nozzle.
Working with detergents:
Note: To apply detergents you must be operating at low pressure.
Step 1. Press chemical hose onto barbed fitting located near high pressure water hose connection of pump.
Step 2. Place other end of chemical hose with filter on it into container holding chemical/cleaning solution.
Step 3. Install low pressure (black) nozzle into quick fix-up of lance.
Step 4. Pull trigger to operate unit. The liquid detergent will automatically mix with water and be discharged through
nozzle.
Step 5. Allow detergent to remain on the surface for a short time before rinsing. Do not allow detergent to dry on
surface.
Step 6. Rinse with clean water under high-pressure. On a vertical surface, rinsing from the top down to avoid streaking.
Step 7. When you have finished using the detergent injection system, remove detergent suction tube from bottle and
insert into 5L of fresh water. Siphon water at a low pressure for one minute so that all detergent is flushed
through system. Remove detergent bottle and rinse it until it is thoroughly cleaned.
Shutting Down Procedure
Step 1. Release the trigger can stop the water flowing out. After doing this engage the trigger safety lock to avoid
accident.
Step 2. In emergency condition: turn engine off immediately.
Step 3. Turn engine off. See Engine Owner’s Manual.
NOTE: NEVER turn the water off with the engine running.
Step 4. Turn water source off.
Step 5. Press trigger to release residual water.
Step 6. Disconnect all hoses used
Step 7. See storage section in this manual for proper storage procedures.
Note: Let the engine cool for at least 30 minutes after use before touching.

9
Explanation
Washer Pump: Increase the pressure of the water supply.
Engine: Drive the washer pump
High Pressure Water Hose: Carries the pressurized water from the pump to the gun and lance.
Gun: Connects with lance to control water flow rate, direction, and pressure.
Lance: Lance is equipped with a female quick fix-up on the end. This allows the user to quickly change out nozzle for
different spray patterns and change the soap nozzle for the low pressure and chemical/soap applications.
Chemical Hose: Feeds cleaning agents into the pump to mix the pressurized water.
Thermal Relief Valve: In an effort to prevent extreme damage, pumps are equipped with a thermal relief valve. This
valve will open when the temperature inside the pump rises too high. This valve will then release a gush of water in an
effort to lower the temperature inside the pump. Immediately after this occurs, the valve will close.
Chemical Injection System: Mixes cleaners or cleaning solvents with the pressurized water to improve cleaning
effectiveness.
Water Supply: All pressure washers must have a source of water. The minimum flow rate requirement of water
supply must not fall below 19 LPM (liters per minute) at 20PSI
Pressure Regulator: The pressure setting is preset at the factory to achieve optimum pressure and cleaning. If you
need to lower the pressure, it can be accomplished by these methods. Back away from the surface to be cleaned. The
future away you are, the less the pressure will be on the surface to be cleaned.
By Pass Mode: In bypass Mode, the pump is reticulating water because the trigger of the spray gun is not pulled. If
unit is left in bypass mode for more than two (2) minutes, the water temperature will rise to a dangerous level and
could damage internal components of the pump. Any damage to pump due to these causes will not be covered under
warranty.
Nozzle: The size of the nozzle determines the size of the fan spray and the pressure out of the nozzle. The 0°, 15°,
25°and 40°nozzles are high pressure nozzle, the chemical nozzle 84°is a low pressure nozzle.
0°nozzle – red. This nozzle delivers a pinpoint stream and is extremely powerful. It covers a very small area of
cleaning. This nozzle should only be used on surface that can withstand this high pressure such as metal or concrete.
Do not use on wood
15°nozzle - Yellow. This nozzle delivers a powerful 15 degree spray pattern for intense cleaning of small areas. This
nozzle should only be used on areas that can withstand the high pressure from this nozzle.
25°nozzle - Green. This nozzle delivers a powerful 25 degree spray pattern. This nozzle should only be used on areas
that can withstand the high pressure from this nozzle.

10
40°nozzle - White. This nozzle delivers a 40 degree spray pattern and a less powerful stream of water. It covers a wide
area of cleaning; this nozzle should be used for most general cleaning jobs.
Chemical Nozzle – black. This nozzle is used to apply chemicals or cleaning solutions. It has the least power stream.
Maintenance
Warning: When performing maintenance, you may be exposed to hot surfaces, water pressure, or moving parts that
can cause serious injury or death!
Before performing any maintenance or repair, stop engine and let it cool and release all water pressure. The engine
contains flammable fuel. Do not smoke or work near open flames while performing maintenance.
Nozzle cleaning: If the nozzle becomes clogged with foreign materials, such as dirt, excessive pressure may develop.
If the nozzle becomes partially clogged or restricted, the pump pressure will pulsate. Clean the nozzle immediately
using the nozzle kit supplied.
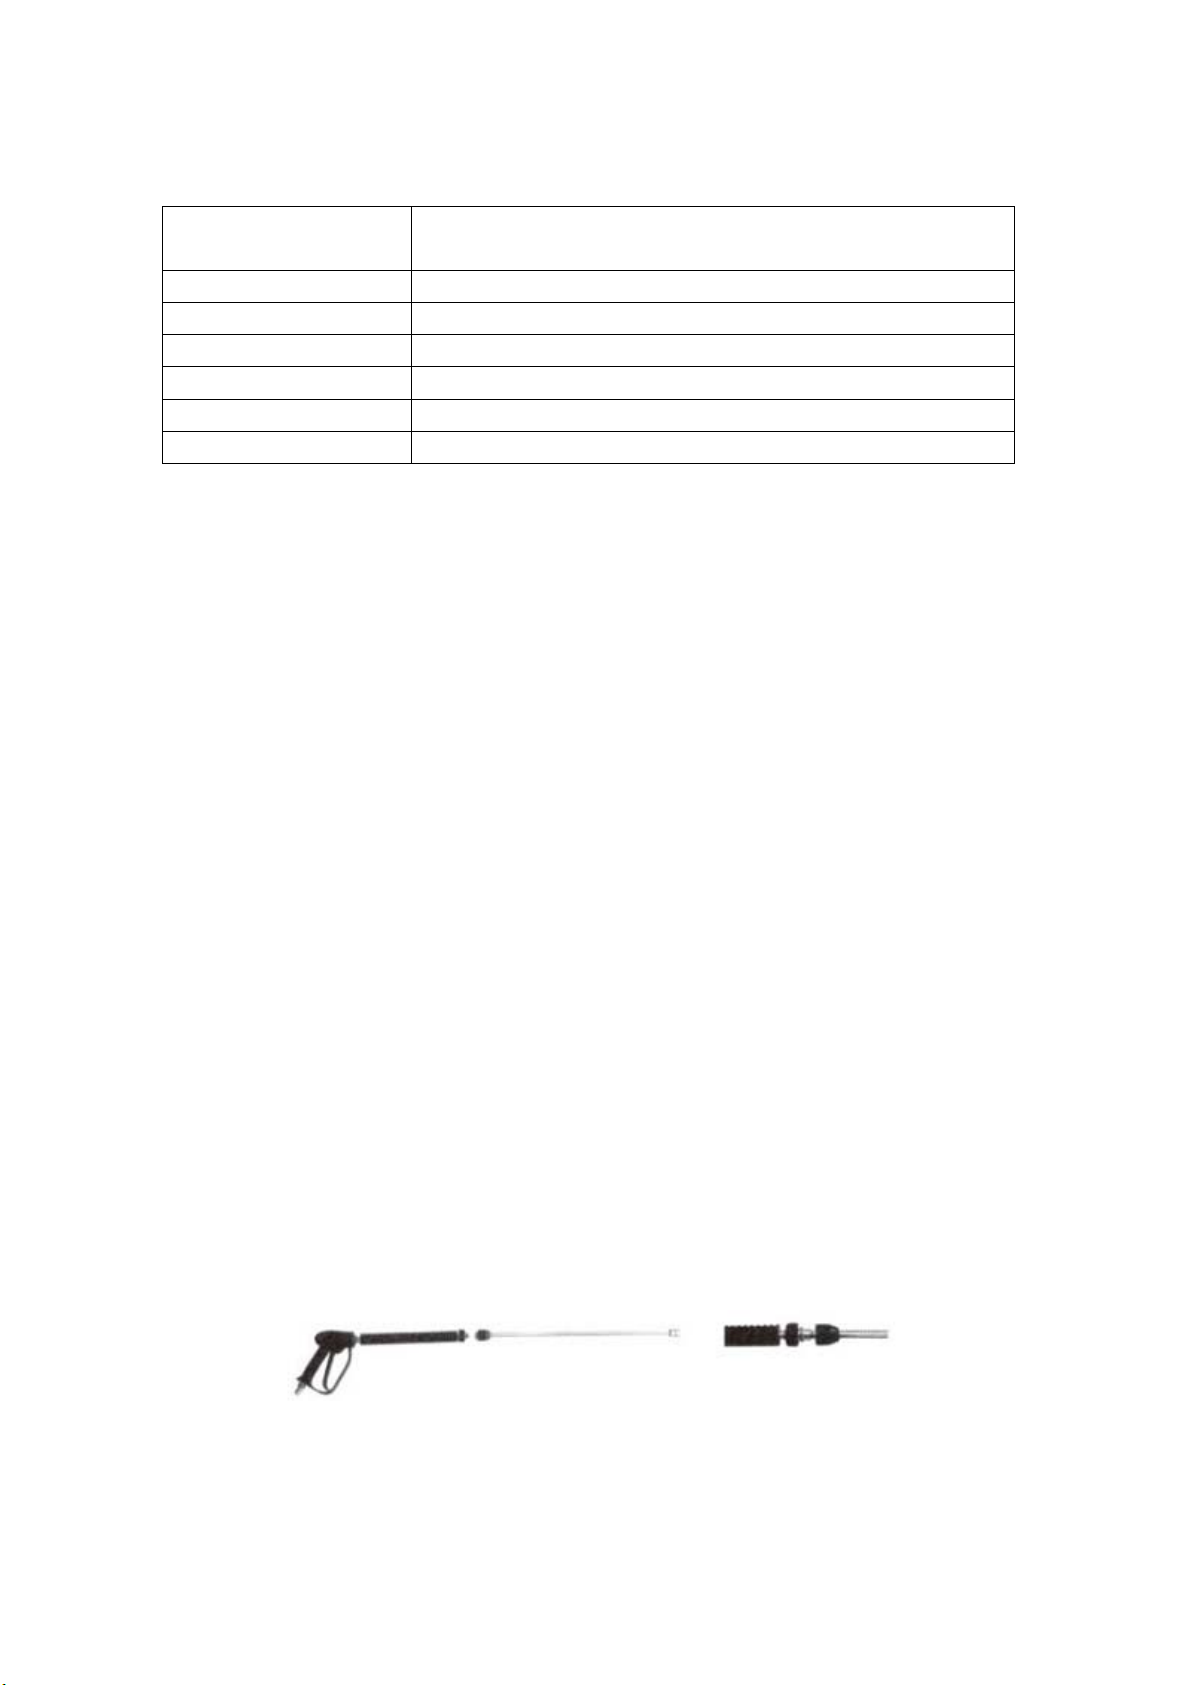
Wand/Lance:
1. Shut off the pressure washer and turn off the water supply.
2. Disconnect the wand/lance from the gun.
3. Clean the nozzle using the nozzle cleaner provided or a straightened paper clip. Insert into the nozzle end and
work back and forth until obstruction is removed.
4. Direct water supply into nozzle end to back flush loosened particles for 30 seconds.
5. Reconnect wand/lance to gun and turn on water supply.
6. Start pressure washer.
Water Inlet Screen Cleaning:
All pumps are equipped with some type of water filter screen. This screen should be checked periodically and cleaned
if necessary.
1. Remove the filter screen and flush with clean water.
2. Place the cleaned filter screen into the water inlet connector.
Storage
Optimum Winterizing Procedure
1. Drain all water from high pressure washer hose. Roll hose carefully and do not allow hose to be kinked.
2. Drain all water from gun and lance by holding gun in a vertical position with nozzle end pointing down and
squeezing trigger. Store in gun/hose holder.
3. Store chemical hose. High pressure water hose, so they are protected from damage, such as being run over.
It is recommended that you follow these steps to protect the internal seals of the washer pump when storing the unit for
more than 30 days and/or when freezing temperature is expected;
4. Obtain a funnel, 200ml of antifreeze, and approximately 1 meter of garden hose with a male connector attached to
the one end
5. Disconnect spark plug wire
6. Connect the hose to water inlet of pump
7. Add antifreeze to hose.
8. Pull engine starter rope slowly several times. Until antifreeze comes out of high pressure water hose connection
of pump
9. Remove short hose from water inlet of pump

11
10. Reconnect spark plug wire.
Alternative Procedure
If you cannot perform the Optimum Winterizing Procedure, you can still protect your pressure washer from
winter-damage:
1. Disconnect all water connections.
2. Press trigger to bleed any remaining water in the pump.
3. Remove the gun and hose from the pressure washer. Drain any excess water. Roll hose carefully and do not allow
hose to be kinked.
4. Store the machine and accessories in a room that does not reach freezing temperature. Do not store near furnace or
other hot areas.
Trouble Shooting Guide
Problem Cause Correction
Engine will not start
(see Engine Manual
for further engine
troubleshooting)
No Fuel
Low oil
Pressure builds up after two pulls on the
recoil starter or after initial use
Choke level in the “No choke” position
Spark plug wire not attached
Engine on/off switch in Off position
Choke lever in the “choke” position on a
“hot” engine or an engine that has been
exposed to thermal heat for a long period
of time.
Fuel Valve closed
Add Fuel
Add required amount of oil
Squeeze gun trigger to relieve pressure
Move choke to the “choke” position
Attach spark plug wire
Place engine ON/OFF switch in ON
position
Move choke to the “NO CHOKE”
Position
Move fuel Valve lever to the “Open”
Position

12
No or low Pressure
(initial use)
Lower water supply
Leak at high pressure water hose fitting
Nozzle obstructed
Water filter screen clogged
Air in hose
High Pressure water hose is too long
Water supply must be at least 19 LPM
Tighten. Apply Sealant tape if necessary
See Nozzle cleaning paragraph in the
maintenance section for the correct
procedure
Remove and clean filter
Turn off the engine, then the water
source. Disconnect the water source
from the pump inlet and turn the water
source on to remove all air from hose,
when there is a steady stream of water
present, turn water source off.
Re-connect water source to pump inlet
and turn on water source. Squeeze
trigger to remove remaining air.
Use high pressure water hose under 15
meters
Will not draw
chemical
Lance not low pressure
Chemical Filter clogged
Chemical screen not in chemical
Chemical too thick
See working with detergent paragraph
in the operation section
Clean filter
Ensure end of chemical hose is fully
submerged into chemical
Dilute chemical. Chemical should be
the same consistency as water
No or Low
pressure(after period
of normal use
Worn seal or packing
Worn or obstructed valves
Worn unload piston
Check and replace
Check and replace
Check and replace
Water leaking at
gun/lance connection
Worn or broken o-ring
Loose hose connection
Check and replace
Tighten

13
Oil Leaking at pump
Oil seals worn
Loose oil drain plug
Worn oil drain plug o-ring
incorrect oil used
Vent plug is clogged
Check and replace
Tighten
Check and replace
Drain and fill with correct amount and
type of oil
Clean vent plug, blow air through it to
remove any blockage. If problem
persists, replace plug
Pump Pulsates Nozzle obstructed
See lance paragraph in the maintenance
section for the correct procedure
Disposal of The Machine
In any case this machine must be kept out of the reach of children
Being as the machine is a special waste, disassemble it and gather the homogeneous parts for disposal according
to the applicable laws
Do not use the scrapped parts as spare parts.
Environmental Protection
Please arrange for the proper disposal of the packaging
The packaging material can be recycled
Please do not place the packaging into the ordinary refuse for disposal, but arrange for the proper recycling
Please arrange for the proper disposal of the old appliance
Old appliance contain valuable materials that can be recycled.
Please arrange for the proper recycling of old appliances. Batteries, oil, and similar substances must not enter
the environment. Please dispose of your old appliance using appropriate collection systems
Table of contents
Other Waspper Pressure Washer manuals