Where are the SOHO 6 settings stored?
The configuration parameters are stored in memory on the SOHO 6.
How do I change to a DHCP trusted IP address?
1. Make sure your computer is set up to use DHCP dynamic addressing, refer to
“Enable your Computer for DHCP”of the SOHO6 UserGuide.
2. With your Web browser, go to the SOHO 6 System Status page using the
Trusted IP address of the SOHO 6. For example, if usingthe default IP address,
go to: http://192.168.111.1
3. From the navigation bar on the right side, select Network => Trusted.
4. Select Enable DHCP Server and then click Submit.
How do I change to a static, trusted IP address?
Before you can use a static IP address, you must have a base Trusted IP address
and subnet mask.
The following IP address ranges and subnet masks are set aside for private
networks in compliance with RFC 1918. Replace the Xs in the network IP address
with a number between 0 and 254, however the final number cannot be 0. The
subnet addresses do not need to be changed.
Network IP range Subnet mask
10.x.x.x 255.0.0.0
172.16.x.x 255.240.0.0
192.168.x.x 255.255.0.0
TROUBLESHOOTING TIPS
To change to a static, trusted IP address:
1. With your Web browser, go to the SOHO 6 System Status page using the
Trusted IP address of the SOHO6 . For example, if using the default IP address,
go to: http://192.168.111.1
2. From the navigation bar on the right side, select Network => Trusted.
3. Deselect Enable DHCP Server and then click Submit.
4. Enter the information in the appropriate fields. Click Submit.
How do I set up and disable the WebBlocker™option?
1. With your Web browser, go to the SOHO 6 System Status page using the
Trusted IP address of the SOHO 6. For example, if using the default IP address,
go to: http://192.168.111.1
2. From the navigation bar on the right side, select WebBlocker => Settings.
The WebBlocker Settings page appears.
3. Select Enable WebBlocker. Enter a Full Access password, and an Inactivity
Timeout (in minutes). To disable WebBlocker , deselect Enable WebBlocker.
How do I allow incoming services such as POP3, Telnet, and Web (HTTP)?
1. With your Web browser, go to the SOHO 6 System Status page using the
Trusted IP address of the SOHO 6. For example, if using the default IP address,
go to: http://192.168.111.1
2. From the navigation bar on the right side, select Firewall => Incoming. The
Filter Incoming Traffic page appears.
3. Locate the pre-configured service you wish to allow in and select Allow from
the drop list.
4. Enter the Trusted IP address of the computer hosting the service.
5. Click Submit.
How do I allow incoming IP, or uncommon TCP and UDP protocols?
You will need the IP address of the computer that will be receiving the incoming
data and the IP protocol number that corresponds to the specific incoming IP
protocol. To allow an incoming IP protocol:
1. With your Web browser, go to the SOHO 6 System Status page using the
Trusted IP address of the SOHO 6. For example, if using the default IP address,
go to: http://192.168.111.1
2. From the navigation bar on the right side, select Firewall => Custom Service.
The Custom Service page appears.
3. Beneath the Protocol Settings fields, select either TCP Port, UDP Port or
Protocol from the drop list. The Custom Service page refreshes.
4. Enter a name for the service.
5. Enter the protocol number to allow in the Protocol field.
6. Click Submit.
7. From the navigation bar on the right side, select Firewall => Incoming.
The Firewall Incoming Traffic page appears.
8. Towards the bottom of the page, under the Custom Service header, locate the
service you created and select Allow from the drop list.
9. Under the header Service Host, enter the IP address of the computer to which
this traffic will be allowed.
10. Click Submit.
Before setting up a VPN, you must have the following:
•Two properly configured and working SOHO 6s or one SOHO 6 with the latest
version of firmware and one Firebox II/III. Each SOHO 6 must have the VPN
option enabled.
•The static, external, IP address, the network address, and the subnet masks of
both devices. (The base trusted IP address of each SOHO 6 must be static and
unique.)
•The DNS and WINS server IP addresses, if used.
•The shared key (passphrase) for the tunnel.
•The same encryption method for each end of the tunnel (DES or 3DES).
•The same authentication method for each end (MD-5 or SHA-1).
How do I set up my SOHO 6 for VPN Manager Access?
This requires the add-on product, WatchGuard VPN Manager software, which
is purchased separately used with the WatchGuard Firebox System software. To
purchase VPN Manager, use your Web browser to go to:
https://www.watchguard.com/products/vpnmanager.asp.
For more information on how to allow VPN Manager access to a SOHO 6, see
the VPNGuide.
GENERAL
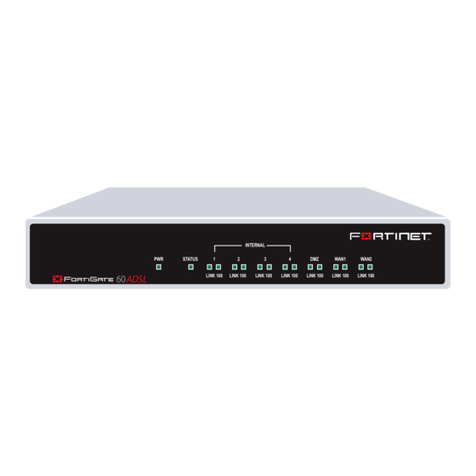
What do the PWR, Status, and MODE lights signify on the SOHO 6?
When the PWR light is lit, the SOHO 6 has power. When the Status light is lit,
there is management connection to the SOHO 6. When the MODE light is lit, the
SOHO 6 is operational.
If the PWR light is blinking:
The SOHO 6 is running from its backup flash memory. You are able to connect
to the SOHO 6 from a computer on one of the four, numbered, Ethernet ports
(labeled 0-3) and reload the configuration.
If the Mode light is blinking:
The SOHO 6 requires a DHCP assigned IP address for the external interface but
did not receive it. The WAN port is not connected to another appliance, the
physical connection is faulty, or the other appliance is not operating properly.
How do I register my SOHO 6?
Register online by activating your bundled LiveSecurity®Service subscription.
Activation entitles you to receive threat alert notifications, expert security advice,
free anti-virus protection, software updates, technical support by web or phone,
and access to extensive online help resources. To activate, make a note of your
SOHO 6 serial number, then use your browser to visit
http://www.watchguard.com/activate.
For more information, refer to “Register your SOHO 6 and Activate the LiveSecurity
Service”in the WatchGuardFirebox SOHO6 UserGuide.
CONFIGURATION
VPN MANAGEMENT
REFERENCE INFORMATION
How do I set up a VPN to a SOHO6?
For detailed information on how to configure a VPN tunnel between a
SOHO 6 and another IPSec compliant appliance, use your Web browser to
go to: http://www.watchguard.com/support.
1. Log in to the site.
2. Download the file you need.
3. Follow the instructions to configure your VPN tunnel.
Contacting WatchGuard Technical Support
1-877-232-3531
U.S. End-User Support
1-206-521-8375
U.S. Authorized Reseller Support
+1-360-482-1083
International Support
www.watchguard.com/support
© 2002 WatchGuard Technologies, Inc. All rights reserved. WatchGuard, Firebox, WebBlocker and LiveSecurity
are either trademarks or registered trademarks of WatchGuard Technologies, Inc. in the United States and/or
other countries. All other trademarks and trade names are property of their respective owners.
Part No. 250602WGPLE64653
How do I restart my SOHO 6?
1. With your Web browser, go to the SOHO 6 System Status page using the
Trusted IP address of the SOHO 6. For example, if using the default IP address,
go to: http://192.168.111.1
2. Click Reboot.
3. Wait for the SOHO 6 to complete the process. The MODE light on the front
of the SOHO 6 will turn off, then back on. NOTE: You can also reboot by
removing the power source for ten seconds, and then restoring power.
How do I reset the SOHO 6 to the factory defaults?
Firmware corruptions or other unforseen events (such as a lost System Security
passphrase) require you to reset the SOHO 6 to its factory default settings.
To do this, first disconnect the power supply. Then find the reset button located
at the rear of the SOHO 6. Press and hold the reset button. At the same time,
reconnect the power supply. Continue pressing the reset button while the SOHO
6 reboots–approximately 15 seconds. The PWR indicator light should blink in a
steady pattern once the reboot is complete. When this occurs, reboot the SOHO
6 again by disconnecting your power supply. Finally, the PWR indicator light
should remain illuminated. Your SOHO 6 is now reset to factory defaults.
How do I reset my System Security password if forgot it or lost it?
If you forgot your password, you must reset the SOHO 6to its factory default.
See the question above on “How do I reset the SOHO 6 to factory defaults”.
How does the seat limitation on the SOHO work?
The default user license on the SOHO 6 allows for 10 users. The first 10 computers
on the network behind the SOHO 6 to access the Internet are allowed through
the SOHO 6. To clear the list of these first 10 computers, you must reboot the
SOHO 6.
I can’t get a certain SOHO 6 feature to work with a DSL modem.
Some DSL routers implement NAT firewalls. Running NAT in front of the SOHO
causes problems with WebBlocker™and the performance of IPSec. When a
SOHO 6 is used in conjunction with a DSL router, the NAT feature of the DSL
router should be set for bridge-only mode.
How do I install and configure the SOHO 6 using a Macintosh (or other)
operating system?
Installation instructions for the Macintosh and other operating systems can be
found on our Web site at: http://support.watchguard.com/pubs/install/index.asp
How do I know whether the cables are connected correctly to my SOHO?
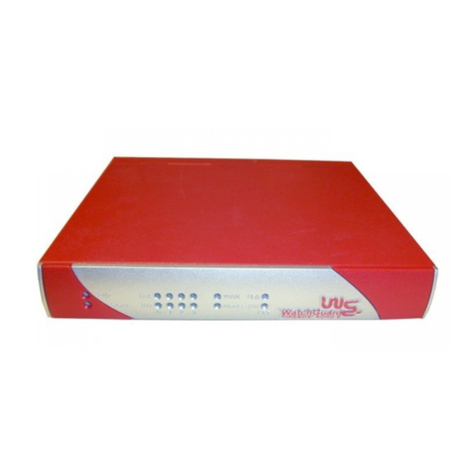
There are fourteen lights on the front of the SOHO grouped in pairs. The link
light labeled WAN tells you if your SOHO 6 is connected to your modem. If this
light is not lit, the SOHO 6 is not connected to your modem. Check to make sure
that both sides of the cable are connected and that your Internet connection is
active. The link lights labeled 0 through 3 correspond to the four numbered
Ethernet ports of the Trusted network. They tell you if the SOHO 6 is connected
to a computer or hub. If the lights are not lit, the SOHO 6 is not connected to
the computer or hub. Check to make sure that both sides of the cable are
connected and that the computer or hub has power.
I can connect to the configuration screen; why can’t I browse the Internet?
This means that the SOHO 6 is on, but something may be wrong with the
connection from the SOHO 6 to the Internet. Make sure the cable or DSL modem
is connected correctly and has power. Also check the link light on your modem
as well as the WAN link light on the SOHO 6.
If you continue to have trouble connecting to the Internet, you may need to call
your ISP.
How can I see the MAC address of my SOHO 6?
A MAC (Media Access Control) address is a unique number used to identify the
actual physical hardware of an Ethernet device.
1. With your Web browser, go to the SOHO 6 Configuration Settings page using
the Trusted IP address of the SOHO. For example, if using the default IP address,
go to: http://192.168.111.1
2. Towards the bottom of the System Status page, you will see the External
Network header on the right side. The MAC address is listed there.
