OTF TABLET ARM & SERIES 5 MONITOR ASSEMBLY
INSTALLING THE TABLET ARM
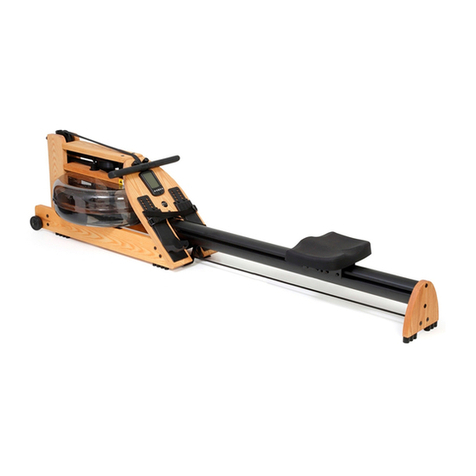
1. Place the tablet arm on top of the forward riser and sit the kickstand of the tablet arm onto the pad,
ensuring the kickstand pad does not click into place. Check to make sure the orientation of the black
tablet holder is correct, the WaterRower logo on the back of the tablet holder shoule be right-side
up. Be sure that the tablet arm is sitting on the outside of the brackets, secure it into place using a
5mm Allen keys and provided JCNs and JCBs.
Note: If the kickstand pad does click into place, reach below the top deck and press upwards on the
kickstand pad to release it.
REASSEMBLING THE WATERROWER
1. Ensuring that the handle is facing the correct way, pass the strap of the handle assembly over the
large pulley in the Forward Riser as shown. Ensure the strap does not have any twists in it.
Note: To ensure the handle is facing the correct way, check to see that the rivet-side of the handle itself
is facing down towards the footboard.
2. Guide the end of the strap through the small guide pulleys, around the clutch and insert it into the
slot in the clutch (the slot without the bolt hole). Giving yourself some slack to work with, wrap the
strap around the clutch and insert the end of the strap into the slot with the hole for the bolt. Secure
the handle strap into the clutch using the original clutch screw and a 3mm Allen key.
3. With the handle in the full forward position, it is important that the Recoil Belt wraps around the
Recoil Bush one and a half times. Once this is so, pass the Recoil Belt inside (towards the center of
the machine) the Recoil Belt guide pulley (the lower of the two guide pulleys) and over the two
smaller pulleys in the Forward Riser. Pass the belt underneath the machine towards the bungee.
4. Re-attach the recoil belt to the bungee.
5. While holding the kickstand pad up to provide clearance, replace the tank cover by sliding it
forwards in an angled fashion towards the front of the unit.
6. Once the tank cover is in its normal position, press on the kickstand pad so that it audibly “clicks”
into place. Then, rotate the kickstand of the tablet arm outward and rest the tablet arm on the tank
cover.
7. Rotate the top of the footboard towards the front of the unit. Using a 5mm Allen key, reinstall the
handle rests.
pg. 4 of 4
For
additional
support,
please
contact
our
support
team
at
[email protected] or
1.800.852.2210
