manuals.online logo
Brands
  1. Home
  2. •
  3. Brands
  4. •
  5. WaterUps
  6. •
  7. Lawn And Garden Equipment
  8. •
  9. WaterUps Oasis 1680 User manual

WaterUps Oasis 1680 User manual

Assembly Instructions
1. Check that you have all of the
components listed in the “What
is in the kit?” list.
2. Peel the protective plastic o the
rails and corner panels.
3. Join 1 x left-side and 1 x right-
side bracket rail to 1 x end rail
(with the short side facing out
and the longer side facing in) to
one end rail and screw in the 4
x self-tapping screws to secure
the rails.
4. Repeat to create a second U-
shaped rail.
5. Join the 2 x U-shaped rails using
the apptropriate Joiner pieces to
form the base for the Oasis bed
as shown in Figure 1. Ensure
that the screw holes align and
screw in the 4 x self-tapping
screws.
6. Now turn the connected U-
shaped rails over so that you can
see the channel for the corner
and wall panels. Locate the
corner panel with the hole for
the overow pipe and position it
(when looking from the end of
the bed) to the base of the far
left corner with the hole closest
to the bottom. Align the screw
hole in the corner panel and the
matching hole in the rail and
insert the self-tapping screw to
secure.
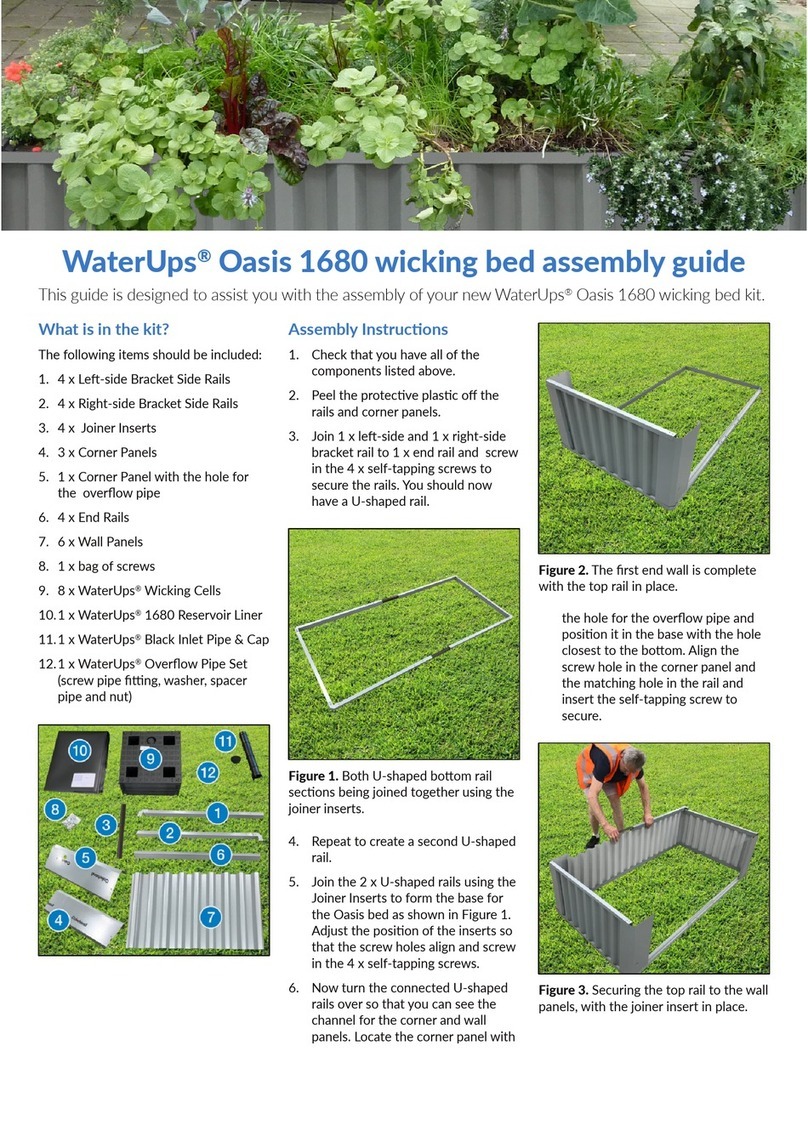
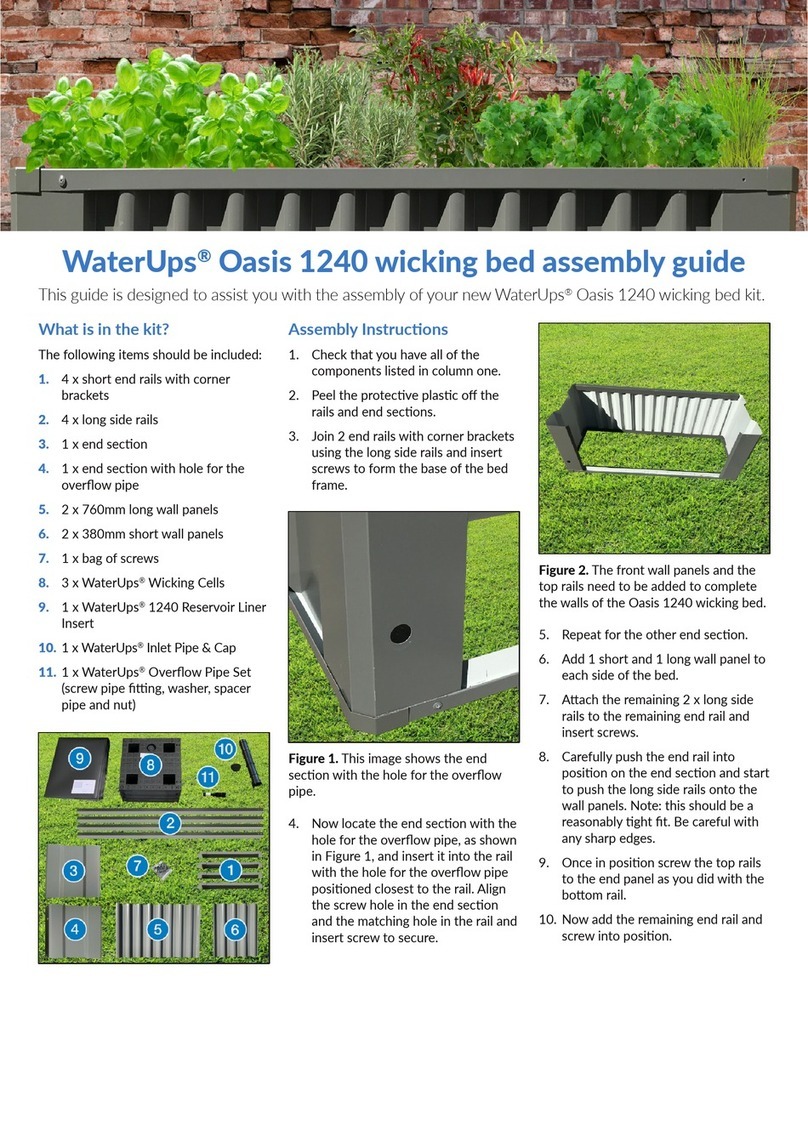
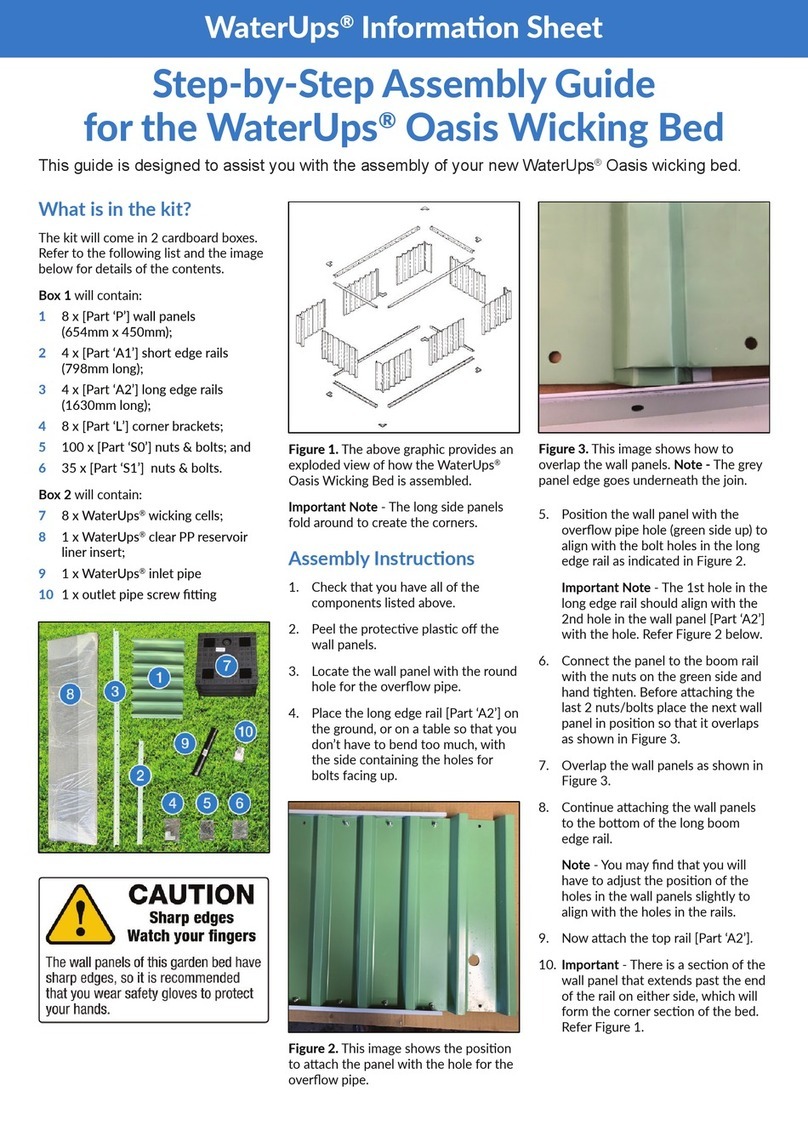
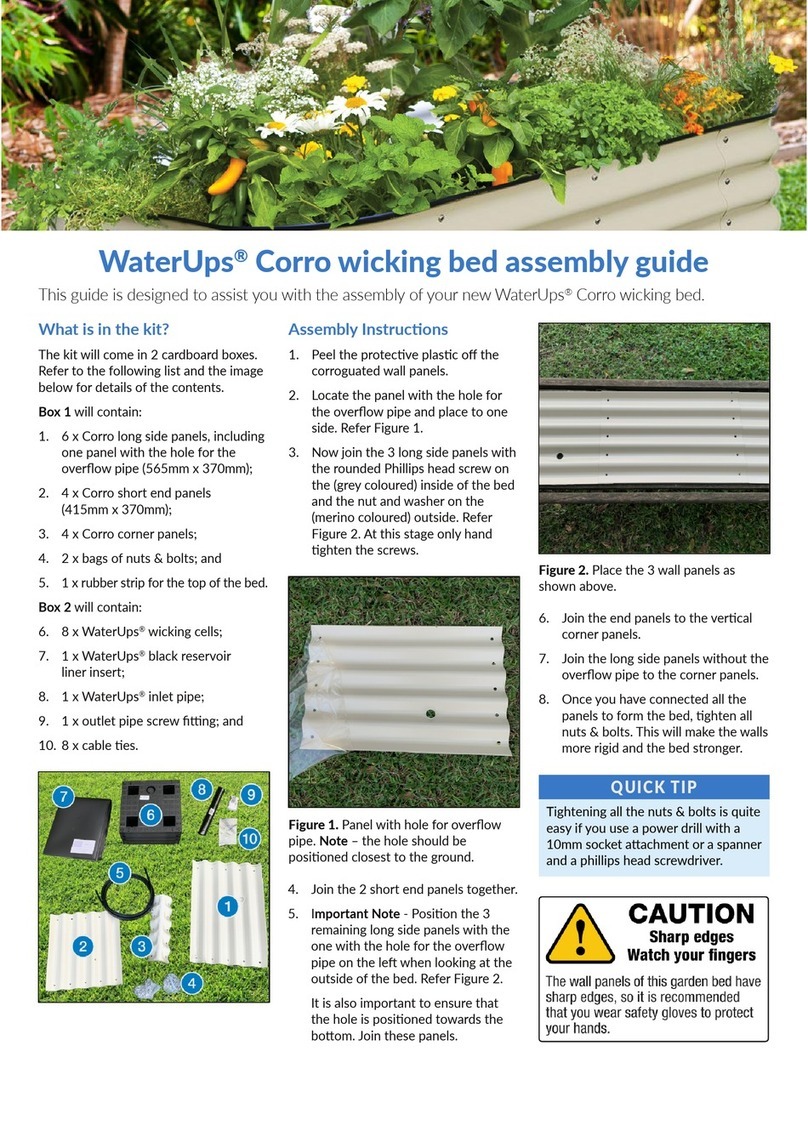
WaterUps®Oasis 1680 wicking bed assembly guide
This guide will assist you with the assembly of your WaterUps®Oasis 1680 wicking bed kit.
What is in the kit?
The following items should be
included:
1. 4 x Left-side Bracket Side Rails
2. 4 x Right-side Bracket Side Rails
3. Long Rail Joiners - 2 types
[Type A] 4 x right angled inserts
that go on the inside of the rails
on the Windspray and Woodland
Grey beds, or
[Type B] 4 x U-shaped covers that
go on the outside of the rails on
the Pale Eucalypt and Wallaby
beds.
4. 3 x Corner Panels
5. 1 x Corner Panel with the hole
for the overow pipe
6. 4 x End Rails
7. 6 x Wall Panels
8. 1 x bag of screws
9. 8 x WaterUps®Wicking Cells
10. 1 x WaterUps®1680 Reservoir
Liner
11. 1 x WaterUps®Black Inlet Pipe &
Cap
12. 1 x WaterUps®Overow Pipe Set
(screw pipe tting, washer,
spacer pipe and nut)
Figure 1. Both U-shaped bottom rail
sections being joined together using
the Joiners. Note: Type A Long Rail
Joiners t inside the grooves of the
rail sections. Type B Long Rail
joiners t on the outside. Align the
pre-drilled holes and add self
tapping screws.
Figure 2. The rst end wall is
complete with the top rail in place.
Figure 3. Securing the top rail to the
wall panels, with the joiner insert in
place.
Save Water... Save Time... Grow healthier plants
Wwww.waterups.com.au
P1300 205 550
Esales@waterups.com.au
Published: 198 November 2020
The WaterUps®website is owned and operated by WaterWix Pty Ltd – ABN 58
166 973 011.
The information contained in this document is provided as is and without any
warranties of any kind, whether expressed or implied. Users are advised to make
their own determination as to the suitability of this information in relation to their
particular purpose or specic circumstances. No responsibility can be accepted
by WaterUps®, WaterWix Pty Ltd, or its sta for any loss resulting from any action
taken or reliance made by you on any information contained in this document.
Copyright © 2020 WaterWix Pty Ltd. All rights reserved. WaterUps and the
WaterUps Logo are registered trademarks of WaterWix Pty Ltd
7. Repeat for the opposite corner
panel.
8. Insert the the end wall panel
between the 2 corner panels.
9. Place the end rail on top to keep
the end wall panel and the
corner panels in the correct
position as shown in Figure 2.
10. Insert the other 2 corner panels
and the end wall panel following
the same process as above.
11. Place 2 wall panels in position
along one side.
13. Add Joiner pieces A or B as
appropriate in position to
connect the long rails and add
screws to secure.
14. Gradually slide the side rail into
position over the top of the
corner and wall panels. Align the
screw hole in the corner panel
and the one in the rail and insert
screw to secure.
15. Repeat at the other end.
16. Repeat the above to add the
other side rails.
Adding the WaterUps®
Reservoir Liner Insert
1. Unfold the reservoir liner Insert
and clip corners in to position.
2. Before placing the reservoir liner
in the base of the bed ensure
that the base is level and
compacted and free from any
sharp object such as stones.
3. Place the reservoir liner in the
base so that it sits inside the
bottom railing.
Adding the WaterUps®
cells, plus the Inlet and
overow pipes
1. Place a WaterUps®cell in the
base of the liner near the
overow hole to work out the
correct position to attach the
overow pipe to the cell. After
attaching the overow pipe and
clicking it into position, add the
rubber washer to the overow
pipe and push in until it abuts
the liner.
2. Now carefully place the cell with
the overow pipe in the base of
the liner positioning it so that
the thread of the overow pipe
protrudes from the external wall
of the bed frame. Slide on the
white spacer pipe and push it
through the hole in the steel
frame until it abuts the wall of
the reservoir liner. Now screw on
the nut and secure tightly in
position.
3. Cut out the circle in the top of
one of the remaining WaterUps®
cells and insert the inlet pipe –
refer to the WaterUps®
Installation Guide if needed.
4. Place all remaining WaterUps®
cells in position and fold down
the aps on the top of the
reservoir line. These can be
secured in position with either
cable ties or WaterUps®joiners
or simply left folded over.
5. Now ll the 4 wicks of each cell
with perlite and then add your
potting mix, compost and plants.
Refer to the WaterUps®
Installation Guide for more
information (see the link below).
Click here to view & download
the WaterUps®Installation
Further Information
Figure 5. The last bracket side rail
just needs to be screwed into place.
Figure 7. This image shows the
overow pipe rubber washer & nut
in place on the corner panel.
Figure 6. This image shows the
short white spacer pipe on the
overow pipe.
Figure 4. Securing the top rail to the
wall panels, with the joiner insert in
place.

Other WaterUps Lawn And Garden Equipment manuals

WaterUps Oasis 1680 Wicking Bed User manual

WaterUps

WaterUps Oasis 1680 Wicking Bed User manual

WaterUps Oasis 1240 User manual

WaterUps

WaterUps Oasis 1240 User manual

WaterUps 15090 User manual

WaterUps

WaterUps 15090 User manual

WaterUps Oasis 1680 User manual

WaterUps

WaterUps Oasis 1680 User manual

WaterUps Oasis 1240 User manual

WaterUps

WaterUps Oasis 1240 User manual

WaterUps Oasis 1680 User manual

WaterUps

WaterUps Oasis 1680 User manual

WaterUps Oasis 1240 User manual

WaterUps

WaterUps Oasis 1240 User manual

WaterUps 15090 User manual

WaterUps

WaterUps 15090 User manual

WaterUps Oasis Wicking Bed Manual

WaterUps

WaterUps Oasis Wicking Bed Manual

WaterUps Corro User manual

WaterUps

WaterUps Corro User manual

Popular Lawn And Garden Equipment manuals by other brands

Sunforce SOLAR user manual

Sunforce

Sunforce SOLAR user manual

GARDEN OF EDEN 55627 user manual

GARDEN OF EDEN

GARDEN OF EDEN 55627 user manual

Goizper Group MATABI POLMINOR instruction manual

Goizper Group

Goizper Group MATABI POLMINOR instruction manual

Rain Bird 11000 Series Operation & maintenance manual

Rain Bird

Rain Bird 11000 Series Operation & maintenance manual

Cub Cadet BB 230 brochure

Cub Cadet

Cub Cadet BB 230 brochure

EXTOL PREMIUM 8891590 Translation of the original user manual

EXTOL PREMIUM

EXTOL PREMIUM 8891590 Translation of the original user manual

Snapper 690179 installation instructions

Snapper

Snapper 690179 installation instructions

Exmark SAR481KA30 Operator's manual

Exmark

Exmark SAR481KA30 Operator's manual

Yazoo/Kees Z12 Operator's manual

Yazoo/Kees

Yazoo/Kees Z12 Operator's manual

Makita EM408MP Original instruction manual

Makita

Makita EM408MP Original instruction manual

Exmark Quest Bagger Setup instructions

Exmark

Exmark Quest Bagger Setup instructions

Manitou Systems AS960 Operator's manual

Manitou Systems

Manitou Systems AS960 Operator's manual

Vertex 1/3 HP Maintenance instructions

Vertex

Vertex 1/3 HP Maintenance instructions

GHE AeroFlo 80 manual

GHE

GHE AeroFlo 80 manual

Land Pride Post Hole Diggers HD25 Operator's manual

Land Pride

Land Pride Post Hole Diggers HD25 Operator's manual

Yazoo/Kees Z9 Commercial Collection System Z9A Operator's & parts manual

Yazoo/Kees

Yazoo/Kees Z9 Commercial Collection System Z9A Operator's & parts manual

Premier designs WindGarden 26829 Assembly instructions

Premier designs

Premier designs WindGarden 26829 Assembly instructions

Snapper 1691351 installation instructions

Snapper

Snapper 1691351 installation instructions

manuals.online logo
manuals.online logoBrands
  • About & Mission
  • Contact us
  • Privacy Policy
  • Terms and Conditions

Copyright 2025 Manuals.Online. All Rights Reserved.