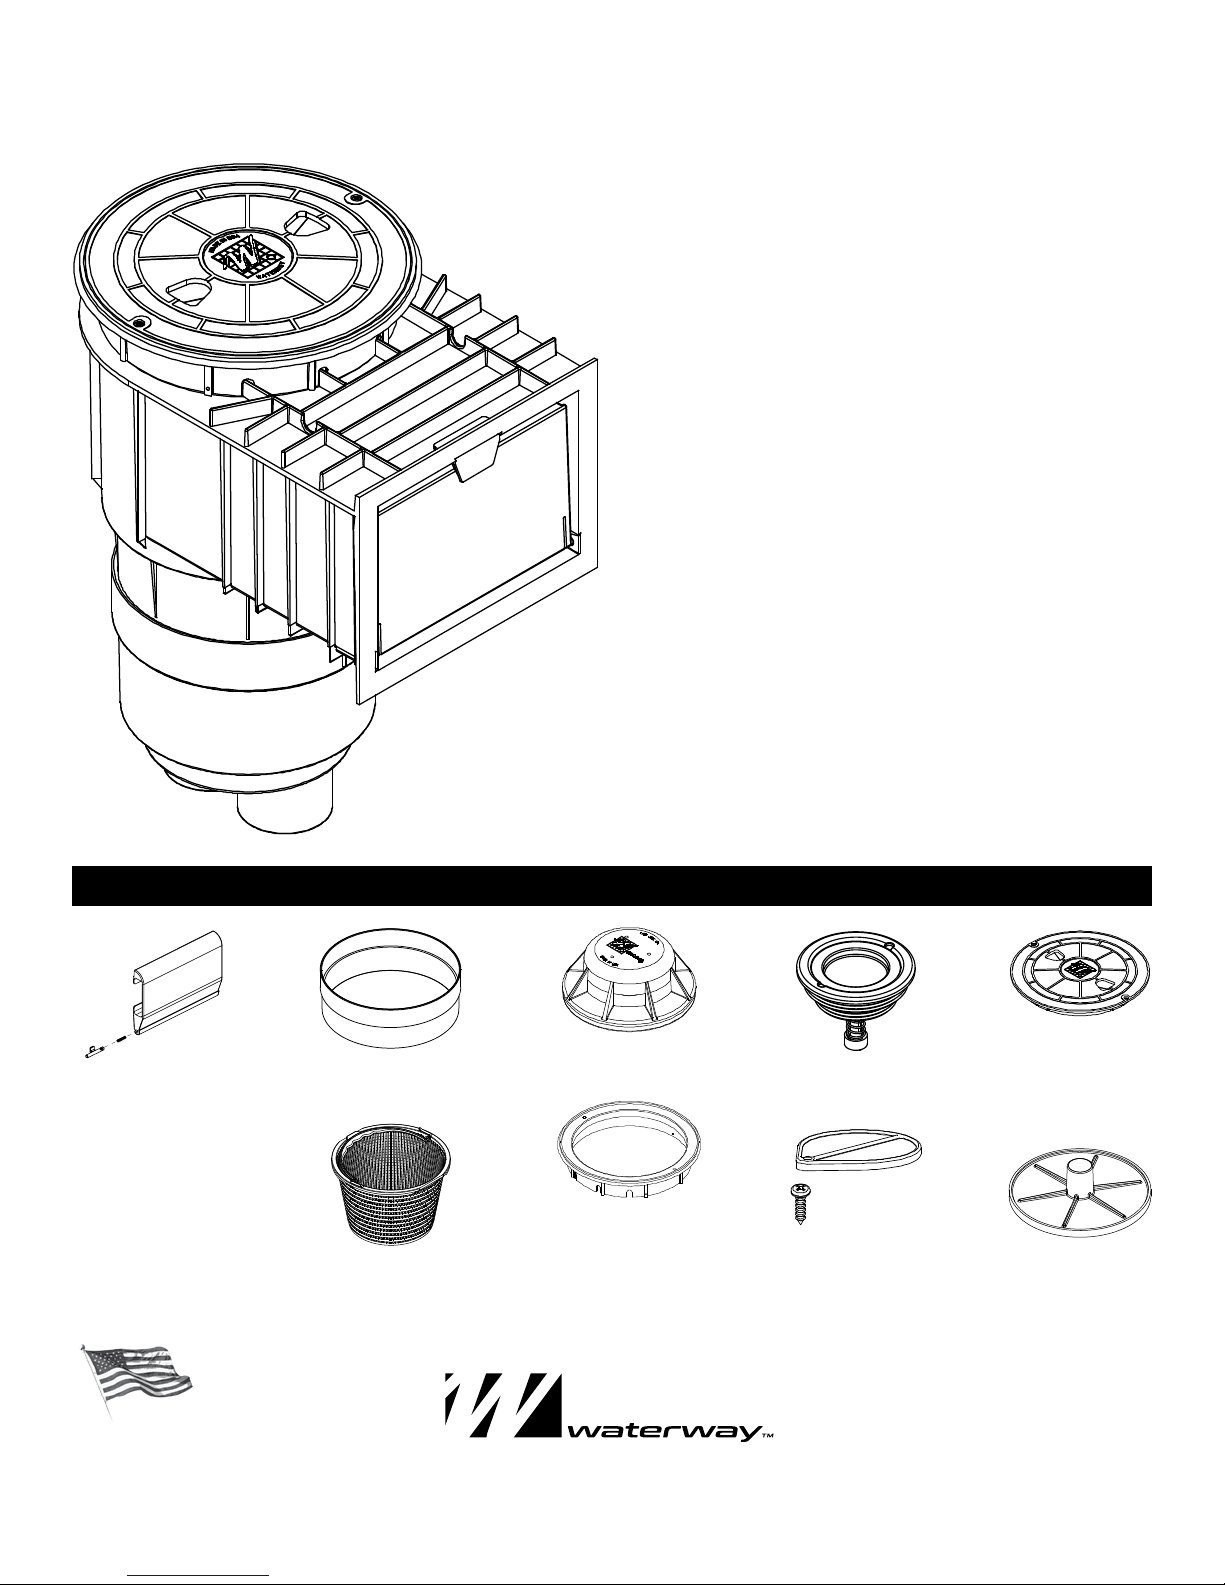
manuals.online logo
Brands
  1. Home
  2. •
  3. Brands
  4. •
  5. Waterway
  6. •
  7. Lighting Equipment
  8. •
  9. Waterway RENEGADE User manual

Waterway RENEGADE User manual

Other Waterway Lighting Equipment manuals

Waterway 640-18 V Series User manual

Waterway

Waterway 640-18 V Series User manual

Waterway 640-231 V Series User manual

Waterway

Waterway 640-231 V Series User manual

Popular Lighting Equipment manuals by other brands

Brizo 8SP-MU-4 manual

Brizo

Brizo 8SP-MU-4 manual

LUCE&LIGHT BROM 1.0 installation instructions

LUCE&LIGHT

LUCE&LIGHT BROM 1.0 installation instructions

IKEA BJÖRKSPIREA manual

IKEA

IKEA BJÖRKSPIREA manual

Laserworld Evolution Series ES-400RGB manual

Laserworld

Laserworld Evolution Series ES-400RGB manual

EuroLite LED B-40 user manual

EuroLite

EuroLite LED B-40 user manual

Qazqa Suplux SL 3 Black 103062 instruction manual

Qazqa

Qazqa Suplux SL 3 Black 103062 instruction manual

Commercial Electric 54568141 Use and care guide

Commercial Electric

Commercial Electric 54568141 Use and care guide

CREE LIGHTING 304 Series installation instructions

CREE LIGHTING

CREE LIGHTING 304 Series installation instructions

Goobay 49867 user manual

Goobay

Goobay 49867 user manual

ECOMAN ITALIA LED T8 instruction manual

ECOMAN ITALIA

ECOMAN ITALIA LED T8 instruction manual

Alkalite Krypton KT-81 user manual

Alkalite

Alkalite Krypton KT-81 user manual

Clas Ohlson GU10 manual

Clas Ohlson

Clas Ohlson GU10 manual

DTS DELTA 10 F user manual

DTS

DTS DELTA 10 F user manual

ring Solar Steplight manual

ring

ring Solar Steplight manual

One Stop Gardens 57696 Owner's manual & safety instructions

One Stop Gardens

One Stop Gardens 57696 Owner's manual & safety instructions

SIREM Swimeo A2 instructions

SIREM

SIREM Swimeo A2 instructions

Silvair MESH-CEDRP quick start guide

Silvair

Silvair MESH-CEDRP quick start guide

S&P PCRL80 manual

S&P

S&P PCRL80 manual

manuals.online logo
manuals.online logoBrands
  • About & Mission
  • Contact us
  • Privacy Policy
  • Terms and Conditions

Copyright 2025 Manuals.Online. All Rights Reserved.

RENEGADE GUNITE SKIMMER OPERATING INSTRUCTIONS
NORMAL OPERATION
Water passes over the weir door, down through the basket and float valve assembly to
the pump. The trimmer plate on the float valve assembly or the diverter plate are both
open.
ADJUSTING THE SKIMMER FLOW
If the skimmer flow is too fast due to excessive flow rate from the pump, either rotate
the float valve trimmer plate or the diverter plate over the port to the pump until
required flow is achieved.
VACUUM/BRUSHING THE POOL
To vacuum the pool, first remove the float valve, then close the diverter plate over the
main drain. Install the vacuum plate above the basket and connect the vacuum hose
to the vacuum plate to proceed with the brushing operation.
MULTIPLE SKIMMERS
Rotate the diverter plate at the bottom of the skimmer over the pump port to restrict
the flow and balance the flow from each skimmer.
LOW WATER LEVELS
When the water level drops below the weir door, water will no longer flow from the
pool through the upper part of the skimmer. The pump will evacuate the remaining
water from the skimmer causing the float valve to close and water will flow from the
main drain only, or until the water level is increased.The same can occur when and if
the basket gets filled with leaves and debris.
RENEGADE GUNITE SKIMMER REPLACEMENT PARTS
Replacement Weir Door
550-9950 White
550-9951 Black
550-0057 Gray
550-9959-DKG Dark Gray
550-9959-BEI Beige
(bagged individually)
Extension Ring
519-6570 White
Float Valve Assembly
542-6200 White Equalizer Valve
540-6010
Lid Assembly
540-6460WW White
540-6467WW Gray
540-6469WW-B Beige
Vacuum Plate
519-6480
Diverter Plate & Screw
519-6470
819-4350
Mounting Ring
519-6420 White
519-6427 Gray
519-6429-BEI Beige
Skimmer Basket
542-3240 White
810-0054.0618
©2018 Waterway Plastics
2200 East Sturgis Road, Oxnard CA 93030 • Phone 805.981.0262 • Fax 805.981.9403
www.waterwayplastics.com • waterway@waterwayplastics.com
Designed,
Engineered &
Manufactured
in the USA.
2
SKIMMER INSTALLATION
Eyeball Fitting
1 ½" MPT
1" Eye
Eyeball Fitting
1 ½" Insider Inlet
1" Eye
Flush Mount
Return Fitting
1" Eye 1 ½" Insider
1" Socket
For the Skimmer to work most effectively, it must be
positioned pertinent to the prevailing wind and drift,
the pool shape, and the water circulation pattern. The
function of directional inlet fittings will ensure the
appropriate circulation pattern. See diagrams.
For 1 ½" or FPT Skimmer (2" Spigot) beat results are 1 ½" pipe to
drain and 2" 90° for pump.
Return
Fitting
Return
Fitting
Return
Fitting Circulation Pattern
Skimmer
Tile
Cold Joint
Deck
Water Level
To Pump
From Main Drain
Concrete
2" Pipe
Installation
Tile Bottom
& Sides
Coping
From Main Drain 2"
Alternate 2 ½" Pipe Installation
For Better Flow
2 ½" Pipe 2 ½" 90°
810-0054.0618
©2018 Waterway Plastics
3
FOR COMMERCIAL:
Use EqualizerValve and Float Valve.
SKIMMER DIMENSIONS
15.15"
4.16" 2.10"
5.29"
Weir
Twist-Lock
Skimmer
Basket
3.02"
19.65"
8.17"
1 ½" S for
Overflow Hose
3.09"8.33"
1 ½" or 2" Threads,
1 ½" Spigot or 2"
Socket Connections
15.15" dia.
10.21" dia.
18.19"
7.7" 6.1"
6.38" dia.
7.73" dia.
8.21" dia.
810-0054.0618
©2018 Waterway Plastics
WARRANTY
For product registration visit: www.waterwayplastics.com.
For Warranty questions or claims please contact point of purchase.
4
SKIMMER WITH DIVERTER PLATE
SKIMMER WITH FLOAT VALVE (OPTIONAL)
SKIMMER WITH FLOAT VALVE & EQUALIZER VALVE (REQUIRED FOR COMMERCIAL USE)
FLOW ADJUSTMENT
For full follow, slide the diverter plate until it is fully open.To adjust flow, slide diverter
plate to desired position over pump outlet.
TO VACUUM
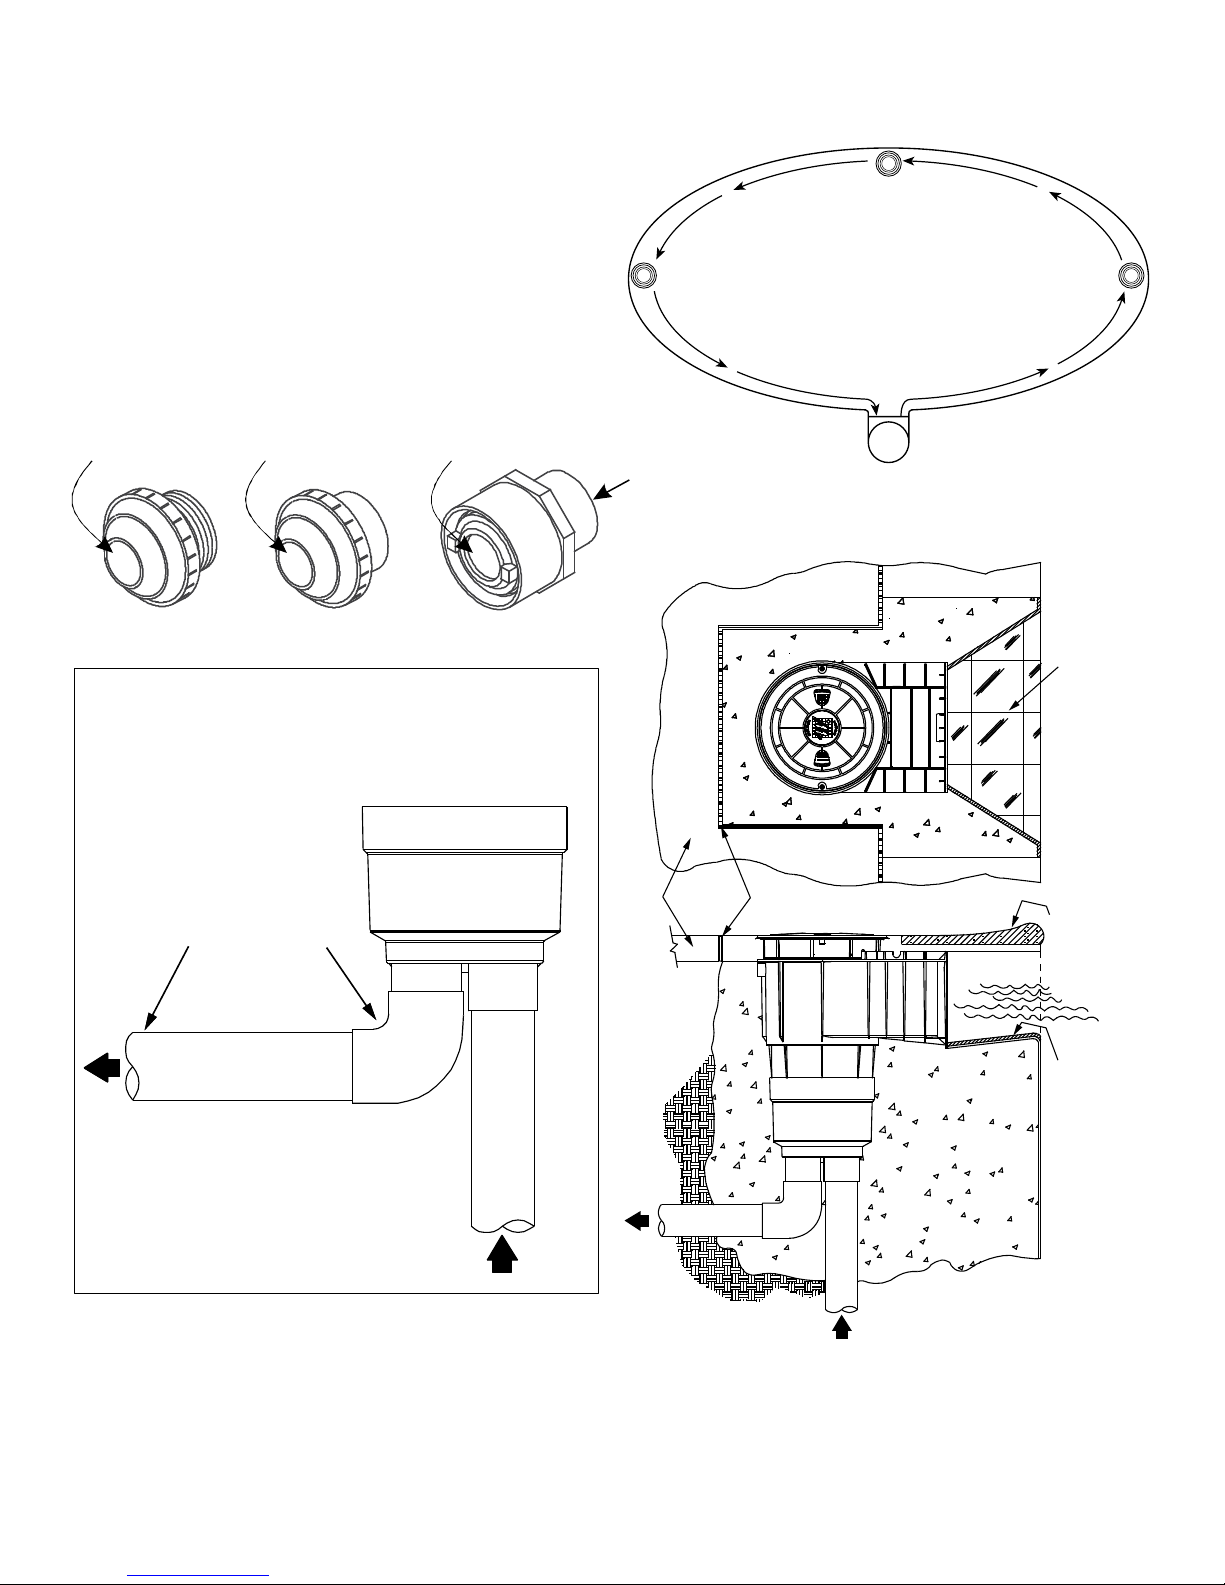
Remove the cover and the basket. Screw the hose adapter into the pump outlet. Fill
the vacuum hose with water and insert over the hose adapter.
When using the Float Valve Assembly, water is drawn by the suction of the pump from
the surface of the pool and the main drain line.The flow is balanced by the diverter
plate located under the FloatValve Assembly. If obstruction or evaporation occurs,
causing a significant reduction of flow over the weir, the float will automatically snap
shut.This diverts all flow to the pump from the main drain line ad prevents possible air
lock. When the pump is shut off or water level condition has been remedied, the float
will rise back to the top of the assembly, allowing for normal operation of the flow.
TO SWEEP/BRUSH
To divert all suction of the main drain, simply hold the wire above the normal
operation level and allow the float to snap shut. Or lift the Float Valve Assembly out,
close the diverter plate and replace. To reset float after sweeping, turn off pump for
about 10-15 seconds and allows the float to rise back up.
TO VACUUM
Remove the cover, basket, and the Float Valve Assembly. Screw the hose adapter into
the pump outlet. Fill the vacuum hose with water and insert over the hose adapter.
Equalizer Check Valve Assembly screws into the main drain port and is used in
conjunction with the FloatValve Assembly. If the water level drops below the skimmer
opening, or the skimmer flow is obstructed, the float will automatically snap shut and
the equalizer valve will open. This diverts all flow to the pump from the equalizer line
and prevents airlock in the pump. When the pump is off, and the water level condition
is corrected, the float valve will rise and the equalizer valve will open, allowing normal
skimming operation when the pump is restarted.
TO VACUUM
Select one convenient skimmer and remove the cover and FloatValve Assembly. Place
the vacuum plate on the basket. Fill the vacuum hose with water and insert over the
hose adapter. Throttle down the flow from the other skimmer(s) until desired suction
is obtained through vacuum.
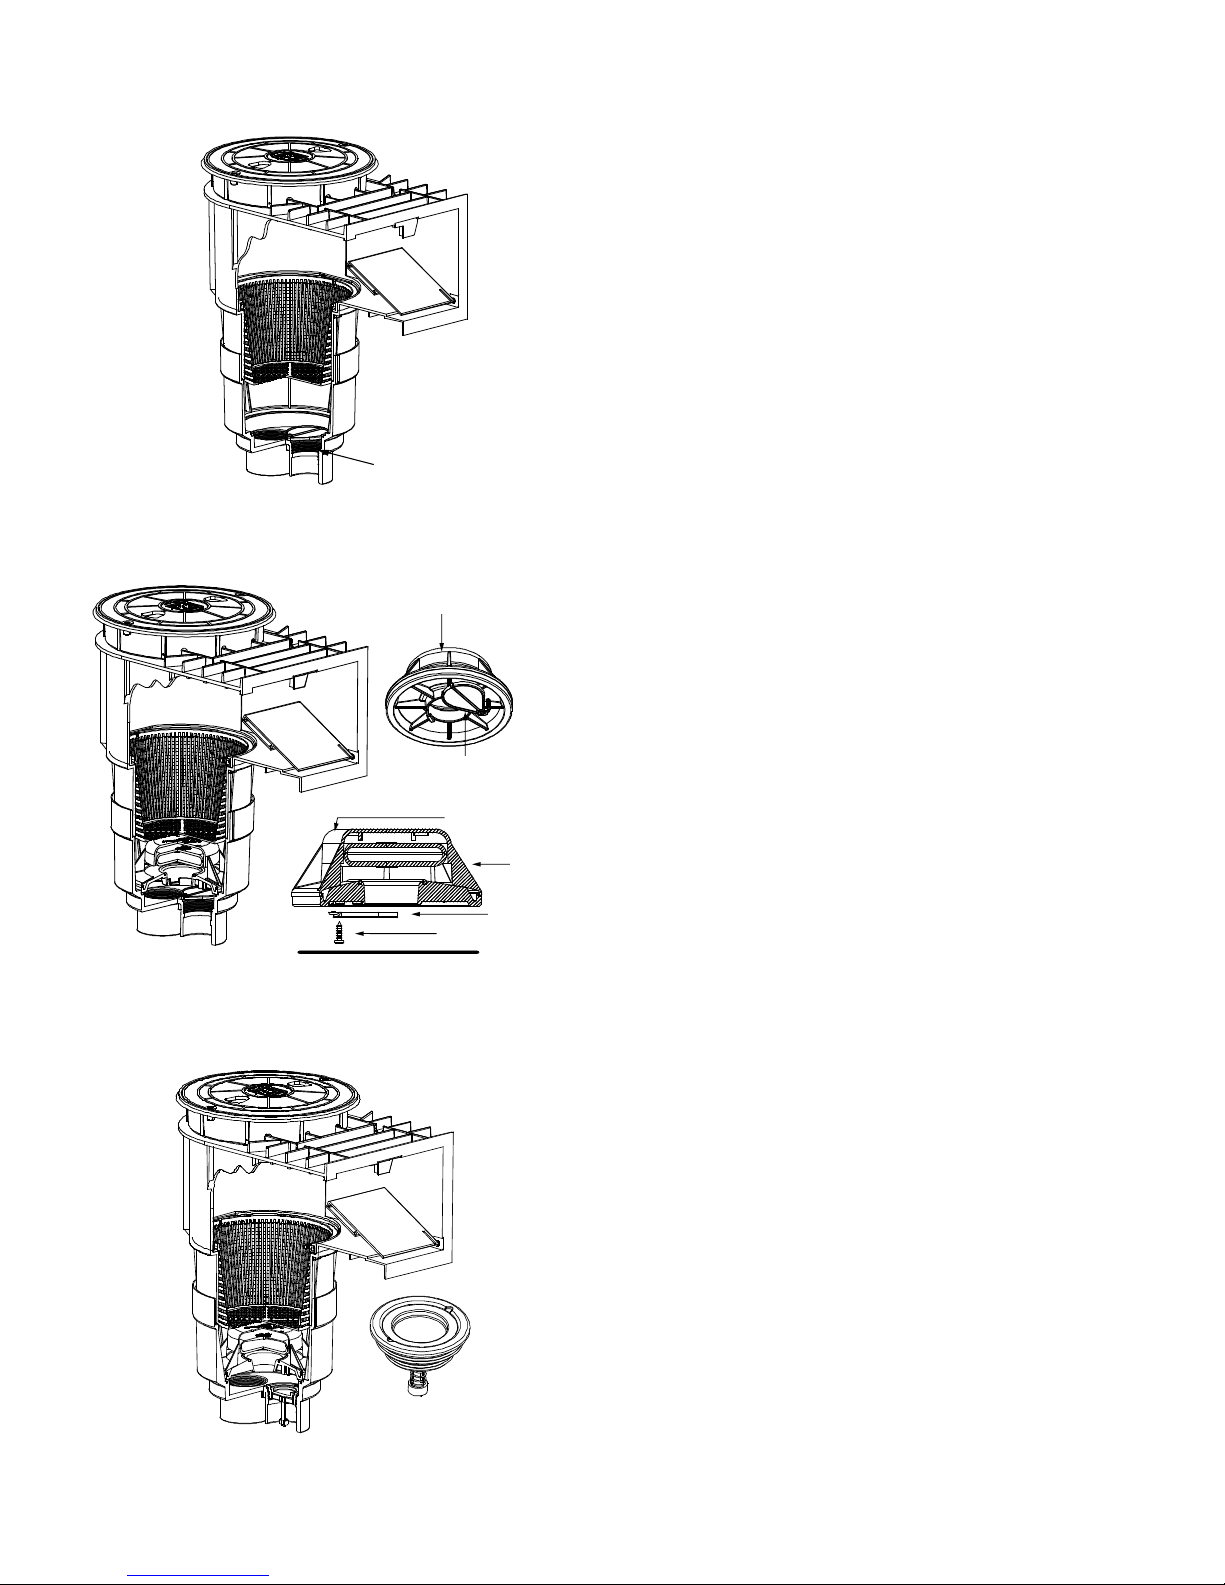
Diverter Plate
Float Valve
Float Valve O-Ring
Screw Diverter Plate
Float Valve
Side View
Valve Housing
Diverter Plate
Snaps in 3 Positions
Equalizer Valve
(optional 2" only)
810-0054.0618
©2018 Waterway Plastics