manuals.online logo
Brands
  1. Home
  2. •
  3. Brands
  4. •
  5. Watts
  6. •
  7. Control Unit
  8. •
  9. Watts 900 Series User manual

Watts 900 Series User manual

Series 900
Reduced Pressure Principle Backflow Preventers
Sizes: 21/2", 6" (65, 150mm)
• Service
• Replacement Parts
• Maintenance
For field testing procedure, send for IS-TK-DP and S-FT-TK9A.
For troubleshooting guide, send for S-TSG.
For other repair kits and service parts, send for PL-RP-BPD.
For technical assistance, contact your local Watts
representative. See back page.
Attn. Installer: After installation please leave this instruction
sheet for occupant's information.
Important: Inquire with governing authorities for local installa-
tion requirements.
Note: For Australia and New Zealand, line strainers should be
installed between the upstream shutoff valve and the inlet of the
backflow preventer.
RP-L900
Watts product specifications in U.S. customary units and
metric are approximate and are provided for reference only.
For precise measurements, please contact Watts Technical
Service. Watts reserves the right to change or modify prod-
uct design, construction, specifications, or materials without
prior notice and without incurring any obligation to make such
changes and modifications on Watts products previously or
subsequently sold.
RP-L900.indd 1 9/24/08 8:15:37 AM
2
Service Replacement Parts and Maintenance
Series 900
First Check Valve Quick Cleaning Operation:
A. Insert maintenance tool (15) into the vent port until the mark
on the handle is flush with vent port surface.
B. Close both inlet and outlet gate valves.
C. Open three test cocks (2, 3, and 4) located between the
gate valves. The test cock which is immediately upstream of
the first check valve (2) must be left open when the access
door is swung open to equalize pressure. When this test
cock is opened, the relief valve will tend to open, but will be
captivated in a partially open position by the maintenance
tool.
D. Remove eight hexagonal bolts from the access door.
E. Swing the door to an open position collecting water spillage
in a suitable receptacle.
F. Inspect 1st check valve seat and discs for damage or deteri-
oration, after wiping with a clean cloth.
G. If damage or deterioration to either seat is evident, remove
the eight socket head screws and remove seat and gasket
from valve. See photo (A).
H. Reverse above procedure for reassembly. Note: Lubricate
seat gasket with O-ring grease.
Removal of First Check Valve Assembly:
I. Insert assembly tool (13) into the hole in the end of the relief
valve casting and screw threaded rod onto the end of the
check valve assembly (1) hand tight. Lubricate rod for easier
turning.
J. Tighten the wing nut of the assembly tool only until the
maintenance tool (15) can just be removed from the relief
valve vent port. (Approximately a half turn.) See photos (C)
and (D).
A
B
DISC
MAINTENANCE
TOOLS
T Bolt Tool
Assembly Tool
Maintenance Tool
513
15
Required for 4" and 6" only.
34
7
5
15
14
13
12
12nd Check Valve
1st Check Valve
2
RP-L900.indd 2 9/24/08 8:15:37 AM
3
Caution: Do not over-tighten the wing nut as this may dam-
age the relief valve disc.
K. Remove maintenance tool (15). Loosen wing nut while
restraining rod from turning, allowing springs to completely
decompress. When wing nut spins loosely, threaded rod can
be unscrewed from device permitting removal of 1st check
valve assembly.
L. After replacing parts of the check valve assembly, reverse
procedure to reassemble parts taking note of the "Caution"
regarding over-tightening of the wing nut. Tighten the wing
nut only until maintenance tool (15) can just be inserted to
the mark on the handle of the tool.
M. Insert maintenance tool (15), photo (D). Loosen with nut and
remove assembly tool (13) from device.
Dismantling of Second Check Valve:
N. Depress valve stem of second check valve assembly (12)
and hold in an open position. Collect any water spillage.
O. Reach in through the door and wipe both seat and disc of
the second check assembly while depressing (holding). Allow
valve to close. Caution: Keep fingers clear of closing.
P. If second check valve is damaged or deteriorated, remove
six bolts from the flange of the second check valve module
and remove the module.
Q. After disassembly and cleaning, reassemble the check valve
module in the position shown in photo (B).
R. Inspect access door O-ring seal to be sure it is in its proper
position and close the door. Reassemble with eight hexago-
nal bolts.
S. Close all petcocks and open gate valves.
T. Remove maintenance tool (15) after restoring water pressure,
photo (E).
Opening of access door when maintenance
tool cannot be fully inserted into vent port
because relief valve is open:
U. Insert T bolt (5) into cavity of outlet casting (14) and through
the ear of relief valve casting.(7).
V. Tighten wing nut hand tight.
W. Remove eight hexagonal hatch bolts. There is now a spring
load transmitted to the T bolt assembly (5) from the first
check spring.
X. Slowly back off the wing nut allowing the door to open to
the point where the first check an relief valve springs have
decompressed enough so the door can be freely opened
and the T bolt assembly (5) can be removed.
C
D
F
E
RP-L900.indd 3 9/24/08 8:15:38 AM
Replacement Parts
Series 900
Service Parts Kit consists of:
First Check Valve Disc
Second Check Valve Disc
Set of O-rings (B, C, D, E)
Silicone Grease
For Prices:
Refer to Separate Replacement Parts Price Sheet, PL-RP/BPD.
Second Check Valve
Spring Assembly
Second Check
Valve Disc
Second Check Valve
(A) O-ring
(A) O-ring
1st Valve Seat
Relief Valve Seat
Relief Valve Spring
Piston & Guide Assembly
Gasket
Back-up
Seat
Back-up Third
Check Valve
First Check
Valve Disc
First Check
Valve Spring
(C) O-ring
Lock Nut
(D) Piston O-ring
(E) O-ring
Note: Before re-assembly, grease Relief Valve Seat orifice,
Piston Bore and Piston O-ring. Use silicone base grease.
RP-L900 0829 EDP# 0834254 © Watts, 2008
USA: 815 Chestnut St., No. Andover, MA 01845-6098; www.watts.com
Canada: 5435 North Service Rd., Burlington, ONT. L7L 5H7; www.wattscanada.ca
Water Safety & Flow Control Products
Limited Warranty: Watts Regulator Co. (the “Company”) warrants each product to be free from defects in material and workmanship under normal usage for a period of one year from the date of
original shipment. In the event of such defects within the warranty period, the Company will, at its option, replace or recondition the product without charge.
THE WARRANTY SET FORTH HEREIN IS GIVEN EXPRESSLY AND IS THE ONLY WARRANTY GIVEN BY THE COMPANY WITH RESPECT TO THE PRODUCT. THE COMPANY MAKES NO OTHER
WARRANTIES, EXPRESS OR IMPLIED. THE COMPANY HEREBY SPECIFICALLY DISCLAIMS ALL OTHER WARRANTIES, EXPRESS OR IMPLIED, INCLUDING BUT NOT LIMITED TO THE IMPLIED
WARRANTIES OF MERCHANTABILITY AND FITNESS FOR A PARTICULAR PURPOSE.
The remedy described in the first paragraph of this warranty shall constitute the sole and exclusive remedy for breach of warranty, and the Company shall not be responsible for any incidental,
special or consequential damages, including without limitation, lost profits or the cost of repairing or replacing other property which is damaged if this product does not work properly, other costs
resulting from labor charges, delays, vandalism, negligence, fouling caused by foreign material, damage from adverse water conditions, chemical, or any other circumstances over which the Company
has no control. This warranty shall be invalidated by any abuse, misuse, misapplication, improper installation or improper maintenance or alteration of the product.
Some States do not allow limitations on how long an implied warranty lasts, and some States do not allow the exclusion or limitation of incidental or consequential damages. Therefore the above
limitations may not apply to you. This Limited Warranty gives you specific legal rights, and you may have other rights that vary from State to State. You should consult applicable state laws to
determine your rights. SO FAR AS IS CONSISTENT WITH APPLICABLE STATE LAW, ANY IMPLIED WARRANTIES THAT MAY NOT BE DISCLAIMED, INCLUDING THE IMPLIED WARRANTIES OF
MERCHANTABILITY AND FITNESS FOR A PARTICULAR PURPOSE, ARE LIMITED IN DURATION TO ONE YEAR FROM THE DATE OF ORIGINAL SHIPMENT.
RP-L900.indd 4 9/24/08 8:15:39 AM
Other Watts Control Unit manuals

Watts Golden Eagle 719 Series Instruction Manual

Watts

Watts Golden Eagle 719 Series Instruction Manual

Watts IS-TWH-UTS User manual

Watts

Watts IS-TWH-UTS User manual

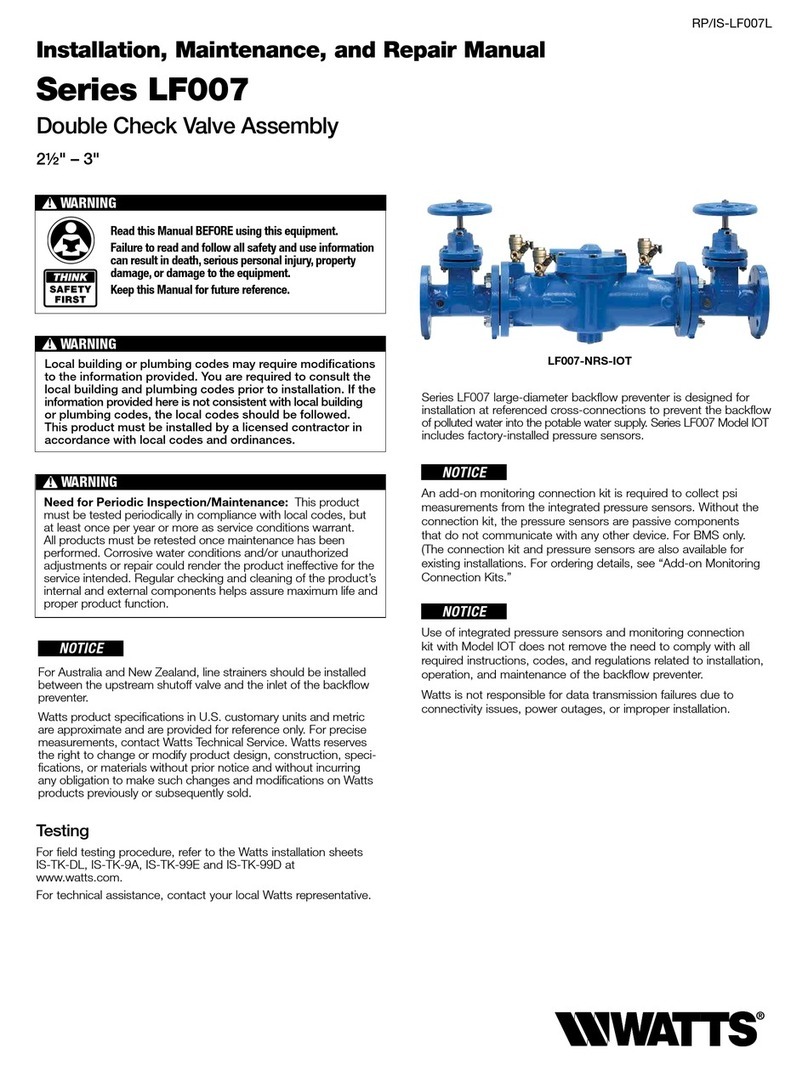
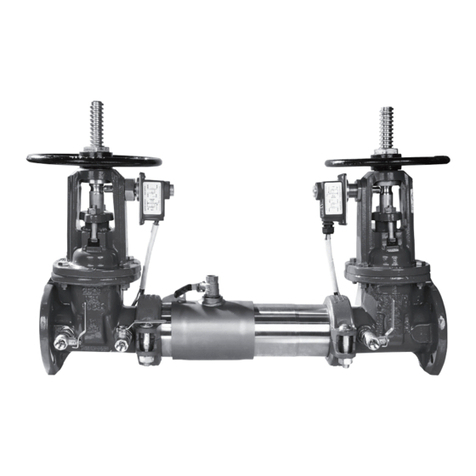
Watts LF007 IOT Series Operating instructions

Watts

Watts LF007 IOT Series Operating instructions

Watts LF007 Series Operating instructions

Watts

Watts LF007 Series Operating instructions

Watts LF007 Series Instruction Manual

Watts

Watts LF007 Series Instruction Manual

Watts bar PKI Operational manual

Watts

Watts bar PKI Operational manual

Watts LFM127-1 Installation and operating instructions

Watts

Watts LFM127-1 Installation and operating instructions

Watts FP-53L-M1 User manual

Watts

Watts FP-53L-M1 User manual

Watts AMES 979GD User manual

Watts

Watts AMES 979GD User manual

Watts AMES 930GD-01-19 Manual

Watts

Watts AMES 930GD-01-19 Manual

Watts AMES 960GD-15-17 Installation and operating instructions

Watts

Watts AMES 960GD-15-17 Installation and operating instructions

Watts MS20 User manual

Watts

Watts MS20 User manual

Watts 972GD-20 User manual

Watts

Watts 972GD-20 User manual

Watts 775 Series Installation and user guide

Watts

Watts 775 Series Installation and user guide

Watts 909RPDA User manual

Watts

Watts 909RPDA User manual

Watts LFM127-11 Installation and operating instructions

Watts

Watts LFM127-11 Installation and operating instructions

Watts LFM114-3 Owner's manual

Watts

Watts LFM114-3 Owner's manual

Watts Lync DigiTemp Jr V23 User manual

Watts

Watts Lync DigiTemp Jr V23 User manual

Watts AMES Deringer 20 User manual

Watts

Watts AMES Deringer 20 User manual

Watts bar PKW Operational manual

Watts

Watts bar PKW Operational manual

Watts LFM116-32 Installation and operating instructions

Watts

Watts LFM116-32 Installation and operating instructions

Watts LFM115-3 Owner's manual

Watts

Watts LFM115-3 Owner's manual

Watts LFM113-21 Guide

Watts

Watts LFM113-21 Guide

Watts Ames 910GD-17 Owner's manual

Watts

Watts Ames 910GD-17 Owner's manual

Popular Control Unit manuals by other brands

Jung KNX 4192 TSM operating instructions

Jung

Jung KNX 4192 TSM operating instructions

Festo VZBA-...-R Series operating instructions

Festo

Festo VZBA-...-R Series operating instructions

Vimar Elvox 8051/0 Installer's guide

Vimar

Vimar Elvox 8051/0 Installer's guide

AzureWave AW-CU544 Reference Design Guide

AzureWave

AzureWave AW-CU544 Reference Design Guide

HIMA HIMax X-DI 64 01 manual

HIMA

HIMA HIMax X-DI 64 01 manual

Emerson Rosemount 2410 Reference manual

Emerson

Emerson Rosemount 2410 Reference manual

Parker PSSN8M8A Installation & service instructions

Parker

Parker PSSN8M8A Installation & service instructions

KROHNE OPTISWITCH 3100 C Handbook

KROHNE

KROHNE OPTISWITCH 3100 C Handbook

Oasis BV700 Series instruction manual

Oasis

Oasis BV700 Series instruction manual

CHELIC SM Series manual

CHELIC

CHELIC SM Series manual

ASCO Valves 8262 Series Installation & maintenance instructions

ASCO Valves

ASCO Valves 8262 Series Installation & maintenance instructions

MaxStream 9XTend product manual

MaxStream

MaxStream 9XTend product manual

Guardian BEAM V2 product manual

Guardian

Guardian BEAM V2 product manual

BENDIX TW-1-3-4-5-6 CONTROL VALVES manual

BENDIX

BENDIX TW-1-3-4-5-6 CONTROL VALVES manual

HORNE TSV1-3 Installation, operating,  & maintenance instructions

HORNE

HORNE TSV1-3 Installation, operating, & maintenance instructions

Nice MC824HHS Instructions and warnings for installation and use

Nice

Nice MC824HHS Instructions and warnings for installation and use

GEM 660 operating instructions

GEM

GEM 660 operating instructions

M-system R7D-EC16B instruction manual

M-system

M-system R7D-EC16B instruction manual

manuals.online logo
manuals.online logoBrands
  • About & Mission
  • Contact us
  • Privacy Policy
  • Terms and Conditions

Copyright 2025 Manuals.Online. All Rights Reserved.