Wave Central AXTX3 User manual

AXIS AXTX3 TRANSMITTER
with AXIS PAINT
Menu Guide
June 6, 2019
Wave Central LLC
99 Garden Parkway, Suite C., Carlisle, PA 17013
+1 888 736 9283 www.wavecentralrf.com
1Wave Central LLC AXTX3 with PAINT June 2019

FORWARD
This document provides detail for the menus used for the AXTX3
transmitter with AXIS Paint. It is recommended that the user reads the
Operations manual for the AXIS TX PICO PLUS TRANSMITTER and AXIS
PAINT. These are available at www.wavecentralrf.com in the product
manual section. Wave Central LLC acknowledges Domo Tactical
Communications (DTC) and Videosys Broadcast for their contributions to
these products.
SPECIFICATIONS ARE SUBJECT TO CHANGE WITHOUT NOTICE. WAVE CENTRAL,
LLC IS NOT LIABLE FOR DAMAGES TO THIS OR ASSOCIATED EQUIPMENT CAUSED
BY ANY ERRORS OR OMMISSIONS CONTAINED HEREIN. FIMILIARIZATION OF THESE
MENUS IS ENCOURAGED. HOWEVER, ANY CHANGES THAT MAY AFFECT THE
OPERATION PARAMETER’S PRE-PROGRAMED BY WAVE CENTRAL PRIOR TO
SHIPMENT.THE PROGRAMMING GUIDE IS USE AT USERS OWN RISK.
2Wave Central LLC AXTX3 with PAINT June 2019

CAUTION
The HD/SDI Video input connector is 75 Ohms.
Ensure that the video cable(s) are fitted with
75 Ohm and NOT 50 Ohm connectors.
The illustration on the right is the correct
BNC connector.
Failure to do so will damage the BNC
connector(s). The customer is liable for any
damages for not adhering to this practice.
3Wave Central LLC AXTX3 with PAINT June 2019

TRANSMITTER MENU GUIDE
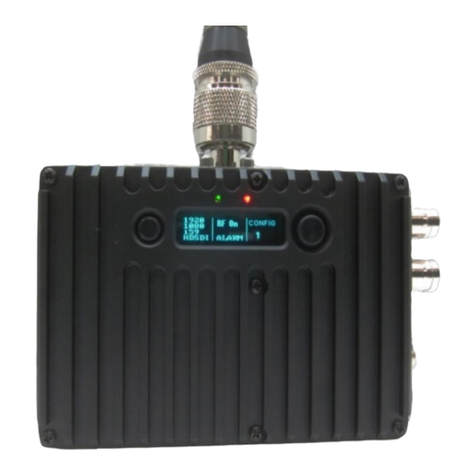
The AXTX3 transmitter has been turned
ON
and will enter the initialization cycle (boot
up).
CANCEL/BACK DISPLAY SCREEN SCROLL/ENTER
CONFIRM
There are two push buttons located adjacent to the OLED display screen. The function
of the button on the left is Cancel/Back.To select a menu header, press in on the
joystick button on the right. Using the joystick controller, scroll up or down through the
menu headings: STATUS / CONFIG RF / CONFIG VIDEO / CONFIG AUDIO / CONFIG
DATA / PRESET / PATTERN GENERATOR / UNIT. Select by pressing the right joystick
button in then scroll up or down to the sub-menu, press the button in again to backlight
a selection, and then scroll to the desired setting. Press the right button in again to
ENTER/CONFIRM setting.
Pressing the Cancel/Back button will restore the previous
setting prior to pressing ENTER/CONFIRM.
DEFAULT MENU
INITIALIZATING….
5850.000 PRESET: 11
RF: ON TEMP: 44
RLoD 1920X1080i 29fps
WAVE CENTRAL
4Wave Central LLC AXTX3 with PAINT June 2019

Select the “Status” menu. Press the right joystick button in to Enter/Confirm. Use the
right joystick button to scroll down and view the following parameters.
Press the left button (CANCEL/BACK) to return to the STATUS menu. Scroll down to the
next menu using the right joystick button.
STATUS
BAND: 8MHz
CONST: 16-QAM
FEC: 1/2
GUARD 1/32
Video Input: SDI
ASI Input: OFF
RLoD 1920X1080i 29fps
Source: EMBEDDED 1
Mode: STEREO
Encoder: MPEG-1 LAYER2
Bitrate: 192kbps
5Wave Central LLC AXTX3 with PAINT June 2019

CONFIGURATIONMENUS
There are four menus: RF / VIDEO / AUDIO / DATA. Press the right joystick button in and
then scrolling up or down, select which menu you want to view. By pressing the right
joystick button in again will enter the menu.
RF ON/OFF
RF POWER (HIGH-MED-LOW)
To change RF POWER, press the right joystick button in to highlight, and then scroll up
or down to select the power level. Then press the right joystick button in again to
ENTER/CONFIRM. Scroll down to the next menu.
CONFIG RF
RF POWER
HIGH
RF ON/OFF
ON
6Wave Central LLC AXTX3 with PAINT June 2019

RF FREQUENCY
BACKLIT FREQUENCY DISPLAY
CHANGE FREQUENCY BY USING THE LEFT, RIGHT, UP AND DOWN JOY STICK, SCROLL AND
THEN PRESS IN TO CONFIRM/ENTER EACH INTEGER CHANGED.
NEW FREQUENCY SET
RF FREQUENCY
5850.000
RF FREQUENCY
5850.000
RF FREQUENCY
5880.000
RF FREQUENCY
5880.000
7Wave Central LLC AXTX3 with PAINT June 2019

RF BANDWIDTH (6, 7 & 8 MHz)
RF CONSTELLATION (QPSK, 16-QAM OR 64-QAM)
RF FEC (1/2, 2/3, 3/4, 5/6 AND 7/8)
RF GUARD INT (1/32, 1/16, 1/8 AND 1/4)
RF CONSTELLATION
16-QAM
RF GUARD INT
1/32
RF FEC
2/3
RF BANDWIDTH
8MHz
8Wave Central LLC AXTX3 with PAINT June 2019

CONFIG VIDEO
CONFIG VIDEO (OFF, Composite 1, Composite 2, S-Video, SDI and HDMI)
VIDEO SOURCE
VIDEO FORMAT
The AUTO FORMAT mode will sense the input video source and format to that input.
(AUTO, PAL, NTSC, NTSC NP, 720p 50, 720p 59.94, 720p 60, 1080i 50,
1080i 59.95
, 1080i 60,
1080p 23.97, 1080p 24, 1080p 24, 1080p 29.97, 1080p30, 1080psf 23.976, 1080psf 24, 1080pfs
25, 1080psf 29.97, 1080psf 30, 1080p 50, 1080p 59, 1080p 60, 1080dl 50, 1080dl 59 and 1080dl
60.
VIDEO SOURCE
SDI
CONFIG VIDEO
VIDEO FORMAT
AUTO
9Wave Central LLC AXTX3 with PAINT June 2019

VIDEO FORMAT MANUALLY SELECTED
Scroll down to the VIDEO MODE; press in the right joystick button to highlight modes.
Scroll up or down to the mode that you want to operate then press in the joystick button
to ENTER/CONFIRM.
VIDEO MODE (STANDARD DELAY, LOW DELAY and ULTRA LOW DELAY)
Scroll down to the ASI ON/OFF Menu
ASI ON/OFF (ON & OFF)
Pressing the button on the left of the LED display will take you to the top menu level.
Scroll down using the right joystick button. The next menu heading is CONFIG AUDIO.
VIDEO MODE
ULTRA LOW DELAY
ASI ON/OFF
OFF
VIDEO FORMAT
1080i 59.95
10 Wave Central LLC AXTX3 with PAINT June 2019

CONFIG AUDIO
CONFIG AUDIO
Press the right Enter/Confirm joystick button in to access the audio sub-menus.
AUDIO SOURCE 1
(OFF, ANALOG, DIFFERENTIAL, EMBEDDED 1 and EMBEDDED 2)
Use the joystick button to scroll down to the next menu. In a similar way, the sub menus
can be selected.
AUDIO SOURCE 2
(OFF, ANALOG, DIFFERENTIAL, EMBEDDED 1 and EMBEDDED 2)
CONFIG AUDIO
AUDIO SOURCE 1
EMBEDDED 1
AUDIO SOURCE 2
EMBEDDED 2
11 Wave Central LLC AXTX3 with PAINT June 2019

AUDIO MODE
(LEFT MONO, RIGHT MONO and DUAL MONO)
Use the joystick button to scroll down to the next menu
.
AUDIO ENCODER
(MPEG-1 LAYER1 and MPEG-1 LAYER2)
AUDIO BITRATE
(32kbps, 48kbps,56kbps,64kbps, 80kbps, 96kbps, 112kbps, 128kbps, 160kbps, 192kbps,
224kbps, 256kbps, 320kbps and 384kbps)
Use the joystick button to scroll down to the next menu.
AUDIO MODE
STEREO
AUDIO ENCODER
MPEG-1 LAYER2
AUDIO BITRATE
192kbps
12 Wave Central LLC AXTX3 with PAINT June 2019

LEFT GAIN LEVEL
(0 through 63)
RIGHT LEVEL GAIN
(0 through 63)
Use the joystick button to scroll down to the next menu.
2v MIC OPTION
(ON/OFF)
Press the left button to return to the configuration menu.
LEFT LEVEL GAIN
6
RIGHT LEVEL GAIN
6
6
2v MIC OPTION
OFF
13 Wave Central LLC AXTX3 with PAINT June 2019

CONFIG DATA
CONFIG DATA
Press the right joystick button ENTER/CONFIRM in to enter the sub-menus.
DATA INPUT
(ON/OFF)
Use the joystick to scroll down to the next menu.
DATA BAUD
(1200, 2400, 4800, 9600, 19200, 38400, 57600 and 115200)
Use the joystick to scroll down to the next menu.
CONFIG DATA
DATA INPUT
OFF
DATA BAUD
4800
14 Wave Central LLC AXTX3 with PAINT June 2019

DATA FORMAT
(7-BIT ODD PARITY, 7-BIT EVEN PARITY, 7-BIT NO PARITY, NOT AVAILABLE, 8-BIT ODD
PARITY, 8BIT-EVEN PARITY and 8-BIT NO PARITY)
Press the left button to return to the CONFIG DATA menu.
Press the left button again to return to the home menu.
Press the right joystick button in and then scroll down to the PRESET menu.
DATA FORMAT
8-BIT NO PARITY
5850.000 PRESET: 11
RF: ON TEMP: 44
RLoD 1920X1080i 29fps
CONFIG DATA
15 Wave Central LLC AXTX3 with PAINT June 2019

PRESET
PRESET
There are 16 different preset files. This enables the user to change parameters and
save the changes to different files (if needed) all the preset parameters match from one
to sixteen. The only change from one file to the other would be the frequency. The
standard configuration has all parameters matching except the frequency.
Use the right joystick button, press in to select PRESET. The CURRENT PRESET is
displayed, which is preset number eleven (11).
Pressing the right joystick button will backlight the preset current number
PRESET
CURRENT PRESET
11
CURRENT PRESET
11
16 Wave Central LLC AXTX3 with PAINT June 2019

Preset 11 is back lit.Use the scroll joystick and change the value to 16. Pressing the
joystick button in again will ENTER/CONFIRM the Preset 16.
Remember if any parameters in other menus were changed and saved, they will now be
recalled in this preset in these examples. Wave Central will pre-configure the 16
operating frequencies for the operating band plan in Presets 1 – 16. The other
parameters: video, audio, etc. will be identical for each of the 16 presets.
Scrolled to PRESET 16 and right joystick button pressed in to ENTERED/CONFIRM
PRESET 16 IS CONFIRMED
Press the left, ESCAPE button which will return to the PRESET menu. Scroll down to the
PATTERN GENERATOR menu.
CURRENT PRESET
16
CURRENT PRESET
16
CURRENT PRESET
11
17 Wave Central LLC AXTX3 with PAINT June 2019

PATTERN GENERATOR
PATTERN GENERATOR
The internal pattern generator provides Video and Audio test signals. Control can be
automatically selected when the SDI input video signal is disconnected from the AXTX3
transmitter’s input BNC connector. Press the right joystick button in to enter into the
sub-menus.
CONTROL
(DISABLED, FORCE ON, Auto Video/Audio, Auto Video, Auto Audio and AV Sync)
Scroll down to the MODE menu.
MODE
PATTERN GENERATOR
CONTROL
Auto Video/Audio
MODE
Moving Pattern
18 Wave Central LLC AXTX3 with PAINT June 2019

MODE (Static Pattern)
Scroll through the MODE menus.
MODE
(White, Yellow, Magenta, Red, Cyan. Green, Blue and Black Screen)
Press CANCEL/BACK using the left push button to return to PATTERN GENERATOR
screen.
PATTERN GENERATOR
Use the right joystick button to scroll down to next menu, which is the UNIT menu.
MODE
Static Pattern
MODE
Red Screen
PATTERN GENERATOR
19 Wave Central LLC AXTX3 with PAINT June 2019

UNIT
UNIT
Pressing in on the joystick button once will display the unit’s FPGA temperature.
TEMPERATURE
(Degrees Celsius)
Scrolling down will display various unit information
TX VERSION
UNIT
TEMPERATURE
44
TX VERSION
3.3.1
20 Wave Central LLC AXTX3 with PAINT June 2019
Table of contents
Other Wave Central Transmitter manuals


