manuals.online logo
Brands
  1. Home
  2. •
  3. Brands
  4. •
  5. We Made Me
  6. •
  7. Baby Carrier
  8. •
  9. We Made Me Pao Papoose User manual

We Made Me Pao Papoose User manual

Other We Made Me Baby Carrier manuals

We Made Me imagine User manual

We Made Me

We Made Me imagine User manual

We Made Me Venture User manual

We Made Me

We Made Me Venture User manual

We Made Me flow User manual

We Made Me

We Made Me flow User manual

We Made Me smile User manual

We Made Me

We Made Me smile User manual

Popular Baby Carrier manuals by other brands

onya baby BOOSTER user manual

onya baby

onya baby BOOSTER user manual

Joie C2104 quick start guide

Joie

Joie C2104 quick start guide

Edwards & Co AVERY FA0062 Use & care guide

Edwards & Co

Edwards & Co AVERY FA0062 Use & care guide

Quinny 1473 user guide

Quinny

Quinny 1473 user guide

BabyBjorn BaByBjörn Baby Carrier Active owner's manual

BabyBjorn

BabyBjorn BaByBjörn Baby Carrier Active owner's manual

BabyBjorn BaByBjörn Baby Carrier Origina Manuel du propriétaire

BabyBjorn

BabyBjorn BaByBjörn Baby Carrier Origina Manuel du propriétaire

BabyBjorn Miracle owner's manual

BabyBjorn

BabyBjorn Miracle owner's manual

Joie Aire twin instruction manual

Joie

Joie Aire twin instruction manual

BESAFE Haven user manual

BESAFE

BESAFE Haven user manual

WOMPAT ILO instruction manual

WOMPAT

WOMPAT ILO instruction manual

Bellelli FRECCIA user guide

Bellelli

Bellelli FRECCIA user guide

Chicco MARSUPIO Go Instructions for use

Chicco

Chicco MARSUPIO Go Instructions for use

Infantino Infinity owner's manual

Infantino

Infantino Infinity owner's manual

Graco ISPC090BB owner's manual

Graco

Graco ISPC090BB owner's manual

7 A.M. Enfant TEDDY BEBEPOD user manual

7 A.M. Enfant

7 A.M. Enfant TEDDY BEBEPOD user manual

QABA 430-003 Assembly instruction

QABA

QABA 430-003 Assembly instruction

Chicco Coda owner's manual

Chicco

Chicco Coda owner's manual

Chicco Finder Instructions for use

Chicco

Chicco Finder Instructions for use

manuals.online logo
manuals.online logoBrands
  • About & Mission
  • Contact us
  • Privacy Policy
  • Terms and Conditions

Copyright 2025 Manuals.Online. All Rights Reserved.

™
BABYWEARING GUIDE
QUICK&START
Choosing to start a family may be the most natural (or irrational) decision you
take in life, so we’ve made our Pao Papoose™ Babywearing Guide as simple
and stress-free as possible, allowing you to get on with the very important
business of bonding with your baby.. Take a little sneaky peek at how our new
Pao Papoose™ works.
Once upon a time…
2
Components and mechanisms:
1. Instructions pocket (a quick guide for when you’re out and about)
2. Waistband and buckle (adjustable)
3. Leg padding adjusters
4. Shoulder straps
5. Shoulder strap buckles
6. Shoulder strap adjusters
7. Contour adjusters (for use in back-carry position)
8. Lower surface-mounted buckles (for use in parent-facing & back-carry position)
9. Chest strap (for use in back-carry position)
10. Upper surface-mounted buckles (for use in world-facing position)
11. Perfect-fit adjusters
12. Adjustable head support/hood
13. Snaps/poppers
8
1
10
11
12
13
13
6
7
9
3
5
4
2
Instructions
pocket
1
™
Getting to
know your
Pao Papoose™
3
positions
(parent-facing)
Pages 8–13
(world-facing)
Pages 14–17
(back-carry)
Pages 20–29
carrying
Three
4
Before you begin, ensure that the surface-mounted buckles are
unfastened, the perfect-fit adjusters are completely loosened,
and the waistband and shoulder strap adjusters are loosened to
approximately halfway.
We recommend that you run through the following step-by-step
instructions WITHOUT baby. Familiarise yourself with the carrier’s
user-friendly components and mechanisms, then practise the
three carrying positions. When you and baby are ready for your
Pao Papoose™ debut, try it near a soft surface such as a bed or
sofa, or with someone watching.
Rehearsal
5
A baby’s spine and hips are not yet fully developed. Their spine is
naturally rounded, not straight, and their spine and hip joints are
soft and flexible.
Therefore, it is vitally important that when baby is placed in the
Pao Papoose™, they remain in the ergonomically correct sitting
position at all times. This ensures baby’s back, hips and the back
of their head are supported and protected.
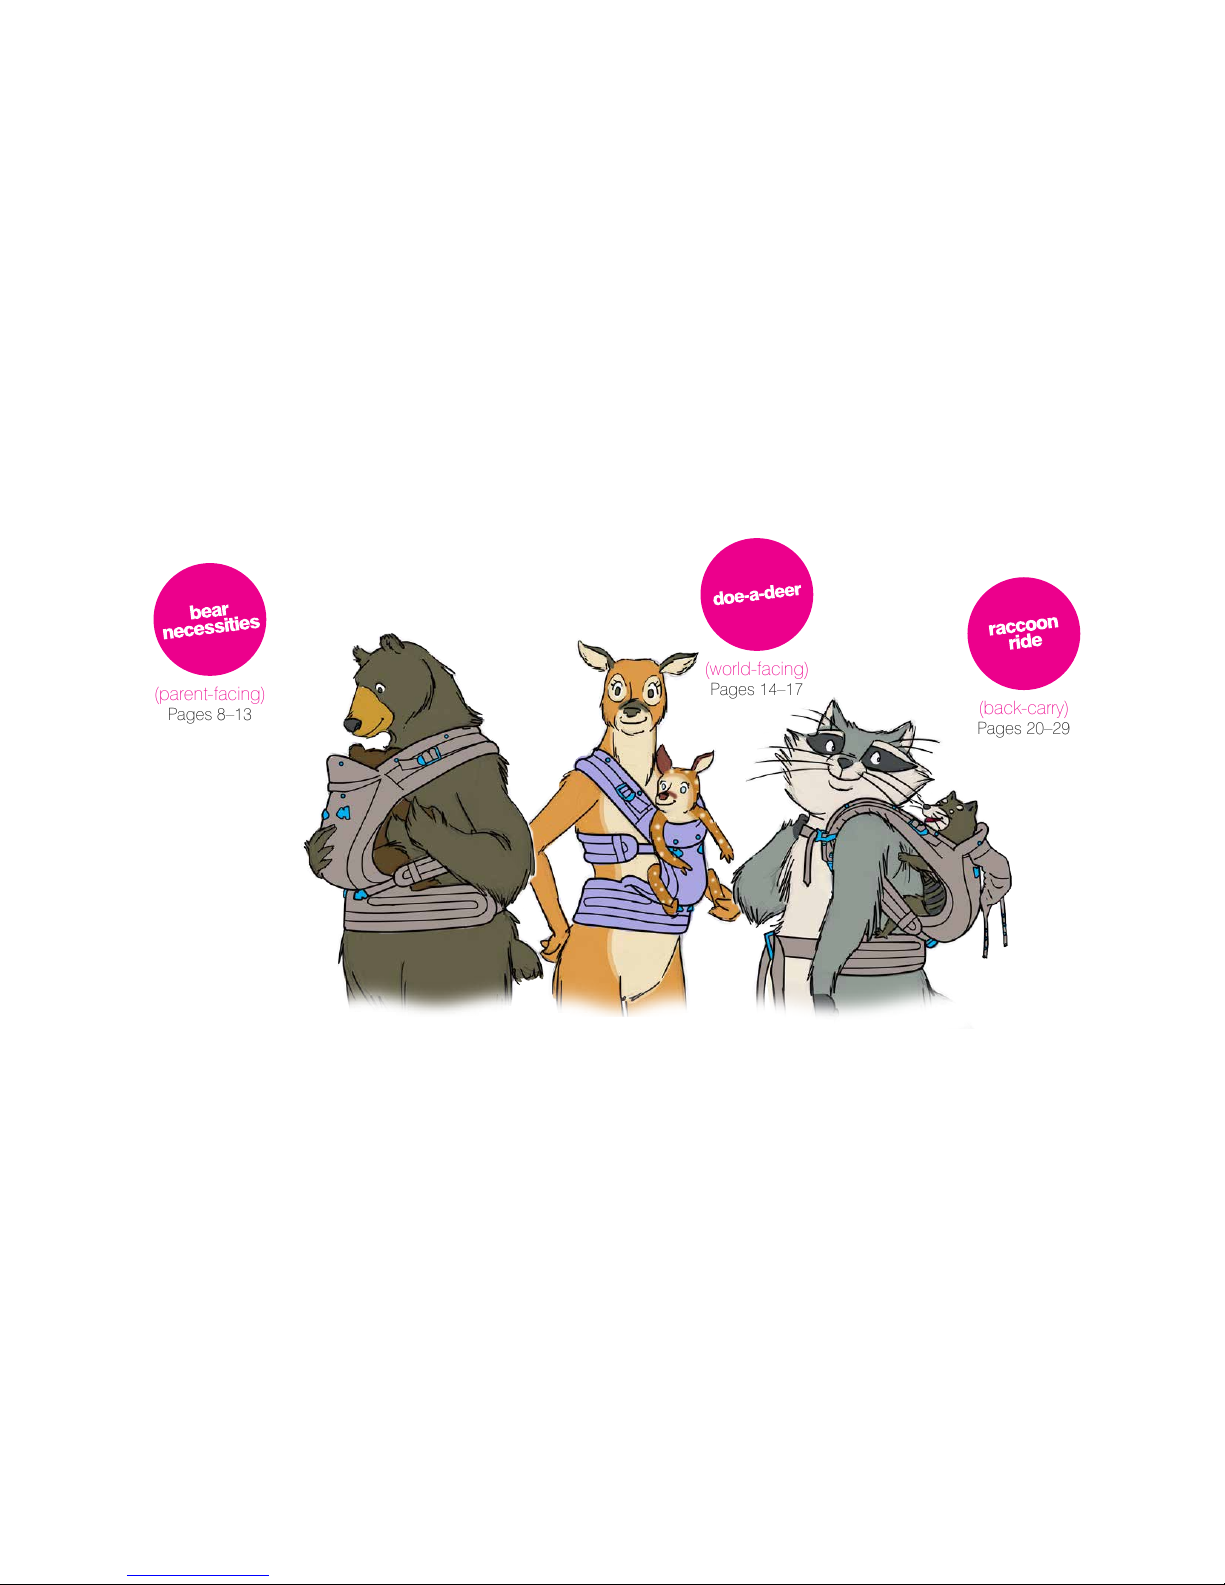
Our Pao Papoose™ is designed with this in mind and avoids
baby assuming the dangling position where all their weight rests
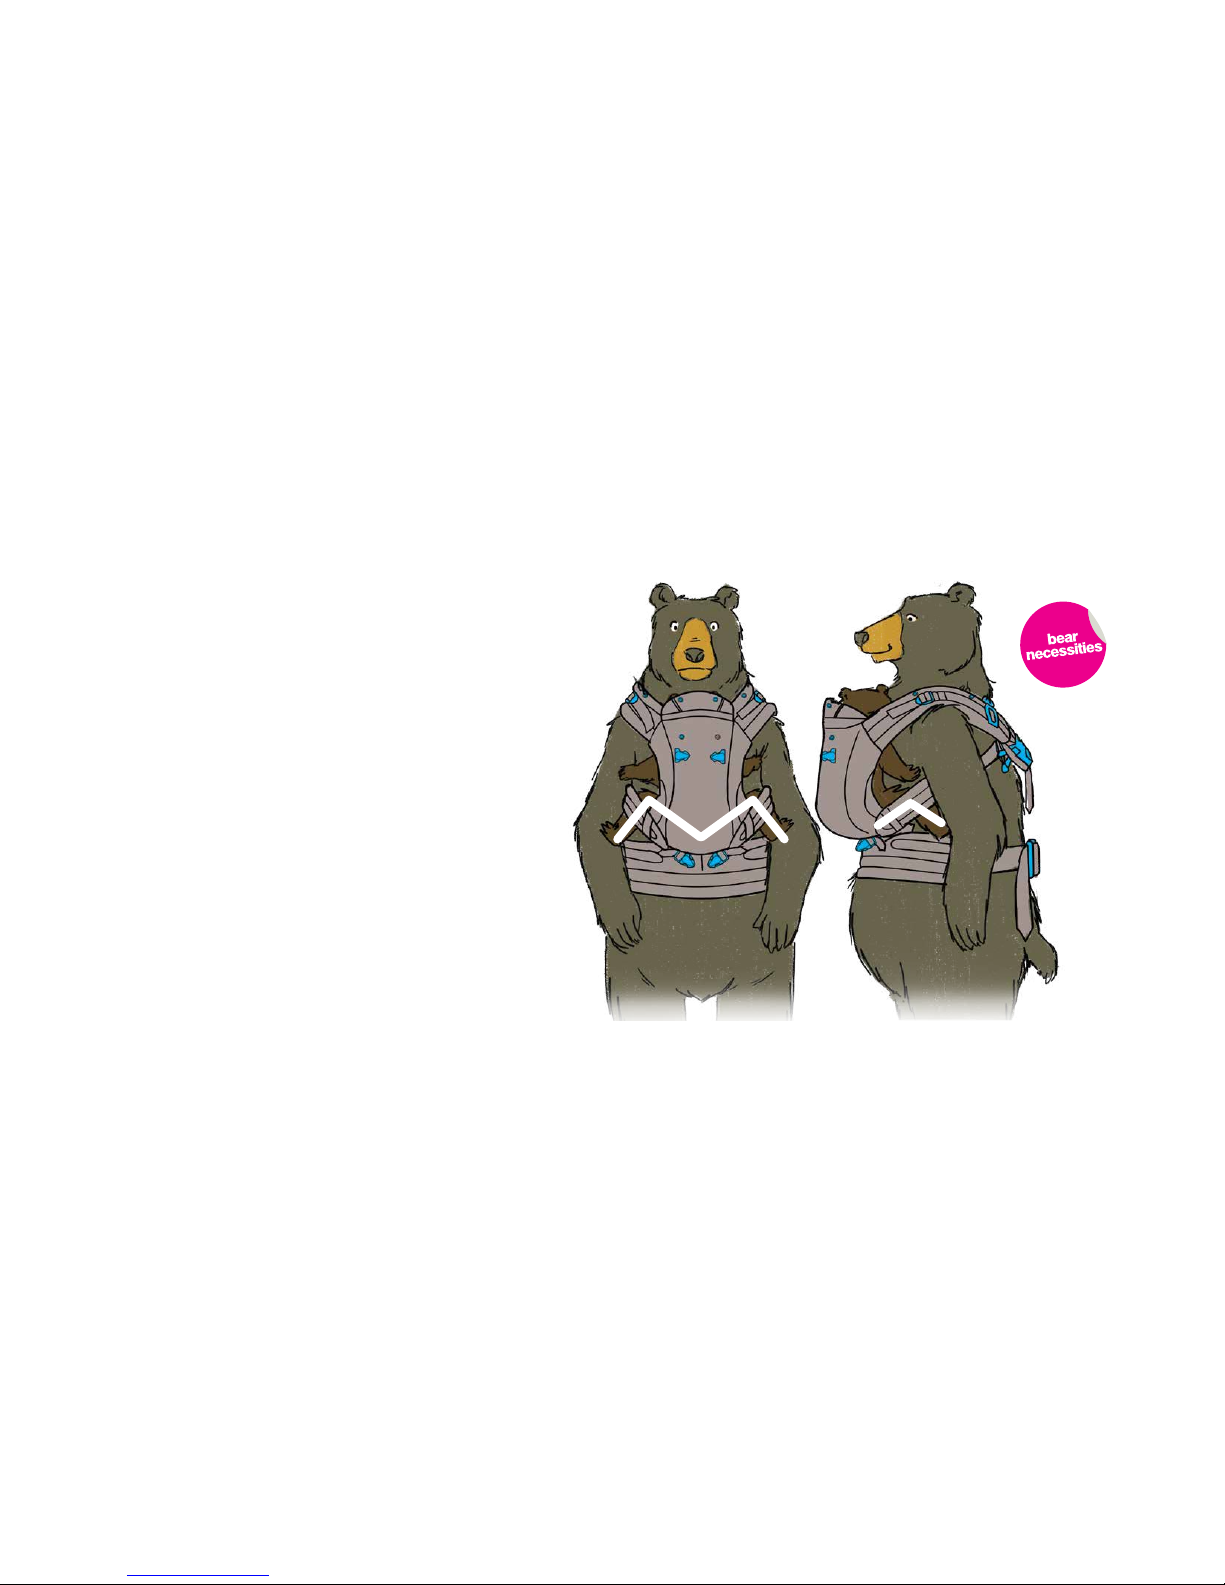
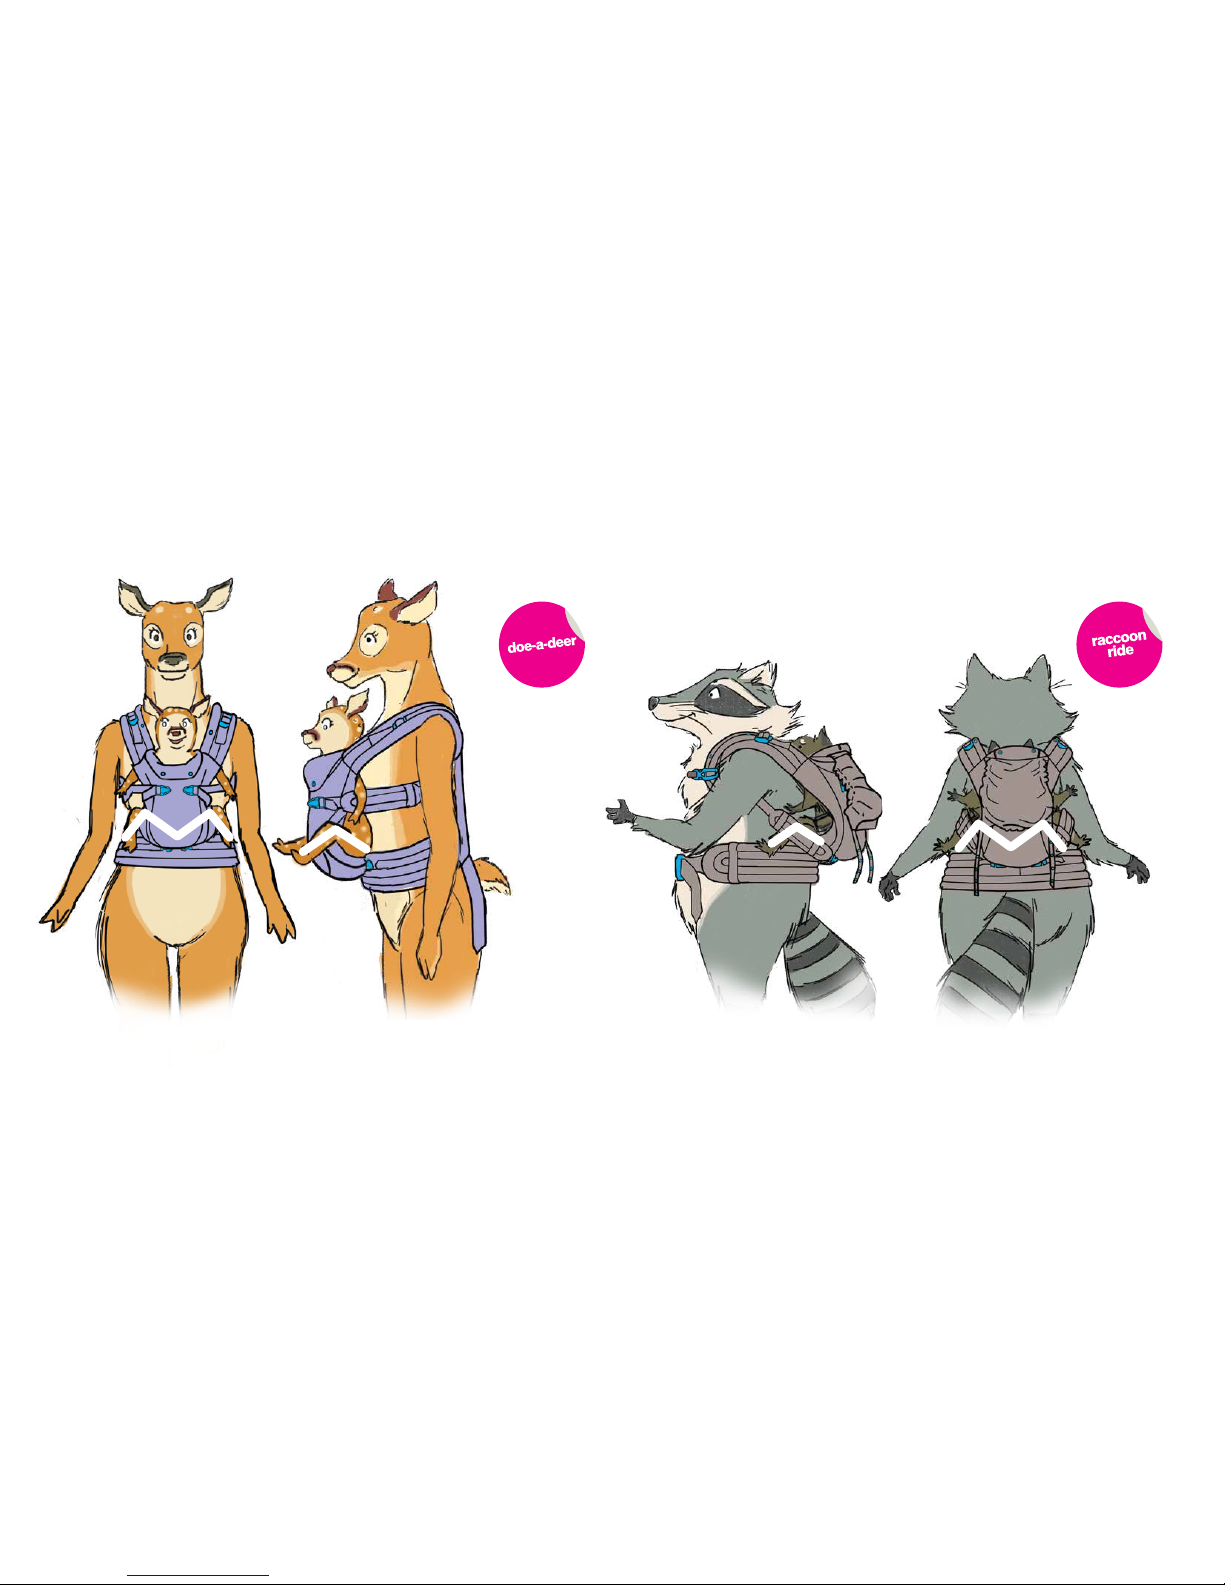
on their crotch. Whether using the Bear Necessities (parent-facing
position), the Doe-a-deer (world-facing position) or the Raccoon
Ride (back-carry position), the papoose will automatically support
baby in this natural sitting position.
To check baby achieves this comfortable spread squat, or M
position, ensure their bottom is always positioned lower than their
knees, and the fabric of the papoose fully supports their thighs.
Ergonomically
correct sitting
position
6
7
(parent-facing position)
4–24m | 5.5–12.2kg | 12–26.9lbs
This front position is perfect for those who want
to share every snugly moment on the move,
belly-to-belly with baby. Ideal for babies aged 4
to 24 months and comfortable both for when
they are awake or asleep.
front
back
8
Step 01. Attach
Lay your papoose out with the inner side and
the instructions pocket facing upwards and the
waistband nearest to you.
1. Pick up your papoose by the waistband and
position it on to the front of your waist.
2. Fold the waistband down so that the inner side of
the papoose hangs down in front. You should see
the instructions pocket facing downwards.
3. Clip the waistband around your waist, just above
your hips,
4. Use both hands to tighten straps comfortably.
Great. So far so good.
1 2 3
4
9
Step 02. Embrace
Now you are going to half-build the papoose before placing baby
inside.
1–2.Bring one shoulder strap up and position over your shoulder.
3–5.Move it around your back to the front and clip it into the
opposing lower surface-mounted buckle. This creates the bucket
seat to place baby.
6.Look your baby in the eyes (this assures them that you know
exactly what you’re doing), pick them up under their arms and
place them on to your shoulder without the shoulder strap.
7. Now lower baby into the bucket seat in an embrace position.
Make sure their precious little bottom is comfortably positioned just
above the waistband and their legs are wrapped around your body.
Check that the top of baby’s head is ‘close enough to kiss’. Ensure
their bottom is positioned lower than their knees and the fabric of the
papoose fully supports their thighs. (See M position on page 6.)
1 2 3
10