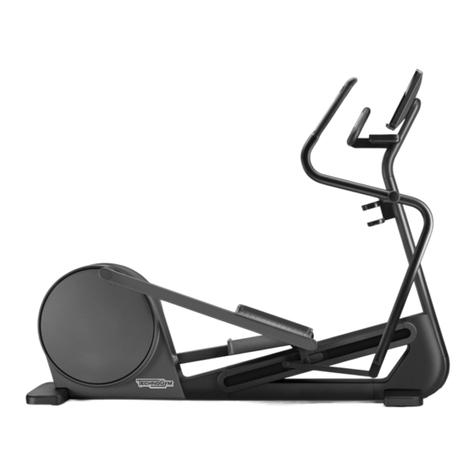
Wellness TechnoGym Element Cables Crossed User manual

1
E L E M E N T
E S S E N T I A L S T R E N G T H
Cables Crossed
User manual
Identification of the manufacturer
and the equipment
Description of the equipment
Technical data
Safety labels and devices
Packing
Place of installation
Unpacking
Assembling the equipment
Securing the equipment
Lifting and handling
the equipment
Routine maintenance
Replacing the cable
Replacing the spring hook
Technical Service
Storage
Disposing of the equipment
Installing accessories
Using the equipment

2
A B D
C
04269100
E
Identificationofthemanufacturerandtheequipment
The identification plate of the equipment and manufacturer, affixed on the frame
behind the weight stack, gives the following details:
AName and address of the manufacturer
BCE Mark
CSerial number
DCautions
EEquipment classification
Identification of the manufacturer
and the equipment
Description of the equipment
Technical data
Safety labels and devices
Packing
Place of installation
Unpacking
Assembling the equipment
Securing the equipment
Lifting and handling
the equipment
Routine maintenance
Replacing the cable
Replacing the spring hook
Technical Service
Storage
Disposing of the equipment
Installing accessories
Using the equipment
Contents
CablesCrossed

3
04269101
Description of the equipment
Frame
Side handgrips
Weight stack
Pin
Pulley
Beam
Frame: load-bearing structure of the equipment.
Identification of the manufacturer
and the equipment
Description of the equipment
Technical data
Safety labels and devices
Packing
Place of installation
Unpacking
Assembling the equipment
Securing the equipment
Lifting and handling
the equipment
Routine maintenance
Replacing the cable
Replacing the spring hook
Technical Service
Storage
Disposing of the equipment
Installing accessories
Using the equipment
Contents
CablesCrossed

4
04269102
Description of the equipment
Frame
Side handgrips
Weight stack
Pin
Pulley
Beam
Side handgrips: held by the user to increase stability during the exercises.
Identification of the manufacturer
and the equipment
Description of the equipment
Technical data
Safety labels and devices
Packing
Place of installation
Unpacking
Assembling the equipment
Securing the equipment
Lifting and handling
the equipment
Routine maintenance
Replacing the cable
Replacing the spring hook
Technical Service
Storage
Disposing of the equipment
Installing accessories
Using the equipment
Contents
CablesCrossed

5
04269103
Description of the equipment
Frame
Side handgrips
Weight stack
Pin
Pulley
Beam
Weight stack:each pulley,i.e.high orlow,operatedbythe user, moves theweights
along two guides by means of a cable.A pin is used for selecting the load in order
to adjust the exercise effort level.
Identification of the manufacturer
and the equipment
Description of the equipment
Technical data
Safety labels and devices
Packing
Place of installation
Unpacking
Assembling the equipment
Securing the equipment
Lifting and handling
the equipment
Routine maintenance
Replacing the cable
Replacing the spring hook
Technical Service
Storage
Disposing of the equipment
Installing accessories
Using the equipment
Contents
CablesCrossed

6
04269104
Description of the equipment
Frame
Side handgrips
Weight stack
Pin
Pulley
Beam
Weight stack:each pulley, i.e.high or low, operated by the user, moves the weights
along two guides by means of a cable.A pin is used for selecting the load in order
to adjust the exercise effort level.
Identification of the manufacturer
and the equipment
Description of the equipment
Technical data
Safety labels and devices
Packing
Place of installation
Unpacking
Assembling the equipment
Securing the equipment
Lifting and handling
the equipment
Routine maintenance
Replacing the cable
Replacing the spring hook
Technical Service
Storage
Disposing of the equipment
Installing accessories
Using the equipment
Contents
CablesCrossed

7
04269105
Description of the equipment
Frame
Side handgrips
Weight stack
Pin
Pulley
Beam
Weight stack:each pulley, i.e.high or low, operated by the user, moves the weights
along two guides by means of a cable.A pin is used for selecting the load in order
to adjust the exercise effort level.
Identification of the manufacturer
and the equipment
Description of the equipment
Technical data
Safety labels and devices
Packing
Place of installation
Unpacking
Assembling the equipment
Securing the equipment
Lifting and handling
the equipment
Routine maintenance
Replacing the cable
Replacing the spring hook
Technical Service
Storage
Disposing of the equipment
Installing accessories
Using the equipment
Contents
CablesCrossed

8
04269106
Description of the equipment
Frame
Side handgrips
Weight stack
Pin
Pulley
Beam
Beam: the component connecting the two frames.
Identification of the manufacturer
and the equipment
Description of the equipment
Technical data
Safety labels and devices
Packing
Place of installation
Unpacking
Assembling the equipment
Securing the equipment
Lifting and handling
the equipment
Routine maintenance
Replacing the cable
Replacing the spring hook
Technical Service
Storage
Disposing of the equipment
Installing accessories
Using the equipment
Contents
CablesCrossed

9
04269080
04269081
04269015_iconapaccopesi
3239 mm
(128") 686 mm
(27")
280 kg (618 lb)
50 kg x 2 (100 lb x 2)
2312 mm
(91")
Technical data
Identification of the manufacturer
and the equipment
Description of the equipment
Technical data
Safety labels and devices
Packing
Place of installation
Unpacking
Assembling the equipment
Securing the equipment
Lifting and handling
the equipment
Routine maintenance
Replacing the cable
Replacing the spring hook
Technical Service
Storage
Disposing of the equipment
Installing accessories
Using the equipment
Contents
CablesCrossed

10
04269016_targ_schiacciamento
Safety labels and devices
The equipment does not have any sharp corners.
All the parts which come into contact with the body are adequately protected with
rubber coverings or padding.
WARNING
It is important to pay attention to the labels affixed to the equipment,
as they provide information about possible risks and hazards.
Pay particular attention to the parts of
the equipment with labels indicating the
“DANGEROFSQUASHING”.
Identification of the manufacturer
and the equipment
Description of the equipment
Technical data
Safety labels and devices
Packing
Place of installation
Unpacking
Assembling the equipment
Securing the equipment
Lifting and handling
the equipment
Routine maintenance
Replacing the cable
Replacing the spring hook
Technical Service
Storage
Disposing of the equipment
Installing accessories
Using the equipment
Contents
CablesCrossed

11
04269017
Packing
The equipment is supplied partially assembled in a carton and protected by
cellophane wrapping, and secured to a pallet.
The equipment can be lifted and handled using normal lifting machine.
In order to ensure the safety of persons and property, carefully determine the
lifting and handling machine used as a function of the place of installation.
OK
Identification of the manufacturer
and the equipment
Description of the equipment
Technical data
Safety labels and devices
Packing
Place of installation
Unpacking
Assembling the equipment
Securing the equipment
Lifting and handling
the equipment
Routine maintenance
Replacing the cable
Replacing the spring hook
Technical Service
Storage
Disposing of the equipment
Installing accessories
Using the equipment
Contents
CablesCrossed

12
Place of installation
To guarantee safe, comfortable and effective use of the equipment, the place of
installation must comply with certain specific requirements; in particular, before
choosing where to install the equipment it is recommended to check the following:
-temperature between +10°C and +25°C;
- sufficient ventilation to maintain a humidity level between 20% and 90%, when
the equipment is in use;
- adequate lighting, so that the physical exercise takes place in pleasant and
relaxing conditions;
- sufficient clearance on all sides of the equipment, taking into account its
maximum dimensions during the movements, necessary for safety reasons;
- a flat, stable and vibration-free floor surface, with adequate carrying capacity
for the equipment’s weight.
If the equipment is installed in a public recreational area, the place must conform
to all the requirements prescribed by the regulations in force.
WARNING
The equipment must be installed and used in a place whose access
and supervision are specifically controlled by the owner.
Identification of the manufacturer
and the equipment
Description of the equipment
Technical data
Safety labels and devices
Packing
Place of installation
Unpacking
Assembling the equipment
Securing the equipment
Lifting and handling
the equipment
Routine maintenance
Replacing the cable
Replacing the spring hook
Technical Service
Storage
Disposing of the equipment
Installing accessories
Using the equipment
Contents
CablesCrossed

13
04269107
Unpacking
The equipment is supplied on a pallet, to which it is secured by means of straps.
To remove the equipment from the packing:
- cut the carton along the bottom and pull it away from the top;
- remove the cellophane by pulling it away from the top;
cont.
Identification of the manufacturer
and the equipment
Description of the equipment
Technical data
Safety labels and devices
Packing
Place of installation
Unpacking
Assembling the equipment
Securing the equipment
Lifting and handling
the equipment
Routine maintenance
Replacing the cable
Replacing the spring hook
Technical Service
Storage
Disposing of the equipment
Installing accessories
Using the equipment
Contents
CablesCrossed

14
04269108
Unpacking
- untie the straps securing the
equipment to the pallet;
- lift each equipment unit from the
weight stack side and place it on the
ground.
WARNING
Given the weight of the equipment, we recommend that more than one
person be involved in lifting it.
DANGER
The packing materials (boxes, bags, etc.) must not be left within the
reach of children, as they constitute a possible hazard; nor must they
be disposed of in the environment.
Identification of the manufacturer
and the equipment
Description of the equipment
Technical data
Safety labels and devices
Packing
Place of installation
Unpacking
Assembling the equipment
Securing the equipment
Lifting and handling
the equipment
Routine maintenance
Replacing the cable
Replacing the spring hook
Technical Service
Storage
Disposing of the equipment
Installing accessories
Using the equipment
Contents
CablesCrossed

15
04269109 ABC
Assembling the equipment
- Insertthebeam(A)intoholes(B)ofbothequipmentunitstobringthemtogether;
DANGER
The equipment must be moved with great care, due to the risk of it
tipping over.
- insert the screws (C), three on each side;
cont.
Identification of the manufacturer
and the equipment
Description of the equipment
Technical data
Safety labels and devices
Packing
Place of installation
Unpacking
Assembling the equipment
Securing the equipment
Lifting and handling
the equipment
Routine maintenance
Replacing the cable
Replacing the spring hook
Technical Service
Storage
Disposing of the equipment
Installing accessories
Using the equipment
Contents
CablesCrossed

16
04269110
E
F
G
D
Assembling the equipment
- passthecablethroughthepulley(D);
check the cable is correctly
positioned in the pulley groove;
- insert the rubber gaiter (E) and the
attachment (F), then tighten the
screws (G);
- lower the rubber gaiter (E).
Identification of the manufacturer
and the equipment
Description of the equipment
Technical data
Safety labels and devices
Packing
Place of installation
Unpacking
Assembling the equipment
Securing the equipment
Lifting and handling
the equipment
Routine maintenance
Replacing the cable
Replacing the spring hook
Technical Service
Storage
Disposing of the equipment
Installing accessories
Using the equipment
Contents
CablesCrossed

17
04269111
BA
Securing the equipment
WARNING
It is obligatory to secure the equipment to the wall or ceiling.
Technogym is not liable for damage caused by failure to secure the
equipment.
Use cables, ropes or chains to secure the equipment to the wall or ceiling.
DANGER
Use cables, ropes or chains that strictly meet the following minimum
requirement: minimum guaranteed workload of 90 kg.
- tighten the eyebolts (A) into the threaded holes (B);
cont.
Identification of the manufacturer
and the equipment
Description of the equipment
Technical data
Safety labels and devices
Packing
Place of installation
Unpacking
Assembling the equipment
Securing the equipment
Lifting and handling
the equipment
Routine maintenance
Replacing the cable
Replacing the spring hook
Technical Service
Storage
Disposing of the equipment
Installing accessories
Using the equipment
Contents
CablesCrossed

18
04269121
D
C
A
E
Securing the equipment
- drill two holes in the ceiling or wall for the hooks (C) and insert the rawl plugs (D)
into the holes;
- screw in the hooks (C) into the rawl plugs (D) and tighten;
- connect the hooks (C) to the eyebolts (A) using cables, ropes or chains (E)
(not supplied with the equipment).The cables, ropes or chains must be under
slight tension.
cont.
Identification of the manufacturer
and the equipment
Description of the equipment
Technical data
Safety labels and devices
Packing
Place of installation
Unpacking
Assembling the equipment
Securing the equipment
Lifting and handling
the equipment
Routine maintenance
Replacing the cable
Replacing the spring hook
Technical Service
Storage
Disposing of the equipment
Installing accessories
Using the equipment
Contents
CablesCrossed

19
04269112
C D
A B
E
Securing the equipment
Alternatively, it is possible to secure the
equipmenttothewallwiththeappropriate
screws and brackets:
- insert the screws (A) in frame
holes (B) as indicated in the figure;
- insert brackets (C) and washers (D)
in the protruding screw section;
WARNING
The brackets may be rotated
around the fastening axis to
facilitate subsequent wall-
fasteningandthenrepositioned
correctly.
- tighten the brackets slightly using
self-locking nuts (E) to hold them in
position;
cont.
Identification of the manufacturer
and the equipment
Description of the equipment
Technical data
Safety labels and devices
Packing
Place of installation
Unpacking
Assembling the equipment
Securing the equipment
Lifting and handling
the equipment
Routine maintenance
Replacing the cable
Replacing the spring hook
Technical Service
Storage
Disposing of the equipment
Installing accessories
Using the equipment
Contents
CablesCrossed

20
04269113
C
GF
Securing the equipment
- markthepositionoftwo14dia.holes
on the wall;
- fully tighten brackets (C) to the
frame;
- drill the wall and insert the rawl
plugs (F) in the wall holes;
- bring the equipment up to the wall
and ensure the holes in the wall are
alignedwiththeholesonthebracket;
- screw in screws (G) and tighten to
the wall.
DANGER
ALWAYS use rawl plugs
supplieddirectlybyTechnogym.
Ifthesecannotbeobtained,use
arawlplugthatstrictlymeetsthe
followingminimumrequirement:
minimum guaranteed workload
of 90 kg.
Identification of the manufacturer
and the equipment
Description of the equipment
Technical data
Safety labels and devices
Packing
Place of installation
Unpacking
Assembling the equipment
Securing the equipment
Lifting and handling
the equipment
Routine maintenance
Replacing the cable
Replacing the spring hook
Technical Service
Storage
Disposing of the equipment
Installing accessories
Using the equipment
Contents
CablesCrossed
Table of contents
Other Wellness Fitness Equipment manuals
Popular Fitness Equipment manuals by other brands

G-FITNESS
G-FITNESS AIR ROWER user manual

CAPITAL SPORTS
CAPITAL SPORTS Dominate Edition 10028796 manual

Martin System
Martin System TT4FK user guide

CIRCLE FITNESS
CIRCLE FITNESS E7 owner's manual

G-FITNESS
G-FITNESS TZ-6017 user manual

Accelerated Care Plus
Accelerated Care Plus OMNISTIM FX2 CYCLE/WALK user manual