manuals.online logo
Brands
  1. Home
  2. •
  3. Brands
  4. •
  5. Weslo
  6. •
  7. Treadmill
  8. •
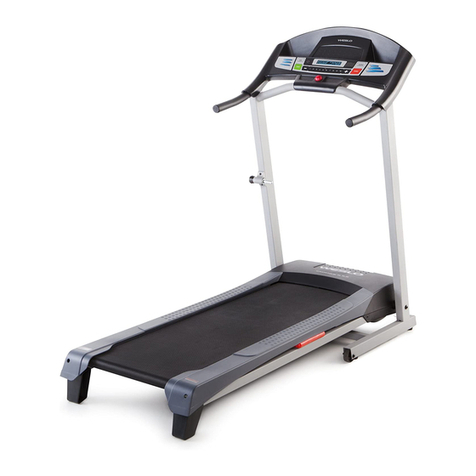
  9. Weslo CADENCE C78 User manual

Weslo CADENCE C78 User manual

This manual suits for next models

1

Other Weslo Treadmill manuals

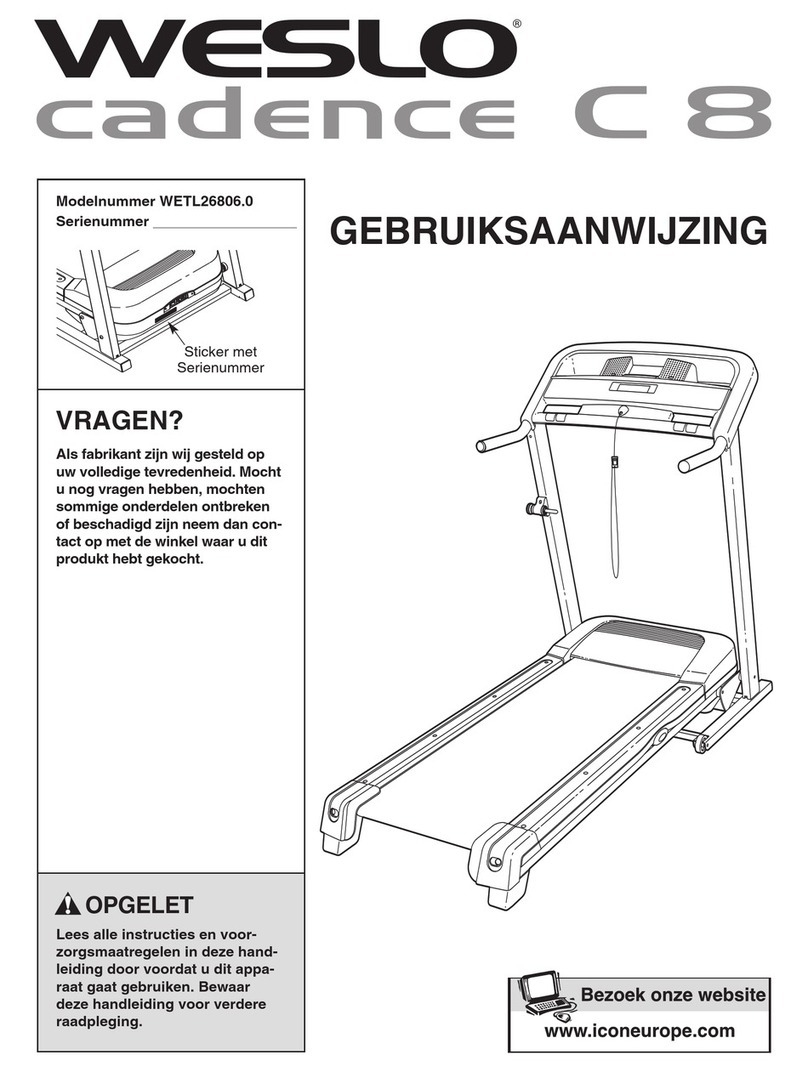
Weslo Cadence LS 8 User manual

Weslo

Weslo Cadence LS 8 User manual

Weslo Cadence 500 Treadmill Operating and maintenance manual

Weslo

Weslo Cadence 500 Treadmill Operating and maintenance manual

Weslo Cadence ex14 User manual

Weslo

Weslo Cadence ex14 User manual

Weslo CADENCE DX3 User manual

Weslo

Weslo CADENCE DX3 User manual

Weslo Cadence S6 Treadmill User guide

Weslo

Weslo Cadence S6 Treadmill User guide

Weslo Cadence 5.0 Treadmill User manual

Weslo

Weslo Cadence 5.0 Treadmill User manual

Weslo Cadence Ls 6 User manual

Weslo

Weslo Cadence Ls 6 User manual

Weslo Cadence 820 User manual

Weslo

Weslo Cadence 820 User manual

Weslo Cadence5.8 Treadmill User manual

Weslo

Weslo Cadence5.8 Treadmill User manual

Weslo Cadence 90 Treadmill User manual

Weslo

Weslo Cadence 90 Treadmill User manual

Weslo Compact XS WETL20708.0 User manual

Weslo

Weslo Compact XS WETL20708.0 User manual

Weslo Cadence 6.0 Treadmill User manual

Weslo

Weslo Cadence 6.0 Treadmill User manual

Weslo WLTL99315.0 User manual

Weslo

Weslo WLTL99315.0 User manual

Weslo Cadence C6 Treadmill

Weslo

Weslo Cadence C6 Treadmill

Weslo Cadence 70 Treadmill System manual

Weslo

Weslo Cadence 70 Treadmill System manual

Weslo CADENCE LX25 User manual

Weslo

Weslo CADENCE LX25 User manual

Weslo Cadence 16.0 Cwl Treadmill User manual

Weslo

Weslo Cadence 16.0 Cwl Treadmill User manual

Weslo Cadence 935 Treadmill User manual

Weslo

Weslo Cadence 935 Treadmill User manual

Weslo Sport 100 Treadmill Quick start guide

Weslo

Weslo Sport 100 Treadmill Quick start guide

Weslo Cadence 1050 User manual

Weslo

Weslo Cadence 1050 User manual

Weslo Cadence 715 Treadmill User manual

Weslo

Weslo Cadence 715 Treadmill User manual

Weslo Cadence 400 Treadmill User manual

Weslo

Weslo Cadence 400 Treadmill User manual

Weslo Cadence Sl 20 User manual

Weslo

Weslo Cadence Sl 20 User manual

Weslo Cadence 450v Treadmill Quick start guide

Weslo

Weslo Cadence 450v Treadmill Quick start guide

Popular Treadmill manuals by other brands

Motus M990T Service manual

Motus

Motus M990T Service manual

NordicTrack APEX4100i NTTL18906 user manual

NordicTrack

NordicTrack APEX4100i NTTL18906 user manual

CAPITAL SPORTS Pacemaker Touch manual

CAPITAL SPORTS

CAPITAL SPORTS Pacemaker Touch manual

Insportline Hill Pro user manual

Insportline

Insportline Hill Pro user manual

Expondo Gymrex GR-MG31 user manual

Expondo

Expondo Gymrex GR-MG31 user manual

HEALTH ONE Walk Ro user manual

HEALTH ONE

HEALTH ONE Walk Ro user manual

NordicTrack T7.5 S user manual

NordicTrack

NordicTrack T7.5 S user manual

Gold's Gym ADVANTAGE GGTL12920 user manual

Gold's Gym

Gold's Gym ADVANTAGE GGTL12920 user manual

Merax MS282992 manual

Merax

Merax MS282992 manual

FitLogic freewill d225 owner's manual

FitLogic

FitLogic freewill d225 owner's manual

HOP-SPORT ESTIMA HS-3200LB instruction manual

HOP-SPORT

HOP-SPORT ESTIMA HS-3200LB instruction manual

Stamia InMotion II owner's manual

Stamia

Stamia InMotion II owner's manual

Smooth Fitness EVO 3i user manual

Smooth Fitness

Smooth Fitness EVO 3i user manual

NordicTrack NETL81810.0 user manual

NordicTrack

NordicTrack NETL81810.0 user manual

Schwinn 830/Journey 8.0 Assembly manual / owner's manual

Schwinn

Schwinn 830/Journey 8.0 Assembly manual / owner's manual

Keys Fitness HealthTrainer HT-740T owner's manual

Keys Fitness

Keys Fitness HealthTrainer HT-740T owner's manual

Spirit XT8 Service manual

Spirit

Spirit XT8 Service manual

NordicTrack T 14.0 Treadmill Manuel de l'utilisateur

NordicTrack

NordicTrack T 14.0 Treadmill Manuel de l'utilisateur

manuals.online logo
manuals.online logoBrands
  • About & Mission
  • Contact us
  • Privacy Policy
  • Terms and Conditions

Copyright 2025 Manuals.Online. All Rights Reserved.

ModelNo.WLTL493040
SedalNo.
WritethesedaUnumberinthespace
aboveforfuturereference,
SedaUNumberDecaU
mfyou havequestions,orifthere
aremissingparts,wewillguar-
anteecompletesatisfaction
throughdirectassistancefrom
ourfactory.
TOAVOIDDELAYS,PLEASE
CALLDIRECTTOOURTOLL-
FREECUSTOMERHOTLINE.
Thetrainedtechniciansonour
CustomerNotLinewillprovide
immediateassistance,freeof
chargetoyou.
CUSTOMERHOTMNE:
1°866-699-3756
Mon.-FrL 6 a.m.-6 p.m. MST
Read aH precautions and !nstruc-
this equipment. Save this mare
ual for future reference.
'S
wwwowesmoocom
new products, prizes,
fitness tips, and much more!
TABLE OF CONTENTS
iMPORTANT PRECAUTIONS ................................................................. 3
BEFORE YOU BEGIN ....................................................................... 5
ASSEMBLY AND PART HDENTHFHCATHONCHART ................................................ 6
TREADMILL OPERATION ................................................................... 10
HOW TO FOLD AND MOVE THE TREADMHLL .................................................. 21
TROUBLESHOOTHNG ...................................................................... 22
EXERCISE GUiDELiNES ................................................................... 24
PART LiST ............................................................................... 26
HOW TO ORDER REPLACEMENT PARTS .............................................. Back Cover
LHMHTEDWARRANTY ............................................................... Back Cover
Note: An EXPLODED DRAWHNG is attached in the center of this manual
WESLO is a registered trademark of HCONHP,Hnc,
2
iMPORTANT PRECAUTIONS
WARN raNG:Toreducethe.skofburns,fire,electricshock,orinjurytopersons,readthe
folJowing important precautions and information before operating the treadmill.
1. mtis the responsibility of the owner to ensure
that aH users of this treadmill are adequately
informed of all warnings and precautions.
2. Use the treadmill only as described in this
manual
11. FaiJure to use a properly functioning surge
suppressor couJd resuJt in damage to the con=
troJ system of the treadmill, if the control sys-
tem is damaged, the waJking belt may change
speed or stop unexpectedJy, which may result
in a fall and serious injury.
3. Place the treadmill on a level surface, with at 12. Keep the power cord and the surge suppres-
least eight feet of clearance behind it and two sot away from heated surfaces.
feet on each side. Do not pJace the treadmill
on any surface that blocks air openings. To 13. Never move the walking belt while the power
protect the floor or carpet from damage, place is turned off. Do not operate the treadmill if
a mat under the treadmill, the power cord or plug is damaged, or if the
treadmill is not working properly. (See
4. Keep the treadmill indoors, away from mois- BEFORE YOU BEGmNon page 5 if the tread-
ture and dust. Do not put the treadmHJ in a ............................
garage or covered patio, or near water. 14. Never start the treadmill while you are stand-
5. Do not operate the treadmill where aerosol ing on the walking beff. AJways hold the
products are used or oxygen is administered, handrails while using the treadmill.
8. Keep children under the age of !2 and pets 15. The treadmill is capabJe of high speeds.
away from the treadmill at nit times. Adjust the speed in smalt increments to avoid
sudden jumps In speed.
7. The treadmill should not be used by persons
weighing more than 250 pounds. Never allow 15. The pulse sensor is not a medicaJ device.
more than one person on the treadmill at a time. Various factors, including the user's move-
8. Wear appropriate exercise clothes when
using the treadmill. Do not wear loose clothes
that could become caught in the treadmill.
Athletic support clothes are recommended
for both men and women. Always wear ath-
letic shoes. Never use the treadmill with bare
feet, wearing only stockings, or in sandals.
g. When connecting the power cord (see page 10),
pJug the power cord into a surge suppressor
(not included) and plug the surge suppressor
meat, may affect the accuracy of heart rate
readings. The pulse sensor is intended only
as an exercise aid in determining heart rate
trends in general
17. Never leave the treadmill unattended while it
is running. Always remove the key, unplug
the power cord, and move the reset/off circuit
breaker to the off position when the treadmill
is not in use. (See the drawing on page 5 for
the location of the circuit breaker.}
into a grounded circuit capable of carrying 15 18. Do not attempt to raise, tower, or move the
or more amps. No other appJiance should be on treadmill until it is properJy assembled. (See
the same circuit. Do not use an extension cord. ASSEMBLY on page 8, and HOW TO FOLD
AND MOVE THE TREADMILL on page 21.)
10. Use onJy a singJe-ouflet surge suppressor that You must be able to safely mift45 pounds (20
meets aH of the specifications described on kg) to raise, lower, or move the treadmill.
page 10. To purchase a surge suppressor, see
your Jocal WESLO dealer or call 1-888-899- lg. When folding or moving the treadmill, make
3758 and order part number 148148. sure that the storage latch is fuJly dosed.
20.When using iFIT.com CDs and videos, an
electronic "chirping" sound will alert you
when the speed of the treadmit, is about to
change. Always listen for the "chirp" and be
prepared for speed changes, in some in-
stances, the speed may change before the
23. inspect and properly tighten all parts of the
treadmill every three months.
24. Never drop or insert any object into any open-
ing,
25.DANG ER: Alwoysunplug thepower
personal trainer describes the change.
21. When using iFmT.comCDs and videos, you
can manually override the speed setting at
any time by pressing the speed buttons.
However, when the next "chirp" is heard, the
speed wHJ change to the next settings for the
CD or video program.
22. Always remove iRT.com CDs and videos from
your CD player or VCR when you are not
using them.
cord immediately after use, before cleaning
the treadmill, and before performing the main=
tenance and adiustment procedures de=
scribed in this manual Never remove the
motor hood unless instructed to do so by an
authorized service representative. Servicing
other than the procedures in this manual
should be performed by an authorized service
representative only.
26. The treadmi8 is intended for in-home use
only. Do not use the treadmill in any
commercial, rental, or institutional setting.
WAR NmNG: Sefo,ebeginningth soranyexerciseprogram,oonsultyourphysio an.7his
is especially important for persons over the age of 35 or persons with pre-existing health problems.
Read aH instructions before using, mCONassumes no responsibility for personal injury or property
damage sustained by or through the use of this product.
SAVE THESE mNSTRUCTIONS
The decals shown below have been ptaced on your treadmill, mfa decal is missing
or illegible, please call our Customer Service Department toll-free at 1-866-699-3756
to order a free replacement decal Apply the decal in the tocation shown. Note: The
decals are not shown actual size.
KEEPHANDSANDFEETAWAY
FROMTHISAREAWHILETHE
TREADMILLISINOPERATION.
4
Protect yourself and
others from risk of serious
injury. Read the users
manual and :
,Stand onlyon the
siderailswhen
startingor stopping
treadmill,
,Change speed in
small inclements,
,Hold handrails to
provent falling, and
always wear the
salety clJp while
operating treadmill.
*Stop if you feel faint,
dizzy, or short ol
bleath,
mill is movedor
s_ored.
•Reduceinclinetoits
lowestlevelbefore.
folding _readmillinto
storage position1,
not in use,
,Keep clothing,
fingers, and hair
it is moving,
,Always weal
athletic shoes while
opelating treadmill
BEFORE YOU BEGIN
Congratulations for purchasing the WESLO _ CA-
DENCE C78 treadmill The CADENCE C78 treadmHU
offers an impressive array of features to heUpyou
achieve your fitness goaUsin the convenience of your
home, From the advanced consob to the cushioned
waUkingpUatform, the CADENCE C78 treadmHUis de-
signed to make each workout more effective and en-
joyabb, And when you're not exercising, the treadmHU
can be foUdedaway, taking bss than haUfthe floor
space of conventionaU treadmHb,
For your benefit, read this manual carefully before
using the treadmill, if you have questions after read-
ing this manual, call our Customer Service Department
toll-free at 1-866-699°3756, Monday through Friday, 6
a,m, until 6 p,m, Mountain Time (excluding holidays),
To help us assist you, please note the product model
number and serial number before calling, The model
number is WLTL493040, The serial number can be
found on a decal attached to the treadmill (see the
front cover of this manual for the location),
Before reading further, please familiarize yourself with
the parts that are labeled in the drawing below,
Accessory Tray
Handrail
Latch Knob
Fan
Console
grip Pulse Sensor
Key/Clip
Reset/Off Circuit Breaker
Walking Belt
Foot Rail
BACK Cushioned Walking Platform
RIGHT SIDE
Rear Roller
5
Assembly requires two persons. Set the treadmill in a cleared area and remove all packing materials, Do not
dispose of the packing materials until assembly is completed, Note: The underside of the treadmill walking belt is
coated with high-performance lubricant, During shipping, a small amount of lubricant may be transferred to the
top of the walking belt or the shipping carton, This is a normal condition and does not affect treadmill perfor-
mance, if there is lubricant on top of the walking belt, simply wipe off the lubricant with a soft cloth and a mild,
non-abrasive cleaner,
Assembty requires the incJuded allen wr_ and your own phiJJips screwdriver
wire cutters -_<,_z>, rubber mallet _, and adjustable wrench
For help identifying the assembly hardware, refer to the drawings below, Note: The assembly hardware and other
small parts are packaged in separate part bags, Do not open the part bags untiJ instructed to do so. (The
part bags are not JabeJedaccording to the order in which they are to be opened.} If a part is not found in
the part bags, check to see if the part has been preassembted.
3/4" Screw (6)-16 <szsq}@
1 1/4" Screw (92)-2 2" Silver Screw (93)-2
1 1/4" Bolt (104)-4
1" Bolt (71)-2 Wheel Nut (21)-2
Wheel Bolt (107)-2
D@
Internal Star
Washer (72)-4 H@
5/16" Star
Washer (127)-2
1, Open part bag B. identify the Right Upright (82) (the
Left Upright [69] has a large round hob in the location
shown), Lay the Right Upright fiat, Cut the plastic ties off
the lower end of the Right Upright, Next, feed the Wire
Harness (83) into the bottom of the Right Upright and
pull it out of the hob in the top, Note: There may be a tie
on the end of the Wire Harness to help you pull it
through the hob,
Attach the Right Upright (82) to the bracket on the right
side of the Base (109) with two 1 1/4" Bolts (104) and
two Internal Star Washers (72), (Note: it may be helpful
to use a rubber mallet to fully insert the Right Upright
into the bracket,) Do not tighten the BoJts yet. Be
carefut not to damage the Wire Harness.
Attach the Left Upright (69} to the teft side of the
Base (109} in the same way. Note: There is not a wire
harness on the left side,
Hole
69
109
6
Open part bag C. See drawing 2a, Locate the Wheel
Housings (106), Attach a Wheel (108) to each Wheel
Housing with a Wheel Bolt (107) and a Wheel Nut (21)
as shown, Do not overtighten the Wheel Bolts.
See drawing 2b, insert a Wheel Housing (106) into the
Base (109), (Note: it may be helpful to use a rubber mallet
to fully insert the Wheel Housing,) Press a Base Endcap
(99) onto the end of the Base,
Repeat this step on the opposite side of the treadmill.
2a 106
lO7 %
1O8
2b _.
106
106
108
99
107
With the help of a second person, carefully tip the
Uprights (69, 82) down so the treadmill pivots on the
Wheels (108) as shown,
Tighten a 3/4" Screw (6) into one side of the Base (109)
and one of the Wheel Housings (106), Attach a long Rear
Base Pad (105) and a short Front Base Pad (100) to the
Base with four additional 3/#' Screws (6) as shown,
Repeat this step on the opposite side of the treadmill.
With the help of a second person, carefully raise the
Uprights (69, 82) to the vertical position,
69
105
108
109
106
100
105
6
108
With the help of a second person, hold the Console
Base (85) near the Uprights (69, 82) as shown,
Connect the Wire Harness (83) to the wire harness in
the Right Handrail Bracket (113), Make sure to connect
the connectors properly (see the inset drawing}. The
connectors should slide together easily and snap
into place, if the connectors do not slide together easily
and snap into place, turn one connector and try to con-
nect them again, IF THE CONNECTORS ARE NOT
CONNECTED PROPERLY, THE CONSOLE MAY BE
DAMAGED WHEN THE POWER mSTURNED ON.
insert the wire harness into the Right Upright (82),
Open part bag A. Hold the Handrail Brackets (73, 113)
on top of the Uprights (69, 82), Finger tighten two 1"
Bolts (71) with 5/16" Star Washers (127) into the
Handrail Brackets and the tops of the Uprights as
shown, Press the Handrail Brackets towards the cen-
ter of the treadmill. Then, tighten both Bolts,
73 85
113
82
HoHdthePuHseBar(125)neartheConsoHeBase(85),
ConnectthePuHseWire(124)onthePuHseBartotheino
dicatedwireontheConsoHeBase,Theconnectors
shouJdsJidetogethereasily and snap into place. Hf
the connectors do not slide together easily and snap into
pHace,turn one connector and try to connect them again,
Hnsertthe wires into the hoHein the ConsoHeBase,
Have a second person hoHdthe PuHseBar (125) firmHyon
the ConsoHe Base (85), Attach the PuHseBar to the
ConsoHe Base with two ! 1/4" Screws (92) in the loca-
tions shown. Be careful not to damage the Pulse
Wire (!24} or the wire on the ConsoJe Base. Next,
tighten two 2" SHver Screws (93) into the ConsoHe Base
and the PuHseBar in the Hocations shown, Note: The
correct Screws must be used in the correct loca-
tions, or the Pulse Bar may be damaged.
92 125
Hdentifythe Left and Right HandraiHs(68, 81) (see the
end views of the HandraiHs in the inset drawing), The
curved edges of the HandraiHs shouHdbe on the outside,
SHidethe Right HandraiH(81) onto the Right HandraiH
Bracket (113), and press the Hipon the front of the Right
HandraiH under the ConsoHeBase (85), (Note: Htmay be
heHpfuHto tip the Right HandraiH and to tap it with a rub-
ber maHHetto correctly position it,) Tighten three 3/4"
Screws (6) into the Right HandraiH as shown, Note: Ht
may be necessary to move the Howerend of the Right
HandraiHsHightHyto aHignthe Howerscrew hoHe,
Attach the Left Handrait (68} in the same way.
See assembly step 1. Tighten the four 1 1/4" Bolts
(104).
668
-Curved Edge
(81) (68)
Press the Latch Knob SHeeve(75) into the Left Upright
(69), Note: Htmay be heHpfuHto use a rubber maHHetto
fuHHyinsert the Latch Knob SHeeve,
Remove the Latch Knob (70) from the Latch Pin (80).
Make sure that the Latch Pin CoHHar(76) and the Spring
(77) are on the Latch Pin. (Note: Hfthere are two Latch
Pin CoHHars,pHaceone on each side of the Spring.) Hnsert
the Latch Pin into the Left Upright (69) and tighten the
Latch Knob onto the Latch Pin, 8O
Make sure that aH parts are properJy tightened before you use the treadmill. Note: Extra hardware may
be incHuded, Keep the incHuded aHHenwrenches in a secure pHace,The HargeaHHenwrench is used to adjust the
waHkingbeHt(see page 23), To protect the floor or carpet, pHacea mat under the treadmiHL
8
mfyoupurchasetheoptionaJchestpuJsesensor(seepage20),followthestepsbelowtoinstallthere-
ceiverandtheshortjumperwireincJudedwiththechestputsesensor.
1, MakesurethatthepowercordisunpJugged.Remove
theindicated3/4"Screw(6)andtheAccessDoor(94)from
thebackoftheConsoUeBack(95),
2, Removethepaperfromtheadhesivepadonthebackof
thereceiver(A),Holdthereceiversothesmallcylin-
deris neartheJoweredge of the receiver and is fac-
ing the Console (88) as shown. FirmUypress the re-
ceiver onto the indicated corner of the Access Door (94),
Connect the wire on the receiver to the indicated wire ex-
tending from the ConsoUe,
3, Make sure that no wires are pinched. Reattach the
Access Door (94) with the 3/4" Screw (6), The other wires
included with the receiver may be discarded,
108
TREADMILL OPERATION
THE PERFORMANT LUBE TM WALKmNG BELT
Your treadmHUfeatures a waUkingbeUtcoated with
PERFORMANT LUBE TM, a high@erformance Uubrbant,
IMPORTANT: Never apply silicone spray or other
substances to the walking belt or the walking plat-
form. Such substances will deteriorate the walking
belt and cause excessive wear.
HOW TO PLUG IN THE POWER CORD
DANG ER: Improperconnection
of the equipment-grounding conductor can
result in an increased risk of electric shock.
Check with a qualified electrician or service=
man ifyou are in doubt as to whether the
product is properly grounded. Do not modify
the plug provided with the product--if it wiJl
not fit the outlet, have a proper ouUet
installed by a qualified eJectdcian.
Your treadmill, like any other type of sophisticated
electronic equipment, can be seriously damaged by
sudden voltage changes in your home's power,
Voltage surges, spikes, and noise interference can
result from weather conditions or from other appliances
being turned on or off, To decrease the possibility of
your treadmill being damaged, always use a surge
suppressor with your treadmill (see drawing 1 at
the right). To purchase a surge suppressor, see
your loca! WESLO dealer or call toll-free 1-866-699-
3756 and order part number 148148.
Use onJy a singJe-ouflet surge suppressor that is
UL 1449 tisted as a transient voltage surge sup-
pressor (TVSS). The surge suppressor must have a
UL suppressed voltage rating of 400 voJts or tess
and a minimum surge dissipation of 450 jouJes.
The surge suppressor must be electrically rated
for 120 voJts AC and 15 amps. There must be a
monitoring light on the surge suppressor to indi-
cate whether it is functioning property. Failure to
use a propedy functioning surge suppressor could
resutt in damage to the control system of the
treadmill. If the controJ system is damaged, the
waJking belt may change speed or stop une×pect-
edty, which may result in a fall and serious injury.
This product must be grounded, if it should maifunc°
tion or break down, grounding provides a path of least
resistance for electric current to reduce the risk of ebc°
tric shock, This product is equipped with a cord having
an equipment:grounding conductor and a grounding
plug, Ptug the power cord into a surge suppressor,
and plug the surge suppressor into an appropriate
outlet that is properly installed and grounded in
accordance with aH local codes and ordinances.
Important: The treadmill is not compatible with
GFCl-equipped outJets.
This product is for use on a nominal 120-volt circuit,
and has a grounding plug that looks like the plug illus-
trated in drawing 1 below, A temporary adapter that
looks like the adapter illustrated in drawing 2 may be
used to connect the surge suppressor to a 2:pole
receptacle as shown in drawing 2 if a properly
grounded outlet is not available,
i-Grounded Outlet Box
_-.l _ Surge Suppressor
_J.. Grounding Pin
_rounded Outlet Box
Adapter Surge Suppressor
The temporary adapter should be used only until a
properly grounded outlet (drawing 1) can be installed
by a qualified electrician,
The greemcolored rigid ear, lug, or the like extending
from the adapter must be connected to a permanent
ground such as a properly grounded outlet box cover,
Whenever the adapter is used it must be held in place
by a metal screw, Some 2-poJe receptacle outJet box
covers are not grounded. Contact a qualified elec-
trician to determine if the outlet box cover is
grounded before using an adapter.
10