8
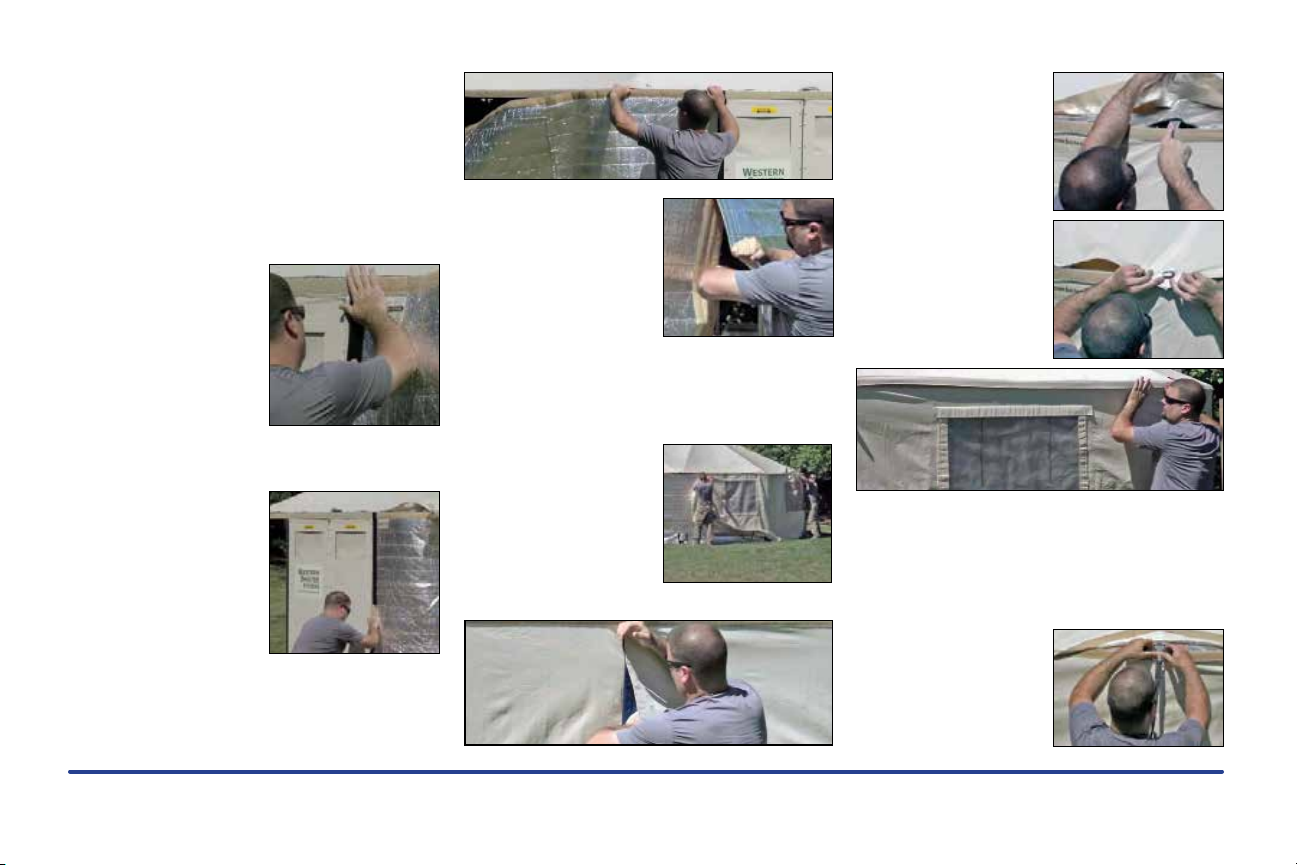
ØDo not secure either of the roof panels to the
eave bars at this point.
ØPosition one of the the vent collars of the roof
panel over each key flange pipe.
ØRemove the protective vinyl squares covering
the vent collars. Return these squares to the
field bag; they will be needed again when the
roof is repacked.
ØMake sure both collars are centered on their
respective key flange pipes.
ØTo install the vent caps, pull on the locking pin,
align the cap with the flange pipe and push
the cap down until it meets the collar. Release
the pin and rotate the vent cap until the pin
snaps into place.
ØUnroll the insulated and vinyl roof panels and
lightly attach the fastening strips around the
eave bars to prevent wind from displacing the
roof.
5. Raising the frame
ØWith three people evenly spaced along one
long side of the shelter frame, gently raise
that side, allowing the legs to fold outward. Be
sure to keep fingers clear of the leg hinges as
they unfold. If setting up in windy conditions,
raise the windward side first.
ØLock the four long-side legs into place using
the captive locking pins. Do not lock the
short-side legs at this time.
ØRaise the other side of the shelter, allowing
the legs to fold down. Lock the four long-side
legs into place.
ØNow extend and lock the short-side legs into
place, using the captive locking pins.
6. The floor and basebars
ØThe floor panel is designed to form a weather-
tight seal with the vinyl walls, protecting the
shelter interior against wind and moisture.
ØUnroll the floor panel down the length of the
shelter.
ØUnfold the floor panel. Ensure that the black
fastening strips of the floor are facing up.
Center the floor around the perimeter within
the shelter frame.