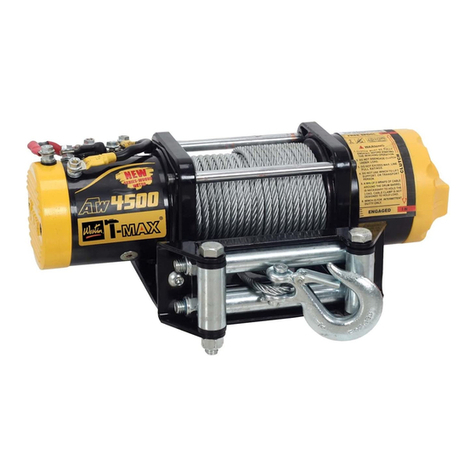
Westin 47-2100 User manual

WestinAutomotive Products,Inc.
320 W. Covina Blvd
San Dimas, Ca. 91773
Thank you for choosing Westin products
for additional installation assistance please call
CustomerService(800)793-7846
www.westinautomotive.com
DATE: 1/4/17
1
P.N.: 75-XXXX-
RevX
ECO #: W16-
XXXX
INSTALLATION INSTRUCTIONS
WESTIN WINCH
APPLICATION:
AUTOMOTIVE PRODUCTS, PART NUMBER: 47-2100, 47-2103, 47-2106, 47-2109, 47-2200, 47-2203
ITEM
QUANTITY
DESCRIPTION
TOOLS NEEDED
1
1
WINCH
ANTI-SEIZE LUBRICANT MUST BE USED ON ALL STAINLESS STEEL FASTENERS TO PREVENT THREAD DAMAGE AND GALLING
General Safety Precautions
Warning! Observe safety precautions for personal safety and the safety of others. Improper equipment operation may
cause personal injury and equipment damage. Read the following carefully before attempting to operate your winch
and keep the instructions for future reference.
1. Dress Properly:
Don’t wear loose clothing or jewelry. They can get caught in moving parts.
Wear leather gloves when handling winch cable. Do not handle cable with bare hands as broken wires can causeinjuries.
Non-skid footwear is recommended.
Wear protective hair covering to contain long hair.
2. Keep a Safe Distance:
Be sure to stand well clear of the winch cable during winch operation; 1.5 times the cable length is recommended. If a ca-
ble pulls loose or breaks under load it can lash back and cause serious personal injury or death.
Don’t step over the cable.
All visitors and onlookers should be kept away from the winching area.
Keep proper footing and balance at all times.
3. Don’t Abuse the Cord:
Never carry your winch by the cord or yank it to disconnect it.
Keep cord from heat, oil and sharp edges.
4. Don’t Overwork the Winch
If the motor becomes uncomfortably hot to touch, stop and let it cool for a few minutes.
Don’t maintain power to the winch if the motor stalls.
Don’t exceed the maximum line pull ratings shown in tables. Shock loads must not exceed these ratings.
5. Avoid Unintentional Starting:
Winch clutch should be disengaged when not in use and fully engaged when in use.
6. Check Damaged Parts:
Before using, you should check your winch carefully. Any part that is damaged should be properly repaired or replaced by
an authorized service center.
7. Repairing your Winch:
When repairing, use only identical replacement parts or it may cause considerable danger to the user.

WestinAutomotive Products,Inc.
320 W. Covina Blvd
San Dimas, Ca. 91773
Thank you for choosing Westin products
for additional installation assistance please call
CustomerService(800)793-7846
www.westinautomotive.com
DATE: 1/4/17
2
P.N.: 75-XXXX-
RevX
ECO #: W16-
XXXX
Winch Operation Warnings
Never operate the winch with less than 10 wraps of synthetic rope or 6 wraps of steel cable around the drum. The ter-
minal end is to prevent the rope from unraveling; it is NOT a load bearing attachment point. Improper spooling out to
the last layer will put a load on the terminal end and the rope will release from the terminal.
Read the following carefully before attempting to operate your winch and keep the instructions for future reference.
1. The uneven spooling of cable, while pulling a load, is not a problem unless the cable piles up on one end of the drum. If
this happens reverse the winch to relieve the load and move your anchor point further to the center. After the job isdone,
you can un-spool and rewind to even out the cable layers.
2. Store the remote control switch inside your vehicle where it will not become damaged. Inspect it before you plug itin.
3. When ready to begin spooling in, plug in the remote control switch with clutch disengaged, do not engage theclutch with
the motor running.
4. Never connect the hook back to the cable. This causes cable damage. Always use a sling or chain of suitablestrength.
5. Observe your winch while winching. Stop the winching process every yard or so to assure the cable is not piling up in one
corner. Jamming the cable can break your winch.
6. Do not attach tow hooks to the winch mounting apparatus. They must be attached to vehicleframe.
7. The use of a snatch block will aid recovery operations by providing a doubling of the winch capacity and a halving of the
winching speed and the means to maintain a direct line pull to the center of the rollers. When double loading during sta-
tionary winching, the winch hook should be attached to the chassis of thevehicle.
8. Ensure rated “D” or bow shackles are used in conjunction with an approved tree trunk protector to provide a safeanchor
point.
9. When extending the winch cable, ensure that at least 6 wraps of steel cable or 10 wraps of synthetic rope remain on the
drum. Failure to do this could result in the cable parting from the drum under load. Serious personal injury or property
damage may occur.
10. All steel cable winches are provided with a red cable marking to identify that 6 cable wraps remain on the winch drum
when this mark appears at the rollers. No recovery should be attempted beyond this marking.
8. Re-spooling the cable:
Leather gloves must be worn while re-spooling. To re-spool correctly, it is necessary to keep a slight load on the cable.
Hold the cable with one hand and the remote control switch with the other. Start as far back and in the center as you
can. Walk up keeping load on the cable as the winch is powered on.
Do not allow the cable to slip through your hand and do not approach the winch too closely.
Disconnect the remote control switch and finish spooling in the cable by rotating the drum by hand with the clutch disen-
gaged.
On hidden winches, spool in the cable under power but keep handsclear.
Warning: The use of any other accessory or attachment other than those recommended in the Installation Instructions
may present a risk of personal injury.

WestinAutomotive Products,Inc.
320 W. Covina Blvd
San Dimas, Ca. 91773
Thank you for choosing Westin products
for additional installation assistance please call
CustomerService(800)793-7846
www.westinautomotive.com
DATE: 1/4/17
3
P.N.: 75-XXXX-
RevX
ECO #: W16-
XXXX
To keep your winch in working order please:
Once a month cycle the winch by:
1. Power out steel cable/synthetic rope 15ft. Then free spool out another 50+ ft of steel cable/synthetic rope. Always
make sure you have at least 6 wraps of steel cable or 10 wraps of synthetic rope around winch drum.
2. Put winch into gear and re-spool the winch line. Inspect winch line as you re-spool winch line. It is recommended thatyou
have at least 1000 lbs of tension when re-spooling cable. This prevents the rope from pinching itself during recovery.
*Keep instructions in glove box for reference.
Winching is dangerous and potentially fatal.
Use caution when winching:
-Be sure that the cable is in good condition and is attached properly.
-Do not use the winch if the cable is frayed.
11. Since the greatest pulling power is achieved on the innermost layer of your winch, it is desirable to pull off as much line as
you can for heavy pulls (you must leave 6 wraps of steel cable or 10 wraps of synthetic rope minimum on thedrum-red
cable). If this is not practical use a snatch block and double line arrangement.
12. Draping a heavy blanket or similar object over the extended winch cable is recommended as it will dampen any backlash
should failure occur.
13. Neat, tight spooling avoids cable binding, which is caused when load is applied and the cable is pinched between the oth-
ers. If this happens, alternatively power the winch in and out. Do not attempt to work a bound cable under load, free it by
hand.
14. Apply blocks to wheels when vehicles are on an incline.
15. Battery:
-Be sure that the battery is in good condition. Avoid contact with battery acid or othercontainments.
-Always wear eye protection when working around a battery.
-Have the engine running when using the winch, to avoid draining the battery.
16. Winch Cable:
-NEVER operate winch with less than 10 wraps of synthetic rope or 6 wraps of steel cable around the drum. Theterminal
end is to prevent the rope from unraveling, it is NOT a load bearing attachment point. Improper installation and/or spool-
ing out to last layer will put a load on the terminal end and the rope will release from theterminal.
-Always re-spool winch rope under a minimum 1000 lb load before each use.
17. Do not attempt to exceed the load rating of the winch.
18. Do not drive your vehicle to assist the winch in any way. Vehicle movement in combination with winch operationmay
overload the cable, the winch itself or cause damaging shock loads.
19. Shock loads when winching are dangerous! A shock load occurs when an increased force is suddenly applied to the cable.
A vehicle rolling back on a slack cable may induce a damaging shockload.
20. The winches shown in this manual are solely for vehicle and boat use. Do not use
21. Do not use the winch in hoisting applications due to required hoist safety factors and features.
22. Do not use the winch to lift, support or otherwise transport personnel.
23. Never operate your electric winch near flammable liquids.
24. Power out only enough to relive slack, excessive powering out can cause damage to internal parts.
25. Do not use to drop loads (example-unloading vehicles).
26. Only DC power can be applied to the winch.

WestinAutomotive Products,Inc.
320 W. Covina Blvd
San Dimas, Ca. 91773
Thank you for choosing Westin products
for additional installation assistance please call
CustomerService(800)793-7846
www.westinautomotive.com
DATE: 1/4/17
4
P.N.: 75-XXXX-
RevX
ECO #: W16-
XXXX
Should you choose a fiber rope to take the place of the steel cable:
-Please make sure the chosen fiber rope can withstand the maximum capacity of your winch. Always bear in mind the working
load limitation of the fiber rope, and never exceed the working load limitation or shock load of yourrope.
-Fiber rope should be attached to winch drum properly, always keep a minimum of 10 wraps on the winch drum. Failure to
do this could result in rope parting from the drum. Serious personal injury or property damage mayresult.
-Please make sure the fiber rope is in good condition, without cuts or pulled strands. Fiber rope will fail if worn,
damaged, overloaded, or not properly maintained.
-Use a Hawse style fairlead only.
-Do not use over rough surfaces without chafe protection.
-Do not bend around unprotected sharp corners.
-Do not move the vehicle when pulling a load.
-Do not replace the cable with a cable of lesser strength.
-The life of a cable is directly related to the use and care it receives. Following its first and subsequent uses, a cable must be
wound onto the drum under a load of at least 1000 lbs or the outer wraps will draw into the inner wraps and severely damage
the cable during winching. The first winch use should be a familiar run while in a relaxed, non-recovery situation. Spool out
the cable until the rad cable mark appears (about 6 wraps on the drum), when rewind the cable onto the drum under a load of
1000 lbs or more. This will slightly tension and stretch the new cable and create a tight cable wrap around the drum. Failure to
do so may result in cable damage and reduce cable life.
When replacing the steel wire rope or the fiber rope, be sure to disconnect the winch cable from the “+” (positive) of the bat-
tery, and disengage the clutch by moving the clutch handle to the “OUT” position.

WestinAutomotive Products,Inc.
320 W. Covina Blvd
San Dimas, Ca. 91773
Thank you for choosing Westin products
for additional installation assistance please call
CustomerService(800)793-7846
www.westinautomotive.com
DATE: 1/4/17
5
P.N.: 75-XXXX-
RevX
ECO #: W16-
XXXX
PROCEDURE
1. Remove contents from box, verify if all parts listed are present and free from damage.
Carefully read and understand all instructions before attempting installation.
Failure to identify damage before installation could lead to a rejection of any claim.
INSTALLATION
MOUNTING YOUR WINCH
1. A) The winch is to be mounted into a suitable steel mounting frame using the 4 point foot mounting system in either a hori-
zontal or vertical plane.
B) It is very important that the winch is mounted on a flat surface so that the three sections (motor, cable drum and gear
housing) are properly aligned.
C) Before commencing installation, ensure the mounting facility being used is capable of withstanding the rated capacity
of the winch.
2. Should you wish to manufacture your own mounting plate the dimensions below will assist. A steel mount plate of atleast
1/4” thickness is recommended. Fasteners should be steel class 8.8 or better. A poorly designed mount may void warranty.
3. When installing the winch tighten the M10 hardware to 35-40 ft-lbs.
4. The roller fairlead is to be mounted so as to guide the rope onto the drumevenly.
LUBRICATION
All moving parts in the winch are permanently lubricated with high temperature lithium grease at the time of assembly. Under
normal conditions factory lubrication will suffice. Lubricate the cable periodically using light penetrating oil. Inspect for bro-
ken strands and replace if necessary. If the cable becomes worn or damaged, it must be replaced.

WestinAutomotive Products,Inc.
320 W. Covina Blvd
San Dimas, Ca. 91773
Thank you for choosing Westin products
for additional installation assistance please call
CustomerService(800)793-7846
www.westinautomotive.com
DATE: 1/4/17
6
P.N.: 75-XXXX-
RevX
ECO #: W16-
XXXX
SOLENOID MOUNTING SUPPLEMENT
Horizontal over cable spool
Step 1:
Install the long mounting brackets with spacers (hooks facing forward) on the solenoid box and tighten the bolts. (Fig A)
Step 2:
Place solenoid on top of winch tie-rods with hooks facing forward in desired location. Secure by tightening the screws in
the rear. (Fig B,C,D,E,F) Installation is now complete. Use the wiring diagram in the instruction manual for further assem-
bly.

WestinAutomotive Products,Inc.
320 W. Covina Blvd
San Dimas, Ca. 91773
Thank you for choosing Westin products
for additional installation assistance please call
CustomerService(800)793-7846
www.westinautomotive.com
DATE: 1/4/17
7
P.N.: 75-XXXX-
RevX
ECO #: W16-
XXXX
SOLENOID MOUNTING SUPPLEMENT
Vertical over cable spool
Step 1:
Connect the long mounting brackets and L shaped mounting bracket with the supplied hardware. (Fig A)
Step 2:
Install the mounting bracket assembly (hooks facing forward) on the solenoid box and tighten the bolt. (Fig B)
Step 3:
Place the solenoid on top of the winch tie-rods with hooks facing forward in desired location. Secure by tightening the
screws in the rear. (Fig C) Installation is now complete. Use the wiring diagram in instruction manual for further assembly.

WestinAutomotive Products,Inc.
320 W. Covina Blvd
San Dimas, Ca. 91773
Thank you for choosing Westin products
for additional installation assistance please call
CustomerService(800)793-7846
www.westinautomotive.com
DATE: 1/4/17
8
P.N.: 75-XXXX-
RevX
ECO #: W16-
XXXX
SOLENOID MOUNTING SUPPLEMENT
Over Motor Mounting
Step 1:
Loosen the fasteners on the side of the solenoid box and place the small mounting bracket at the side of the solenoid box.
(Fig A) Slide the bracket over the screw heads and tighten them.
Step 2:
Loosen the winch tie rod bolt at the motor side, and place the control box in the desired location, and then tighten the bolt.
(Fig B) Use the supplied screws to further secure the bracket to the winch body.
Step 3:
Tighten the logo bar bolt at the motor side. Installation is complete. Use the wire diagram in the instruction manual for fur-
ther assembly. (Fig C)

WestinAutomotive Products,Inc.
320 W. Covina Blvd
San Dimas, Ca. 91773
Thank you for choosing Westin products
for additional installation assistance please call
CustomerService(800)793-7846
www.westinautomotive.com
DATE: 1/4/17
9
P.N.: 75-XXXX-
RevX
ECO #: W16-
XXXX
ELECTRICAL CONNECTIONS
For normal self-recovery work, your existing electrical system is adequate. A fully charged battery and proper connections are
essential. Run the vehicle engine during winching operations to help retain a charged battery.
Attach the electrical cables as follows: (Refer to Diagram)
1. Short black cable with red jacket (B’) connect to the red terminal (B) of the motor.
2. Short black cable with yellow jacket (C’) connect to the yellow terminal (C) of themotor.
3. Short black cable with black jacket (D ‘) connect to the black terminal (D) of the motor.
4. Thin black cable connecting to bottom terminal (A) of the motor.
5. Long thick black cable, one terminal (A’) connecting to the bottom terminal (A) of the motor, and the other terminal nega-
tive (-) connecting to negative (-) terminal of battery.
6. Long red cable positive (+) connecting to positive (+) terminal of battery.

WestinAutomotive Products,Inc.
320 W. Covina Blvd
San Dimas, Ca. 91773
Thank you for choosing Westin products
for additional installation assistance please call
CustomerService(800)793-7846
www.westinautomotive.com
DATE: 1/4/17
10
P.N.: 75-XXXX-
RevX
ECO #: W16-
XXXX
NOTE:
1. Your battery must be kept in good condition.
2. Battery cables should not rub or chafe across any surfaces, this could possibly damagethem.
3. Corrosion on electrical connections will reduce performance or may cause excessive heat.
4. Clean all connections, especially the remote control switch and receptacle.
5. In harsh weather environments use a silicone sealer to protect from corrosion.
Motor Wire Nuts Mounting Instruction
Step 1: Do not overtighten the nuts that secure the cables.
Step 2: Use a wrench on bottom nut when installing cable nuts to prevent movement of terminal stud. See pictures below:

WestinAutomotive Products,Inc.
320 W. Covina Blvd
San Dimas, Ca. 91773
Thank you for choosing Westin products
for additional installation assistance please call
CustomerService(800)793-7846
www.westinautomotive.com
DATE: 1/4/17
11
P.N.: 75-XXXX-
RevX
ECO #: W16-
XXXX
WINCH OPERATION
Be sure to test your winch at home before you actually need to use it. Plan your test in advance. Remember you can hear your
winch as well as watch it operate. Learn to recognize the sound of a light steady pull, a heavy pull, and sounds caused by load
jerking or shifting. Soon you will gain confidence in operating your winch and its use will become second nature to you.
OPERATING:
Pre/post op check list:
1. Check fasteners for adequate torque before each outing.
2. Inspect wiring and make sure connections are tight. Verify that there is no chafing or damage towires.
3. Inspect rope for damage before and after each use.
4. Inspect remote for damage and function. Check the range on the wireless remote, if applicable, replace battery ifnecessary.
5. Keep winch clean, remote socket covered and steel cable lightly lubricated.
6. Synthetic rope needs to be kept clean and free from any chemicals or dirt.
NEVER operate the winch with less than 10 wraps of synthetic rope or 6 wraps of steel cable around the drum. The terminal
end is to prevent the rope from unraveling, it is NOT a load bearing attachment point. Improper installation and/or spooling out
to the last layer will put a load on the terminal end and the rope will release from theterminal.
1. Ensure the vehicle is secured by applying the parking brake or chocking thewheels.
2. Pull out the winch cable to the desired length and connect it to an anchor point. The winch clutch allows rapid uncoiling of
the cable for hooking onto the load or anchor point. The shifter tab located on the gear housing of the winch operatesthe
clutch as follow:
(A) To disengage the clutch, move the clutch shifter tab to the “OUT” position. Cable may be free spooled off thedrum.
(B) To engage the clutch, move the clutch shifter tab to the “IN” position. The winch is now ready for pulling.
3. Recheck all cable rigging before proceeding.
4. Plug in the winch hand control. It is recommended that the winching operation takes place from the driver's position toen-
sure safe operation.
5. To commence winching operation, start vehicle engine, put the transmission in neutral, maintain engine speed atidle.
Remote
Control
Switch

WestinAutomotive Products,Inc.
320 W. Covina Blvd
San Dimas, Ca. 91773
Thank you for choosing Westin products
for additional installation assistance please call
CustomerService(800)793-7846
www.westinautomotive.com
DATE: 1/4/17
12
P.N.: 75-XXXX-
RevX
ECO #: W16-
XXXX
SPARE PARTS:
A comprehensive range of spare parts are available. For further information please contact the distributors from whom you
purchased the winch.
NOTE: The safety pr ecautions and instr uctions discussed in this manual can' t cover all possible conditions and situa- tions
that may occur. It must be understood by the operator that common sense and caution are factors, which cannot be built into
this product, but must be applied by the operator.
6. Operate the remote control switch to IN or OUT until the vehicle has been retrieved. Regularly check the winch to ensure
cable is winding onto the drum evenly.
Note:
1. Never winch with your vehicle in gear or in park, this can damage your vehicle' s transmission.
2. Never wrap the cable around the object and hook onto the cable when winching.
3. Keep hands, clothing, hair and jewelry clear of the drum area and cable whenwinching.
4. Never use the winch if the cable is frayed, kinked or damaged.
5. Never allow anyone to stand near the cable, or in line with the cable behind thewinch while it is under power. If the cable
should slip or brake, it can suddenly whip back towards the winch, causing a hazard for anyone in thearea.
Always stand well to the side while winding.
6. Don' t leave the switch plugged in when winch is not in use.
7. Do not use as a hoist.
8. Power out only to relieve slack on cable or rope. Excessive powering out can cause damage to internalcomponents.
9. Do not use to hold loads.
10. Do not use to drop loads (example-unloading vehicles).
CHECK THE WINCH CAREFULLY AND THOROUGHLY BEFORE OPERATING!

WestinAutomotive Products,Inc.
320 W. Covina Blvd
San Dimas, Ca. 91773
Thank you for choosing Westin products
for additional installation assistance please call
CustomerService(800)793-7846
www.westinautomotive.com
DATE: 1/4/17
13
P.N.: 75-XXXX-
RevX
ECO #: W16-
XXXX
Part Number: 47-2100 OR-9500 / 47-2103 OR-9500S
Rated Line Pull:
9500lbs single-line
Motor:
6.6hp Series Wound
Control:
Remote Switch, 12’ lead
Gear Train
3-State Planetary
Gear Ratio:
161.28
Clutch:
Sliding Ring Gear
Brake:
Automatic In The Drum
Drum Size:
Diameter 2.5" Length 8.75"
Wire / Synthetic Rope:
94' Long 5/16" Diameter (Wire Rope) / 94' Long 3/8" Diameter (Synthetic Rope)
Fairlead:
4-Way Roller (Wire Rope) / Hawse (Synthetic Rope)
Remote Control:
Included
Recommended Battery:
650CCA minimum for winching
Battery Leads:
72"
Finish:
Black
Weight:
77lbs (Wire Rope) / 57lbs (Synthetic Rope)
Overall Dimension:
(LxWxH) 20.83" x 6.3" x 7.8"
Mounting Bolt Pattern:
10.00
±
0.015IN x 4.50
±
0.010IN

WestinAutomotive Products,Inc.
320 W. Covina Blvd
San Dimas, Ca. 91773
Thank you for choosing Westin products
for additional installation assistance please call
CustomerService(800)793-7846
www.westinautomotive.com
DATE: 1/4/17
14
P.N.: 75-XXXX-
RevX
ECO #: W16-
XXXX
Part Number: 47-2106 OR-12500 / 47-2109 OR-12500S
Rated Line Pull:
12500lbs single-line
Motor:
6.6hp Series Wound
Control:
Remote Switch, 12’ lead
Gear Train
3-State Planetary
Gear Ratio:
193.2
Clutch:
Sliding Ring Gear
Brake:
Automatic In The Drum
Drum Size:
Diameter 2.5" Length 8.75"
Wire / Synthetic Rope:
85' Long 3/8" Diameter (Wire Rope) / 88' Long 7/16" Diameter (Synthetic Rope)
Fairlead:
4-Way Roller (Wire Rope) / Hawse (Synthetic Rope)
Remote Control:
Included
Recommended Battery:
650CCA minimum for winching
Battery Leads:
72"
Finish:
Black
Weight:
83lbs (Wire Rope) / 61lbs (Synthetic Rope)
Overall Dimension:
(LxWxH) 21.2" x 6.3" x 7.8"
Mounting Bolt Pattern:
10.00
±
0.015IN x 4.50
±
0.010IN

WestinAutomotive Products,Inc.
320 W. Covina Blvd
San Dimas, Ca. 91773
Thank you for choosing Westin products
for additional installation assistance please call
CustomerService(800)793-7846
www.westinautomotive.com
DATE: 1/4/17
17
P.N.: 75-XXXX-
RevX
ECO #: W16-
XXXX
Part List
Item
NO.
Part No.
Description
Qty
9500
12500
1
OR9500-01
OR12500-01
Long Bolt Hardware set
2
2
OR9500-02
OR12500-02
Motor Fixed Bolt Seals Ring
2
2A
OR9500-03
OR12500-03
Seals Ring
2
3
OR9500-04
OR12500-04
Motor End Cover
1
4
OR9500-05
OR12500-05
Motor Seal Ring
2
5
OR9500-06
OR12500-06
4.5" Carbon Bracket
1
6
OR9500-07
OR12500-07
4.5" Carbon
1
7
OR9500-08
OR12500-08
Stator
1
8
OR9500-09
OR12500-09
Rotor
1
9
OR9500-10
OR12500-10
Link Screw M8*25
4
11
OR9500-11
OR12500-11
Motor Base
1
12
OR9500-12
OR12500-12
Drum Anti Friction Sheet
2
13
OR9500-13
OR12500-13
Tie Bar
2
15
OR9500-14
OR12500-14
Coupling Joint
1
16
OR9500-15
OR12500-15
Brake Assembly
1
17
OR9500-16
OR12500-16
Clutch Handle
1
18
OR9500-17
OR12500-17
Clutch Pin
1
19
OR9500-18
OR12500-18
Clutch Handle Cover
1
20
OR9500-19
OR12500-19
O Ring
1
21
OR9500-20
OR12500-20
O Ring
2
22
OR9500-21
OR12500-21
Bolt M10*12
1
23
OR9500-22
OR12500-22
Gear Box
1
24-1
OR9500-23
OR12500-23
Sun Gear-Input Washer
1
24-1
OR9500-24
OR12500-24
Sun Gear-Input Washer
1
24
OR9500-25
OR12500-25
φ20/φ14.5*φ12.5*6 Flanged Bush
1
25
OR9500-26
OR12500-26
Sun Gear-Input
1
26
OR9500-27
OR12500-27
Inner Gear I
1
27
OR9500-28
OR12500-28
Gear Carrier Assembly-Input
1
28
OR9500-29
OR12500-29
Gear Carrier Assembly-Intermediate
1
29
OR9500-30
OR12500-30
Planet Carrier Cushion
1
30
OR9500-31
OR12500-31
Inner Gear II
1

WestinAutomotive Products,Inc.
320 W. Covina Blvd
San Dimas, Ca. 91773
Thank you for choosing Westin products
for additional installation assistance please call
CustomerService(800)793-7846
www.westinautomotive.com
DATE: 1/4/17
18
P.N.: 75-XXXX-
RevX
ECO #: W16-
XXXX
Winch Motor Clocking:
Step 1: The winch motor can be clocked to change the cable mount positions.
Step 2: Loosen the long bolts and pull them out fr om the winch motor .
Step 3: Rotate the motor to the r equir ed position. Note: The r otation of the winch motor must be 90 degr ees, 180 de-
grees, and/or 270 degrees clockwise or counter-clockwise, due to the fixed holes on motor base.
Step 4: Re-install long bolts to complete. To maintain the IP67 waterproof rating it is best to have this done professionally and
replace the sealing components.
31
OR9500-32
OR12500-32
Gear Carrier Assembly-Output
1
31A
OR9500-33
OR12500-33
Spline Cushion
1
32
OR9500-34
OR12500-34
Gear Box Seals Ring
1
34
OR9500-35
OR12500-35
Gear Box Base
1
35
OR9500-36
OR12500-36
Spring Washer 4
10
36
OR9500-37
OR12500-37
Bolt M4*16
10
37
OR9500-38
OR12500-38
Dust Ring
2
38
OR9500-39
OR12500-39
Nylon Bearing
1
39
OR9500-40
OR12500-40
Bolt M8*10
1
40
OR9500-41
OR12500-41
Drum Assembly
1
41
OR9500-42
OR12500-42
Seals Ring
2
42
OR9500-43
OR12500-43
Hexagon Socket Cap Screws M6*8
1
43
OR9500-44
OR12500-44
Wire Rope Assembly
1
OR9500S-44
OR12500S-44
Synthetic Rope Assembly
1
43A
OR9500-45
OR12500-45
Hook
1
44
OR9500-46
OR12500-46
Fairlead Assembly
1
OR9500S-46
OR12500S-46
Aluminum Fairlead
1
45
OR9500-47
OR12500-47
High-Strength Bolt M10*32 10.9
4
46
OR9500-48
OR12500-48
Heavy Type Spring Washer 10
4
47
OR9500-49
OR12500-49
Square Nut 10
4
48
OR9500-50
OR12500-50
Hexagon Nut 12
2
49
OR9500-51
OR12500-51
Heavy Type Spring Washer 12
2
50
OR9500-52
OR12500-52
High-Strength Bolt M12*25 10.9
2
51
OR9500-53
OR12500-53
NEW Control Box Assembly(12V)
1
52
OR9500-54
OR12500-54
NEW Handle Control Assembly
1

WestinAutomotive Products,Inc.
320 W. Covina Blvd
San Dimas, Ca. 91773
Thank you for choosing Westin products
for additional installation assistance please call
CustomerService(800)793-7846
www.westinautomotive.com
DATE: 1/4/17
19
P.N.: 75-XXXX-
RevX
ECO #: W16-
XXXX
Gear Box Clocking Instructions:
Step 1: Loosen the tie r ods and r emove them fr om the gear box.
Step 2: Take off the 10 r emaining bolts.
Step 3: Rotate the gear box to the desir ed location, then connect the gear box with the gear box base again, and then
reattach all hardware. After that connect the gear box with the tie. Note: The rotation of the gear box must be 36 degree, or a
degree which is the multiple of 36 degree clockwise or counter clockwise due to the fixed holes that receive the connection
with the retaining bolts.
Step 4: Re-install the long bolts.
To maintain the IP67 waterproof rating it is best to have this done professionally and to replace the sealing components.
Control Box Fuse
WARNING: Only r eplace fuse with the same amp r ating.
Westin winches are equipped with a fuse inside the control box. This fuse provides protection in the case of an internal failure
or overload.
If winch fails to function, you may need to inspect the fuse.
Step 1: Remove the contr ol box cover bolts. Car efully r emove contr ol box cover . Ther e will be r emote plug wir es at-
tached to the cover. Figure 1 & 2.
Step 2: Unscr ew fuse holder halves.
Step 3: Remove fuse by unscr ewing the fuse case halves and inspect for br eakage, r eplace if necessar y.
NOTE: If the r eplaced fuse blows immediately, please contact a winch distr ibutor .
Step 4: Car efully r e-assemble control box, taking care to avoid damage/pinching of wires.

WestinAutomotive Products,Inc.
320 W. Covina Blvd
San Dimas, Ca. 91773
Thank you for choosing Westin products
for additional installation assistance please call
CustomerService(800)793-7846
www.westinautomotive.com
DATE: 1/4/17
20
P.N.: 75-XXXX-
RevX
ECO #: W16-
XXXX
Part Number: 47-2200 ORI-10000S
Rated Line Pull:
10000lbs single-line
Motor:
6.6hp, 12v Series Wound
Control:
Wireless Multi-control
Gear Train
3-State Planetary
Gear Ratio:
218:1
Clutch:
Sliding Ring Gear
Brake:
Automatic In The Drum
Drum Size:
Diameter 2.52" Length 8.82"
Synthetic Rope:
100’ Long 3/8" Diameter
Fairlead:
Aluminum Fairlead
Recommended Battery:
650CCA minimum for winching
Battery Leads:
72"
Finish:
Black
Weight:
77lbs
Overall Dimension:
(LxWxH) 21.15" x 6.3" x 10.0"
Mounting Bolt Pattern:
10.00
±
0.015IN x 4.50
±
0.010IN
This manual suits for next models
11
Table of contents
Other Westin Winch manuals
Popular Winch manuals by other brands

haacon
haacon TANGO WV 300/500 operating instructions

Fransgard
Fransgard W-6011-EH manual

Warrior Winches
Warrior Winches S4000EN Assembly & operating instructions

Andersen
Andersen 28 STE manual

Columbus McKinnon
Columbus McKinnon Yale Mtrac Mini Translated Operating Instructions

Hammerhead
Hammerhead HG2200AT Operator's manual