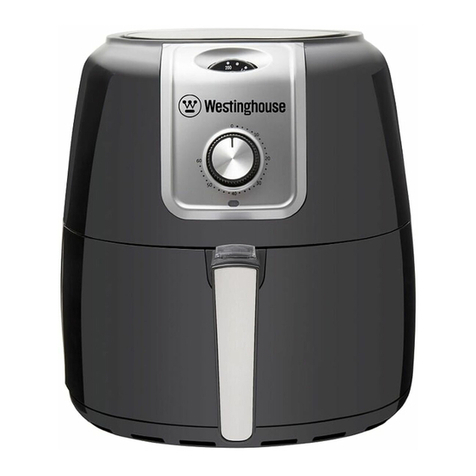
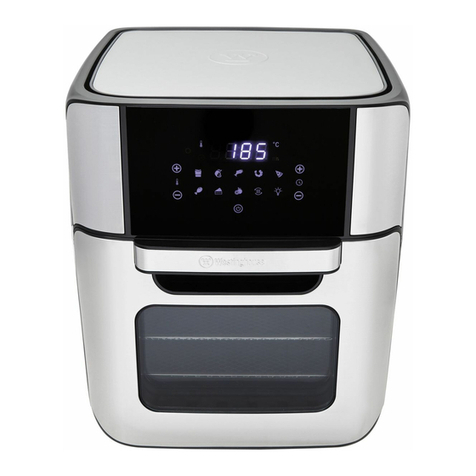
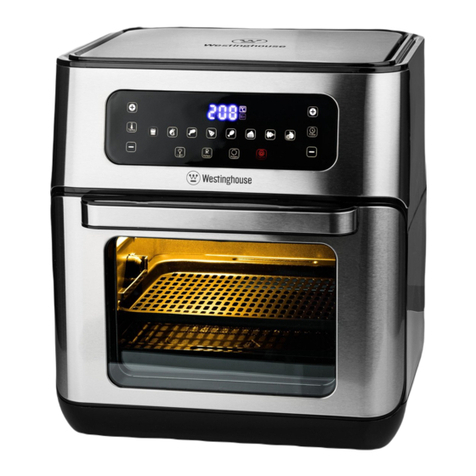
Westinghouse WHOF06K User manual

1800W
WHOF06K1800W
220~240V
DIGITAL AIR FRYER 5.2L
INSTRUCTION MANUAL

SAFETY INFORMATION
Important Safety Instructions ........................ 1 - 2
Electrical Requirements ................................ 3
SETUP AND USE
Installation Guide ...................................... 3
Parts and Features .................................... 4
Digital Air Fryer Operation ......................... 5
Cooking Temperatures & Times ......................... 6
Recipes ............................................ 7 - 11
CLEANING AND CARE ........................... 12
TROUBLESHOOTING.......................... 12 - 13
WARRANTY .................................... 14 - 15
CONTENTS
Figures and illustrations in this User Manual are provided for
reference only and may differ from actual product appearance.
Product design and ations may be changed without notice.
.....
ATTENTION: We advise not to use this appliance on a
stone bench top whilst in operation. This is due to stone
bench tops being sensitive to heat and the bench top
may crack if heated locally. If using this appliance on a
stone benchtop, we recommend placing a chopping
board or heat proof mat underneath the appliance
before operation.

© 2021 RVM Australia Pty Ltd. All Rights Reserved 1
IMPORTANT SAFETY INSTRUCTIONS
1. Read all instructions carefully before using your new Digital Air Fryer.
This appliance is not intended for use by persons (including children) with
reduced physical, sensory or mental capabilities, or lack of experience and
knowledge, unless they have been given supervision or instruction concerning
use of the appliance by a person responsible for their safety. Children should be
supervised to ensure that they do not play with the appliance.
2.
3. DANGER: Do not operate the appliance if:
i) the cord or plug is split, melted or damaged.
ii) the appliance has malfunctioned.
iii) the appliance has been damaged in any manner.
If any of the above incidents occur, return your unit to the nearest authorised
service center for examination, repair or adjustment.
4. DANGER: Do not under any circumstances immerse the power cord, mains
plug or appliance body in water or any other liquid.
5. WARNING: Use handle grip and buttons only as some surfaces may become
warm whilst the Appliance is in use.
6. WARNING: If the mains supply cord is damaged, it must be replaced by the
manufacturer, its service agent or a similarly person in order to avoid a
hazard.
7. WARNING: Do not cover the Appliance whilst in operation as the air inlet and
outlet vents must be kept clear.
8. WARNING: Ensure drip tray is cleaned regularly as build-up of oils and fats
mare hazard.
9. WARNING: Exercise caution when removing the cooking basket and drip tray
from the Digital Air Fryer.
10. WARNING: The insides of the appliance will become very hot during and after
operation. Do not touch.
11. WARNING: Do not move Digital Air Fryer whilst food is present in the
basket as hot liquids may have collected in the drip tray and may leak out whilst
moving.
12. WARNING: Combustible materials such as paper, curtains, tablecloths, kitchen
towels etc should not be placed near the Digital Air Fryer whilst in operation.
13. WARNING: Do not place the Digital Air Fryer against a wall or against
another appliance. Leave at least 10cm free space on the back and sides and
10cm free space above the Digital Air Fryer.
14. WARNING: Exercise caution when removing the basket and drip tray as hot
steam and air will expel from the Digital Air Fryer.
15. WARNING: Immediately unplug the Digital Air Fryer if you see any smoke
coming from the unit. Wait for the smoke to stop before removing the basket
and drip tray from the Digital Air Fryer.
DANGER - Immediate hazards
which WILL result in severe
personal injury or death.
DANGER
WARNING - Hazards or unsafe
practices which COULD result in
severe personal injury or death.
WA R N I N G
CAUTION - Hazards or unsafe
practices which COULD result in
minor personal injury.
CAUTION
2
17. CAUTION: Keep the Digital Air Fryer and its cord out of reach of children
less than 8 years old.
18. CAUTION: Wait for the Digital Air Fryer to cool before moving. Carry only
by the outer side panels.
19. CAUTION: During operation, hot steam is released through the air vent
openings. Keep your hands and other body parts at a safe distance from the air
vent openings.
20. CAUTION: Allow 30 minutes to cool down after cooking before handling or
cleaning.
21. This Digital Air Fryer is not intended to be operated by means of an external
timer or separate remote-control system.
22. Any appliance that has been dropped or damaged should not be used until
examined by an authorised service center.
23. Do not permit the mains supply cord or plug to touch hot objects or allow the
power cord to lay across the Digital Air Fryer.
24. This appliance is deemed for use indoors only.
25. Do not use harsh or abrasive cleaning agents. The outside surface may be
wiped clean with a soft, damp cloth and dried thoroughly. If necessary, a mild
dishwashing detergent may be applied to the cloth but not directly applied to the
Appliance.
26. Children should not play with the Digital Air Fryer.
27. Your Digital Air Fryer should not be unattended while in use.
28. This Digital Air Fryer should not be used in a commercial environment
such as a restaurant or commercial kitchen.
29. Always use this Digital Air Fryer with a power outlet of the voltage (A.C. only)
marked on the back of the Digital Air Fryer.
30. Do not use the Digital Air Fryer for any purpose other than its intended use.
31. Do not place y
our Digital
Air Fryer on or near a hot gas e, electric element,
heated oven or any hot surface.
32. Do not place the Digital Air Fryer on top of any other appliance.
33. Do not allow the power cord of this Digital Air Fryer to hang over the edge of a
table or benchtop.
34. Keep liquids away from the Digital Air Fryer.
35. cooking basket past the max level indicated on the basket.
36. Do not place anything on top of the Digital Air Fryer.
37. Ensure the appliance in placed on a horizontal, even and stable surface.
IMPORTANT SAFETY INSTRUCTIONS
16. CAUTION: Close supervision is necessary when this appliance is used by or
near children.
Westinghouse recommends the use of a residual current device (RCD) with a
tripping current not exceeding 30mA in the electrical circuit supplying power
to your Digital Air Fryer.
Do not immerse the appliance in water or any other liquid.
38.
39.
This appliance is intended to be used in household and similar applications such as:
type environments.
39.

© 2021 RVM Australia Pty Ltd. All Rights Reserved 3
ELECTRICAL REQUIREMENTS
POWER SUPPLY CORD
1. Do not attempt to modify the power cord or plug in any way.
2. A short power supply cord is provided to reduce the risk of becoming entangled
in or tripping over a longer cord.
3. If the power supply cord is too short, do not use an extension cord. Have a
ceman install an outlet near the appliance.
NOTE: Neither Westinghouse nor the retailer can accept any liability for damage
to the product or personal injury resulting due to failure to observe the electrical
connection procedures.
INSTALLATION GUIDE
1. Carefully unpack your Digital Air Fryer.
2. Carefully remove packaging around the Digital Air Fryer and power cord. Do
not remove warning labels.
3. W
before use.
ash cooking basket and drip tray in warm soapy water and allow to dry
DANGER: Do not under any circumstances immerse the Digital Air Fryer, mains
cord or mains plug in water or any other liquid.

4
4
3
2
1
5
1. Digital Control Panel
2. Basket.
3. Basket handle
4. Drip tray (in the base of the basket).
5. Outlet air vent (back of unit).
PARTS AND FEATURES
DIGITAL CONTROL PANEL
1
3
4
2
5
1. Pre-Set Cooking Indicators
2. Menu Button (changes cooking pre-set)
3. Temperature Up Button
6. Time & Temperature Display
7. Cook Time Up Button
4. Temperature Down Button
5. Operation Indicator Light
8. Cook Time Down Button
9. Power Button
6
7
8
9

© 2021 RVM Australia Pty Ltd. All Rights Reserved 5
DIGITAL AIR FRYER OPERATION
1. Before st use, the basket and drip tray must be cleaned. Wash with hot water
and mild detergent, rinse with fresh water and dry thoroughly. Do not use abrasive
cleaning products or abrasive sponges when cleaning.
2. We recommend the unit complete a 20 minute cycle without any food present
i) Ensure unit is unplugged from wall power outlet.
ii) Insert drip tray and basket back into the Digital Air Fryer after cleaning
iv)
the power cord into the wall power outlet and turn on.
v) Press the power button. The default time will show 15 minutes and default
temperature 180°C. Using the temp and time adjustment buttons, adjust the
temperature and time buttons to show 20 minutes and 200°C. Press the power
button to begin the cycle. Once completed, your Air Fryer is ready for use.
WARNING: Please exercise caution when removing the basket and drip tray
as it will be very hot.
3. Remove basket and drip tray from your Digital Air Fryer by gripping the basket
handle and pulling in an outward motion.
4. Release basket from drip tray by pressing the release button.
5. Place your ingredients into the basket.
6. Put the basket back into the drip tray and ensure it is locked into position.
The basket should click into place.
5. Slide the basket and drip tray back into the Digital Air Fryer and push in an
inwards direction until closed.
6.
select the temperature and time manually if preferred.
7. Determine the required preparation time for the food via the cooking temperatures
and times page and The Digital Air
Fryer will now begin the cooking cycle.
8. The cycle may need to be interrupted during cycle for turning or agitation of
ingredients. Refer cooking temperatures and times interrupt the
cycle, slowly pull the basket handle outwards and keep clear of steam released
from Appliance. The Digital Air Fryer will automatically cease operation.
Place the basket and drip tray onto a heat proof surface before attempting to
turn or agitate the ingredients. Reinsert basket and drip tray into the Air Fryer to
resume operation.
9. Once the time cycle has been completed, remove the basket and drip tray using
the bas
when releasing the basket and drip tray from the Air Fryer.
ket handle. Do not press the release button or use the button slide guard
WARNING: Use caution removing the basket and drip tray as hot steam and air will
expel from the Digital Air Fryer.
to disburse any initial burn off smells. Follow the guide below for this process.
process.
Plug
Press the menu button repeatedly until the desired menu function is selected or
press the on/off button to begin cooking.
as to when to

6
COOKING TEMPERATURE AND TIMES
ITEM MAX
Chicken Breast 500g 180°C Turn
Over
20-25min
TIME TEMP ACTIONS NOTES
Chicken Nuggets
(Frozen) 400g 200°C Shake or
Agitate
10-15min
Chicken Drumsticks 500g 180°C Turn
Over
20-25min
Fish Fingers
(Frozen) 400g 200°C Shake or
Agitate
10-15min
Hamburger Patties 500g 180°C Turn
Over
10-15min
Potato Gems 600g 180°C Shake or
Agitate
Add 1/2
tbsp of oil
20-25min
Pork Chops 500g 180°C Turn
Over
15-20min
Potato Wedges
(Oven Ready) 600g 180°C Shake or
Agitate
Add 1/2
tbsp of oil
20-25min
Sausage Rolls
(Oven Ready) 400g 200°C Turn
Over
15-20min
Spring Rolls
(Oven Ready) 400g 200°C Shake or
Agitate
Add 1/2
tbsp of oil
10-15min
Beef Steak 500g 180°C Turn
Over
8-12min
Thick Frozen Fries
(Oven ready) 600g 200°C Shake or
Agitate
Add 1/2
tbsp of oil
15-20min
Thin Frozen Fries
(Oven ready) 600g 200°C Shake or
Agitate
Add 1/2
tbsp of oil
10-15min
(Please use only as a guide and adjust to your individual tastes and preferences.)
MENU PRESETS
FRIES RIBS SHRIMP BAKE CHICKEN STEAK FISH KEEP
WARM
TIME
TEMPERATURE
20
MINS
200°C 180°C 160°C 160°C 180°C 160°C 180°C CYCLE
TEMP
15
MINS
20
MINS
40
MINS
25
MINS
25
MINS
20
MINS
120
MINS

RECIPES
SPICY FRIES
INGREDIENTS
4pcs potatoes (600g)
2 tsp oil
1/2 tsp chicken salt
1/2 tsp ground pepper
1/2 tsp onion powder
1/2 tsp red chilli powder
STEPS
1. Peel potatoes and cut into strips.
2. Soak potato strips in hot water for 20
minutes.
3. Remove stips from water and pat dry
with paper towel.
4. In a separate bowl, mix the salt, pepper,
oil, onion powder and chilli powder.
5. Coat the strips with the above mixture evenly.
6. Set the air fryer temperature to 180°C and the timer to 5 minutes to preheat.
7. Place potato strips into the air fryer basket evenly and place the basket back to the air fryer.
Select the fries menu function to begin cooking. Add time as necessary until the fries become
golden brown. Agitate the fries every 10 minutes to ensure even cooking.
CHICKEN WINGS
INGREDIENTS
Chicken wings (500g)
1 tbsp olive oil
1/2 tsp garlic powder
1/4 tsp salt
1/4 tsp ground pepper
1/2 tsp smoked paprika powder
STEPS
1. Rinse chicken wings with running water
then pat dry with paper towel and set aside.
2. In a separate bowl, mix the salt, pepper,
oil, garlic powder and smoked paprika
powder.
3. Add the chicken wings to the bowl
containing the mixture above and toss until
the wings are evenly coated with the mixture. Allow to sit for 20 minutes to marinate.
5. Set the air fryer temperature to 180°C and the timer to 5 minutes to preheat.
6. Place chicken wings into the air fryer basket evenly and place the basket back to the air fryer.
Select the chicken menu function to begin cooking. Add time as necessary until the wings become
golden brown. Agitate the wings every 10 minutes to ensure even cooking.
© 2021 RVM Australia Pty Ltd. All Rights Reserved 7

RECIPES
FRIED CHICKEN NUGGETS
INGREDIENTS
500g chicken breast
Cooking oil spray
1/2 tsp ground pepper
1/2 tsp salt
3 eggs
100g breadcrumbs
STEPS
1. Slice chicken breast into 1.5cm thick strips
then cut to desired shape.
2. In a large bowl, whisk the eggs, salt and
pepper together.
4. Dip each piece of chicken into the egg mixture then into the
to coat each chicken piece. Set each piece aside on a plate wit
the chicken pieces sticking to the plate.
5. Spray the air fryer basket and each chicken strip with cooking oil then place the chicken strips
the air fryer.
6. Select the chicken menu function to begin cooking. Add time as necessary until the chicken
LAMB CHOPS
INGREDIENTS
500g lamb chops
1 tsp soy sauce
1 dash brandy
1/2 tsp ground pepper
STEPS
1. Rinse lamb chops with running water
then pat dry with paper towel and set aside.
2. In a separate bowl, mix the soy sauce,
oil, pepper and brandy.
3. Add the lamb chops to the bowl
20 minutes to marinate.
5. Set the air fryer temperature to 180°C and the timer to 5 minutes to preheat.
he basket back to the air fryer.
Select the ribs menu function to begin cooking. Add time or repeat the function as necessary
8

RECIPES
FRIED LAMB KEBABS
INGREDIENTS
500g diced lamb
1 egg
1/2 tsp cumin powder
1/2 tsp chilli powder
1/2 tsp salt
2 teaspoons oil
STEPS
1. Dice the lamb into 2cm thick pieces.
2. In a large bowl, whisk the egg, salt, onion,
cumin, chilli powder and oil together.
3. Place the diced lamb into the whisked solution above and allow to marinate for 20 minutes.
4. Remove the lamb from the marinade solution and place onto skewer sticks (20cm max).
nutes to preheat.
7. Select the steak menu function to begin cooking. Add time as
re even cooking.
FRIED PORK CHOPS
INGREDIENTS
500g pork chops
2 eggs
1/2 tsp ginger powder
1/2 tsp garlic powder
1/2 tsp chicken stock powder
1 teaspoon oil
STEPS
1. Rinse pork chops with running water
2. In a separate bowl, whisk the eggs, ginger,
3. Add the pork chops to the bowl containing the mixture above and toss until the chops are
marinate.
nutes to preheat.
6. Select the chicken menu function to begin cooking. Add time or repeat the function as
© 2021 RVM Australia PLtd. All Rights Reserved 9

RECIPES
FRIED CALAMARI
INGREDIENTS
500g fresh calamari rings
Cooking oil spray
1/4 cup milk
1/2 tsp ground pepper
1/2 tsp salt
1 egg
200g breadcrumbs
STEPS
1. Wash the calamari rings with
running water and pat dry.
2. In a large bowl, whisk the eggs,
milk, salt and pepper together.
readcrumbs.
5. Set the air fryer temperature to 180°C and the timer to 5 minutes to preheat.
mixture then into the
breadcrumbs. Spray a dinner plate with cooking oil spray and place the rings onto the plate
once coated. Ensure they are spaced apart to avoid sticking together.
6. Spray the air fryer basket and each calamari ring with cooking oil then place the calamari
rings into the air fryer basket evenly and place the basket back into the air fryer.
6. Select the ribs menu function to begin cooking. Add time as necessary until the calamari
rings become golden brown. Agitate or turn every 5 minutes to ensure even cooking.
SPICY PRAWNS
INGREDIENTS
10-15 large fresh prawns (room
temperature)
2 tbsp olive oil
1 tsp minced garlic
1 tsp black pepper
1 tsp chilli powder
STEPS
1. Rinse prawns with running water
then pat dry with paper towel and set aside.
2. In a large bowl, mix the olive oil, minced
garlic, black pepper and chilli powder.
3. Add the prawns to the bowl containing
the mixture above and toss until the prawns
are evenly coated with the mixture.
5. Set the air fryer temperature to 180°C and the timer to 5 minutes to preheat.
6. Place the praws into the air fryer basket evenly and place the basket back into the air fryer.
Select the shrimp menu function to begin cooking. Add time or repeat the function as
necessary until the desired taste is achieved. Agitate or turn every 5 minutes to ensure even
cooking.
10

RECIPES
FRIED DUMPLINGS (STORE
BOUGHT)
INGREDIENTS
10 dumplings (room temperature)
Cooking oil spray
STEPS
1. Spray a dinner plate with cooking oil spray
and place the dumplings onto the plate once
coated.
2. Spray the dumplings with cooking oil spray
evenly.
3. Set the air fryer temperature to 180°C and the timer to 5 minutes to preheat.
4. Place the dumplings into the air fryer basket evenly and place the basket back into the air
fryer.
5. Select the ribs menu function to begin cooking. Add time as necessary until the dumplings
become golden brown on top. Agitate or turn every 5 minutes to ensure even cooking.
CHOCOLATE CAKE (20CM
CAKE TIN REQUIRED)
INGREDIENTS
3/4 cup sugar
3 tbsp cocoa powder
1/2 tsp salt
1 cup milk
1/4 cup canola oil
1 tsp baking soda
1 tsp vanilla essence
Cooking oil spray
STEPS
lk, canola oil, baking soda and
vanilla essence.
2. Mix the above ingredients thoroughly until a smooth consistency is achieved and all lumps
have disappeared. *Hint* Using an electric hand mixer for this process is ideal.
3. Spray the inside of the 20cm cake tin with the cooking oil spray. Be sure to coat evenly and
completely.
4. Set the air fryer temperature to 180°C and the timer to 5 minutes to preheat.
5. Pour the mixed ingredients into the cake tin and place the tin into the basket of the air
fryer. Reinsert the basket back into the airfryer.
6. Select the bake menu function to begin cooking. Add time as necessary and check to see
if the cake is cooked through with a butter knife or skewer (insert into the cake, if it comes out
clean, the cake is cooked) .
© 2021 RVM Australia Pty Ltd. All Rights Reserved 11

12
TROUBLESHOOTING
BEFORE CALLING FOR SERVICE
If the Digital Air Fryer fails to operate:
1. Check to make sure the appliance is plugged in correctly and securely. If it is not,
remove the plug from the outlet, wait 10 seconds and plug it back in securely.
2. Check for a blown or tripped circuit breaker in your home. If these seem to be
working correctly, test another appliance in the same outlet to ensure the outlet
is working correctly.
IF NONE OF THE ABOVE SOLVES THE PROBLEM, DO NOT TRY TO ADJUST OR
REPAIR THE DIGITAL AIR FRYER YOURSELF.
CUSTOMER SERVICE
In the event you believe your Digital Air Fryer to be defective, please return it along
with your sales receipt to the place of purchase for resolution.
For any enquiries, please call our service center on: Tel: 1300 883 109
Mon-Fri 8:00am – 5:00pm WST
TROUBLESHOOTING
Troubleshoot your problem by using the chart. If the Digital Air Fryer still does not
operate correctly, it may be defective.
CLEANING & CARE
CAUTION: Allow 30 minutes to cool down after cooking before handling or
cleaning.
CLEANING:
1. WARNING: Do not under any circumstances immerse the power cord, mains
plug or Digital Air Fryer body in water or any other liquid.
2. Ensure unit is unplugged from wall power switch before attempting to clean.
3. Do not use harsh or abrasive cleaning agents. The outside surface may be
wiped clean with a soft, damp cloth and dried thoroughly. If necessary, a mild
dishwashing detergent may be applied to the cloth but not directly applied to the
Digital Air Fryer.
4. Soaking the basket and drip tray in soapy water will assist in the removal of sticky
or tough to remove substances. Do not immerse the basket handle.
5. When washing, non-abrasive cloths and plastic bristle kitchen brushes may be
used to remove stubborn food particles from the basket and drip tray. Do not use
abrasive cloths and cleaning materials as they will damage the surface.
6. Do not place the basket or drip tray into a dishwasher. They are not dishwasher
safe.
7. Ensure all items are dried thoroughly after cleaning and placed back into the
Digital Air Fryer for storage.
8. Store in a dry place away from steam and humidity where possible.

© 2021 RVM Australia Pty Ltd. All Rights Reserved 13
Air Fryer
does not turn on.
TROUBLE
Air Fryer
is not plugged in.
POSSIBLE CAUSE
Check that is
plugged into a working
power outlet and turned on.
Air Fryer
does not turn on.
Basket & drip tray not
inserted properly.
Remove basket, check for obstructions
then re-insert basket and drip tray.
The Air Fryer will start
automatically.
Foods have not
cooked properly. Too much in the basket. Remove excess foods from basket
and try with smaller batches.
Foods have not
cooked properly.
Temperature set too low
or timer not set for
correct amount of time.
Check temperature and times page
for temperature and time setting.
Set temperature and timer to
correct settings.
Foods have cooked
unevenly.
Turning / agitation
during the cooking
cycle not completed.
Foods that lay across one another
(eg. Fries) need to be turned or
agitated during cooking cycle.
Interrupt cycle half way through cycle,
remove basket and turn / agitate foods
.
Foods are not crispy
when they come out
of the Digital Air
Fryer.
Foods were not oven
ready or were made to
be cooked in a
traditional deep fryer.
Use oven ready foods or lightly
brush some oil onto the foods
prior to cooking. For best results,
mix ingredients with ½tbsp. oil in
a mixing bowl prior to cooking.
Basket will not t
back into Digital Air
Fryer.
Too much food
in basket
Do not ll basket past the max indicator
on the basket. Remove some food from
basket and try again.
Basket will not t
back into Digital Air Obstruction.
Remove basket and drip tray
from Digital Air Fryer, check for
obstructions and try again.
White smoke coming
from appliance. Foods oily or greasy.
Very oily of greasy foods drip excessive
amounts of oil and fats onto the oil
catch tray which may heat up and
burn off. This is considered normal.
Ensure drip tray is cleaned after
each use.
POSSIBLE REMEDY
Digital Digital appliance
Digital
Digital
Fryer.

14
LIMITED WARRANTY
1.
Consumer Law. The o Consumer under Warr are
Nohnnhwarranaffeche Consumer’s rh underhe Auraan
o and r of buer under an Consumer Guaranees. The
AusrConsumer Law rrawe ca
Our goods come guaranees a be excluded under Ausr
Consumer Law. You are o a replac or refund for a major fre
and for compensa for an r foreseeable loss or damage. You
are also o have goods rred or replaced goods f o be of
accfro a major fre.
2. o Clause 1, Seller warr a Wes branded pr
be free of manuf def and perform o Seller’s a
follo
3. The of Warr exends o owner of pr
Pr manufred or b Seller are s and used b
owner fraWarrP
4. The Warr commences on dae of purchase of pr and
c for of Owner for Warr P If
Warr P a manuf def covered Pr or
Pr f o perform o Seller’s a as a r of some def
a.) R or replace Pr a cos of Seller,
ed o labour and ravel cos Goods rred or replaced under
Warrwarraned frWarr.
b.) Rrcbconsumer.
5. The Warro Pra
a.) Has f due o excesve wear and ear beond wha cred o be
reasonable.
bed.
c.) Has been damaged ac or b of God re and
d.) Has been used or operaed cr o opera or enance s
e.) Has been damaged b Consumer or a rd o for
crrsore Consumer.
6. In order o mae a under Warr, Owner mus where pos
r goods o Seller’s sore a Owner’s cos Proof of purchase mus
7. The seller ex an r Pr and Seller de a
rrfrough no fr
a.) Mae noe of Owner’s c Owner’s elephone
number owner can be ced ss hours, pos
addresress.

b.) Make note of the defects reported by the Owner.
c.) Take back the defective goods from the owner and determine within a
reasonable time through dialogue with the Seller whether the goods are
defective.
d.) Advise the owner within a reasonable time frame whether it accepts or
rejects the Product claim.
e.) If the Seller accepts the return of the Product, the Seller must arrange to have
i) The Product repaired or,
ii) Replace the damaged or faulty Product or,
iii) Refund the purchase price.
8. The Seller will not accept any returned Product which has not been returned
strictly in accordance with this Warranty.
9. For the purpose of this Warranty:
a.) Australian Consumer Law means the law as set out in Schedule 2 of the
Competition and Consumer Act 2010 (Cth).
b.) Consumer means the Purchaser of goods from the seller.
c.) Consumer means a Consumer as that term is set out in section 3 of the
Australian Consumer Law.
d.) Consumer Guarantees means the guarantees under the Australian Consumer
Law.
e.) Implied terms means any guarantees, conditions, warranties or other terms
implied by any Australian Commonwealth, State or Territory laws, (excluding
the Australian Consumer Law) or the law of any other jurisdiction.
f.) Owner has the meaning set out in clause 3.
g.) Warranty means this warranty.
h.) Product means the Product/s bought by the Owner from the Seller that fall
under this warranty.
i.) Warranty Period means:
i) In relation to Cast Iron Cookware: 3 Year Limited Warranty.
ii) In relation to Non-Stick Cookware: 3 Year Limited Warranty
iii) In relation to Cooking Utensils: 3 Year Limited Warranty
iv) In relation to Knives/Knife Block Sets: 3 Year Limited Warranty
v) In relation to Stainless Steel Cookware: 10 Year Limited Warranty
vi) In relation to Chopping boards: 1 Year Limited Warranty
vii) In relation to Small Appliances: 1 Year Limited Warranty
© 2021 RVM Australia Pty Ltd. All Rights Reserved 15

12
CUSTOMER SERVICE - AU: 1300 883 109
CUSTOMER SERVICE - NZ: 0508 776 546
info@westinghousesmallappliances.com.au
www.westinghousesmallappliances.com.au
IMPORTED AND DISTRIBUTED BY RVM AUSTRALIA PTY LTD.
11 Tamara Drive, Cockburn Central, WA 6164
MADE IN CHINA
© 2021 RVM AUSTRALIA PTY LTD. ALL RIGHTS RESERVED.
W& ESTINGHOUSE are trademarks of Westinghouse Electric Corporation.
Used under license by RVM AUSTRALIA PTY LTD. ALL RIGHTS RESERVED.
Table of contents
Other Westinghouse Fryer manuals

Westinghouse
Westinghouse WHOF04B User manual

Westinghouse
Westinghouse WST3034 User manual

Westinghouse
Westinghouse WKAFGOT01WH User manual

Westinghouse
Westinghouse WKAFDS16 User manual

Westinghouse
Westinghouse WKAFDT10 User manual

Westinghouse
Westinghouse WKAFSL200 User manual

Westinghouse
Westinghouse Deep Fryer User manual

Westinghouse
Westinghouse WHOF05SS User manual

Westinghouse
Westinghouse WKAF988 User manual