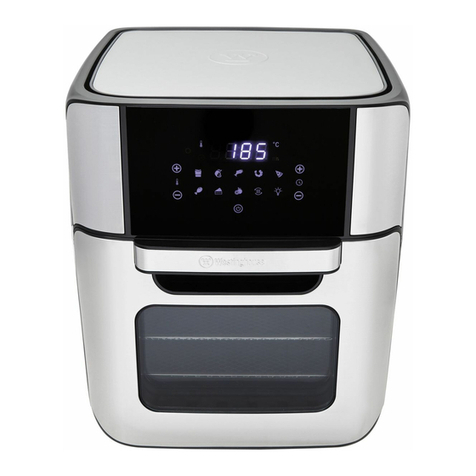
Westinghouse WKAFDT10 User manual

AIR FRYER OVEN
WKAFDT10
Instructions
Bedienungsanweisungen
Instructions
Instrucciones
Gebruiksaanwijzing
P.2
P.13
P.24
P.35
P.45
EN
DE
FR
ES
NL

2
EN
INTENDED USE
Use the appliance only for the intended purpose. Any other use may result in
damage to the appliance or injuries.
IMPORTANT SAFEGUARDS
General
1. Read this instruction manual carefully before using the appliance. It contains
important information on the safe installation, use and maintenance of the
appliance. Keep these instructions for future reference and pass them on to the
possible new owner of the appliance.
2. Always follow basic safety precautions and accident prevention measures when
using the appliance.
3. Pay particular attention to the warnings indicated on the appliance and in this
instruction manual.
4. Use the appliance only for its intended purpose. Improper use may lead to
hazards.
5. This appliance is designed for household use only. It is not intended for use in
staff kitchen areas in shops, offices and other working environments, in farm
houses, hotels, motels and other residential type environments, or in bed and
breakfast type environments. It is not suitable for commercial use.
6. Damage due to improper use or repairs done by unqualified personnel will void
the warranty. We will assume no liability for any damages caused by misuse of
the product or failure to comply with these instructions.
7. The use of accessories and components not expressly recommended by the
manufacturer may result in injuries or damages and will void the warranty.
8. This appliance can be used by children aged 8 and above and by people with
reduced physical, sensory or mental capabilities or by people who have a lack of
experience or knowledge, provided that they are supervised and are given the
instructions regarding the safe use of the appliance and understand the hazards
involved.
9. Children should be supervised to ensure that they do not play with the
appliance.
10. Cleaning and user maintenance should not be performed by children.
11. CAUTION: Never leave the appliance unattended while it is switched on.
12. Do not immerse the appliance or its electrical parts in water or any other liquids.
Never place them under running water (see CARE AND MAINTENANCE).
13. Do not under any circumstances attempt to repair the appliance yourself.
For servicing and repairs, please consult an authorised dealer or authorised
customer service centre.
14. This appliance is not intended to be operated by means of an external timer or
separate remote control system.
15. CAUTION: The Rotisserie accessories are sharp. Handle with care.
16. KEEP OUT OF REACH OF CHILDREN: Keep the appliance, cooking accessories
and power cord out of the reach of children younger than 8 years of age.
FOR HOUSEHOLD USE ONLY

3
EN
Power supply
1. Before connecting the appliance to the power supply, check that the voltage
indicated on the rating label of the appliance corresponds with the voltage in
your home. If this is not the case, do not use the appliance and contact the retail
outlet or the manufacturer immediately.
2. Do not use with power converters or adapters.
3. Only connect the appliance to an earthed wall socket.
4. The appliance is only disconnected from the electricity supply if the power plug
has been removed from the socket. The power plug must be accessible.
5. Always unplug the appliance immediately after use and before cleaning and
storing.
6. Avoid damage to the power cord that may be caused by kinks or contact with
sharp corners.
7. Ensure the appliance (including power cord and power plug) is not exposed to
hot surfaces.
8. To unplug from the mains, hold and pull the plug head. Do not pull on the cord.
9. If the power cord or plug is damaged, do not use the appliance. The power cord
must be replaced by the manufacturer, an authorized service agent or a similarly
qualified person.
10. WARNING: Do not touch or operate the appliance with wet hands or while
standing on a wet floor. Do not connect or disconnect the electric plug when
your hands are wet.
Installation location
1. Place the appliance on a flat, sturdy and heat-resistant surface.
2. The power cord has a short design to prevent accidents. Do not use an
extension cord.
3. WARNING: Keep the appliance, cooking accessories and the power cord away
from the edge of tables or countertops. KEEP OUT OF THE REACH OF BABIES,
CHILDREN AND PETS.
4. Use the appliance indoors and in a dry location only.
5. Keep the power cord away from sharp edges or pointed objects.
6. Do not operate the appliance near flammable liquids or gases or flammable
materials (e.g. curtains, tablecloths, wallpapers, etc.). Ensure that there is always
a sufficient safe distance from flammable materials.
7. Do not place the appliance against a wall or other appliances. Keep a minimum
clearance distance on all sides of at least 10 cm. Never cover or place any
objects on the appliance.
8. WARNING: Do not use this appliance near water or heavy moisture (e.g. in a
damp basement, next to a swimming pool or bathtub).
9. WARNING: Do not expose the appliance or its electrical parts to dripping or
splashing water.

4
EN
Specific Safety Instructions
1. CAUTION: Always switch off and unplug the appliance and let it cool down
completely before handling, cleaning or storing.
2. Do not overfill the Rotisserie Basket. Beware that some food may expand (e.g.
popcorn). Overfilling may cause food to come into contact with the heating
element, which may result in fire and/or personal injury.
3. Ensure there is enough room around the bird or meat in the oven to allow the
Rotisserie Tool to rotate.
4. WARNING: Never pour oil into the Rotisserie Basket or Cooking Cavity. Do not
fill the Drip Pan with oil. This may cause a fire or injury.
5. Do not block or cover the air vents of the appliance.
6. Do not place heavy objects on the door, as they may damage the appliance.
7. WARNING: When opening the oven door, beware of hot steam coming out from
the appliance. Keep your face and hands at a safe distance.
8. WARNING: The heating components inside the oven and the cooking
accessories become extremely hot. To prevent serious burns, always wear oven
mitts to protect your hands when inserting or removing food and cooking
accessories from the oven.
9. WARNING: This electrical appliance contains a heating function. Surfaces
(including non-functional surfaces) become extremely hot during use. The
appliance emits hot steam through the air outlet vents. Always keep your hands
and face at a safe distance from the appliance. Only handle the appliance using
the handles and buttons provided.
10. CAUTION: The burning hazard remains long after the appliance has stopped
operating.

5
EN
AIR FRYER OVEN
DESCRIPTION OF PARTS
1. Control Panel
2. Display
3. Door Handle
4. Door
5. Shelf Supports
6. Air Inlet Vents
7. Hot Air Outlet Vents (rear)
8. Glass Window
9. Drip Pan / Baking Pan
10. Mesh Rack
11. Rotisserie Basket
12. Handle Tool
13. Rotisserie Tool
2
3
4
5
6
7
8
1
9 10 11 12 13

6
EN
BEFORE FIRST USE
1. Remove all packaging materials from the oven, oven cavity and the accessories.
Retain the packaging in case you would like to store the appliance or transport
it at a later date. If you choose to dispose of the packaging, please do so
according to the applicable legal regulations.
2. Check the packaging contents to ensure that there are no missing or damaged
parts. If there are any missing or damaged parts, do not use the appliance and
return it to your retail outlet immediately.
3. Clean the appliance and all accessories before first use (see CARE AND
MAINTENANCE).
WARNING: Keep all packaging materials out of the reach of babies and children.
CONTROL PANEL
TXG-KK-DT10L-E 2019.5.7
BAKING TIPS
• The temperature of the top shelf is the highest and the temperature of the
bottom shelf is the lowest. When using more than 1 rack, it is recommendable to
switch the positions of the racks halfway through the cooking process to ensure
even cooking.
- It is recommendable to add 3 minutes to the air frying time to preheat the
oven.
- Foods cook more evenly when they are of similar size and thickness. Smaller
pieces of food require less cooking time than larger items.
- To achieve crispy results, pat dry the food items with kitchen paper towel.
Lightly spray or brush them with oil (e.g. French fries, potatoes) before air
frying.
USING YOUR AIR FRYER OVEN
Prepare the cooking accessory
1. Place the food ingredients in the Baking Pan, Mesh Rack, Rotisserie Basket or
Rotisserie Tool (see USING THE ACCESSORIES).
Preheat the oven (recommendable)
2. Plug the oven into an earthed wall socket. The appliance will beep and enter
Standby Mode, lighting up the button.

7
EN
3. Touch the button to switch on the Control Panel.
4. Select the French Fries preset program, and touch the [+] or [-] button to
adjust the cooking time to 3 minutes.
5. Touch the button to start preheating.
Insert the cooking accessory into the oven
6. When the preheat process is complete, open the door and insert the prepared
cooking accessory into the oven (see USING THE ACCESSORIES).
7. Touch the button to switch on the Control Panel.
8. a) Select a Preset Program (see PRESET PROGRAMS); or
b) Select any Preset Program and
touch the [+] or [-] and [+] or [-] buttons to manually set the cooking
TEMPERATURE and TIME.
9. Touch the button to start the cooking process.
10. If using the Rotisserie Tool or the Rotisserie Basket, touch the ROTATE button to
start the Rotisserie function. Touch again to stop.
11. Once the cooking has finished, the oven will beep and automatically switch off.
12. Unplug the oven when the cooling fan stops running (see COOLING FAN).
NOTE:
• Press the button to STOP and CANCEL the cooking process at any time.
• You can open the door halfway through the cooking process to check on the
progress, to add food, to turn or stir the food, or to switch the shelf position of
the Baking Pan or Mesh Rack. The cooking process automatically pauses (Auto-
pause) when the door is opened and resumes when the door is closed.
PRESET PROGRAMS
Preset Program Preset Temperature Preset Time
French Fries 200°C 15 minutes
Roast 175°C 25 minutes
Fish 165°C 15 minutes
Pizza 180°C 15 minutes
Chicken 175°C 30 minutes
Cake 160°C 30 minutes
Rotisserie 190°C 30 minutes
Dehydrate 40°C 2 hours
Reheat 115°C 6 minutes
NOTE: The preset temperatures and times are guidelines only. If necessary, adjust
the settings according to the recipe, size and portion of the food.

8
EN
AIR FRYING TIMES
Food Min. – Max. Temperature Air Fry Time Recommendations
Thin frozen fries 1.5-3 cups 200°C 15-16 minutes
Thick frozen
fries
1.5-3 cups 200°C 15-20 minutes
Homemade
fries
1.5-3.5 cups 200°C 10-16 minutes
Homemade
potato wedges
1.5-3.5 cups 182°C 18-22 minutes Add 1/2 tbsp. oil
Homemade
potato cubes
1.5-3 cups 182°C 12-18 minutes Add 1/2 tbsp. oil
Hash browns 1 cup 182°C 15-18 minutes Add 1/2 tbsp. oil
Potato gratin 2 cups 200°C 15-18 minutes
Steak 1/4-1.1lb
(110-500g)
182°C 8-12 minutes
Pork chops 1/4-1.1lb
(110-500g)
182°C 10-14 minutes
Hamburger 1/4-1.1lb
(110-500g)
182°C 7-14 minutes
Sausage roll 1/4-1.1lb
(110-500g)
200°C 13-15 minutes
Chicken
drumsticks
1/4-1.1lb
(110-500g)
182°C 18-22 minutes
Chicken breast 1/4-1.1lb
(110-500g)
182°C 10-15 minutes
Frozen spring
rolls
1/4-3/4lb
(110-350g)
200°C 15-20 minutes
Frozen chicken
nuggets
1/4-1.1lb
(110-500g)
200°C 10-15 minutes
Frozen fish
sticks
1/4-1.1lb
(110-500g)
200°C 6-10 minutes
Frozen
mozzarella
sticks
1/4-1.1lb
(110-500g)
182°C 8-10 minutes
Stuffed
vegetables
1/4-1.1lb
(110-500g)
160°C 10 minutes
Cake 1.25 cups 160°C 20-25 minutes Use baking tin
Quiche 1.5 cups 182°C 20-22 minutes Use baking tin or oven
dish
Muffins 12 muffins 200°C 15-18 minutes Use muffin tin
Sweet snacks 1.5 cups 160°C 20 minutes Use baking tin or oven
dish
Frozen onion
rings
1lb
(450g)
200°C 15 minutes
NOTE: The Air Frying Times are guidelines only. If necessary, adjust the temperature
and air frying time according to the recipe, size and portion of the food.

9
EN
MINIMUM MEAT INTERNAL TEMPERATURE
Food Type Minimum Internal Temperature
Beef, pork, veal Ground
Steaks, chops, roasts: medium
Steaks, chops, roasts: rare
70°C
70°C
63°C
Chicken, turkey,
duck, goose
Ground
Breasts, drumsticks, legs, wings
Whole bird, stuffed
75°C
75°C
75°C
Fish, shellfish Any type 63°C
Lamb Ground
Chops, roasts: medium
Chops, roasts: rare
70°C
70°C
63°C
Ham Fresh (raw)
Pre-cooked (to reheat)
70°C
60°C
NOTE: Follow your recipe or the above guidelines. Use a food thermometer to
measure the internal temperature of the meat. You may choose to cook meat to
higher temperatures.
USING THE ACCESSORIES
DRIP PAN OR BAKING PAN
For easy cleaning, insert the Drip Pan on the bottom shelf to collect fat or food
drippings whenever you are cooking with the other accessories.
• Alternatively, use the Drip Pan as a Baking Pan to bake, roast, reheat, or
dehydrate food.
• Insert the pan onto the supports on the top, middle or bottom shelf and push it
into the oven.
MESH RACK
Use the Mesh Rack for roasting or broiling.
• Insert the Mesh Rack onto the supports on the top, middle or bottom shelf, and
push it into the oven (see the picture below).
• A maximum of 3 Mesh Racks (1 provided) can be used at the same time. Switch
the shelf positions of the racks midway through cooking to ensure even cooking.
• Insert the Drip Pan on the bottom shelf, if required.
NOTE: The temperature of the top shelf is the highest and the temperature of the
bottom shelf is the lowest.

10
EN
ROTISSERIE BASKET
Use the Rotisserie Basket to air fry or slow roast small food items such as popcorn,
French fries, shrimps and seafood.
• Place seasoned food inside the Rotisserie Basket. Close the lid.
• For best cooking results, do not exceed 1.5lb (680g).
• When preparing food that expands after cooking, such as popcorn, make sure
there is enough room in the basket for the food to expand.
• Insert the Drip Pan onto the bottom shelf.
To insert or remove the Rotisserie Basket from the oven, see HANDLE TOOL.
ROTISSERIE TOOL (SPIT, FORKS AND SET SCREWS)
Use the Rotisserie Tool to spit roast whole chickens, poultry, meat cuts, fish, legs
and more.
• The whole chicken or roast should not exceed 3lb (1350g).
• Choose meat cuts with a uniform shape to roast.
• Tie uneven meat cuts or the wings and legs of the whole chicken with a cooking
string to keep them nice and tight in the Rotisserie Tool.
• Use a food thermometer to measure the internal temperature of the chicken
or meat for doneness according to the recipe (see MINIMUM MEAT INTERNAL
TEMPERATURE).
How to spit a whole chicken (or meat)
1. Run the spit lengthwise through the chicken.
2. Slide one fork on the spit (facing inwards) and push the fork into the chicken.
Centre the chicken on the spit and tighten the fastening screw to secure the
fork.
CAUTION: The forks are sharp. Handle with care.
3. Insert the second fork on the spit and push the fork into the chicken. Squeeze
the chicken securely between both forks and tighten the second spit fork with
the screw to secure the bird into place.
NOTE: Ensure that the rotisserie chicken or meat has enough free space to
rotate in the oven.
To insert or remove the Rotisserie Tool from the oven, see HANDLE TOOL.
HANDLE TOOL
Use the Handle Tool to insert or remove the Rotisserie Basket or the Rotisserie Tool
from the oven.
To insert the Rotisserie Basket or Rotisserie Tool:
1. Open the oven door.
2. Hook both ends of the rotisserie accessory with the Handle Tool and insert the
accessory into the oven cavity.
CAUTION: Wear oven mitts to prevent burns.

11
EN
3. Rest both ends of the rotisserie accessory on the rotisserie rails.
4. Pull the rotisserie catch lever (located on the left of the oven) to the right side
and hold it in place.
5. Move the rotisserie accessory all the way inside along the rail.
6. Release the rotisserie catch lever, making sure the left end of the accessory is
secured in the rotisserie catch. The right end of the accessory should rest on the
U notch of the right rail.
To remove the Rotisserie Basket or Rotisserie Tool:
1. Open the oven door.
2. Hook both ends of the accessory with the Handle Tool.
3. Pull the rotisserie catch lever to the right side and hold it in place.
4. Remove the rotisserie accessory and release the rotisserie catch lever.
NOTE: Place a trivet or a heat resistant mat on your countertop or table to rest the
Rotisserie Basket safely on the surface once it has been removed from the oven.
COOLING FAN
While the oven is cooking, the cooling fan turns on to circulate the air in the cooking
cavity. Once cooking has finished and the oven switches off, the cooling fan will
continue to run for 20 seconds to cool down the oven. Unplug the oven when the
fan stops running.
AUTO-PAUSE FUNCTION
The door of the oven is fitted with a sensor. The cooking process automatically
pauses when the door is opened and resumes when the door is closed.
You can open the door halfway through the cooking process to check on the
progress, to add food, to turn or stir the food, or to switch the shelf position of the
Baking Pan or Mesh Rack. Close the door to resume cooking.
CARE AND MAINTENANCE
WARNING: Before cleaning, unplug the appliance from the wall socket and allow it
to cool down to prevent an electric shock or scalding.
WARNING: Never immerse the appliance or power cord in water or allow moisture
to come into contact with these parts. Ensure that all connectors and sockets are
kept dry.

12
EN
CLEANING
Before first use or after each use
• Never use solvents, chemical or abrasive cleaning agents, wire brushes, sharp
objects or scouring pads to clean the appliance or its accessories.
• Use a soft cloth moistened with warm water (or warm water and a mild dish
detergent solution) to wipe the inner cavity and external surfaces of the oven.
Wipe clean and allow to dry.
• Wash the baking accessories with warm water and a mild dish detergent
solution. Leave them to soak for a few minutes to soften stubborn food residues,
if required. Use a soft sponge for cleaning. Rinse well and allow to dry.
STORAGE
If you do not intend to use the appliance for an extended period, store it carefully.
• Unplug the appliance.
• Store the appliance in a cool and dry place.
• KEEP OUT OF REACH OF CHILDREN.
DISPOSAL
Proper disposal of this product
This label indicates that, in the EU, electronic devices cannot be disposed of
with regular household waste.
Please use the return or collection systems in your municipality or contact the
retailer where you purchased this product.
SPECIFICATIONS
Model Power Supply Rated Power Capacity Temperature
WKAFDT10 220-240V~, 60Hz 1500W 10L 65°C- 200°C
INFORMATION AND SERVICE
If you have questions or concerns about your product, please visit our website:
www.westinghousehomeware.com, or contact our overseas offices/agents.
In line with our policy of continuous product development, we reserve the right to
change product, packaging and documentation specifications without prior notice.

13
DE
ZWECKGEMÄSSE VERWENDUNG
Das Gerät darf nur für den vorgesehenen Zweck benutzt werden. Jeder davon
abweichende Gebrauch kann zu Schäden am Gerät oder zu Verletzungen führen.
WICHTIGE HINWEISE ZUR SICHERHEIT
Allgemeines
1. Vor dem Gebrauch des Geräts diese Bedienungsanleitung aufmerksam lesen.
Sie enthält wichtige Informationen zur sicheren Installation, Verwendung und
Instandhaltung des Geräts. Diese Anweisungen für künftige Nachschlagezwecke
aufbewahren und an künftige Besitzer des Geräts weitergeben.
2. Beim Gebrauch des Geräts immer die grundlegenden Vorkehrungen zur
Sicherheit und die Maßnahmen zur Unfallverhütung befolgen.
3. Besonders sollte auf die Warnhinweise am Gerät und in dieser
Bedienungsanleitung geachtet werden.
4. Das Gerät darf nur für den vorgesehenen Zweck benutzt werden. Der
unsachgemäße Gebrauch kann Gefahren hervorrufen.
5. Dieses Gerät ist nur für den Gebrauch in Privathaushalten vorgesehen. Es ist
nicht für den Einsatz in Personalküchenbereichen von Ladengeschäften Büros
und anderen Betriebsumgebungen, auf Bauernhöfen, in Hotels und Motels
noch in anderen Privatumgebungen oder privat vermieteten Gästezimmern
vorgesehen. Für die gewerbliche Nutzung ist es nicht geeignet.
6. Bei Schäden durch unsachgemäße Verwendung oder Reparaturen, die
von ungeschulten Personen ausgeführt wurden, erlischt die Garantie. Wir
übernehmen keine Haftung für Schäden, die durch den Fehlgebrauch des Geräts
oder durch Abweichungen von diesen Anweisungen entstehen.
7. Der Gebrauch von Zubehör und Bauteilen, die vom Hersteller nicht ausdrücklich
empfohlen werden, kann Verletzungen oder Schäden hervorrufen und macht die
Garantie ungültig.
8. Dieses Gerät kann von Kindern ab einem Alter von 8 Jahren und von Personen
benutzt werden, die über eingeschränkte körperliche, sensorische oder geistige
Fähigkeiten verfügen oder von Personen mit mangelnden Erfahrungen oder
Fachkenntnissen, wenn diese beaufsichtigt werden, Einweisungen in den sicheren
Gerätebrauch erhalten und sich über die einhergehenden Gefahren bewusst sind.
9. Um dafür zu sorgen, dass Kinder nicht mit dem Gerät spielen, müssen diese
beaufsichtigt werden.
10. Kinder dürfen das Gerät weder reinigen noch instandhalten.
11. ACHTUNG: Das Gerät nie im eingeschalteten Zustand unbeaufsichtigt lassen.
12. Das Gerät und dessen elektrische Teile nicht in Wasser oder andere Flüssigkeiten
tauchen. Nie unter fließendes Wasser halten (siehe PFLEGE UND WARTUNG).
13. Das Gerät unter keinen Umständen versuchen, selbst zu reparieren. Reparatur-
und Wartungsarbeiten sollten einem Vertragshändler oder einem befugten
Kundendienst überlassen werden.
14. Das Gerät ist für den Betrieb über eine externe Zeitschaltvorrichtung oder ein
separates Fernbediensystem nicht vorgesehen.
15. ACHTUNG: Das Drehspieß-Zubehör ist scharfkantig. Vorsichtig damit umgehen.
16. AUS DER REICHWEITE VON KINDERN FERN HALTEN: Das Gerät, das
Garzubehör und das Netzkabel müssen außerhalb der Reichweite von Kindern
aufbewahrt werden, die jünger als 8 Jahre sind.
NUR FÜR DEN HAUSGEBRAUCH GEEIGNET

14
DE
Stromversorgung
1. Vor dem Anschließen des Geräts an die Stromversorgung nachprüfen, ob
die Spannungsangabe auf dem Typenschild mit der Haushaltsspannung
übereinstimmt. Falls nicht, darf das Gerät nicht benutzt werden. Stattdessen das
Geschäft oder den Hersteller sofort kontaktieren.
2. Nicht über Spannungswandler oder Netzadapter betreiben.
3. Das Gerät darf nur an geerdete Steckdosen angeschlossen werden.
4. Erst wenn der Netzstecker aus der Steckdose gezogen ist, ist das Gerät
stromlos. Der Netzstecker muss zugänglich sein.
5. Das Gerät nach dem Gebrauch und vor dem Reinigen und Verstauen immer
sofort vom Netz trennen.
6. Schäden am Netzkabel durch Knicke oder Kontakt mit scharfen Ecken
vermeiden.
7. Sicher stellen, dass das (Gerät und insbesondere das Netzkabel und der
Netzstecker) vor heißen Flächen geschützt wird.
8. Zum stromlos machen am Netzstecker ziehen. Nicht am Kabel ziehen.
9. Das Gerät nicht benutzen, wenn das Netzkabel oder der Netzstecker beschädigt
ist. Das Netzkabel muss vom Hersteller, von einem Vertragskundendienst oder
von einer ähnlich qualifizierten Person ausgetauscht werden.
10. WARNUNG: Das Gerät nicht mit nassen Händen oder beim Stehen auf einem
nassen Untergrund berühren oder in Betrieb setzen. Das Gerät nicht stromlos
machen oder den Netzstecker ziehen, wenn die Hände nass sind.
Aufstellort
1. Das Gerät auf einer ebenen, robusten und wärmefesten Fläche aufstellen.
2. Das Netzkabel wurde mit Absicht kurz gehalten, um die Unfallgefahr zu mindern.
Kein Verlängerungskabel benutzen.
3. WARNUNG: Das Gerät, Garzubehör und das Netzkabel von Tischkanten oder
Arbeitstischrändern fern halten. NICHT IN REICHWEITE VON BABIES, KINDERN
UND HAUSTIEREN HINTERLASSEN.
4. Das Gerät nur innerhalb von Gebäuden und an einem trockenen Ort benutzen.
5. Das Netzkabel vor scharfen Kanten oder spitzen Gegenständen schützen.
6. Das Gerät nicht in der Nähe entzündlicher Flüssigkeiten, Gase oder
entflammbarer Stoffe benutzen (z. B. Vorhängen, Tischtüchern, Tapeten etc.).
Ein ausreichender Sicherheitsabstand zu entzündlichen Materialien ist stets
einzuhalten.
7. Das Gerät nicht an einer Wand oder an anderen Geräten anlehnen. Auf allen
Seiten einen Mindestabstand von 10 cm einhalten. Das Gerät nie abdecken oder
Gegenstände darauf abstellen.
8. WARNUNG: Das Gerät nicht in der Nähe von Wasser oder erheblicher
Feuchtigkeit benutzen (beispielsweise in einem feuchten Keller oder neben
einem Schwimmbecken oder einer Badewanne).
9. WARNUNG: Das Gerät oder die elektrischen Teile vor tropfendem Wasser oder
Spritzwasser schützen.

15
DE
BESONDERE ANWEISUNGEN ZUR SICHERHEIT
1. ACHTUNG: Vor dem Transportieren, Reinigen oder Aufbewahren das Gerät
immer ausschalten, den Netzstecker ziehen und vollständig abkühlen lassen.
2. Den Korbeinsatz nicht überfüllen. Daran denken, dass sich manche Zutaten
ausdehnen (z. B. Popcorn). Durch Überfüllen können die Zutaten mit dem
Heizelement in Kontakt geraten. Das kann einen Brand und/oder Verletzungen
verursachen.
3. Darauf achten, dass genügend Platz um das Fleisch oder Geflügel herum im
Ofen ist, damit sich der Grillspieß frei drehen kann.
4. WARNUNG: Nie Öl in den Grillkorb oder in die Kochmulde gießen. Kein Öl in die
Tropfschale gießen. Das kann einen Brand oder Verletzungen verursachen.
5. Die Lüftungsöffnungen des Geräts nicht blockieren oder zudecken.
6. Keine schweren Gegenstände auf die Tür legen, da das Gerät sonst beschädigt
wird.
7. WARNUNG: Beim Öffnen der Ofentür daran denken, dass aus dem Gerät heißer
Dampf austritt. Gesicht und Hände auf Sicherheitsabstand halten.
8. WARNUNG: Die Heizkomponenten im Ofen und das Garzubehör werden äußerst
heiß. Um schwere Verbrennungen zu vermeiden, immer Ofenhandschuhe
anziehen, um die Hände beim Befüllen oder Entleeren des Ofens zu schützen.
9. WARNUNG: Dieses Elektrogerät ist mit einer Heizfunktion ausgestattet.
Während des Gebrauchs werden die Flächen (auch die funktionslosen Flächen)
sehr heiß. Das Gerät setzt über die Lüftungsauslässe heißen Dampf frei. Hände
und Gesicht in sicherem Abstand vom Gerät lassen. Zum Handhaben des Geräts
nur die Griffe und Tasten benutzen.
10. ACHTUNG: Auch lange nach dem Abschalten des Geräts besteht noch
Verbrennungsgefahr.

16
DE
HEISSLUFTOFEN
BESCHREIBUNG DER TEILE
1. Bedienfeld
2. Display
3. Türgriff
4. Tür
5. Fachauflagen
6. Lufteinlassöffnungen
7. Heißluft-Auslassöffnungen
(Rückseite)
8. Glasfenster
9. Tropfschale / Bratpfanne
10. Bratrost
11. Frittierkorb
12. Griffhilfe
13. Spieß-Zubehör
2
3
4
5
6
7
8
1
9 10 11 12 13

17
DE
VOR DEM ERSTEN GEBRAUCH
1. Das gesamte Verpackungsmaterial des Ofens, der Ofenmulde und der
Zubehörteile entfernen. Die Verpackung aufbewahren, falls das Gerät einmal
verstaut oder transportiert werden muss. Falls die Verpackung entsorgt werden
soll, bitte die geltenden Vorschriften beim Entsorgen befolgen.
2. Prüfen, ob der Verpackungsinhalt vollständig ist oder ob Teile beschädigt sind.
Sollten Teile fehlen oder beschädigt sein, darf das Gerät nicht benutzt werden.
Stattdessen muss es sofort an das Handelsgeschäft zurückgebracht werden.
3. Das Gerät und sämtliches Zubehör vor dem ersten Gebrauch reinigen (siehe
PFLEGE UND WARTUNG).
WARNUNG: Das gesamte Verpackungsmaterial außerhalb der Reichweite von
Babies und Kindern aufbewahren.
BEDIENFELD
TXG-KK-DT10L-E 2019.5.7
ZUBEREITUNGSTIPPS
• Die Temperatur im oberen Fachs am höchsten und im unteren Fach
am niedrigsten. Bei Belegung von mehr als 1 Einschub sollten die
Einschubpositionen zur Halbzeit des Garvorgangs getauscht werden, damit
Garvorgang möglichst gleichmäßig verläuft.
- Es empfiehlt sich, zum Vorheizen des Ofens 3 Minuten zur Heißluft-Frittierzeit
hinzuzuaddieren.
- Zutaten garen gleichmäßiger, wenn sie ähnlich groß und dick sind. Kleinere
Stücke garen schneller als größere.
- Für ein knuspriges Ergebnis die Zutaten mit Küchenpapier trocken tupfen.
Vor dem Heißluftfrittieren leicht mit Öl einsprühen bzw. einbürsten (z B.
Pommes Frietes, Kartoffeln).
VERWENDUNG DER HEISSLUFTFRITTEUSE
Kochzubehör vorbereiten
1. Die Zutaten in die Bratpfanne, auf das Gitterrost, in den Frittierkorb oder
Grillspieß geben (siehe VERWENDEN DES ZUBEHÖRS).
Den Ofen vorheizen (empfehlenswert)
2. Den Ofen an eine geerdete Steckdose anschließen. Das Gerät gibt einen Piepton
aus und schaltet auf Standby-Modus. Die Taste leuchtet auf.

18
DE
3. Die Taste drücken, um das Bedienfeld einzuschalten.
4. Als Programm die Einstellung French Fries (Pommes Frites) wählen und mit den
Tasten [+] bzw. [-] die Garzeit auf 3 Minuten stellen.
5. Um den Vorheizvorgang zu starten, die Taste berühren.
Das Garzubehör in den Ofen geben
6. Nach Abschluss des Vorheizvorgangs die Tür öffnen und das vorbereitete
Garzubehör in den Ofen einführen (siehe VERWENDEN DES ZUBEHÖRS).
7. Zum Einschalten des Bedienfelds die Taste berühren.
8. a) Ein Programm auswählen (siehe PROGRAMME); oder
b) En beliebiges Programm wählen und mit den Tasten [+] oder [-] und
[+] oder [-] die Temperatur und Garzeit manuell einstellen.
9. Zum Starten des Garvorgangs die Taste berühren.
10. Bei Verwendung des Frittierkorbs oder Spießes die Taste ROTATE (DREHEN)
berühren, um die Grillspießfunktion zu starten. Zum Anhalten erneut berühren.
11. Sobald der Garvorgang beendet ist, gibt der Ofen einen Piepton aus und
schaltet sich automatisch ab.
12. Den Gerätestecker aus der Steckdose ziehen, wenn sich das Kühlgebläse nicht
mehr dreht (siehe KÜHLGEBLÄSE).
HINWEIS:
• Die Taste drücken, um den Garvorgang jederzeit zu stoppen und
abzubrechen.
• Die Tür kann während des Garvorgangs zwischendurch geöffnet werden, um
den Fortschritt zu kontrollieren oder um Zutaten hinzuzugeben, das Gargut zu
wenden oder umzurühen oder um die Einschubposition der Bratpfanne bzw.
des Gitterrosts zu wechseln. Wenn die Tür geöffnet wird, wird der Garvorgang
automatisch unterbrochen (Pausenautomatik). Nach dem Schließen der Tür wird
der Vorgang fortgesetzt.
PROGRAMME
Programm Programmierte Temperatur Programmierte Zeit
Pommes Frites 200°C 15 Minuten
Braten 175°C 25 Minuten
Fisch 165°C 15 Minuten
Pizza 180°C 15 Minuten
Hähnchen 175°C 30 Minuten
Kuchen 160°C 30 Minuten
Spießbraten 190°C 30 Minuten
Trocknen 40°C 2 Stunden
Aufwärmen 115°C 6 Minuten
HINWEIS: Die vordefinierten Temperaturen und Garzeiten dienen nur als Richtwerte.
Bei Bedarf können die Einstellungen abhängig vom Rezept, der Größe und der
Portion der Zutaten verstellt werden.

19
DE
HEISSLUFT-FRITTIERZEITEN
Zutat Min. – Max. Temperatur Heißluft-
Frittierzeit
Empfehlungen
Dünne Pommes
Frites
1,5 - 3 Cups 200°C 15-16 Minuten
Dicke Pommes
Frites
1,5 - 3 Cups 200°C 15-20 Minuten
Selbstgemachte
Pommes Frites
1,5 - 3,5 Cups 200°C 10-16 Minuten
Selbstgemachte
Kartoffel-
Wedges
1,5 - 3,5 Cups 182°C 18-22 Minuten 1/2 EL Öl zufügen
Hausgemachte
Kartoffelecken
1,5 - 3 Cups 182°C 12-18 Minuten 1/2 EL Öl zufügen
Kartoffelpuffer 1 Cup 182°C 15-18 Minuten 1/2 EL Öl zufügen
Kartoffelgratin 2 Cups 200°C 15-18 Minuten
Steak 1/4 - 1,1 Pfd.
(110-500g)
182°C 8-12 Minuten
Schweinekoteletts 1/4 - 1,1 Pfd.
(110-500g)
182°C 10-14 Minuten
Hamburger 1/4 - 1,1 Pfd.
(110-500g)
182°C 7-14 Minuten
Wurst in
Blätterteig
1/4 - 1,1 Pfd.
(110-500g)
200°C 13-15 Minuten
Hähnchenkeulen 1/4 - 1,1 Pfd.
(110-500g)
182°C 18-22 Minuten
Hähnchenbrust 1/4 - 1,1 Pfd.
(110-500g)
182°C 10-15 Minuten
Tiefkühl-
Frühlingsrollen
1/4 - 3/4lb
(110-350g)
200°C 15-20 Minuten
Chicken Nuggets
(tiefgekühlt)
1/4 - 1,1 Pfd.
(110-500g)
200°C 10-15 Minuten
Fischstäbchen
(tiefgekühlt)
1/4 - 1,1 Pfd.
(110-500g)
200°C 6-10 Minuten
Tiefgekühlte
Mozzarella-
Sticks
1/4 - 1,1 Pfd.
(110-500g)
182°C 8-10 Minuten
Gefülltes
Gemüse
1/4 - 1,1 Pfd.
(110-500g)
160°C 10 Minuten
Kuchen 1,25 Cups 160°C 20-25 Minuten Backblech benutzen
Quiche 1,5 Cups 182°C 20-22 Minuten Backblech oder
Ofengeschirr
verwenden
Muffins 12 Muffins 200°C 15-18 Minuten Muffinblech verwenden
Süße Snacks 1,5 Cups 160°C 20 Minuten Backblech oder
Ofengeschirr
verwenden
Tiefgekühlte
Zwiebelringe
1 Pfd.
(450g)
200°C 15 Minuten
HINWEIS: Die Zeitangaben für das Heißluftfrittieren dienen nur als Richtwerte. Bei
Bedarf können die Temperatur und die Heißluft-Frittierzeit abhängig vom Rezept,
der Größe und der Portion der Zutaten verstellt werden.

20
DE
FLEISCH-MINDESTTEMPERATUR
Zutat Typ Mindesttemperatur innen
Rind, Schwein, Kalb Gehacktes
Steaks, Filets, Braten: Mittel
Steaks, Filets, Braten: Kurz
70°C
70°C
63°C
Hähnchen, Pute,
Ente, Gans
Gehacktes
Brustfilets, Schlegel, Schenkel,
Flügel
Ganzes Tier, gefüllt
75°C
75°C
75°C
Fisch, Schalentiere Beliebig 63°C
Lamm Gehacktes
Filets, Braten: Mittel
Filets, Braten: Kurz
70°C
70°C
63°C
Schinken Frisch (roh)
Vorgegart (zum Aufwärmen)
70°C
60°C
HINWEIS: Das Rezept oder die obigen Richtwerte befolgen. Ein Backthermometer
zum Messen der Innentemperatur des Fleischs benutzen. Eventuell das Fleisch bei
höheren Temperaturen garen lassen.
VERWENDUNG DES ZUBEHÖRS
TROPFSCHALE ODER BRATPFANNE
Zum einfachen Reinigen die Tropfschale in das untere Fach einführen, um das Fett
oder die abtropfende Flüssigkeit der Zutaten aufzunehmen, sobald mit dem übrigen
Zubehör gegart wird.
• Alternativ kann die Tropfschale auch als Bratpfanne zum Braten, Rösten,
Aufwärmen oder Trocknen von Zutaten benutzt werden.
• Die Pfanne auf die Schienen oben, in der Mitte oder im unteren Fach einführen
und ganz in den Ofen hineinschieben.
BRATROST
Das Bratrost zum Rösten oder Kochen verwenden.
• Das Bratrost auf die Ablagen im oberen, mittleren oder unteren Fach aufsetzen
und ganz in den Ofen einführen (siehe Abbildung unten).
• Gleichzeitig können maximal 3 Bratroste (1 mitgeliefert) benutzt werden.
Für ein gleichmäßiges Garen nach der Hälfte der abgelaufenen Garzeit die
Fachpositionen wechseln.
• Die Tropfschale in das untere Fach einführen, falls erforderlich.
HINWEIS: Die Temperatur im oberen Fachs am höchsten und im unteren Fach am
niedrigsten.
This manual suits for next models
1
Table of contents
Languages:
Other Westinghouse Fryer manuals

Westinghouse
Westinghouse WHOF04B User manual

Westinghouse
Westinghouse WST3034 User manual

Westinghouse
Westinghouse WKAF988 User manual

Westinghouse
Westinghouse WHOF05SS User manual

Westinghouse
Westinghouse Deep Fryer User manual

Westinghouse
Westinghouse WKAFDS16 User manual

Westinghouse
Westinghouse WKAFGOT01WH User manual

Westinghouse
Westinghouse WKAFSL200 User manual

Westinghouse
Westinghouse WHOF06K User manual