3. MAINTENANCE
• This product should only be maintained by Westinghouse® certified technicians. Otherwise, EBI reserves the
right to void the warranty.
• Disconnect the power cord after if you do not plan to use the chair for a long period.
• Make sure the wall outlet is in good working order before use.
• If this chair will not be used for an extended period, store in a dry and dustless environment.
• Avoid chair exposure to high temperatures and direct sunlight.
• Clean this product with a dry cloth. Do not use thinner, benzene or alcohol.
• When moving the chair on a wood floor, rough ground or in a narrow space two people should lift the chair
together.
• We recommend using the massage chair intermittently and not for long periods.
4. TROUBLESHOOTING
• It is normal for the motor to make noise while in use.
• If the controller doesn’t normally work, please check that the plug and socket are properly connected, and
the switch is turned on.
• When the programmed working time is over, the chair will power off automatically.
• After several uses, the chair might power off because of overheating. It can be used again after half an hour
of cooling time.
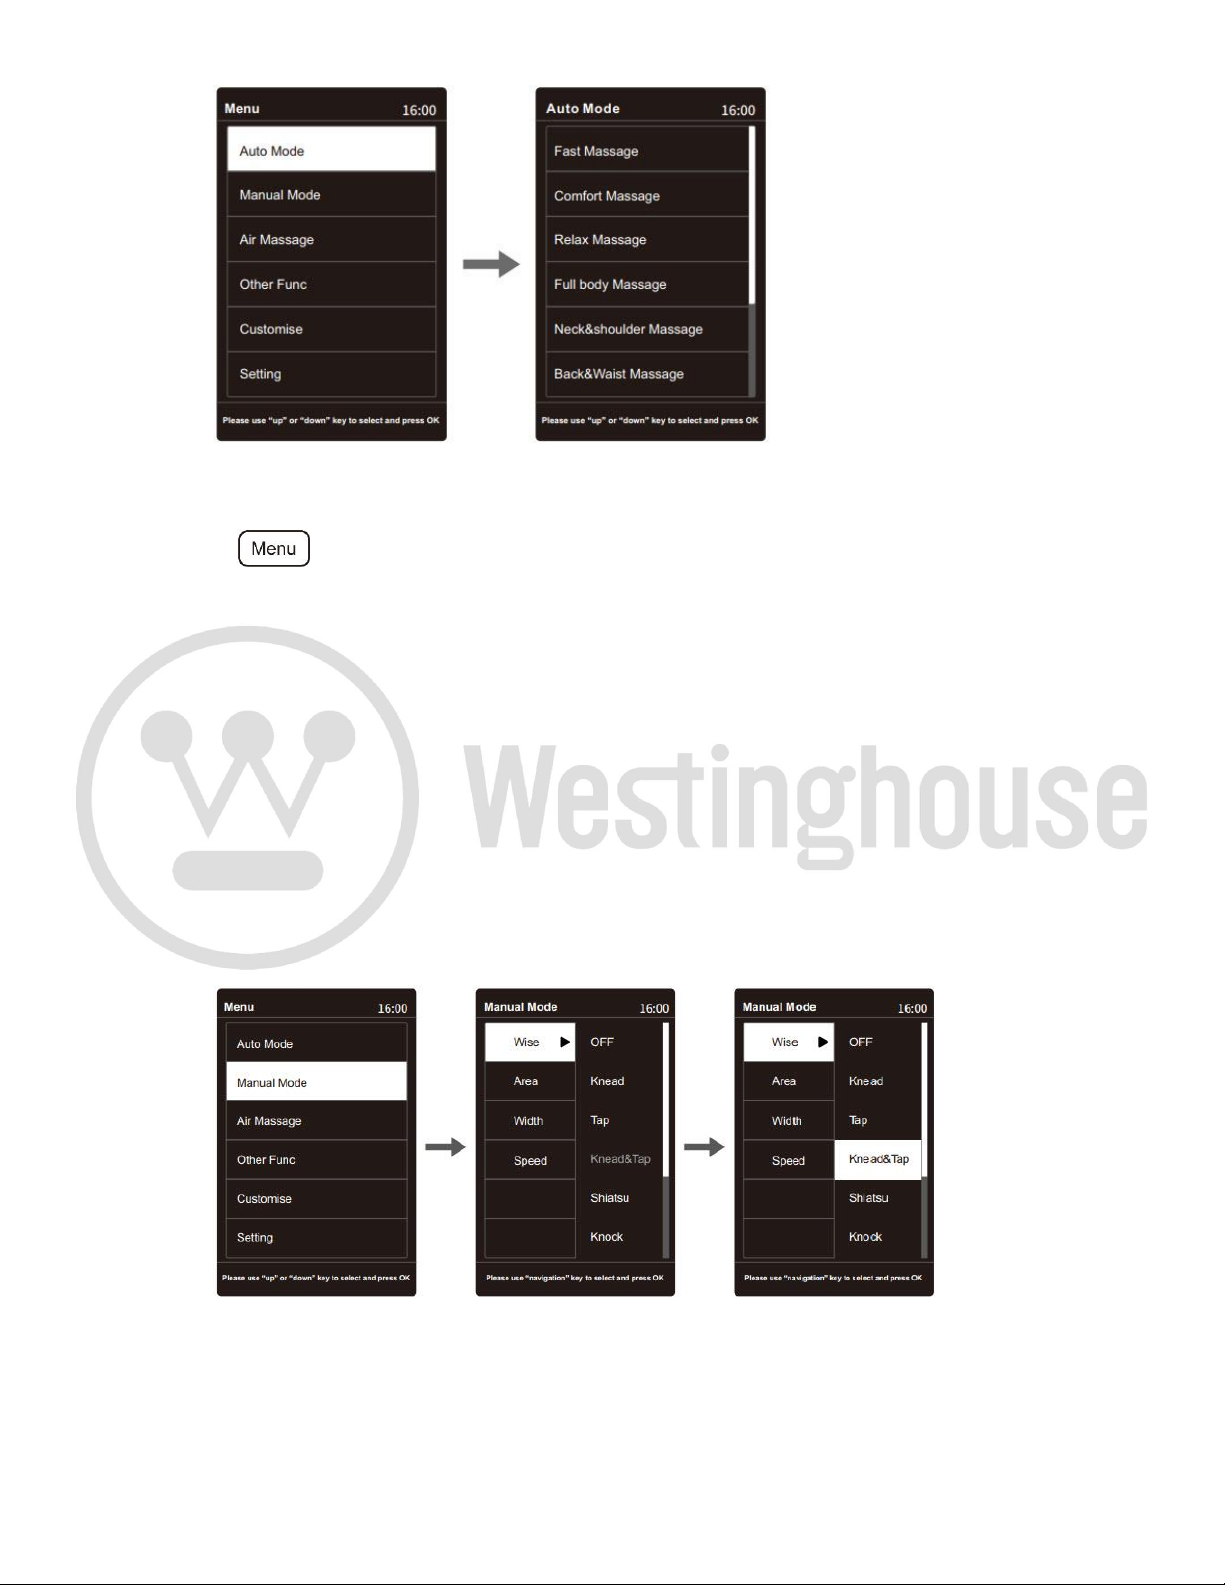
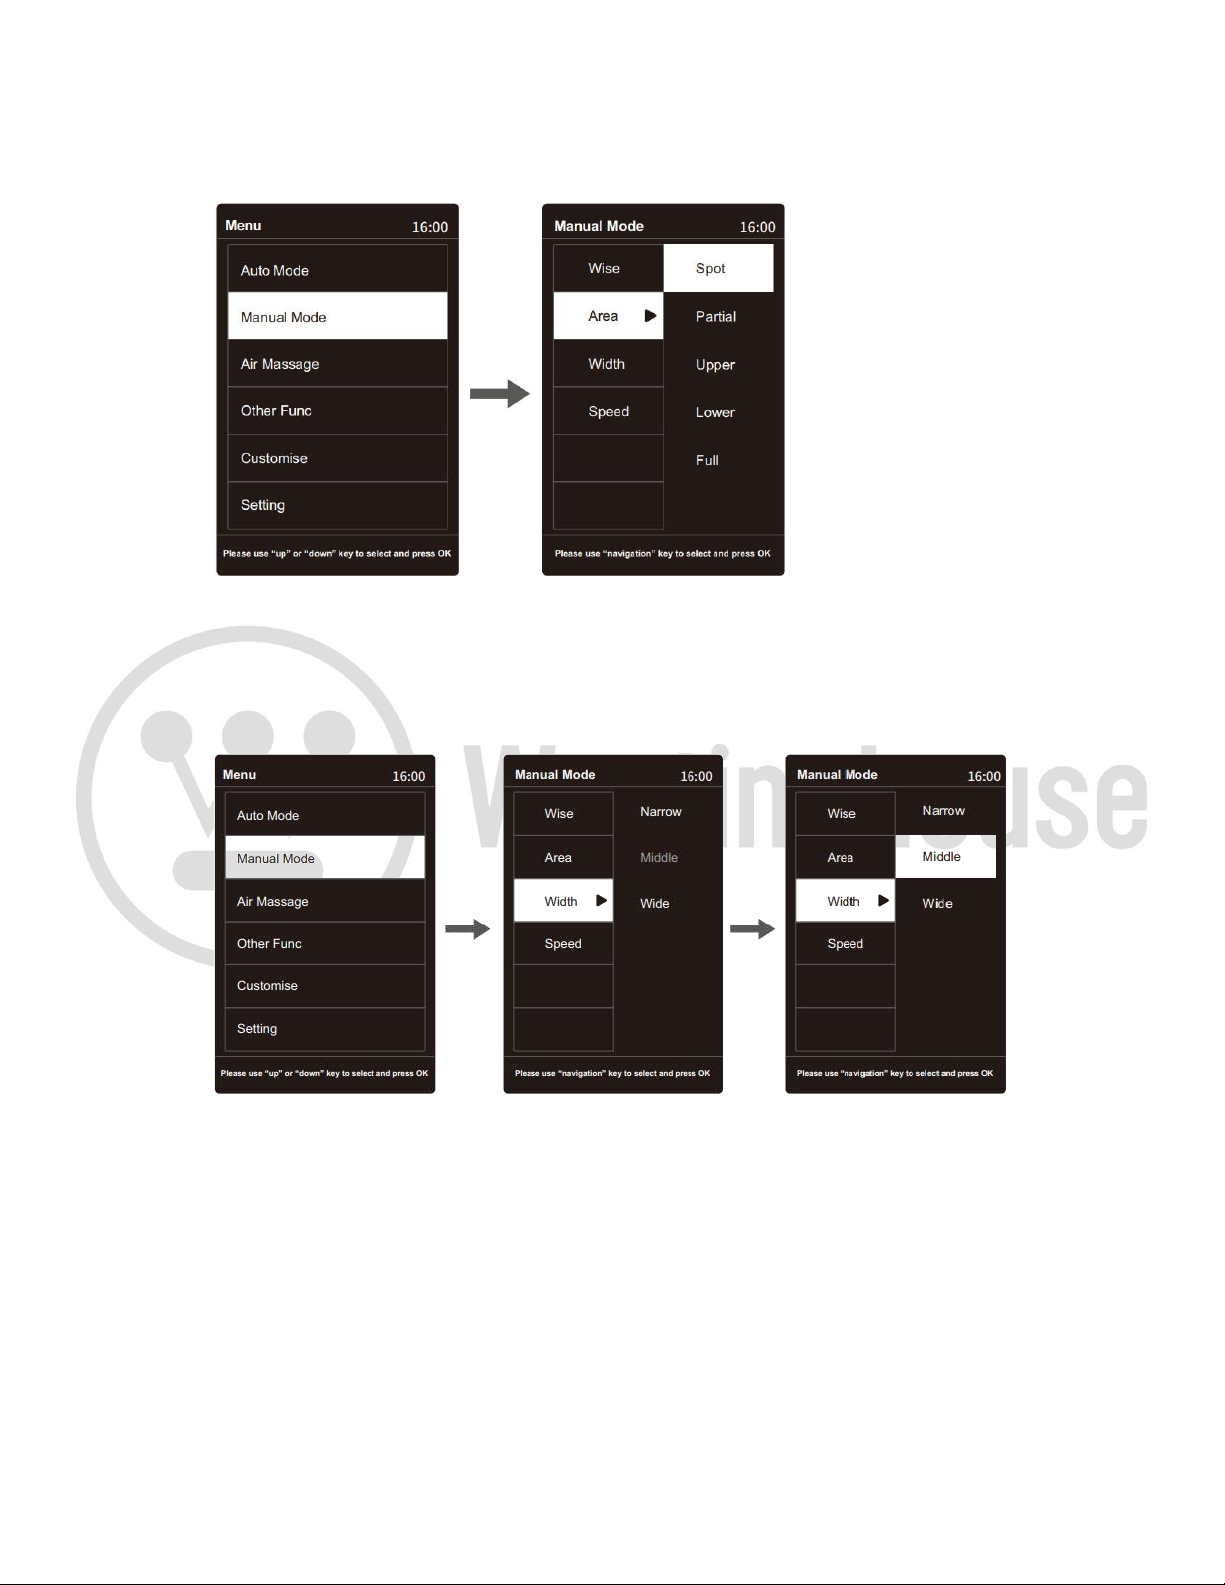
5. FEATURES AND BENEFITS
Enjoy the new Westinghouse® WES41-800-3D massage chair. Its vertical to horizontal movable quad-rollers will massage
from your neck all the way to your thighs. Very versatile, the Westinghouse® WES41-800-3D massage chair reproduces
over 7 massage actions with the sensation of a professional massage in the comfort of your very own home! It even
includes shoulder, seat, forearms, and foot massages.
6. INSTALLATION
The WES41-800-3D massage chair comes partly assembled.
• Assemble this massage chair according to the installation instructions provided in this guide.
• Check the parts list carefully to make sure nothing is missing.
• Sitting in the massage chair before it is completely assembled could result in permanent damage to
the chair and personal injury.
• This massage chair is equipped with a cord having a grounding conductor. The cord must be
connected into an appropriate AC wall outlet.
• If the massage chair fuse is burned out, please use the chair’s main On/Off button to turn it off and
unplug the AC power cord. You can unscrew the fuse located in the switch box at the bottom right of
the chair in the back.
Use a same size and type of fuse to replace the old one and then cover the lid.
You can call Westinghouse® at 1-866-967-7333 ext 227 if you need help.
CAUTION: Never substitute a missing part with one of your own. If a part is missing, contact customer
service at: 1-866-967-7333 ext 227
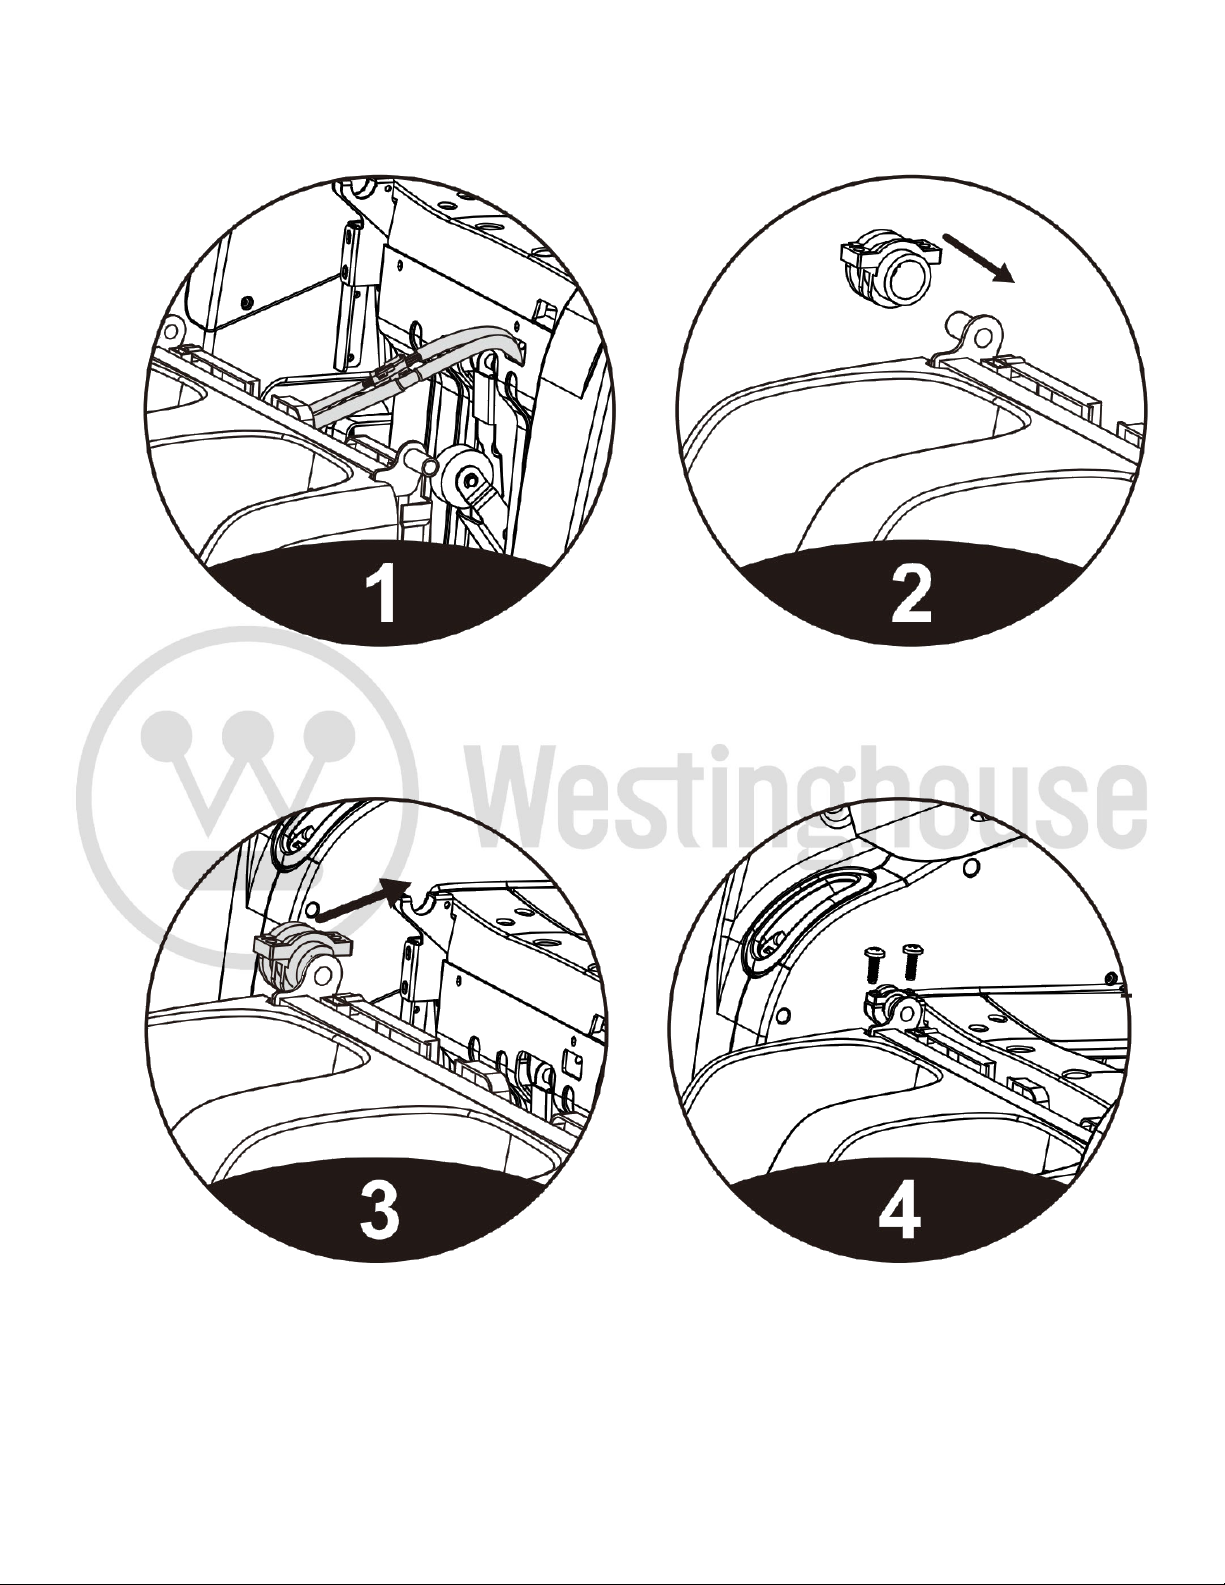
Unpacking
1) Remove the massage chair, cushions, and accessories from the main box.
2) Remove all plastic wraps.
3) Connect the leg massage section air tube with the air tube on the massage chair. Connect the wire
harness, untie the fixed pipeline belt and insert the connecting part into the seat