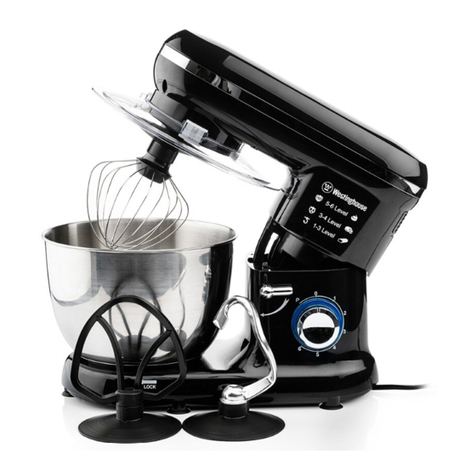
Westinghouse WKSMX1503 User manual

STAND MIXER
WKSMX1503
Instructions
Bedienungsanweisungen
Instrucciones
Instructions
Istruzioni
Instructies
Instruções
Instrukcje
Οδηγίες
Инструкции
P.2
P.9
P.16
P.23
P.30
P.37
P.44
P.51
P.58
P.65
NL
EN
PT
DE
PL
ES
GR
FR
RU
IT
WKSMX1503_Stand Mixer_10L_IB.indd 1 10/5/2021 16:02:54

2
EN
KEEP THIS MANUAL FOR FUTURE REFERENCE AND
PASS IT ON WITH THE EQUIPMENT TO ANY FUTURE
USERS.
GENERAL SAFETY INSTRUCTIONS
Read the operating instructions carefully before putting the appliance into
operation and keep the instructions including the warranty, the receipt and, if
possible, the box with the internal packing. If you give this device to other people,
please also pass on the operating instructions.
• The appliance is designed exclusively for private use and for the envisaged
purpose. This appliance is not fit for commercial use. Do not use it outdoors
(except if it is designed to be used outdoors). Keep it away from sources of heat,
direct sunlight, humidity (never dip it into any liquid) and sharp edges. Do not
use the appliance with wet hands. If the appliance is humid or wet, unplug it
immediately.
• When cleaning or putting it away, switch off the appliance and always pull out
the plug from the socket (pull on the plug, not the cable) if the appliance is not
being used and remove the attached accessories.
• Do not operate the machine without supervision. If you should leave the
workplace, always switch the machine off or remove the plug from the socket
(pull the plug itself, not the lead).
• Check the appliance and the cable for damage on a regular basis. Do not use the
appliance if it is damaged. Do not try to repair the appliance on your own. Always
contact an authorized technician. To avoid the exposure to danger, always have a
faulty cable be replaced only by the manufacturer, by our customer service or by
a qualified person and with a cable of the same type.
• Use only original spare parts.
• Pay careful attention to the following “Special Safety Instructions”.
Children and Frail Individuals
• In order to ensure your children‘s safety, please keep all packaging (plastic bags,
boxes, polystyrene etc.) out of their reach.
• Caution! Do not allow small children to play with the foil as there is a danger of
suffocation!
• This appliance shall not be used by children. Keep the appliance and its cord out
of reach of children.
• This device is not a toy. Children shall not play with the appliance.
• Appliances can be used by persons with reduced physical, sensory or mental
capabilities or lack of experience and knowledge if they have been given
supervision or instruction concerning use of the appliance in a safe way and if
they understand the hazards involved.
Special safety Instructions for this Machine
• Always disconnect the appliance from the supply if it is left unattended and
before assembling, disassembling or cleaning.
• Switch off the appliance and disconnect from supply before changing
accessories or approaching parts that move in use.
• Do not use appliance for other than intended purpose.
WKSMX1503_Stand Mixer_10L_IB.indd 2 10/5/2021 16:02:54

3
EN
• Caution: In order to avoid a hazard due to inadvertent resetting of the thermal
cut-out, this appliance must not be supplied through an external switching
device, such as a timer, or connected to a circuit that is regularly switched on and
off by the utility.
• Only operate this machine under supervision.
• Do not interfere with any safety switches.
• Do not insert anything into the rotating hooks while the machine is working.
• Place the machine on a smooth, flat and stable working surface.
• Do not insert the mains plug of the machine into the power socket without
having installed all the necessary accessories.
OVERLOAD PROTECTION SYSTEM
The motor is protected from burning out by a Thermal Protector. If the appliance
is overloaded or operated continuously for too long, the motor may overheat and
stop. To operate the appliance again, it must be switched off and disconnected from
the power socket then left for at least 30 minutes. Once the motor is fully cooled
the appliance may be used again.
SAFETY INSTRUCTIONS
The motor will not start if the Mixer Head is raised. If it is raised during normal
operation,the safety switch will activate and the motor will shut off immediately.
Turn the Speed Control back to 0. Return the head to the locked position to start
the machine again.
HOUSEHOLD USE ONLY
WKSMX1503_Stand Mixer_10L_IB.indd 3 10/5/2021 16:02:54

4
EN
BEFORE USING STAND MIXER
1. Before assembling the appliance,remove and safely discard any packaging
material.
2. Wash the mixing bowl, Beater, Dough Hook and Whisk attachments in warm
soapy water with a soft cloth then rinse and dry.
OVERVIEW OF THE COMPONENTS
1 Output shaft
2 Tilt-up knob
3 Speed control dial
4 Power cord
5 Mixing bowl
6 Dough hook
7 Beater
8 Whisk
9 Bowl cover
WKSMX1503_Stand Mixer_10L_IB.indd 4 10/5/2021 16:02:54

5
EN
USING STAND MIXER
1. Set the Speed Control Dial to the “OFF” position.
note: If the Speed Control is not at 0,the machine’s safety feature will be
triggered and it will not activate when switched on. If this happens,see Safety
Instructions for how to get the appliance running.
2. Place one hand on top of the Mixer Head and with other hand downward rotation
the Tilt Button as per the arrow showed to lift the Mixer Head up until it stops.
Release the “Tilt” button. The Mixer Head will lock into the elevated position.
3. Attach the Splash Guard to the Upper Body directly.
4. Fit the bowl so that it aligns with the grooves on the Mixer Stand. To lock the
mixing bowl,turn it clockwise following “ ” on the Mixer Stand. Make sure
that the mixing bowl is securely locked in place.
5. Insert the Dough Hook, Beater or Whisk attachment depending on which
attachment the recipe requires. Align the chosen attachment so that grooves
on attachment align with the Attachment Shaft located under the Mixer Head.
With some pressure, push the attachment towards the Mixer Head, lifting the
Attachment Shaft spring upwards and twist the attachment in an anti-clockwise
direction. Make sure that the attachment is securely locked in place.
6. Add ingredients into the Mixing Bowl supplied as listed in the recipe. Do not
overfill the bowl. For light mixture,it’s recommended not to mix more than 1.5kg
mixture. For kneading dough,the proportion of flour and water is near 2:1 such as
700g dough + 380g water.
7. Place one hand on top of the Mixer Head and with other hand downward rotation
the Tilt Button as per the arrow showed. Push the Mixer Head down so that it is in
the horizontal position and the Dough Hook,Beater or Whisk attachment is inside
the Mixing Bowl. Release the “Tilt” button.
8. Plug the power cord into the mains supply. This will make the Speed Control light
up and flash blue.
9. Turn the Speed Control clockwise to select a speed and start mixing. The Speed
Control Dial will illuminate blue. It’s recommended that mixing is started at a
lower speed to prevent splattering and then increased to suit the recipe. Consult
the Mixing Guide for example speeds.
10.Use the Pulse Function when you require a quick burst of power or for quick
incorporations. Turn the Speed Control Dial in an anti-clockwise direction and
hold it in this position. When the dial is released,it returns to the “OFF” position
automatically.
11. When mixing is complete,turn the Speed Control Dial to the “OFF”
position,switch the appliance off at the power outlet and remove the power cord
from the outlet.
12. Remove the Dough Hook, Beater or Whisk -- Lifting up the Mixer Head,then
hold onto the assembled attachment. With some pressure, push the attachment
towards the Mixer Head,lifting the Attachment Shaft spring upwards and twist
the attachment in a clockwise direction. Pull the attachment away from the
Attachment Shaft to remove it from the Mixer Head.
13. Clean the parts as described under “Cleaning”.
WKSMX1503_Stand Mixer_10L_IB.indd 5 10/5/2021 16:02:54

6
EN
MIXING GUIDE
Attachment Speed setting Time
(min.)
Remarks
Dough hook 1-4 3-5 Heavy mixtures
(e.g. bread or short pastry)
Beater 1-6 3-10 Medium-heavy mixtures
(e.g. crepes or sponge mixture)
Whisk 7-8 3-10 Light mixtures
(e.g. cream, egg white,
blancmange)
WKSMX1503_Stand Mixer_10L_IB.indd 6 10/5/2021 16:02:55

7
EN
NOTE:
• Max. operation time: With heavy mixtures, do not operate the machine for more
than six minutes, and then allow it to cool down for a further ten minutes.
• Always begin mixing at a low speed, then increase to a high speed to prevent
splattering.
TROUBLESHOOTING
Problem Solution
The machine doesn't
work
• Check if the plug is in good contact with the socket.
• Check if the rise button spring back in place.
• Check if the machine works continuously more than
10 minutes, and wait until the motor cool down.
Noise in the mixing
bowl when working (the
accessory scraped the
bowl)
• Check if the mixing bowl is properly installed.
• Check if the accessory installed properly on
machine.
The bowl cover doesn’t
fit the mixing bowl
properly
• Check if the bowl cover placed on the machine
properly.
• Check if the mixing bowl installed properly on
machine and locked correctly.
The machine doesn’t
work on certain speed
• Check if the mark on speed knob correspond to the
speed silkscreen on housing.
• Rotate speed knob to 0 ,and re-check if the
machine works.
Movements when the
machine working
• Check if the anti-slip feet fall off.
• Check if the machine is placed on a smooth and flat
tabletop.
The rise button didn’t
spring back in place
after installing the
mixing bowl and pot
cover
• Check if the pot cover placed on the machine
properly.
• Check if the mixing bowl is properly installed.
CLEANING
• Before cleaning, make sure the appliance has been unplugged from the power
supply.
• Never immerse the appliance into any liquid.
• Hand wash the Dough Hook, Beater, Whisk and mixing bowl in warm soapy
water with a soft cloth after each use. Rinse and dry thoroughly. The Die-casting
Aluminium Dough Hook and Beater are not dishwasher safe.
• Clean the housing of the appliance with a damp cloth only.
• Do not expose them to heat or caustic cleaner. If so, they might become
misshapen or discolored.
• Do not use any sharp or abrasive detergents.
WKSMX1503_Stand Mixer_10L_IB.indd 7 10/5/2021 16:02:55

8
EN
DISPOSAL
Proper disposal of this product.
This label indicates that, in the EU, electronic devices cannot be disposed of
with regular household waste.
Please use the return or collections systems of your municipality or contact the
seller where you purchased this product.
INFORMATION AND SERVICE
If you have question or concerns about your product, please visit our website:
www.westinghousehomeware.com, or contact our oversea offices/agents.
In line with our policy of continuous product development, we reserve the right to
change product, packaging and documentation specifications without notice.
Technical Data
Rated voltage: 220-240V~ 50/60Hz
Power consumption: 1300W
Protection class: II
This device has been tested according to all relevant current CE guidelines, such as
electromagnetic compatibility and low voltage directives, and has been constructed
in accordance with the latest safety regulations.
Subject to technical changes without prior notice!
WKSMX1503_Stand Mixer_10L_IB.indd 8 10/5/2021 16:02:55

9
DE
BEWAHREN SIE DIESES HANDBUCH ZUM
SPÄTEREN NACHSCHLAGEN AUF UND GEBEN SIE
ES ZUSAMMEN MIT DEM GERÄT AN ZUKÜNFTIGE
BENUTZER WEITER.
ALLGEMEINE SICHERHEITSHINWEISE
iLesen Sie die Betriebsanleitung vor Inbetriebnahme des Geräts sorgfältig durch
und bewahren Sie die Anleitung einschließlich der Garantie, den Kaufbeleg und
möglichst auch den Karton mit der Innenverpackung auf. Wenn Sie dieses Gerät an
andere weitergeben, fügen Sie bitte auch die Bedienungsanleitung bei.
• Das Gerät ist ausschließlich für den privaten Gebrauch und für den vorgesehenen
Zweck bestimmt. Dieses Gerät ist nicht für den gewerblichen Einsatz geeignet.
Verwenden Sie es nicht im Freien (es sei denn, es ist für die Verwendung
im Freien vorgesehen). Halten Sie das Gerät von Wärmequellen, direkter
Sonneneinstrahlung, Feuchtigkeit (das Gerät niemals in Flüssigkeit tauchen)
sowie von scharfen Kanten fern. Benutzen Sie das Gerät nicht mit nassen Händen.
Ziehen Sie sofort den Netzstecker, wenn das Gerät feucht oder nass ist.
• Schalten Sie das Gerät aus, wenn Sie es reinigen oder wegstellen, ziehen Sie
immer den Netzstecker aus der Steckdose (dabei am Netzstecker ziehen,
nicht am Kabel), wenn das Gerät nicht verwendet wird, und entfernen Sie das
angebrachte Zubehör.
• Betreiben Sie das Gerät nicht ohne Aufsicht. Wenn Sie den Arbeitsplatz
verlassen, schalten Sie das Gerät immer aus oder ziehen Sie den Netzstecker aus
der Steckdose (ziehen Sie am Netzstecker, nicht am Kabel).
• Überprüfen Sie das Gerät und das Kabel regelmäßig auf Beschädigungen.
Verwenden Sie das Gerät nicht, wenn es beschädigt ist. Versuchen Sie nicht, das
Gerät selbst zu reparieren. Wenden Sie sich immer an autorisiertes, technisches
Fachpersonal. Um Gefährdungen zu vermeiden, lassen Sie ein defektes Kabel
immer nur durch den Hersteller, unseren Kundendienst oder eine Fachkraft sowie
durch ein Kabel des gleichen Typs ersetzen.
• Verwenden Sie ausschließlich Originalersatzteile.
• Beachten Sie sorgfältig die folgenden „Besonderen Sicherheitshinweise“.
Kinder und gebrechliche Personen
• Um die Sicherheit Ihrer Kinder zu gewährleisten, bewahren Sie bitte alle
Verpackungen (Kunststofftüten, Schachteln, Styropor usw.) außerhalb deren
Reichweite auf.
• VorsiCht! Lassen Sie kleine Kinder nicht mit der Folie spielen, da
Erstickungsgefahr besteht!
• Dieses Gerät darf nicht von Kindern benutzt werden. Bewahren Sie das Gerät und
dessen Kabel außerhalb der Reichweite von Kindern auf.
• Dieses Gerät ist kein Spielzeug. Kinder dürfen nicht mit dem Gerät spielen.
• Geräte können von Personen mit eingeschränkten körperlichen, sensorischen
oder geistigen Fähigkeiten oder von Personen ohne Erfahrung und Wissen
verwendet werden, wenn sie beaufsichtigt oder bezüglich der sicheren
Verwendung des Geräts unterwiesen wurden und die damit verbundenen
Gefahren verstehen.
WKSMX1503_Stand Mixer_10L_IB.indd 9 10/5/2021 16:02:55
10
DE
Besondere Sicherheitshinweise für dieses Gerät
• Trennen Sie das Gerät immer von der Stromversorgung, wenn es unbeaufsichtigt
bleibt und bevor Sie es zusammenbauen, auseinanderbauen oder reinigen.
• Schalten Sie das Gerät aus und trennen Sie es von der Stromversorgung, bevor
Sie Zubehör wechseln oder sich bewegenden Teilen nähern.
• Verwenden Sie das Gerät nicht für einen anderen als den vorgesehenen Zweck.
• VORSICHT: Um eine Gefährdung durch versehentliches Rücksetzen der
thermischen Sicherungsabschaltung zu vermeiden, darf dieses Gerät nicht
über eine externe Schalteinrichtung, wie z. B. eine Zeitschaltuhr, versorgt
oder an einen Stromkreis angeschlossen werden, der regelmäßig vom
Versorgungsunternehmen ein- und ausgeschaltet wird.
• Bedienen Sie dieses Gerät nur unter Aufsicht.
• Führen Sie keine Eingriffe an den Sicherheitsschaltern durch.
• Stecken Sie während des Betriebs des Geräts keine Gegenstände in die sich
drehenden Haken.
• Stellen Sie das Gerät auf eine glatte, ebene und stabile Arbeitsfläche.
• Stecken Sie den Netzstecker des Geräts erst dann in die Steckdose, wenn Sie alle
benötigten Zubehörteile installiert haben.
ÜBERLASTSCHUTZSYSTEM
Der Motor ist durch einen Thermoschutz vor dem Durchbrennen geschützt. Wenn
das Gerät überlastet ist oder zu lange im Dauerbetrieb läuft, kann der Motor
überhitzen und stehen bleiben. Um das Gerät wieder in Betrieb zu nehmen, muss
es ausgeschaltet und von der Steckdose getrennt werden und dann mindestens
30 Minuten lang nicht benutzt werden. Sobald der Motor vollständig abgekühlt ist,
kann das Gerät wieder verwendet werden.
SICHERHEITSANWEISUNGEN
Der Motor startet nicht, wenn der Rührkopf angehoben ist. Wird der Rührkopf
während des Normalbetriebs angehoben, wird der Sicherheitsschalter aktiviert und
der Motor schaltet sich sofort ab.
Drehen Sie den Geschwindigkeitsregler wieder auf 0. Bringen Sie den Kopf wieder
in die Verriegelungsposition, um das Gerät erneut zu starten.
NUR FÜR DEN HAUSGEBRAUCH GEEIGNET
HAUSGEBRAUCH GEEIGNET
WKSMX1503_Stand Mixer_10L_IB.indd 10 10/5/2021 16:02:55

11
DE
VOR DER VERWENDUNG DER KÜCHENMASCHINE
1. Vor dem Zusammenbau des Geräts das Verpackungsmaterial entfernen und
sicher entsorgen.
2. Rührschüssel, Rührbesen-, Knethaken- und Schneebesen-Aufsätze in warmem
Seifenwasser mit einem weichen Tuch reinigen, abspülen und trocknen.
ÜBERSICHT ÜBER DIE KOMPONENTEN
1 Antriebswelle
2 Kippknopf
3 Geschwindigkeitseinstellrad
4 Netzkabel
5 Rührschüssel
6 Rührschüssel
7 Rührbesen
8 Schneebesen
9 Schüsselabdeckung
WKSMX1503_Stand Mixer_10L_IB.indd 11 10/5/2021 16:02:55

12
DE
VERWENDUNG DER KÜCHENMASCHINE
1. Stellen Sie den Geschwindigkeitsregler auf die Position „AUS“.
hinweis: Wenn der Geschwindigkeitsregler nicht auf 0 steht, wird die
Sicherheitsfunktion des Geräts ausgelöst und das Gerät schaltet sich nicht ein.
Im Abschnitt „Sicherheitshinweise“ erfahren Sie, wie Sie das Gerät in Betrieb
nehmen können.
2. Legen Sie eine Hand auf den Rührkopf und drehen Sie mit der anderen Hand
die Kipptaste gemäß dem gezeigten Pfeil nach unten, um den Rührkopf bis zum
Anschlag anzuheben. Lassen Sie die Kipptaste los. Der Rührkopf rastet in der
angehobenen Position ein.
3. Befestigen Sie den Spritzschutz direkt am Oberteil.
4. Setzen Sie die Schüssel so ein, dass sie an den Rillen der Mixerbasis ausgerichtet
ist. Um die Rührschüssel zu verriegeln, drehen Sie sie im Uhrzeigersinn, dem
Symbol „ “ an der Mixerbasis entsprechend. Achten Sie darauf, dass die
Rührschüssel sicher verriegelt ist.
5. Setzen Sie den Teighaken, den Rührbesen oder den Schneebesen ein, je
nachdem, welchen Aufsatz das Rezept erfordert. Richten Sie den gewählten
Aufsatz so aus, dass die Rillen am Aufsatz mit der unter dem Rührkopf
befindlichen Aufsatzwelle übereinstimmt. Drücken Sie den Aufsatz mit etwas
Druck in Richtung Rührkopf, heben Sie die Feder der Aufsatzwelle nach oben
und drehen Sie den Aufsatz gegen den Uhrzeigersinn. Achten Sie darauf, dass
der Aufsatz sicher verriegelt ist.
6. Geben Sie die Zutaten in die mitgelieferte Rührschüssel, wie im Rezept
angegeben. Füllen Sie die Schüssel nicht zu voll. Es wird empfohlen, bei leichten
Mischungen nicht mehr als 1,5 kg der Menge in der Rührschüssel zu verarbeiten.
Beim Kneten von Teig liegt das Verhältnis von Mehl und Wasser bei nahezu 2:1, z.
B. 700 g Teig + 380 g Wasser.
7. Legen Sie eine Hand auf den Rührkopf und drehen Sie mit der anderen
Hand die Kipptaste gemäß dem gezeigten Pfeil nach unten. Drücken Sie den
Rührkopf nach unten, sodass er sich in der horizontalen Position befindet
und der Knethaken, der Rührbesen oder der Schneebesen sich innerhalb der
Rührschüssel befindet. Lassen Sie die Kipptaste los.
8. Schließen Sie das Netzkabel an das Stromnetz an. Daraufhin leuchtet die
Geschwindigkeitsregelung auf und blinkt blau.
9. Drehen Sie den Geschwindigkeitsregler im Uhrzeigersinn, um eine
Geschwindigkeit auszuwählen und mit dem Mischvorgang zu beginnen. Das
Geschwindigkeitseinstellrad leuchtet blau. Es wird empfohlen, den Mischvorgang
bei einer niedrigeren Geschwindigkeit zu starten, um Spritzer zu vermeiden, und
dann die Geschwindigkeit dem Rezept entsprechend zu erhöhen. Beispiele für
Geschwindigkeiten finden Sie im Leitfaden für das Mischen von Zutaten.
10.Setzen Sie die Pulse-Funktion ein, wenn Sie einen raschen Leistungsschub
benötigen oder für schnelles Einarbeiten von Zutaten. Drehen Sie das
Geschwindigkeitseinstellrad gegen den Uhrzeigersinn und halten Sie es in dieser
Position. Wenn das Einstellrad losgelassen wird, kehrt es automatisch in die
Position „AUS“ zurück.
11. Wenn der Mischvorgang abgeschlossen ist, drehen Sie das
Geschwindigkeitseinstellrad auf die Position „AUS“, schalten Sie das Gerät an der
Netzdose aus und ziehen Sie das Netzkabel aus der Steckdose.
12. Entfernen Sie den Knethaken, den Rührbesen oder den Schneebesen. Heben
Sie den Rührkopf an und ergreifen Sie dann den montierten Aufsatz. Drücken
WKSMX1503_Stand Mixer_10L_IB.indd 12 10/5/2021 16:02:55

13
DE
Sie den Aufsatz mit etwas Druck in Richtung Rührkopf, heben Sie die Feder der
Aufsatzwelle nach oben und drehen Sie den Aufsatz im Uhrzeigersinn. Ziehen Sie
den Aufsatz von der Aufsatzwelle ab, um ihn vom Rührkopf zu entfernen.
13. Reinigen Sie die Teile wie unter „Reinigung“ beschrieben.
Leitfaden für das Mischen von Zutaten
Anhang Geschwindigkeit-
seinstellung
Zeit (Min.) Anmerkungen
Knethaken 1-4 3-5 Schwere Mischungen
(z. B. Brot oder Kekse)
Rührbesen 1-6 3-10 Mittelschwere Mischungen
(z. B. Crêpes oder
Biskuitmasse)
Schneebesen 7-8 3-10 Leichte Mischungen
(z. B. Sahne, Eiweiß,
Dessertmasse)
WKSMX1503_Stand Mixer_10L_IB.indd 13 10/5/2021 16:02:55

14
DE
HINWEIS:
• Max. Betriebszeit: Betreiben Sie das Gerät bei schweren Mischungen nicht länger
als sechs Minuten und lassen Sie es dann weitere zehn Minuten abkühlen.
• Beginnen Sie das Mischen immer mit einer niedrigen Geschwindigkeit und
steigern Sie dann die Geschwindigkeit, um Spritzer zu vermeiden.
PROBLEMBEHEBUNG
Problem Lösung
Das Gerät funktioniert
nicht
• Prüfen Sie, ob der Stecker zuverlässig Kontakt zur
Steckdose hat.
• Prüfen Sie, ob der Hebeknopf wieder einrastet.
• Prüfen Sie, ob das Gerät länger als 10 Minuten
ununterbrochen in Betrieb war, und warten Sie, bis
der Motor abgekühlt ist.
Geräusche in der
Rührschüssel bei der
Arbeit (das Zubehör
kratzt an der Schüssel)
• Prüfen Sie, ob die Rührschüssel richtig aufgesetzt
ist.
• Prüfen Sie, ob das Zubehör richtig am Gerät
befestigt ist.
Die Schüsselabdeckung
passt nicht richtig auf
die Rührschüssel
• Prüfen Sie, ob die Schüsselabdeckung richtig auf
dem Gerät sitzt.
• Prüfen Sie, ob die Rührschüssel richtig auf dem
Gerät angebracht und korrekt verriegelt ist.
Das Gerät funktioniert
bei bestimmten
Geschwindigkeiten nicht
• Prüfen Sie, ob die Markierung am
Geschwindigkeitsregler mit der
Geschwindigkeitsbeschriftung am Gehäuse
übereinstimmt.
• Drehen Sie den Geschwindigkeitsregler auf 0 und
prüfen Sie erneut, ob das Gerät funktioniert.
Bewegungen bei
laufender Maschine
• Prüfen Sie, ob sich die rutschfesten Füße gelöst
haben.
• Prüfen Sie, ob das Gerät auf einer glatten und
ebenen Tischplatte steht.
Der Hebeknopf ist nach
dem Einsetzen der
Rührschüssel und der
Topfabdeckung nicht
wieder zurückgefedert
• Prüfen Sie, ob die Topfabdeckung richtig auf dem
Gerät sitzt.
• Prüfen Sie, ob die Rührschüssel richtig aufgesetzt
ist.
WKSMX1503_Stand Mixer_10L_IB.indd 14 10/5/2021 16:02:55

15
DE
REINIGUNG
• Vergewissern Sie sich vor der Reinigung, dass das Gerät vom Stromnetz getrennt
ist.
• Tauchen Sie das Gerät niemals in eine Flüssigkeit.
• Reinigen Sie Knethaken, Rührbesen, Schneebesen und Rührschüssel nach
jedem Gebrauch von Hand in warmem Seifenwasser und mit einem weichen
Tuch. Anschließend gründlich abspülen und trocknen. Der Teighaken und der
Rührbesen aus Aluminiumdruckguss sind nicht spülmaschinenfest.
• Reinigen Sie das Gehäuse des Geräts nur mit einem feuchten Tuch.
• Setzen Sie Gerät und Zubehör keiner Hitze oder ätzenden Reinigungsmitteln aus.
Andernfalls können Verformungen und Verfärbungen auftreten.
• Verwenden Sie keine scharfen oder scheuernden Reinigungsmittel.
ENTSORGUNG
Ordnungsgemäße Entsorgung dieses Produkts
Dieses Etikett weist darauf hin, dass Elektrogeräte in der EU nicht mit dem
normalen Haushaltsmüll entsorgt werden dürfen.
Bitte nutzen Sie die Rückgabe- oder Sammelsysteme in Ihrer Gemeinde oder
wenden Sie sich an den Händler, bei dem Sie dieses Produkt gekauft haben.
INFORMATION UND SERVICE
Wenn Sie Fragen oder Bedenken in Bezug auf Ihr Produkt haben, besuchen Sie bitte
unsere Website: www.westinghousehomeware.com, oder kontaktieren Sie unsere
Auslandsbüros/Vertretungen.
Im Einklang mit unserer Politik der kontinuierlichen Produktentwicklung behalten wir
uns das Recht vor, die Produkt-, Verpackungs- und Dokumentationsspezifikationen
ohne vorherige Ankündigung zu ändern.
Technische Daten
Nennspannung: 220-240 V~ 50/60 Hz
Stromverbrauch: 1300 W
Schutzklasse: II
Dieses Gerät wurde nach allen relevanten aktuellen CE-Richtlinien geprüft,
z. B. nach der Richtlinie zur elektromagnetischen Verträglichkeit und der
Niederspannungsrichtlinie, und in Übereinstimmung mit den neuesten
Sicherheitsvorschriften konstruiert.
Technische Änderungen ohne Vorankündigung sind vorbehalten!
WKSMX1503_Stand Mixer_10L_IB.indd 15 10/5/2021 16:02:55

16
ES
CONSERVE ESTE MANUAL PARA FUTURA
REFERENCIA Y ENTRÉGUELO JUNTO CON EL
EQUIPO A FUTUROS USUARIOS.
INSTRUCCIONES GENERALES DE SEGURIDAD
Lea las instrucciones de uso con detenimiento antes de usar el aparato y guárdelas
junto con la garantía, el recibo y, a ser posible, la caja con el embalaje interno. Si le
da este aparato a otra persona, entréguele también las instrucciones de uso.
• El aparato está diseñado exclusivamente para uso particular y para el fin previsto.
Este aparato no es apto para un uso comercial. No lo use en exteriores (excepto
si está diseñado para usarse en exteriores). Manténgalo alejado de fuentes de
calor, la luz solar directa, la humedad (no lo meta nunca en ningún líquido) y de
los bordes afilados. No utilice el aparato con las manos mojadas. Si el aparato
está húmedo o mojado, desenchúfelo inmediatamente.
• Cuando lo limpie o lo guarde, apague el aparato y desenchúfelo siempre (tire del
enchufe, no del cable) si no lo está usando y retire los accesorios conectados.
• No use el aparato si no le está prestando atención. Si tiene que salir de la
habitación, apague siempre el aparato o desenchúfelo (tire del enchufe, no del
cable).
• Compruebe periódicamente si el aparato y el cable están dañados. No utilice
el aparato si está dañado. No intente reparar usted mismo el aparato. Contacte
siempre a un técnico autorizado. Para evitar riesgos, un cable defectuoso deberá
reemplazarlo siempre el fabricante, nuestro servicio de atención al cliente o una
persona cualificada y por un cable del mismo tipo.
• Use solo recambios originales.Preste especial atención a las «Instrucciones
especiales de seguridad».
Niños y personas vulnerables
• Para garantizar la seguridad de los niños, mantenga todo el embalaje (bolsas de
plástico, cajas, poliestireno, etc.) lejos de su alcance.
• ¡atenCión! ¡No permita que los niños pequeños jueguen con el envoltorio, ya
que existe peligro de asfixia!
• Los niños no deberían utilizar este electrodoméstico. Mantenga este aparato y su
cable fuera del alcance de los niños.
• Este aparato no es un juguete. Los niños no deben jugar con este aparato.
• Este aparato pueden utilizarlo personas con algún tipo de discapacidad física,
sensorial o mental o que carezcan de experiencia o conocimientos si se las
supervisa o se les da instrucciones sobre el uso seguro del aparato y si entienden
los riesgos que comporta.
WKSMX1503_Stand Mixer_10L_IB.indd 16 10/5/2021 16:02:55

17
ES
Instrucciones especiales de seguridad para este aparato
• Desconecte siempre el aparato de la corriente si lo deja desatendido o antes
de Apague el aparato y desenchúfelo antes de cambiar los accesorios o de
acercarse a partes que se muevan durante el uso.
• No use el aparato para fines diferentes al previsto.
• VISO: Para evitar el riesgo derivado de un restablecimiento involuntario del
disyuntor térmico, el aparato no debe conectarse a un interruptor externo, como
un temporizador o un circuito que se encienda y apague periódicamente.
• Preste siempre atención al aparato mientras esté en funcionamiento.
• No manipule los interruptores de seguridad.
• No introduzca nada en los ganchos giratorios cuando el aparato esté en
funcionamiento.
• Coloque el aparato en una superficie de trabajo lisa, plana y estable.
• No enchufe el aparato a la red eléctrica antes de haber instalado todos los
accesorios necesarios.
SISTEMA DE PROTECCIÓN CONTRA SOBRECARGA
El motor está protegido frente a sobrecargas por un protector térmico. Si el aparato
se sobrecarga o se utiliza de forma continuada durante demasiado tiempo, el motor
podría sobrecalentarse y parar. Para volver a utilizar el aparato, deberá apagarlo y
desenchufarlo de la red eléctrica y dejarlo descansar durante al menos 30 minutos.
Cuando el motor se haya enfriado totalmente, se podrá volver a usar el aparato.
INSTRUCCIONES DE SEGURIDAD
El motor no se pondrá en marcha si la cabeza de la batidora está levantada. Si
levanta mientras se está usando el aparato, el interruptor de seguridad se activará y
el motor se apagará inmediatamente.
Ponga el selector de velocidad de nuevo en 0. Lleve la cabeza a la posición de
bloqueo para volver a poner en marcha el aparato.
SOLO PARA USO DOMÉSTICO
WKSMX1503_Stand Mixer_10L_IB.indd 17 10/5/2021 16:02:55

18
ES
ANTES DE UTILIZAR LA BATIDORA DE MESA
1. Antes de montar el aparato, retire y deseche de forma segura el embalaje.
2. Lave el bol mezclador, el batidor, el gancho amasador y la varilla con agua
caliente con jabón y un paño suave y después aclárelos y séquelos.
ESQUEMA DE LOS COMPONENTES
1 Eje de salido
2 Botón de basculación
3 Selector de velocidad
4 Cable de alimentación
5 Bol mezclador
6 Gancho amasador
7 Batidor
8 Varilla
9 Tapa del bol
WKSMX1503_Stand Mixer_10L_IB.indd 18 10/5/2021 16:02:55

19
ES
UTILIZAR LA BATIDORA DE MESA
1. Coloque el selector de velocidad en la posición «APAGADO»
nota: Si el selector de velocidad no está en 0, se activará el mecanismo de
seguridad del aparato y no se pondrá en marcha al encenderlo. Si ocurre esto,
consulte las instrucciones de seguridad para saber cómo poner el aparato en
marcha.
2. Coloque una mano sobre la cabeza de la batidora y con la otra gire hacia abajo
el botón de basculación, según muestra la flecha para levantar la cabeza de la
batidora hasta que se detenga. Suelte el botón de basculación. La cabeza de la
batidora se quedará fija en la posición elevada.
3. Conecte el protector contra salpicaduras directamente a la parte superior.
4. Coloque el bol de manera que encaje con las ranuras de la base de la batidora.
Para fijar el bol mezclador, gírelo en el sentido de las agujas del reloj « »
sobre la base de la batidora. Asegúrese de que el bol mezclador está fijo en su
lugar.
5. Inserte el gancho amasador, el batidor o la varilla, según el accesorio necesario
para la receta. Coloque el accesorio elegido de forma que las ranuras del
accesorio queden alineadas con el eje para accesorios situado bajo la cabeza de
la batidora. Ejerciendo algo de presión, empuje el accesorio hacia la cabeza de
la batidora, levantando el muelle del eje para accesorios y gire el accesorio en
sentido contrario a las agujas del reloj. Asegúrese de que el accesorio está fijo en
su lugar.
6. Añada los ingredientes indicados en la receta al bol mezclador suministrado. No
llene el bol en exceso. Para mezclas ligeras, se recomienda no batir más de 1,5 kg
de mezcla. Para amasar masa, la proporción de harina y agua está en torno al 2:1,
por ej. 700 g de masa + 380 g de agua.
7. Coloque una mano sobre la cabeza de la batidora y con la otra gire hacia abajo
el botón de basculación, según muestra la flecha. Baje la cabeza de la batidora,
de forma que quede en posición horizontal y el accesorio del gancho amasador,
el batidor o la varilla queden dentro del bol mezclador. Suelte el botón de
basculación.
8. Enchufe el cable de alimentación a la red eléctrica. Esto hará que el disco de
control de velocidad se ilumine y brille de forma intermitente con un color azul.
9. Gire el selector de velocidad en el sentido de las agujas del reloj para seleccionar
una velocidad y comenzar a batir. El disco de control de velocidad se iluminará
con un color azul. Se recomienda comenzar a batir a una velocidad baja para
evitar salpicaduras y luego aumentar la velocidad según requiera la receta.
Consulte el apartado Guía para batir para ver ejemplos de velocidades.
10.Utilice la función Pulse cuando necesite una ráfaga rápida de potencia para
incorporaciones rápidas. Gire el selector de velocidad en sentido contrario a las
agujas del reloj y manténgalo en esa posición. Al soltar el disco, este volverá
automáticamente a la posición de «APAGADO».
11. Cuando haya terminado de batir, lleve el selector de velocidad a la posición de
«APAGADO», apague el aparato y desenchúfelo.
12. Retire el gancho amasador, el batidor o la varilla levantado la cabeza de la
batidora y cogiendo después el accesorio montado. Ejerciendo algo de presión,
empuje el accesorio hacia la cabeza de la batidora, levantando el muelle del eje
para accesorios y gire el accesorio en el sentido de las agujas del reloj. Separe
el accesorio del eje para accesorios tirando del mismo, para quitarlo así de la
cabeza de la batidora.
13. Limpie las partes según lo descrito en el apartado «Limpieza»
WKSMX1503_Stand Mixer_10L_IB.indd 19 10/5/2021 16:02:55

20
ES
Guía para batir
Accesorio Velocidad Tiempo
(Mín)
Observaciones
Gancho amasador 1-4 3-5 Mezclas pesadas
(p. ej. pan o masa
quebrada)
Batidor 1-6 3-10 Mezclas medias-pesadas
(p. ej. mez-cla para crepes o
bizcocho)
Varilla 7-8 3-10 Mezclas ligeras
(p. ej. crema, claras de
huevo, crema de maicena)
WKSMX1503_Stand Mixer_10L_IB.indd 20 10/5/2021 16:02:56
Table of contents
Languages:
Other Westinghouse Mixer manuals

Westinghouse
Westinghouse JE45WW2A-DS User manual

Westinghouse
Westinghouse WHSM03K User manual

Westinghouse
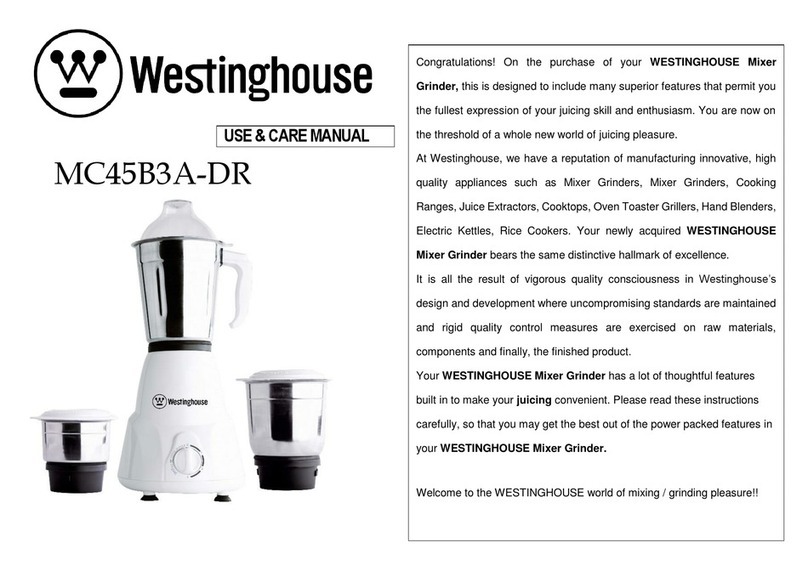
Westinghouse MC45B3A-DR User manual

Westinghouse
Westinghouse WHSM01SS User manual

Westinghouse
Westinghouse SA 61950 Administrator Guide

Westinghouse
Westinghouse MP60W3A-DS User manual

Westinghouse
Westinghouse WKSMX1301 User manual

Westinghouse
Westinghouse MX75WM3A-DR User manual