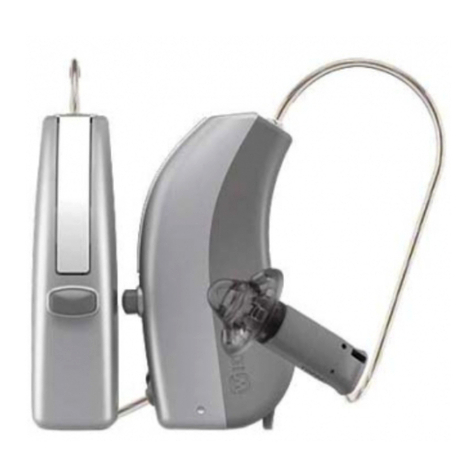
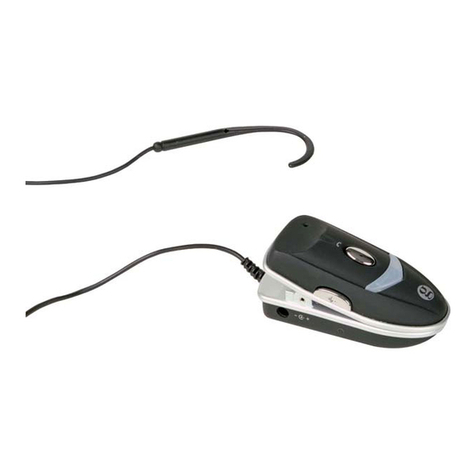
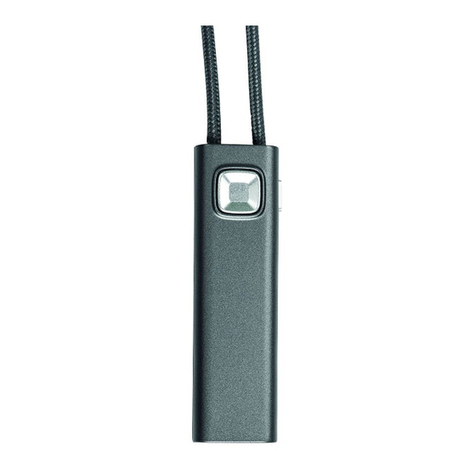
Widex MicroLink MLX User manual

MicroLink system
User’s instructions
for
MicroLink MLX FM receiver
HandyMic TX3 FM transmitter
MicroVox TX2 FM transmitter

2
Contents
Introduction· · · · · · · · · · · · · · · · · · · · · · · · · · · · · · 3
The FM system and how it works · · · · · · · · · · · · · · · · · 6
TheMicroLinkreceiver · · · · · · · · · · · · · · · · · · · · · · · 8
How the MicroLink works · · · · · · · · · · · · · · · · · · · · · 8
Description · · · · · · · · · · · · · · · · · · · · · · · · · · · · · 9
Attaching and removing the MicroLink · · · · · · · · · · · · · 11
Operating the MicroLink receiver · · · · · · · · · · · · · · · · 13
TheHandyMictransmitter · · · · · · · · · · · · · · · · · · · · 15
How the HandyMic works · · · · · · · · · · · · · · · · · · · · 15
Description · · · · · · · · · · · · · · · · · · · · · · · · · · · · 17
HandyMic accessories · · · · · · · · · · · · · · · · · · · · · · 19
Microphone switch modes · · · · · · · · · · · · · · · · · · · · 20
Instructions for use of the HandyMic · · · · · · · · · · · · · · 22
1.Thecompaniontechnique · · · · · · · · · · · · · · · · · · · 23
2.Theinterviewtechnique · · · · · · · · · · · · · · · · · · · · 25
3.Thelecturetechnique · · · · · · · · · · · · · · · · · · · · · 26
4.Theaudio-visualtechnique · · · · · · · · · · · · · · · · · · 27
Recharging the HandyMic · · · · · · · · · · · · · · · · · · · · 30
TheMicroVoxTransmitter · · · · · · · · · · · · · · · · · · · · 32
How the MicroVox works· · · · · · · · · · · · · · · · · · · · · 32
Description · · · · · · · · · · · · · · · · · · · · · · · · · · · · 34
MicroVox accessories · · · · · · · · · · · · · · · · · · · · · · · 36
Connecting the microphone · · · · · · · · · · · · · · · · · · · 38
The battery · · · · · · · · · · · · · · · · · · · · · · · · · · · · 39
Inserting the battery · · · · · · · · · · · · · · · · · · · · · · · 41
How to switch on the MicroVox · · · · · · · · · · · · · · · · · 42
Connecting audio-visuals · · · · · · · · · · · · · · · · · · · · 43
GettingStarted · · · · · · · · · · · · · · · · · · · · · · · · · · · 44
Operating Range · · · · · · · · · · · · · · · · · · · · · · · · · 44
Maintenance · · · · · · · · · · · · · · · · · · · · · · · · · · · · · 46
Daily maintenance · · · · · · · · · · · · · · · · · · · · · · · · 46
Troubleshooting· · · · · · · · · · · · · · · · · · · · · · · · · · 49
Warranty · · · · · · · · · · · · · · · · · · · · · · · · · · · · · · · 55
Notes · · · · · · · · · · · · · · · · · · · · · · · · · · · · · · · 55

Introduction
At Widex, our overall mission is to give people
with a hearing loss the same opportunities for
communication as people with normal hearing. A
Widex hearing aid, combined with the MicroLink,
goes a long way towards achieving this goal by
ensuring optimal listening comfort and speech
understanding. In difficult listening situations, in
particular, the MicroLink gives people with a
hearing loss new possibilities.
In order to get the full benefit of your MicroLink
FM system, please read these instructions care-
fully. They contain a description of all parts of the
system as well as a section on maintenance and
troubleshooting.
3

TheMicroLink systemisbasedontechnologythat
makes it possible to manufacture an FM radio
receiver so tiny that it can be connected to a hear-
ing aid. The receiver’s power consumption is very
low, so it can be powered by the hearing aid’s own
battery.
The MicroLink FM system effectively overcomes
the three fundamental obstacles to optimum com-
munication: distance, noise and echo and – espe-
cially – the combination of these factors. The
system is completely cordless and therefore very
easy to use.
Now you can concentrate on the message behind
what is being said, rather than using your energy
on trying to make out the words. Practically
speaking,withyourMicroLinkyourearsareright
next to the FM transmitter. This creates an opti-
mum listening situation with maximum signal
strength and a minimum of noise and echo.
4

If used and cared for properly, your MicroLink
system – used in combination with your Widex
hearing aid – will give you many pleasurable lis-
tening opportunities. The MicroLink system is a
precision instrument that can be damaged if
knocked or bumped. Therefore it should be hand-
led with care and we recommend that you keep it
in the leather case when you do not use it.
5

The FM system and how it works
An FM system is a radio system in which signals
are sent via radio waves from the transmitter to
the receiver. “FM” stands for Frequency Modula-
tion,atechnicaltermfor the way radiosignalsare
generated. FM transmission ensures advanced
reception quality, free of noise and distortion.
The MicroLink FM system consists of two basic
components:
•A microphone with an FM transmitter to pick
up the sound source. The transmitter sends
radio signals to one or more receivers.
•An FM receiver which is connected to the
hearing aid.
6

The MicroLink FM system from Widex is avail-
able in two versions – with a HandyMic transmit-
ter or with a MicroVox transmitter. Both versions
use the MicroLink receiver. Transmission power
is very low and involves no physiological side
effects.The maximumoperatingrangeisabout15
meters (45 feet).
7

The MicroLink receiver
How the MicroLink receiver works
The MicroLink is the FM receiver that receives
radio signals from either the HandyMic or
MicroVox transmitter. The MicroLink can only be
used on the frequency / channel number for which
it was produced and which is identified by the
channel number and colour code.
The MicroLink Europlug fits all behind-the-ear
hearing aids that have an FM shoe with Europlug
connection. An FM shoe is available for all LOGO,
SENSO and other digital instruments from Widex.
The FM signal is received by a small built-in
antenna. The radio signal is transformed to a sig-
nal which is amplified in the hearing aid in the
same manner as the hearing aid’s own microphone
signal.Thereforenospecial(re)fittingof your hear-
ing aid is needed.
8
1.
2.
3.
4.
5.
6.

Description
1. FM shoe.
2. MicroLink receiver.
3. Europlug.
4. On/Off and function switch
(M –FM –M+FM).
5. Channel identification
The number and colour code indicate which
frequency is being used. The number and col-
our of the receiver must be identical to the
number and colour of the transmitter.
6. Serial number. We recommend that you write
down this number.
9

Attaching and removing the MicroLink
Attaching the MicroLink
to your hearing aid is a
two-step process. Firstly,
the MicroLink is con-
nected to the FM shoe,
which, in turn, is con-
nected to the hearing aid.
Place the MicroLink on
the FM shoe. Insert the
short, thick pin of the
MicroLink plug into the
corresponding hole in the
FM shoe. Push the
MicroLink plug into the
shoe until a “click”is felt.
The shoe with the MicroLink receiver is then con-
nectedtothehearing aid. Pleasecheckthesection
on “Audio input”in the user’s instructions for
your hearing aid for information on how to attach
and remove the audio shoe.
10

Note: Please remember to exchange the solid
cover for the perforated cover on the side of the
hearing aid.
Reverse the procedure to remove the MicroLink.
11

Operating the MicroLink receiver
The switch on the receiver can be set to three dif-
ferent functions:
a. In position mthe receiver is switched off and
does not consume battery power. Only the
hearing aid’s own microphone is active. It is
therefore not necessary to remove the
MicroLinkfrom your hearingaid whennot us-
ing the FM system.
b. In position lonly FM is received (the hearing
aid’s microphone is dampened by 20 dB).
c. In position ll both FM and the signals from
the hearing aid’s microphone are received.
Please remember to also switch on the transmit-
ter (MicroVox or HandyMic).
The hearing aid’sM–MT –T switch modes will
retain their original functions when the
MicroLink is connected. This will result in a num-
ber of possibilities as shown in the overview.
12

MicroLink
switch
m
Off
l
FM
reception
ll
Combined
FM and
hearing aid
microphone
Hearing
aid switch
MHearing
aid micro-
phone
FM
reception FM reception +
hearing aid
microphone
MT Hearing
aid micro-
phone +
telecoil
FM
reception +
telecoil
FM reception +
hearing aid
microphone +
telecoil
TTelecoil Telecoil Telecoil
Please note –When switched on, the MicroLink
consumes battery power. Therefore, when not in
use the MicroLink should be switched off or
removed from the hearing aid.
13

The HandyMic transmitter
How the HandyMic works
The HandyMic is a low power radio transmitter
with a built-in multidirectional microphone sys-
tem. The transmitter sends signals from the
microphone to the MicroLink receiver. Please
note that the transmitter and the receiver must
be on the same channel/frequency.
The HandyMic can be used as a hand-held micro-
phonewithouttheexternalantenna.Thedistance
to the MicroLink receiver should normally not
exceed 1.5 meters (4.5 feet). At this range the
HandyMic’s stand serves adequately as an
antenna. If the HandyMic’s operating range is
between 1.5 metres (4.5 feet) and 15 meters (50
feet), for example at a lecture, you must use the
accompanying external antenna.
14

The integrated multidirectional microphone can
be adjusted to pick up signals in three different
modes:
1. The omnidirectional microphone picks up
sound signals from all directions.
2. The directional microphone primarily picks
up sound signals from an angle of 45°in front
of the microphone.
3. The super-directional microphone primarily
picks up sound signals from an angle of 20°in
front of the microphone.
Select the required mode on the microphone
switch depending on the distance to the speaker,
and the surrounding noise. This switch also
serves as the on/off switch.
Remember to switch off the transmitter when you
do not use it.
15

The HandyMic can also be connected directly to
the headphone outlet of your radio or TV by
meansoftheaccompanyingaudiocord.Thetrans-
mitter is automatically switched on even when it
is in the off position when there are incoming
audio signals. The audio cord then also functions
as an antenna.
A built-in rechargeable battery powers the
HandyMic. A fully charged battery will last
approximately one day. It can be recharged every
night with the battery charger.
16

Description
1. Microphone mode switch and on/off switch.
Switch symbols:
lHandyMic off
mOmnidirectional
Directional
Super-directional.
2. Adapter socket.
3. Battery indicator.
17
4.
7.
8.
5.
6.
2. 1.
3.

4. Audio socket for connection to audio-visual
equipment such as radio and TV.
5. Microphone stand. Functions also as a short
range antenna.
6. Microphone opening.
7. Compartment with cover containing the fre-
quency module. The frequency module is al-
ready in place in the compartment on the
underside of the HandyMic. The HandyMic’s
frequency module has a channel number
which must match the channel number of the
MicroLink receiver in order to function. The
frequency module can be replaced so that the
HandyMic is able to transmit on another
channel.
8. On the underside: Serial number, approval la-
bel, and label for your name and address. We
recommend that you write down the serial
number in these instructions.
18

HandyMic accessories
The HandyMic comes with the following accesso-
ries:
1. Charger / power supply.
2. External antenna.
3. Audio cord for radio, TV, etc. with a 3.5 mm
jack and an additional 6 mm adapter jack.
4. Neck cord.
5. Leather case.
19
1.
2.
3.
4.
5.

Microphone switch modes
Omnidirectional setting
The omnidirectional setting is ideal
for situations with some noise or
disturbance when you want to lis-
ten to the people around you. At
small meetings, for example, the
HandyMic can be placed on the
table in a central position relative to the people
present.
Directional setting
The directional setting can be used
in situations when several people
are speaking at the same time. The
directionalmodeisidealinsuchsit-
uations since the microphone can
be pointed towards the person with
whom you are having a conversation. Sur-
rounding conversation and ambient noise are
thus subdued.
20
This manual suits for next models
2
Table of contents
Other Widex Hearing Aid manuals

Widex
Widex Baby 440 User manual

Widex
Widex CROS-FA User manual

Widex
Widex Compass User manual

Widex
Widex S4-VSD User manual

Widex
Widex UNIQUE Series User manual

Widex
Widex mind 220 Series User manual

Widex
Widex AK-19 User manual

Widex
Widex CROS-FA User manual

Widex
Widex Flash-M User manual

Widex
Widex BEYOND B-F2 RIC User manual

Widex
Widex AIKIA-m User manual

Widex
Widex Daily Series User manual

Widex
Widex The mind 440 Series User manual

Widex
Widex C4-m User manual

Widex
Widex nEARCOM User manual

Widex
Widex CLEAR C4-9 User manual

Widex
Widex CLEAR 440 SERIES User manual

Widex
Widex Inteo SERIES User manual

Widex
Widex B1X User manual

Widex
Widex DREAM D-XP User manual