widos RS 315 User manual

Kunststoffschweißtechnik
WIDOS Einsteinstr. 5 Phone +49 (0) 71 52 99 39 - 0
W. Dommer Söhne GmbH D-71254 Ditzingen-Heimerdingen Fax +49 (0) 71 52 99 39 - 40
Website: www.widos.de Email: info@widos.de
Headquarters: D-71254 Ditzingen-Heimerdingen Country court Stuttgart HRB 200973 Managing director: Jürgen Dommer
Working Instructions
Translation
Band Saw RS 315
Keep for further use!

Kunststoffschweißtechnik
Product identification
21.10.14 Working instructions WIDOS RS 315 Page 2 of 38
Type: Band saw RS 315
Serial number / year of construction: see nameplate
Customer Entries
Inventory No.:
Location:
Order of Spare Parts and After Sales Service
Address of Manufacturer: WIDOS
W. Dommer Söhne GmbH
Einsteinstr. 5
D -71254 Ditzingen-Heimerdingen
Phone: ++49 7152 / 99 39 - 0
Fax: ++49 7152 / 99 39 - 40
http://www.widos.de
Address of Subsidiary Companies
WIDOS
WIDOS GmbH W. Dommer Söhne AG
An der Wiesenmühle 15 St. Gallerstr. 93
D-09224 Grüna / Sachsen CH-9201 Gossau
Phone: ++49 371 / 8 15 73 - 0 Phone: +41 (0) 79 432 5737
Fax: ++49 371 / 8 15 73 - 20

Kunststoffschweißtechnik
Introduction
21.10.14 Working instructions WIDOS RS 315 Page 3 of 38
Purpose of the Document
These working instructions give you information about all important questions which refer to
the construction and the safe working of your machine.
Just as we are, you are obliged to engage in these working instructions, as well.
Not only to run your machine economically but also to avoid damages and injuries.
Should questions arise, contact our service team in the factory or in our subsidiary companies.
We will help you with pleasure.
According to our interest to continuously improve our products and working instructions, we
kindly ask you to inform us about problems and defects which occur in exercise.
Thank you.
Structure of the Working Instructions
This manual is arranged in chapters which belong to the different using phases of the
machine.
Due to this structure, the searched information can be easily found.
10/21/2014 WIDOS
W. Dommer Söhne GmbH
Einsteinstraße 5
D-71254 Ditzingen-Heimerdingen
All rights reserved.
Reprinting only allowed with permission of the corporation.
Any changes are subject to technical innovations.

Kunststoffschweißtechnik
Contents
21.10.14 Working instructions WIDOS RS 315 Page 4 of 38
1. DESCRIPTION OF THE PRODUCT................................................................................ 6
1.1. Usage and purpose-oriented use........................................................................................6
1.2. Safety measures ...................................................................................................................6
1.3. Conformity.............................................................................................................................6
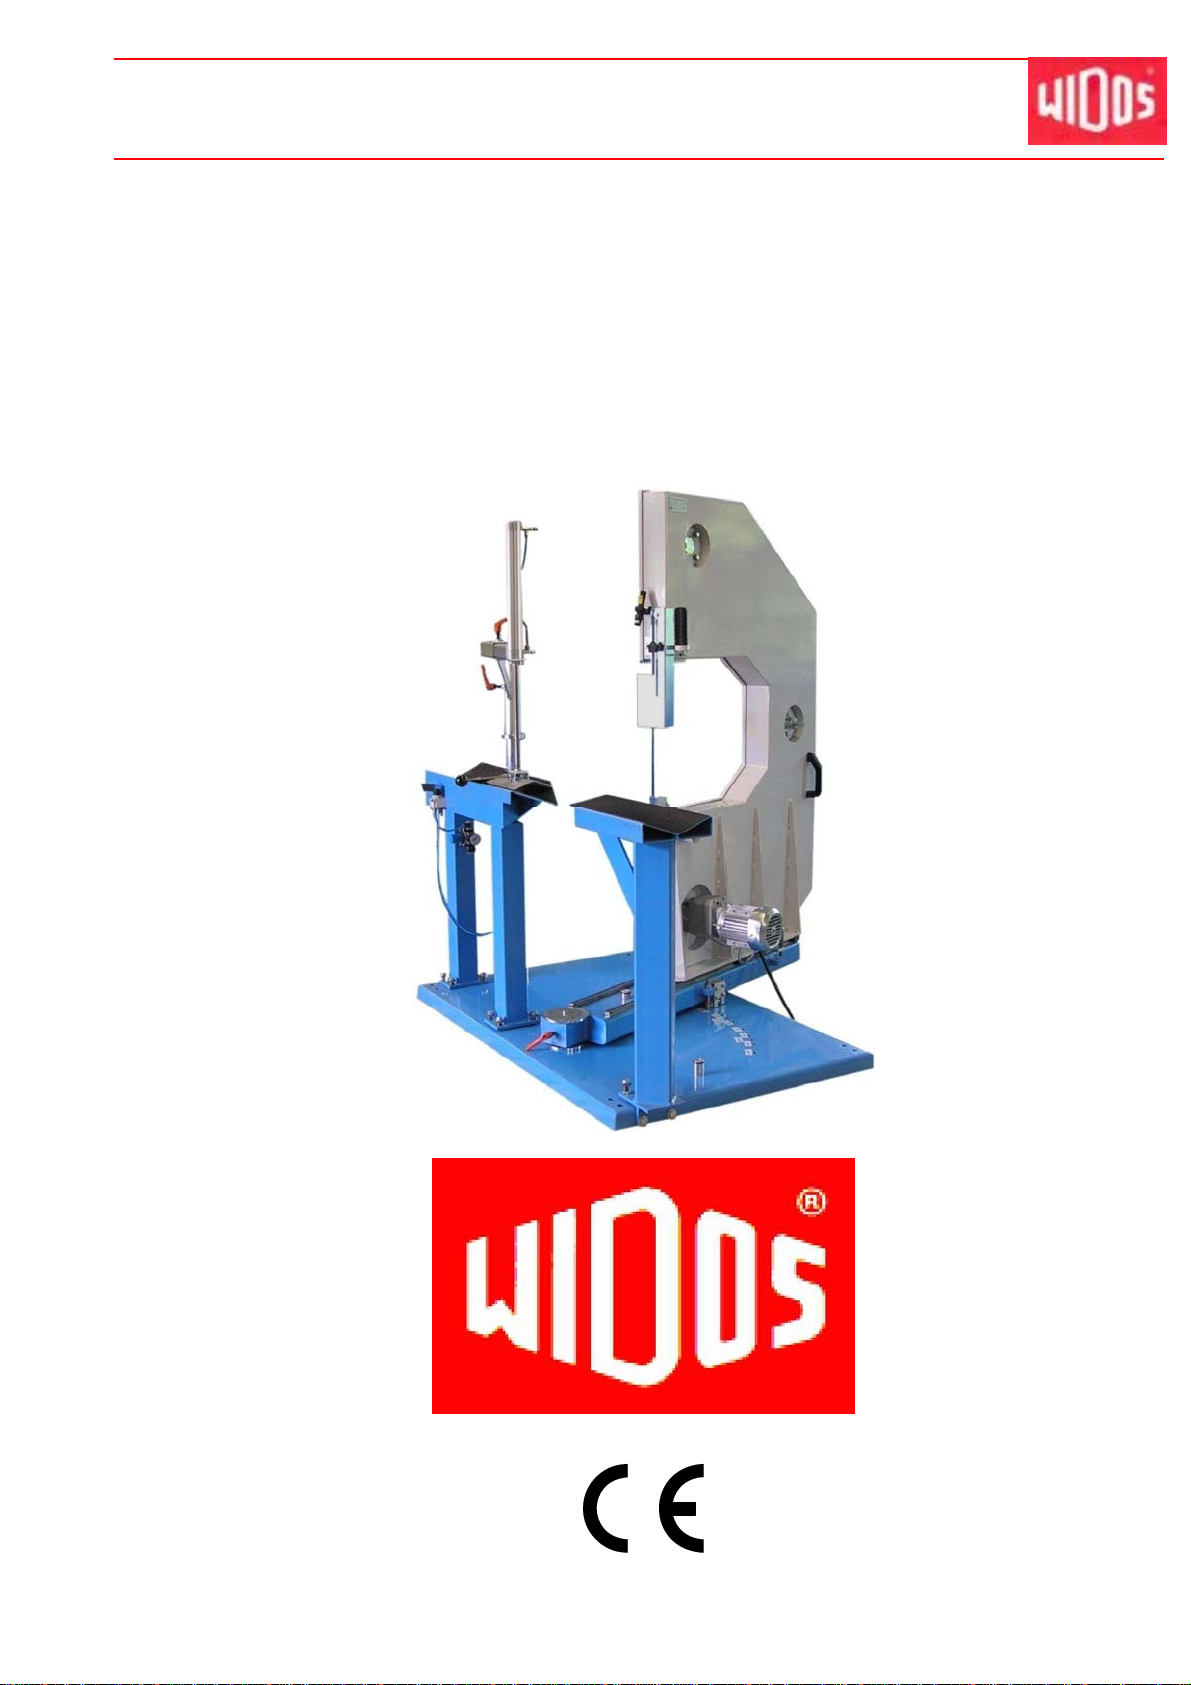
1.4. Designation of the product..................................................................................................6
1.4.1. Technical data................................................................................................................7
1.4.2. Electrical data.................................................................................................................7
1.4.3. Technical data Z-laser (optional) ...................................................................................7
1.5. Equipment and accessories ................................................................................................7
1.6. Wear parts .............................................................................................................................8
2. SAFETY RULES.............................................................................................................. 9
2.1. Explanation of the symbols and indications......................................................................9
2.2. Obligations of the owner....................................................................................................10
2.3. Obligations of the operator................................................................................................10
2.4. Measures of organization ..................................................................................................10
2.5. Information about safety precautions ..............................................................................10
2.6. Instructions for the staff ....................................................................................................10
2.7. Dangers while handling the machine ...............................................................................11
2.8. General safety indications.................................................................................................11
2.9. Specific dangers .................................................................................................................12
2.9.1. Danger of cutting or catching clothes...........................................................................12
2.9.2. Danger of stumbling over pneumatic and electric wires..............................................12
2.9.3. Danger of crushing upon mounting / dismounting the circular cutting device .............12
2.9.4. Danger of injury by cutting chips / remains..................................................................12
2.9.5. Danger of injury by noise .............................................................................................12
2.10. Maintenance and inspection, repair..................................................................................13
2.11. Remaining risks ..................................................................................................................13
2.12. Warranty and liability..........................................................................................................13
3. FUNCTIONAL DESCRIPTION ...................................................................................... 14
4. OPERATING AND INDICATING ELEMENTS .............................................................. 15
4.1. Elements to lock the saw arm ...........................................................................................16
4.2. Saw blade guiding ..............................................................................................................16
4.3. How to set the swiveling angle .........................................................................................17
4.4. Linear laser (optional) and saw blade covering ..............................................................17
4.5. Clamping pipe .....................................................................................................................18
4.5.1. Pipe clamping device (optional)...................................................................................18
4.5.2. How to clamp the pipes with clamping belt (optional)..................................................19
4.6. Circular cutting device (optional)......................................................................................20
4.6.1. Clamping belt for circular cutting..................................................................................20

Kunststoffschweißtechnik
Contents
21.10.14 Working instructions WIDOS RS 315 Page 5 of 38
5. STARTING AND OPERATING...................................................................................... 21
5.1. Starting.................................................................................................................................21
5.1.1. How to adjust the compressed-air regulator................................................................21
5.2. How to make straight cuts.................................................................................................22
5.3. How to cut angles...............................................................................................................22
5.4. How to mount the circular cutting device (optional) ......................................................23
5.5. How to adjust the circular cutting device ........................................................................24
5.5.1. How to adjust the cutting radius...................................................................................24
5.5.2. How to adjust the angle for branch pipe 45° and 60° ..................................................25
5.5.3. How to adjust the gap from saw blade to pipe support................................................25
5.6. How to clamp and cut branch pipes.................................................................................26
6. MAINTENANCE / STORAGE / TRANSPORT .............................................................. 27
6.1. In general.............................................................................................................................27
6.2. Storage.................................................................................................................................27
6.3. Transport .............................................................................................................................28
6.4. How to remove the cutting chips from the saw blade housing.....................................28
6.5. How to tension and adjust the saw blade........................................................................28
6.6. How to exchange the saw blade .......................................................................................29
6.6.1. How to replace the rollers ............................................................................................30
6.7. Disposal...............................................................................................................................30
7. PNEUMATIC AND ELECTRIC DIAGRAMS ................................................................. 31
8. SPARE PARTS LIST..................................................................................................... 33
8.1. Basic machine.....................................................................................................................33
8.2. Circular cutting device (optional)......................................................................................36
9. DECLARATION OF CONFORMITY.............................................................................. 38

Kunststoffschweißtechnik
WIDOS Einsteinstr. 5 Phone +49 (0) 71 52 99 39 - 0
W. Dommer Söhne GmbH D-71254 Ditzingen-Heimerdingen Fax +49 (0) 71 52 99 39 - 40
Website: www.widos.de Email: info@widos.de
21.10.14 Working instructions WIDOS RS 315 Page 6 of 38
1. Description of the product
This chapter gives important basic information about the product and its prescribed use.
All technical details of the machine are put together as a general arrangement.
1.1. Usage and purpose-oriented use
The WIDOS band saw RS 315 is a special machine for cutting plastic pipes Ø 50 up to
Ø 315 mm, an angle of max. 45° on both sides and of 67.5° on one side respectively in
the way as described below.
By means of the optional circular cutting device, it is possible to cut pipes from OD 50 mm up
to OD 200 mm; with radii from 50 mm up to 240 mm.
All use going beyond is not purpose-oriented.
The described plastic saw may only be operated, maintained and repaired by persons who are
trained and informed about the dangers.
It is a workshop machine and not suitable for operation in hazardous locations.
It is forbidden to cut wood and sheets made out of wood (e.g. pressboard).
The manufacturer is not responsible for any damages caused by inexpert handling or
operation.
For personal injuries, material and immaterial damages resulting herefrom, only the user is
responsible!
Also part of the purpose-oriented use is
respecting all the indications of the working instructions and
performing the inspection and maintenance work.
1.2. Safety measures
In case of wrong use, wrong operation or wrong maintenance, the machine itself or products
standing nearby can be damaged or destroyed.
Persons being in the endangered area may be injured.
Therefore these working instructions have to be thoroughly read and the corresponding safety
regulations must be necessarily adhered to.
1.3. Conformity
The machine corresponds in its construction to the valid recommendations of the European
Community as well as to the according European standard specifications.
The development, manufacturing and mounting of the machine were made very carefully.
1.4. Designation of the product
The product is designated by a nameplate at the basic mounting.
It contains the type, the serial number and the year of construction of the machine.

Kunststoffschweißtechnik
Description of product Chapter 1
21.10.14 Working instructions WIDOS RS 315 Page 7 of 38
1.4.1. Technical data
Thickness of saw blade: 0,65 mm
Width of saw blade: 13 mm
Length of saw blade: 3900 mm
Total height: appr. 1800 mm
Total depth, at maximum positioning way: appr. 1670 mm
Total width, at max. swiveling / positioning way: appr. 2330 mm
Length of the pipe support: 800 mm
Max. diameter of pipes: 315 mm
Weight: appr. 346 kg
Transport case (l x w x h): appr. 1670 x 163 x 2180 mm
Weight transport case: appr. 216 kg
Power supply: 16 A CEE plug with phase converter
Option for small radii:
Saw blade thickness: 0,9 mm
Saw blade width: 10 mm
Saw blade length: 3900 mm
1.4.2. Electrical data
Voltage: 400V AC
Power of saw motor: 0,37 kW
Nominal current: 2,3 A
Speed of saw motor: 140 rpm
1.4.3. Technical data Z-laser (optional)
Range appr. 0,5 m
Power 3 mW
1.5. Equipment and accessories
Pieces Name
1 Tool bag
1 each Ring fork wrench size 16 / 17
1 each Fork wrench size 24 / 30
1 each Allen key angle size 3 / 4 / 6 / 8
1 each Allen key with T-grip size 3 / 4 / 6 / 8 (for radiuses only)
1 Key for cupboard
Attention! Hand over the key to authorized personnel only.
1 Clamping belt with Ratchet 50 mm width, 1,5 m length
1 Z3A – laser (optional)
2 Saw blade 3900 x 13 x 0,65 with 4ZpZ
1 Clamping belt (optional)

Kunststoffschweißtechnik
Description of product Chapter 1
21.10.14 Working instructions WIDOS RS 315 Page 8 of 38
1.6. Wear parts
Pieces/Mach. Name Article No.
1 Saw blade 3900x13x0,65 with 4ZpZ 540315
1 Drive wheel D300 (replacement) 5431213
3 Deflection pulley D300 (replacement) 5431214
2 Roller for saw blade guidance 6202 2 Z (rear) L6202Z
4 Roller for saw blade guidance 6201 2 Z (sidewards) L6201Z
1 Battery for line laser Z3A Mignon
Option for small radii:
1 Saw blade 3900 x 10 x 0,65 with 6Z/Z KL
(optional for small radii) 5403151
4 Saw blade guide roller (lateral) 6201 2 Z with large
bezel (optional for small radii) 54312221

Kunststoffschweißtechnik
WIDOS Einsteinstr. 5 Phone +49 (0) 71 52 99 39 - 0
W. Dommer Söhne GmbH D-71254 Ditzingen-Heimerdingen Fax +49 (0) 71 52 99 39 - 40
Website: www.widos.de Email: info@widos.de
21.10.14 Working instructions WIDOS RS 315 Page 9 of 38
2. Safety rules
The base for the safe handling and the fault-free operation of this machine is the knowledge of
the basic safety indications and rules.
These working instructions contain the most important indications to run the machine
safely.
The safety indications are to be followed by all persons working with the machine.
2.1. Explanation of the symbols and indications
In the working instructions, following denominations and signs are used for dangers:
This symbol means a possible danger for the life and the health of persons.
The non-respect of these indications may have heavy consequences for the
health.
This symbol means a possible dangerous situation.
The non-respect of these indications may cause light injuries or damages on
goods.
This symbol means a possible dangerous situation by moving parts of the
machine
The disrespect of these indications may cause heavy crushing of parts of the
body resp. damages of parts of the machine.
This symbol means a possible danger of injury by sawing chips.
It is obligatory to wear safety glasses
This symbol means a possible risk of injury by noise exceeding 80 dB (A).
Ear protection is obligatory
This symbol gives important indications for the proper use of the machine.
The non-respect of these indications may conduct to malfunctions and
damages on the machine or on goods in the surrounding.
Under this symbol you get user tips and particularly useful information.
It is a help for using all the functions on your machine in an optimal way and
helps you to make the job easier.
The regulations for the prevention of accidents are valid (UVV).

Kunststoffschweißtechnik
Safety rules Chapter 2
21.10.14 Working instructions WIDOS RS 315 Page 10 of 38
2.2. Obligations of the owner
The owner is obliged only to let persons work at the machine who
Know about basic safety and accident prevention rules and are instructed in the handling of
the machine, as well as who
Have read and understood the safety chapter of this manual and certify this by their
signature.
The safety-conscious working of the staff has to be checked in regular intervals.
2.3. Obligations of the operator
All persons who are to work at the machine are obliged before working:
To follow the basic safety and accident protection rules;
To have read and understood the safety chapter and the warnings in this manual and to
confirm by their signature that they have well understood them;
To inform themselves about the functions of the machine before using it.
2.4. Measures of organization
All equipment required for personal safety is to be provided by the owner.
All available safety equipment is to be inspected regularly.
2.5. Information about safety precautions
The working instructions have to be permanently kept at the place of use of the saw.
They are to be at the operator's disposal at any time and without much effort.
In addition to the manual, the common valid and the local accident protection rules and
regulations for the environmental protection must be available and followed.
All safety and danger indications on the machine have to be in a clear readable condition.
Every time the machine changes hands or is being rent to third persons, the working
instructions are to be sent along with and their importance is to be emphasized.
2.6. Instructions for the staff
Only skilled and trained persons are allowed to work on the saw.
It must be clearly defined who is responsible for transport, mounting and dismounting,
starting the operation, setting and tooling, operation, maintenance and inspection, repair
and dismounting.
A person who is being trained may only work on the saw under supervision of an
experienced person.

Kunststoffschweißtechnik
Safety rules Chapter 2
21.10.14 Working instructions WIDOS RS 315 Page 11 of 38
2.7. Dangers while handling the machine
The band saw WIDOS RS 315 is constructed according to the latest technical standard and
the acknowledged technical safety rules. However, dangers for the operator or other persons
standing nearby may occur. Also material damages are possible. The saw may only be
operated:
According to the purpose-oriented usage;
In safety technical impeccable status.
Disturbances which may affect the safety of the machine must be cleared immediately.
2.8. General safety indications
A working area without obstacles around the machine and a non-slip and plane floor are of
basic importance for a safe operation.
The working area must be well lightened and free of waste (cuttings, residues).
Before starting the operation, make sure that the saw blade is tightened properly and that
the band guidance is adjusted correctly, as well as that the door situated over the saw blade
guidance is closed.
During the operation, wear tight clothes only.
Keep the handles dry and free from oil and grease.
Wear safety glasses and ear protection during the cutting operation.
Do not wear rings, bracelets etc.
Protect long hair by means of a sufficient headgear.
During work, the pipe must be clamped firmly.
Never remove oddments as long as the saw is working.
In case of irregular running behaviour of the saw blade, switch off the saw immediately and
check the saw blade for correct course, correct tension and possible fractures.
Replace dull or badly set saw blades by orderly installed saw blades.
Before elimination of any disturbances, and before any repair or maintenance work, switch
off the saw and disconnect in any case the mains plug.
Only skilled persons are allowed to work at electrical appliances.
The electrical equipment of the machine has to be checked regularly. Loose
connections and damaged cables have to be replaced or repaired
immediately.
Protect the machine from wetness and humidity.
System parts and pressure hoses should be depressurized before beginning
any repair work.
There is a danger of injuring the eyes by compressed air coming out suddenly.
Replace damaged pneumatic hoses immediately.
Make a visual inspection of the pneumatic hoses before each work beginning.

Kunststoffschweißtechnik
Safety rules Chapter 2
21.10.14 Working instructions WIDOS RS 315 Page 12 of 38
2.9. Specific dangers
2.9.1. Danger of cutting or catching clothes
You can cut yourself during sawing or exchanging the saw blade!
Before starting the cutting operation, take care that no person is standing in the
operating, swiveling or cutting area.
Always wear safety gloves and pull the power plug when exchanging the saw
blade.
Never remove cuttings or remains as long as the saw blade is running.
Before you start the cutting check the pipe is clamped
Attention! The saw still runs for appr. 3 sec after having released the push
button!
2.9.2. Danger of stumbling over pneumatic and electric wires
Make sure that no person has to step over the wires. Lay the wires in such a way
that the danger is kept to a minimum. Do not squeeze, buckle etc. the wires.
2.9.3. Danger of crushing upon mounting / dismounting the circular
cutting device
There may be an increased danger of crushing and jamming upon mounting or
dismounting the circular cutting device.
Please make sure that the device is secured by a belt against an unintentional
swiveling.
2.9.4. Danger of injury by cutting chips / remains
You could injure your eyes by flying around chips
Do wear safety glasses during cutting!
2.9.5. Danger of injury by noise
Noise exceeding 80 dB (A) may occur; during sawing it is obligatory to wear ear
protection!

Kunststoffschweißtechnik
Safety rules Chapter 2
21.10.14 Working instructions WIDOS RS 315 Page 13 of 38
2.10. Maintenance and inspection, repair
All maintenance and repair work have to be basically performed with the machine in
off position.
During this, the machine has to be secured against unauthorized switching on.
2.11. Remaining risks
Even at purpose-oriented use and even if following all the relevant safety instructions, the
following risks are remaining due to the construction conditional on the purpose of operation of
the machine:
Injuries caused by cuttings or parts of the workpieces which are squirting away.
2.12. Warranty and liability
Fundamentally our "General Sales and Delivery Conditions" are valid.
They are at the owner's disposal latest when signing the contract.
Guarantee and liability demands referring to personal injuries or damages on objects are
excluded if they are caused by one or several of the following reasons:
Not using the machine according to the prescriptions;
Inexpert transport, mounting, starting, operating, and maintenance of the machine;
Running the machine with defective or not orderly mounted safety appliances;
Ignoring the information given in this manual;
Structural modifications on the machine without permission;
Unsatisfactory checking of parts of the machine which are worn out;
Repairs performed in an inexpert way;
In case of catastrophes and force majeure.

Kunststoffschweißtechnik
WIDOS Einsteinstr. 5 Phone +49 (0) 71 52 99 39 - 0
W. Dommer Söhne GmbH D-71254 Ditzingen-Heimerdingen Fax +49 (0) 71 52 99 39 - 40
Website: www.widos.de Email: info@widos.de
21.10.14 Working instructions WIDOS RS 315 Page 14 of 38
3. Functional description
Basically, the international and national process guidelines are to be
followed.
Set the saw to the desired angle and secure it by clamping / fixing.
Lay the pipe on the pipe support and clamp it (check the distance to the saw blade!).
Switch on the optional line laser.
After having finished all settings, switch on vacuum and saw motor by button or foot switch
(optional).
At the same time, move the saw blade manually towards the pipe and cut the pipe.
After completion of the cutting process release the push button / foot switch (saw blade motor
switches off) and push the saw backwards.
Switch off the vacuum again.
Switch off the line laser.
Unclamp the pipe or push it into a new position and cut the second angle.

Kunststoffschweißtechnik
WIDOS Einsteinstr. 5 Phone +49 (0) 71 52 99 39 - 0
W. Dommer Söhne GmbH D-71254 Ditzingen-Heimerdingen Fax +49 (0) 71 52 99 39 - 40
Website: www.widos.de Email: info@widos.de
21.10.14 Working instructions WIDOS RS 315 Page 15 of 38
4. Operating and indicating elements
(Saw with optional right pipe support) (Saw with optional circular cutting device)
No. Name / Function
1 Pipe clamping device (chapter 4.5) (optional)
2 Left pipe support
3 Hand lever for the pipe clamping (optional)
4 Pressure regulator for the pipe clamping (optional)
5 Swiveling device of the saw with 2 clamping levers (chapter: 4.3)
6 Stop bolt for limitation upon swiveling, right + left
7 Saw arm
8 Line laser showing the later cutting course (chapter: 4.4) (optional)
9 Handle to guide the saw, with pushbutton for the cutting
10 Saw blade covering (chapter: 4.4)
11 Deflection pulley with saw blade tensioner
12 Handle to swivel the saw
13 Saw blade
14 Nozzle for vacuum
15 Driving motor
16 Right pipe support (optional)
17 Circular cutting device (optional) (chapter: 4.5.2)
18 Connecting cable with plug
19 Foot switch (optional)
20 Set screw, 4 pieces
1
2
3
4
7
8
9
10
6
12
13
5
17
19
18
20
15
11
16
14

Kunststoffschweißtechnik
Operating and indicating elements Chapter 4
21.10.14 Working instructions WIDOS RS 315 Page 16 of 38
4.1. Elements to lock the saw arm
The saw arm features below lug 2with two drill holes. The locking bolts are stored in the lug.
The revolving plate features lug 1and 3.
In order to make straight cuts, you must not lock the saw arm.
The locking device from lug 2to lug 3is meant for the optional circular cutting.
Lock lug 2to one of the drill holes in the basic plate (chapter 4.3) in case you want to cut an
angle.
Lock lug 2to lug 1in case you want to transport the saw.
4.2. Saw blade guiding
The saw blade runs through the saw blade guidings above and below. The saw blade is
guided in each of the front rollers, and is unilaterally held to the rear by a larger roller.
The side without large roller has an eccentric bolt
and can thus adjust the band guiding.
The adjusted position is correct if both rollers in the
front can just be turned against each other and the
saw blade is smoothly running.
In order to adjust the guiding rollers detach the
counter nut of the eccentric bolt by flat wrench SW
24. Now you can turn the eccentric bolt by Allen
wrench SW 6 until the rollers do have the desired
gap. Secure this position by tightening the counter
nut.
You may also use a smaller saw blade (optional) with 10 mm width in order to cut
small radii.
For this purpose you must replace the guide rollers by the ones with large bezels
(see chapter: 6.6.1).
Counter nut for eccentric bolt
Eccentric bolt
Roller for support to the rear
Saw blade guiding rollers
Lug 1
Lug 3
Lug 2

Kunststoffschweißtechnik
Operating and indicating elements Chapter 4
21.10.14 Working instructions WIDOS RS 315 Page 17 of 38
4.3. How to set the swiveling angle
In order to turn the saw arm, release both clamping levers and pull out the locking pins.
Now turn the saw arm onto the requested angle.
Lock the angle by the locking pins (right image).
Additionally tighten both clamping levers.
4.4. Linear laser (optional) and saw blade covering
At the upper saw blade guiding, there is the (optional)
linear laser. It indicates the cutting course on the
clamped pipe.
Adjust the light beam in a way that it is vertically
located above the saw blade.
Example: in case the saw is in position 90°, the light
beam also indicates 90° on the scale. Turn on/off the
laser via the sliding switch.
The laser is operated by a mignon battery.
In order to replace the battery, detach the upper
cover, change the battery and close the cover again.
Clamping lever
Pointer to read the angle
Disk with engraved scale
Drill holes for
angle setting Locking pin
Sliding switch
Star screw
Saw blade covering

Kunststoffschweißtechnik
Operating and indicating elements Chapter 4
21.10.14 Working instructions WIDOS RS 315 Page 18 of 38
Please take the exact setting and further details from the separately enclosed working
instructions of the laser, type: ZA3.
The saw blade covering is recommended to be adjusted in a way that the lower edge of the
cover is a bit above the pipe to be cut.
In order to displace the covering, detach the star screw and push the saw blade covering
to the desired height. Afterwards, tighten the star screw again.
4.5. Clamping pipe
4.5.1. Pipe clamping device (optional)
How to set the clamping device:
Release clamping lever 2 of the telescopic clamping arm and push the telescope in / out
(arrow) of the clamping arm; arrest the desired position with clamping lever 2.
In order to swing the clamping arm, release clamping lever 1, swing the clamping arm into
the desired position and lock it with clamping lever 1.
The pipe clamper is turning horizontally.
Upon clamping it is turned manually onto the pipe center.
The height of the clamping arm can be adjusted by means of the control slide. For that
purpose release the screw in the control slide, bring the clamping arm to the desired height
and tighten the screw again.
By turning the lever of the manual valve, the pipe clamping fixture is moved up and
downwards and the pipe is clamped.
Regulate the speed of opening and closing the pipe clamping fixture at the respective exit
air - one-way flow restrictor.
Set the desired clamping pressure at the pressure regulator.
Clamping arm pullout
Clamping lever 2 for the displacement of the clamping
arm pullout
Clamping lever 1 to swing the clamping arm
Pipe clamping fixture with handle for the guiding
Adjusting ring
Pipe support
Control slide with hand lever for the clamping
Pressure regulator
Exit air restrictor for the opening
Exit air restrictor for the closure

Kunststoffschweißtechnik
Operating and indicating elements Chapter 4
21.10.14 Working instructions WIDOS RS 315 Page 19 of 38
4.5.2. How to clamp the pipes with clamping belt (optional)
Lay the pipe onto the pipe support (take care of the
saw blade distance!) and clamp it by the clamping
belt.
Lay the clamping belt around the pipe and the pipe
support. Lead the belt from the inside to the
outside through the opening of the ratchet and
tighten it (see illustration). Clamp the pipe firmly
onto the pipe support by moving several times the
grip of the ratchet into direction of the arrow. The
ratchet snaps in at both ends.
Attention! Do not deform pipes with thin walls.
The belt can be unclamped again by pulling the
safety gripper into direction of the ratchet grip.
Safety gripper
Ratchet grip

Kunststoffschweißtechnik
Operating and indicating elements Chapter 4
21.10.14 Working instructions WIDOS RS 315 Page 20 of 38
4.6. Circular cutting device (optional)
On the circular cutting device, it is possible to cut pipes from OD 50 mm up to OD 200 mm,
with radii from 50 mm up to 240 mm that are needed for the branch welding of main pipes at
90° / 60° / 45°.
4.6.1. Clamping belt for circular cutting
.
Put the clamping belt around the pipe and through the slots of the prism.
In order to tension, pull the belt at its loose end in a way that it surrounds the pipe slightly;
afterwards move the belt lock in arrow direction.
Move the ratchet handle repeatedly in arrow direction thus tightening the pipe. The ratchet
snaps into place at both ends.
By pulling the retaining clip into direction of the ratchet handle, you may release the belt again.
Support with swivelling prism
Swivel plate
Saw blade
Center of rotation
Hand lever to move the swivel plate
Retaining clip
Ratchet handle
Table of contents
Other widos Saw manuals