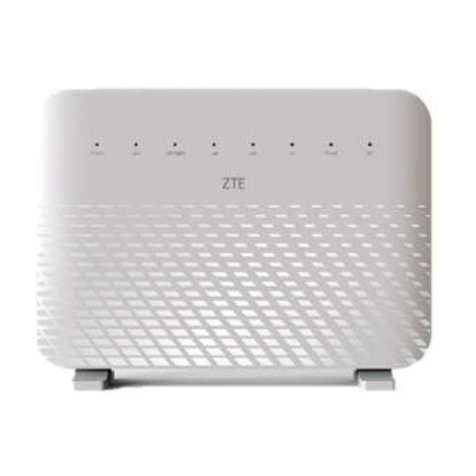
Zte H3140 Programming manual

H3140
Home Gateway
Maintenance Management Guide
Version:V1.0
ZTE CORPORATION
ZTE Plaza, Keji Road South, Hi-Tech Industrial Park,
Nanshan District, Shenzhen, P.R.China
Postcode: 518057
Tel: +86-755-26771900
URL: http://support.zte.com.cn
E-mail: [email protected]

LEGAL INFORMATION
Copyright 2021 ZTE CORPORATION.
The contents of this document are protected by copyright laws and international treaties. Any reproduction
or distribution of this document or any portion of this document, in any form by any means, without the
prior written consent of ZTE CORPORATION is prohibited. Additionally, the contents of this document
are protected by contractual confidentiality obligations.
All company, brand and product names are trade or service marks, or registered trade or service marks,
of ZTE CORPORATION or of their respective owners.
This document is provided as is, and all express, implied, or statutory warranties, representations or
conditions are disclaimed, including without limitation any implied warranty of merchantability, fitness for
a particular purpose, title or non-infringement. ZTE CORPORATION and its licensors shall not be liable
for damages resulting from the use of or reliance on the information contained herein.
ZTE CORPORATION or its licensors may have current or pending intellectual property rights or applica-
tions covering the subject matter of this document. Except as expressly provided in any written license
between ZTE CORPORATION and its licensee, the user of this document shall not acquire any license
to the subject matter herein.
ZTE CORPORATION reserves the right to upgrade or make technical change to this product without
further notice.
Users may visit the ZTE technical support website http://support.zte.com.cn to inquire for related infor-
mation.
The ultimate right to interpret this product resides in ZTE CORPORATION.
Statement on the Use of Third-Party Embedded Software:
If third-party embedded software such as Oracle, Sybase/SAP, Veritas, Microsoft, VMware, and Redhat
is delivered together with this product of ZTE, the embedded software must be used as only a component
of this product. If this product is discarded, the licenses for the embedded software must be void either
and must not be transferred. ZTE will provide technical support for the embedded software of this product.
Revision History
Revision No. Revision Date Revision Reason
R1.0 2021-12-07 First edition
Serial Number: SJ-20210621164956-009
Publishing Date: 2021-12-07(R1.0)

Contents
1 Safety Precautions....................................................................................... 1
2 Product Overview.........................................................................................4
2.1 Package Check........................................................................................................ 4
2.2 Product Specifications..............................................................................................4
2.3 Hardware Description...............................................................................................5
2.4 Hardware Connection.............................................................................................10
3 Configuration Preparation......................................................................... 12
3.1 Configure the IP Address of the Computer............................................................12
3.2 Login....................................................................................................................... 13
4 Configure the Internet................................................................................15
4.1 Check the Status....................................................................................................15
4.1.1 Check the Ethernet Status........................................................................ 15
4.1.2 Check the 3G Status.................................................................................17
4.2 Configure the WAN................................................................................................ 17
4.2.1 Configure the Ethernet Connection...........................................................17
4.2.2 Configure the 3G.......................................................................................20
4.3 Configure the QoS................................................................................................. 22
4.3.1 Configure the QoS Global Parameters..................................................... 23
4.3.2 Configure the QoS Classification.............................................................. 23
4.4 Configure the Security............................................................................................25
4.4.1 Configure the Firewall Level..................................................................... 25
4.4.2 Configure the Filter Criteria.......................................................................27
4.4.3 Configure the Local Service Control......................................................... 30
4.4.4 Configure the ALG.................................................................................... 33
4.4.5 Configure the DMZ....................................................................................34
4.4.6 Configure the Port Forwarding..................................................................34
4.5 Configure the Parental Controls.............................................................................36
4.6 Configure the DDNS.............................................................................................. 37
4.7 Configure the SNTP............................................................................................... 39
4.8 Configure the Mulitcast.......................................................................................... 40
4.8.1 Configure the IGMP.................................................................................. 40
4.8.2 Configure the MLD.................................................................................... 40
5 Configure the Local Network.................................................................... 42
I

5.1 Check the Local Network Status........................................................................... 42
5.2 Configure the WLAN.............................................................................................. 43
5.2.1 Configure the Basic Parameters of the WLAN..........................................43
5.2.2 Configure the Advanced Parameters of the WLAN...................................46
5.2.3 Configure the BSS Steering......................................................................48
5.2.4 Configure the Wi-Fi Scheduler..................................................................48
5.3 Configure the LAN................................................................................................. 49
5.3.1 Configure the LAN(IPv4)........................................................................... 49
5.3.2 Configure the LAN(IPv6)........................................................................... 52
5.3.3 Configure the eDNS0................................................................................ 56
5.4 Configure the Route............................................................................................... 56
5.4.1 Configure the Routing (IPv4).................................................................... 56
5.4.2 Configure the Routing (IPv6).................................................................... 59
5.5 Configure the FTP Server Feature........................................................................ 62
5.6 Configure the UPnP............................................................................................... 62
5.7 Configure the DMS................................................................................................ 63
5.8 Configure the DNS.................................................................................................65
6 Configure the VoIP..................................................................................... 66
6.1 Check the Status of VoIP.......................................................................................66
6.2 Configure the SIP Accounts...................................................................................67
6.3 Configure the Advanced Parameters of VoIP........................................................ 68
6.4 Configure the SIP Protocol.................................................................................... 70
6.5 Configure the Media...............................................................................................71
6.6 Configure the Fax.................................................................................................. 72
6.7 Configure the Digit Map......................................................................................... 73
6.8 Configure the POS.................................................................................................73
7 Configure the Management and Diagnosis............................................. 75
7.1 Check the Device Status....................................................................................... 75
7.2 Configure the Account Management..................................................................... 76
7.3 Configure the Login Timeout..................................................................................77
7.4 Configure the System Management...................................................................... 77
7.4.1 Configure the Device Management...........................................................77
7.4.2 Upgrade Software......................................................................................78
7.4.3 Configure the User Configuration Management........................................79
7.5 Configure the Mirror function................................................................................. 80
7.6 Configure the TR069 function................................................................................ 81
7.7 Manage the Log..................................................................................................... 83
II

7.8 Network Diagnosis................................................................................................. 86
7.9 Check the ARP Table............................................................................................ 88
7.10 Check the MAC Table..........................................................................................88
7.11 Configure the IPv6 Switch....................................................................................89
7.12 Configure the Ethernet WAN............................................................................... 90
8 Troubleshooting......................................................................................... 91
III

IV

Chapter 1
Safety Precautions
Note
Before using the device, read the following safety precautions. ZTE bears no liability to
the consequences incurred by violation of the safety instructions.
Usage Cautions
Read all the safety cautions carefully before using the device.
Only use the accessories included in the package, such as power supply adapter.
Do not extend the power cord, otherwise the device will not work.
The power supply voltage must meet the requirements of the device input voltage (
The voltage fluctuation range is less than 10%).
Keep the power plug clean and dry to prevent any risk of electric shock or other dan-
gers.
Disconnect all the cables during a lightning storm to prevent the device from dam-
age.
Power off and unplug the power plug when the device is not in use for a long time.
Do not attempt to open the covers of the device. It is dangerous to do so when the
device is powered on.
Power off and stop using the device under the conditions such as, abnormal sound,
smoke, and strange smell. Contact the service provider for maintenance if the device
is faulty.
Environment Requirements
Ensure proper ventilation to the device. Place the device away from direct sunlight.
Keep the device ventilated and dry. Never spill any liquid on the device.
Do not place any object on the device to prevent any deformation or damage to the
device.
Do not place the device near any source of heat or water.
SJ-20210621164956-009 | 2021-12-07(R1.0) 1

H3140 Maintenance Management Guide
Keep the device away from any household appliances with strong magnetic or elec-
tric fields, such as microwave oven and refrigerator.
Cleaning Requirements
Before cleaning, power off the device, and unplug all the cables connected to the de-
vice, such as power cable, optical fiber, and Ethernet cable.
Do not use any liquid or spray to clean the device. Use a soft dry cloth.
Environment Protection
Do not dispose the device or battery improperly.
Observe the local regulations about the equipment disposal or treatment.
Restrictions in the 5 GHz Band
According to Article 10(10) of Directive 2014/53/EU, the packaging shows that this ra-
dio equipment will be subject to some restrictions when placed on the market in Bel-
gium(BE), Bulgaria(BG), the Czech Republic(CZ), Denmark(DK), Germany(DE), Esto-
nia(EE), Ireland(IE), Greece(EL),Spain(ES), France(FR), Croatia(HR), Italy(IT),Cyprus(
CY), Latvia(LV), Lithuania(LT), Luxembourg(LU), Hungary(HU), Malta(MT), Nether-
lands(NL), Austria(AT), Poland(PL), Portugal(PT), Romania(RO), Slovenia(SI), Slo-
vakia(SK), Finland(FI), Sweden(SE), Turkey(TR), Norway(NO), Switzerland(CH), Ice-
land(IS), and Liechtenstein(LI).
The WLAN function for this device is restricted to indoor use only when operating in the
5150 to 5350 MHz frequency range.
RF Exposure Information
The Maximum Permissible Exposure (MPE) level is calculated based on a distance of
d=20 cm between the device and the human body. To maintain compliance with the RF
exposure requirement, a separation distance of 20 cm between the device and the hu-
man should be maintained.
EU Declaration of Conformity
Hereby, ZTE Corporation declares that the radio equipment type H3140 is in compliance
with Directive 2014/53/EU, The full text of the EU declaration of conformity is available
at the following Internet address:
http://support.zte.com.cn/support/cer/EU
2 SJ-20210621164956-009 | 2021-12-07(R1.0)
1 Safety Precautions
Environmental Information
The equipment you purchased has required the extraction and use of natural resources
for its production. It may contain substances that are hazardous to people’s health and
to the environment. To avoid putting such substances into our environment and to re-
duce pressure on our natural resources, we ask that you reuse or recycle your end-of-
life equipment by using an accredited electronics take-back system.
The symbols below indicate that this product should be reused or recycled and not sim-
ply discarded. Please locate and use an appropriate reuse and recycling site.
If you need more information on collection, reuse and recycling systems, contact your lo-
cal or regional waste administration. You may also contact your equipment provider for
more information on the environmental performances of these products.
D.Lgs. 03.09.20 n.116.
Raccolta differenziata famiglia di materiale PLASTICA.
Verifica le disposizioni del tuo comune.
SJ-20210621164956-009 | 2021-12-07(R1.0) 3
Chapter 2
Product Overview
Table of Contents
Package Check................................................................................................................. 4
Product Specifications.......................................................................................................4
Hardware Description........................................................................................................5
Hardware Connection......................................................................................................10
2.1 Package Check
After unpacking the H3140 product, check that the following items are complete.
Name Quantity
H3140 1
Power adapter 1
RJ-45 Ethernet cable 1
User manual 1
Note
The list is only for reference. The actual contents may vary from the list.
If any item is found to be wrong, missing, or damaged, contact your service provider.
Keep the package and all the items in good condition if you want to replace the product.
2.2 Product Specifications
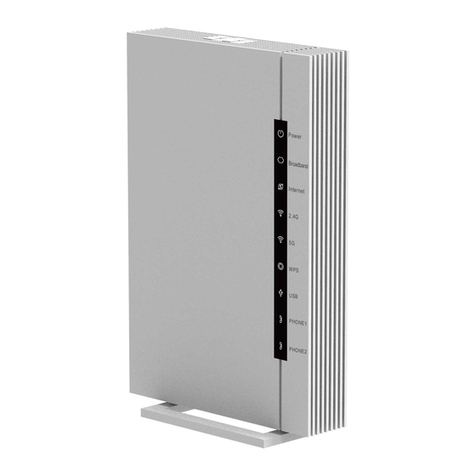
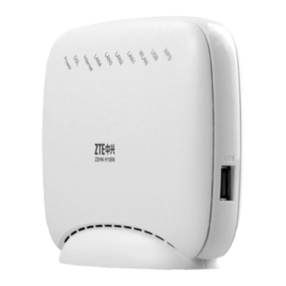
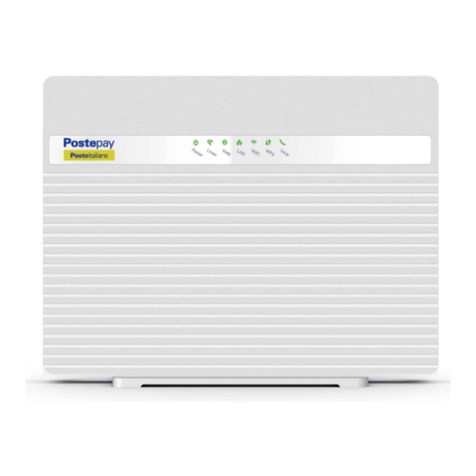
The H3140 product is a new generation home gateway device with 802.11AX Wi-Fi
(2.4GHz, 5GHz), which provides High Speed Internet, IPTV and Voice over IP services
through the GE or Fiber(SFP) uplink. Those services are delivered by the gateway on
your home network to the PCs, STBs, phones, gaming devices and so on via the inte-
grated interfaces: Ethernet, Wi-Fi, phone ports.
4 SJ-20210621164956-009 | 2021-12-07(R1.0)
2 Product Overview
Technical Specifications
Dimension 274 mm (H) × 212 mm (W) × 35 mm (D)
Certification CE Certification and Wi-Fi Certification
Power adapter Input: AC 100 V – 240 V, 50 Hz/60 Hz
Output: DC 12.0 V, 2.5 A
Environment Requirements
Operation temperature 0 °C – 40 °C (32 °F – 104 °F)
Operation humidity 5% – 95% (non-condensing)
Wi-Fi Radio Specifications
Radio Frequencies Maximum Output Power
Wi-Fi 2.4 GHz band:
(2400 – 2483.5) MHz
EIRP < 20 dBm
Wi-Fi 5 GHz band:
(5150 – 5350) MHz
EIRP < 23 dBm
Wi-Fi 5 GHz band:
(5470 – 5725) MHz
EIRP < 30 dBm
Note
Please use the power adapter provided by the manufacturer.
2.3 Hardware Description
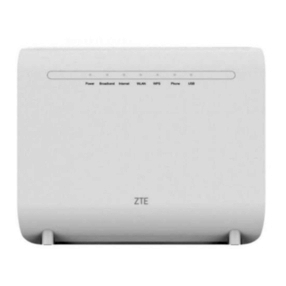
Front panel
Figure 2-1 shows the front panel of the H3140, and Figure 2-2 shows the indicators.
SJ-20210621164956-009 | 2021-12-07(R1.0) 5
H3140 Maintenance Management Guide
Figure 2-1 The Front Panel
Figure 2-2 The indicators
Indicator Status Description
Fixed green All services are available. At lease one wireless radio is
enabled.
Fixed red One or more subscription services are currently unavail-
able.
Green flashing Operator is configuring the modem remotely.
Fixed orange Bootloader in progress.
Flashing orange The device is upgraded remotely or locally.
Power
Off The device is powered off.
Fixed green Connected to the WAN device.Linea (LAN4/
SFP) Off Not connected to the WAN device.
6 SJ-20210621164956-009 | 2021-12-07(R1.0)
2 Product Overview
Indicator Status Description
Fixed green Internet connection succeed.
Flashing green Connected to the Internet, when sending / receiving data.
Web
Off No internet connection.
Fixed green At lease one wireless interface is enabled, no wireless ac-
tivity.
Flashing green At lease one wireless interface is enabled, wireless activi-
ty in progress.
WiFi
Off Both 2.4G and 5G wireless interfaces are disabled.
Fixed green Client registered correctly via WPS.
Fast Flashing green Process error or session overlap is detected.
WPS
Slow flashing green WPS registration in progress.
Fixed green At least one active network device is connected to the
Ethernet switch.
Flashing green At least one active network device is connected to the
Ethernet switch and is in the process of sending / receiv-
ing data.
LAN
Off There are no active Ethernet devices connected to the
Ethernet switch.
Fixed green The VoIP telephone service is active.
Flashing green The VoIP telephone service is active and there are activi-
ties in progress.
Voce
Off The VoIP telephone service is not active or is not included
in your subscription.
Side panel
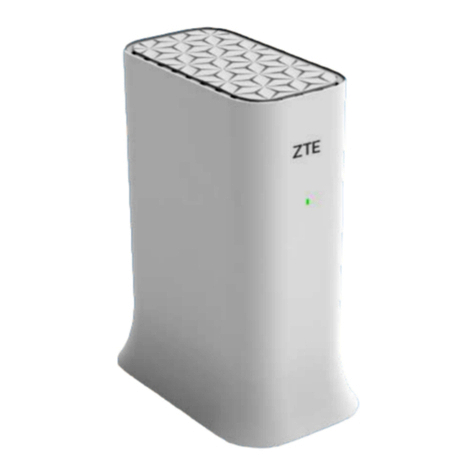
Figure 2-3 shows the interfaces on the side panel of the H3140.
SJ-20210621164956-009 | 2021-12-07(R1.0) 7
2 Product Overview
Figure 2-4 The Rear Panel
Interface/Button Function
WiFi WLAN switch , it is used to turn on / off the WLAN.
WPS WPS Push Button.
Reset During power ON period, hold on this button for more than 5 seconds to
reset the current settings to the factory default setting, and then the sys-
tem restarts automatically.
On/Off Power switch, to power on or power off the device.
Power Power supply port, It is connected to the power adapter.
Tel1
Tel2
RJ-11 port, it is used to connect to the analog telephone.
USB2 USB 2.0 host port, it is used to connect to USB storage device.
LAN1-LAN3 RJ-45 port, it is used to connect the modem to computer , STB or other
network devices.
LAN4/WAN RJ-45 port, it is used to connect to the uplink Ethernet access network
Fibra Optical port, it is used to connect to the uplink PON network.
SJ-20210621164956-009 | 2021-12-07(R1.0) 9
H3140 Maintenance Management Guide
2.4 Hardware Connection
Figure 2-5 shows the devices that are connected to interfaces of the H3140.
Figure 2-5 Cable Connection
After the devices are connected to the H3140 device, press the power button. When the
corresponding indicators on the front panel are On, you can enjoy various services pro-
vided by the service provider.
The factors affecting the wireless network coverage range include the location of the
product, distance between the product and a wireless terminal, number of obstacles, ob-
stacle material and density, and interference source. It is recommended that you place
the product in accordance with the following principles to maximize the strength of wire-
less signals.
The product should be far away from the objects affecting wireless signal propaga-
tion, for example, an object with a high reflectivity such as a metallic object or a mir-
ror.
The product should be far away from an electrical appliance with a strong magnet-
ic or electric field, for example, a microwave oven, a refrigerator, a wireless router, a
cordless phone, or a Bluetooth product.
10 SJ-20210621164956-009 | 2021-12-07(R1.0)

2 Product Overview
The product should be installed on the same floor as the applied area.
Do not put other objects on the product. Try to reduce the number of obstacles be-
tween the product and a wireless terminal.
Horizontally place the product in the middle of the applied area and do not put it in a
corner.
Do not place the product at a high position while it is placed horizontally. The recom-
mended height is 1.2 to 1.5 meters.
SJ-20210621164956-009 | 2021-12-07(R1.0) 11

Chapter 3
Configuration Prepara-
tion
Table of Contents
Configure the IP Address of the Computer.................................................................... 12
Login................................................................................................................................ 13
This manual uses the Windows operating system as an example for describing how to
configure the H3140. Before configuring the H3140, you need to perform the following
operations:
Ensure that a crossover or straight-through Ethernet cable connects a computer to
the device.
Ensure that the TCP/IP configuration on the computer is correct.
Stop any firewall or other security software operating on the computer.
Disable the proxy setting of Internet Explorer.
3.1 Configure the IP Address of the Computer
Abstract
To log in to the H3140 on a computer, you need to set the IP address of the computer
to ensure that the IP address of the computer and the maintenance IP address of the
H3140 are in the same network segment.
Context
The default maintenance IP address of the H3140 is as follows:
IP address: 192.168.1.1
Subnet mask: 255.255.255.0
Default gateway: 192.168.1.1
Steps
1. Use an Ethernet cable to connect a local computer to the LAN interface of the
H3140.
12 SJ-20210621164956-009 | 2021-12-07(R1.0)

3 Configuration Preparation
2. On the local computer, double-click Local Area Connection and click Properties.
The Local Area Connection Properties dialog box is displayed.
3. Double-click Internet Protocol (TCP/IP). The Internet Protocol (TCP/IP) Proper-
ties dialog box is displayed. Set the IP address to 192.168.1.200, subnet mask to
255.255.255.0, and default gateway to 192.168.1.1.
4. Click OK.
Postrequisite
After setting the IP address of the computer, you can run the Ping command to ping the
IP address 192.168.1.1. If the ping operation is successful, it indicates that the TCP/IP
configuration is correct and the computer is properly connected to the H3140.
3.2 Login
Abstract
The H3140 provides a Web-based configuration and management system. You can en-
ter a specified IP address in the address bar of Internet explorer to access the system.
Prerequisite
A computer is directly connected to the H3140, and their IP addresses are in the same
network segment.
Steps
1. Open Internet explorer, and enter http://192.168.1.1 (default maintenance IP address
of the H3140) in the address field. Press the Enter key. The login page is displayed,
see Figure 3-1.
SJ-20210621164956-009 | 2021-12-07(R1.0) 13
Other manuals for H3140
1
Table of contents
Other Zte Gateway manuals

Zte
Zte ZXHN H1600 User manual

Zte
Zte ZXHN H267N User manual

Zte
Zte ZXHN H108N User manual

Zte
Zte ZXHN H198A User manual

Zte
Zte ZXHN H3600 Programming manual

Zte
Zte ZXHN F680 User manual

Zte
Zte ZXHN H2640 Programming manual

Zte
Zte ZXHN H268N User manual

Zte
Zte ZXHN H389A User manual

Zte
Zte ZXHN H6645P User manual