manuals.online logo
Brands
  1. Home
  2. •
  3. Brands
  4. •
  5. WIKE
  6. •
  7. Bicycle
  8. •
  9. WIKE 9032 User manual

WIKE 9032 User manual

Tools needed to assemble Bike:
-High table or Stand
-Set of Allen/Hex wrenches
-Cable cutters
-12mm & 15mm wrenches
-Grease
Thank you for purchasing a WIKE CARGO TRIKE!
Contents
Safety……………………..…………………………..….3
Connecting the frame…….……………………….4
Wheel Assembly……………………………………..5
Box & Handle Bar……………………………………6
Seat post and Saddle………………………………7
Final pre-ride check…………………………………8
Cargo Trike (9032) References
Fig.1
1. Handle bar
2. Gear shift
3. Box
4. Brake lever
5. Corner iron
6. Saddle
7. Seat Post
8. Seat Post clamp
9. Rear Light
10. Rear Fender
11. Rear 26’’ Wheel/Tire
12. Chain cover and chain
13. Rear Frame
14. Chain wheel and crank
15. Pedal
16. Front 20’’ Wheel/Tire
17. Brake Rotor
18. Brake Caliper
19. Front Fender
20. Front Frame
2.
Safety
Before you ride your bike for the first time, familiarize yourself with the
location and operation of both brakes and steering attributes
Always check to make sure that all nuts are secured each time before
you ride in order to make sure the box is stable
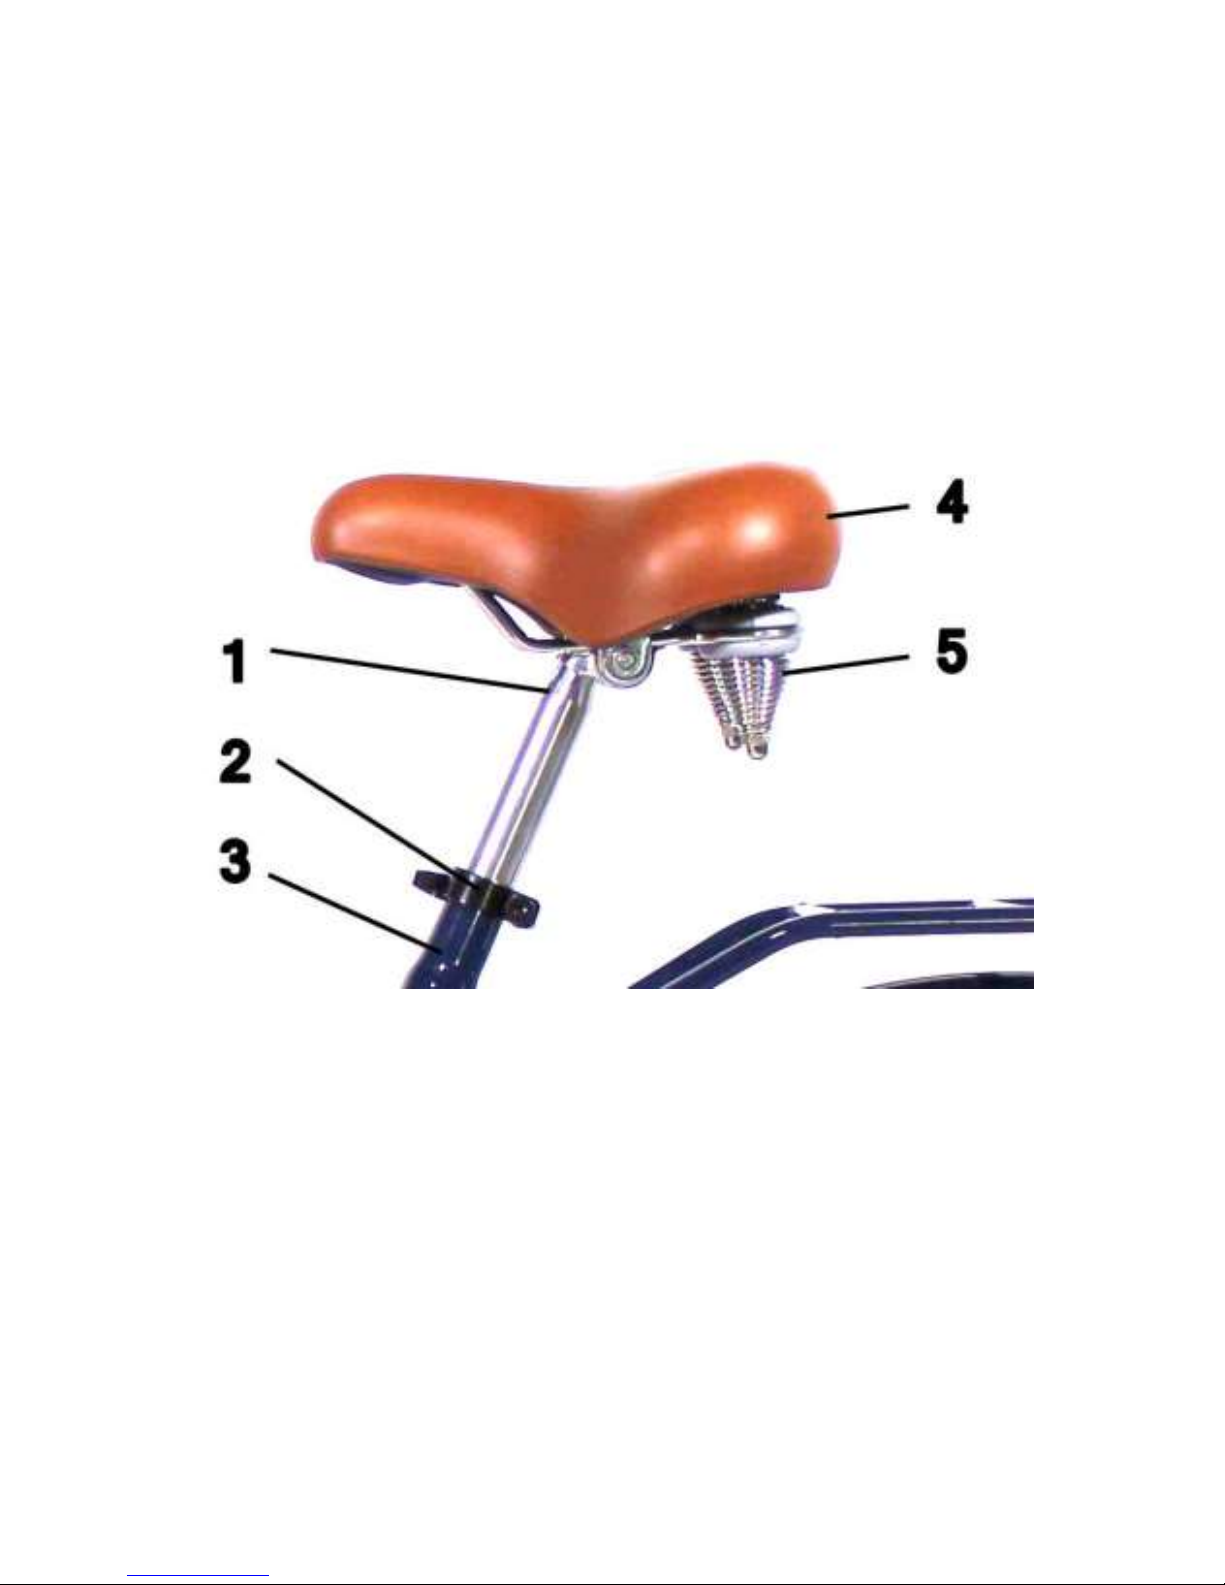
Make sure the seat post bolt is securely fastened and that the seat post
does not slip before you ride
Never operate the bicycle if the frame, wheels or quick releases are
damaged
Proper maintenance and adjustment of the box bicycle will greatly
increase riding safety and performance
Always check your tires for proper inflation (25-40psi) that is indicated
on the tire’s sidewall
Reflectors alone are not adequate for riding at night. Front and rear
lighting systems are recommended to increase visibility
Always wear a helmet when riding the bicycle
The bicycle is designed for users of all sizes. However box bikes should
not be operated by children and young adults
Remember to comply with all bicycle safety laws and use common sense
especially in adverse weather condition
Wike takes no responsibility for accidents resulting from failure to
comply with all bicycle safety laws, careless driving or improper
maintenance of your box bicycle
3.
Step 1
You will need a large area (preferably with a table/ workbench)
Remove contents from boxes
Preparing the #20 FRONT FRAME (Fig 1.)
1. Fix the fenders to each side of the Front Box Frame with the
black curved brackets provided.
2. Using a piece of wood place the bearing caps into slots (bottom
& top) of frame (small & large side) and bang with a mallet
evenly in flush with frame. Make sure caps are open facing
outwards so that coned bearing will slide in properly.
3. Pack grease into both bearings (grease not included)
4. After greasing bearings place bottom bearing back onto Bike
Frame. While propping up the Bike Frame line up steering stem
with Front Box Frame slidding into the slot. Add top bearing, add
locking washer, thin washers and M18 cap nut. Tighten in Place!
5. Align the two damper rods on each side of pivot and assembly.
Using washers, nuts and bolts provided (ADD loctite to all
threads!!)
NOTE: Do NOT over tighten damper rods.
4.
Assemble the wheel sets
1. Assemble the fenders on the sides of the front frame as shown in
in Figure 3.
2. After screwing the disc rotor to the wheels. Place the front
wheels in the drop-outs (frame slots) and tighten axle bolts on
the two sides of front frame and tighten lock nut.
3. Put the disc brake over the rotor and fasten to the mounts. To
align have brake loosely fitted to mount, while brake is engaged
tighten bolts with spacers provided (Figure 4.)
4. Lateral adjustment of brake pads is achieved by turning the red
adjustment knob (for mechanical disc brakes only!!)
5. Tube valves need either a Presta or shredder compatible bicycle
pump to inflate
5.
Assemble the box
1. Attach loosely with bolts the 4 corner irons to front frame
2. Assemble sides to corners
3. Tighten all bolts at completion of assembly of four sides
4. Place floor in box and bolt (x2) to front frame
Assemble handlebar (U-Type)
1. Assemble the handle bar as shown below in figure 6.
2. Adjust to preferred height and lock in place at sides.
3. Ensure brake and shifter cables do not interfere with steering
6.
Saddle and Pedal Assembly (Figure 8.)
1. Insert seat post into the seat and lock it with nut as shown in
figure 8.
2. Put other end of post into the frame seat tube with seat post
clamp and tighten to desired height
1. Seat Post 2. Seat Post Clamp 3. Seat Post (Frame) 4. Saddle
5. Elastomers/Shock absorbers
3. Grease and attach pedals to crank arms. Right hand thread on
Right crank and left hand thread on left crank. Pedals must be
tightened completely.
7.
11-Point Pre-Ride Check
1. Tires are inflated to 25-40 psi
2. All Axle bolts are tightened and wheels are secured
3. Dampers are secured and moving smoothly
4. Brakes are properly adjusted and function
5. Safety Straps in riders in box are secured and fastened
6. Pedals are tight and secure
7. Front Frame is secured to Rear Frame
8. Children have helmets on and are properly adjusted
9. All bolts and nuts are tightened securely
10. Chain has been well lubricated
11. Lights and bell function properly
Contact Us
FACTORY SHOWROOM
79 Regal Road, Unit 14
Guelph, Ontario
N1K 1B6
8.00am to 3.00pm M-F
wike.ca
US and Canada Toll Free: 866-584-9452
Worldwide: 1-519-824-3869
Fax: 519-822-6152
7 days a week 8.00am to 8.00pm EST

Other WIKE Bicycle manuals

WIKE BOX BIKE User manual

WIKE

WIKE BOX BIKE User manual

WIKE CARGO TRIKE User manual

WIKE

WIKE CARGO TRIKE User manual

Popular Bicycle manuals by other brands

Gepida Reptila 1100 instruction manual

Gepida

Gepida Reptila 1100 instruction manual

Stromer ST3 user manual

Stromer

Stromer ST3 user manual

Motorino XMl owner's manual

Motorino

Motorino XMl owner's manual

WILDEWAY FW11 user manual

WILDEWAY

WILDEWAY FW11 user manual

PIHSIANG MACHINERY SUNRUNNER user manual

PIHSIANG MACHINERY

PIHSIANG MACHINERY SUNRUNNER user manual

Intense M 2022 Series manual

Intense

Intense M 2022 Series manual

SPIELWERK Deuba DBLR002 manual

SPIELWERK

SPIELWERK Deuba DBLR002 manual

HITWAY BK8 Quick operation guide

HITWAY

HITWAY BK8 Quick operation guide

Raleigh VOLT user manual

Raleigh

Raleigh VOLT user manual

RooDog Chic user manual

RooDog

RooDog Chic user manual

Dolmar AB-1816 instruction manual

Dolmar

Dolmar AB-1816 instruction manual

DC-Tri Commuter 2.3 owner's manual

DC-Tri

DC-Tri Commuter 2.3 owner's manual

Hercules PASERO Translation of the original operating instructions

Hercules

Hercules PASERO Translation of the original operating instructions

Lapierre CARBON owner's manual

Lapierre

Lapierre CARBON owner's manual

Ecoped CITYGO user manual

Ecoped

Ecoped CITYGO user manual

HUYSER C10 manual

HUYSER

HUYSER C10 manual

lalaloom BLUE BUBBLE BIKE instruction manual

lalaloom

lalaloom BLUE BUBBLE BIKE instruction manual

DAHON JETSTREAM P8 - 2009 manual

DAHON

DAHON JETSTREAM P8 - 2009 manual

manuals.online logo
manuals.online logoBrands
  • About & Mission
  • Contact us
  • Privacy Policy
  • Terms and Conditions

Copyright 2025 Manuals.Online. All Rights Reserved.