Wilderness Systems Helix MD User manual

Wilderness Systems, 575 Mauldin Road, Suite 200, Greenville, SC 29607 Rev. 04/16
Powered by
MD
MOTOR DRIVE
TM
QUICK START GUIDE
Congratulations on your purchase of the Wilderness Systems Helix MDTM Motor Drive.
This quick start guide covers the basic connections and operation of the Helix MD Motor Drive. For your safety and to ensure
your highest level of enjoyment from the Helix MD it is imperative that you read and comply with the full digital Owner’s Manual
prior to use. Please visit WildernessSystems.com for the complete Owner’s Manual.
The Helix MD Motor Drive is intended for use in Wilderness Systems kayaks that utilize the Flex Pod OS and the associated Flex
Pod OS scupper.
The Helix MD Motor Drive is a result of our partnership with Torqeedo and is powered by the Torqeedo 403 Ultralight Motor. The
Torqeedo Ultralight is state-of-the-art in terms of motor, battery, and propeller technology. It has been designed and manufactured
with the utmost care and with a special focus on comfort, user-friendliness, and safety.
Caution:
• Read the full Digital Owner’s manual prior to use. Available at WildernessSystems.com.
• Raise the Motor Drive when launching or coming ashore to avoid damage.
• Be aware of your environment when operating the Motor Drive.
• Avoid collisions and impacts to the system.
• Only run the motor when propeller is under water.
• Become familiar with all Motor Drive controls.
• Flush the unit with fresh water after use in salt or brackish water.
• Always carry a paddle and PFD with you.
• Performance is optimal with a Rudder Steering System.
SET UP
Securing the Battery to the Housing Lid
Align and place the battery into the battery footprint on the lid of the Helix MD housing. The face of the battery with the single
cable port should be facing the widest end of the Helix MD housing lid. Ensure that the hold down levers and the webbing
handle straps are positioned to allow the battery clear access to the lid footprint. Once the battery is seated turn the hold down
levers 90° to the locking position and tighten down with the round thumb knobs to secure the battery in place. Velcro the carry
handle straps together over the top of the battery.

Wilderness Systems, 575 Mauldin Road, Suite 200, Greenville, SC 29607 Rev. 04/16
Connecting the Motor Drive Power Cord to the Battery
Locate the Motor Drive power port on the face of the battery with the single port on it. The Motor Drive cable utilizes an alignment
guide tab to help align the connector pins. Align the male tab and pins to the corresponding female connections on the battery
port. Ensure the threading and connection is seated properly to avoid cross threading and tighten the connection.
Connecting the Throttle Cord to the Throttle
Locate the throttle connection port on the underside of the throttle. The throttle cable utilizes an alignment guide tab to help
align the connector pins. Align the female tab and pins to the corresponding male connections on the throttle port. Ensure the
threading and connection is seated properly to avoid cross threading and tighten the connection. Secure the cord in the slot
under the two tabs of the metal plate and rout the cord out of the cut-out at the end of the throttle base.
Connecting the Throttle Cord to the Battery
Locate the throttle connection port. It is the bottom port on the face of the battery with two connection ports. The cord utilizes
an alignment guide tab to help align the connector pins. Align the male tab and pins to the corresponding female connections
on the battery port. Ensure the threading and connection is seated properly to avoid cross threading and tighten the connection.
Installing the Motor Drive in Your Kayak
To install the Helix MD unit unlatch the Flex Pod OS and remove from pod scupper and store away. Ensure your kayak is in a
sucient depth of water to accommodate the full depth of the installed Helix MD unit (approx. 26”). Align the Helix MD propeller
to a vertical position and lower the unit though the pod scupper with propeller facing to the stern of the kayak. Once you have
the Helix MD unit fully deployed and seated within the pod, use the latching buckles to secure the unit to the pod.

Wilderness Systems, 575 Mauldin Road, Suite 200, Greenville, SC 29607 Rev. 04/16
Removing the Motor Drive from Your Kayak
The Helix MD is equipped with a prop alignment system that will align the propeller to a vertical position when the system is to
be raised from the pod scupper. Disconnect the key from the throttle (See operations section). While the Helix MD is still fully
deployed in the pod scupper, locate the pull ring on the right side of the housing lid. To engage prop alignment system, pull up
firmly until it stops and then release. Do not yank. Unlatch the Helix MD from the pod and slowly remove the unit. If the propeller
did not align properly, reseat the Helix MD in the pod and try again (do not engage the prop alignment system while the motor
drive is running).
OPERATION
Controls
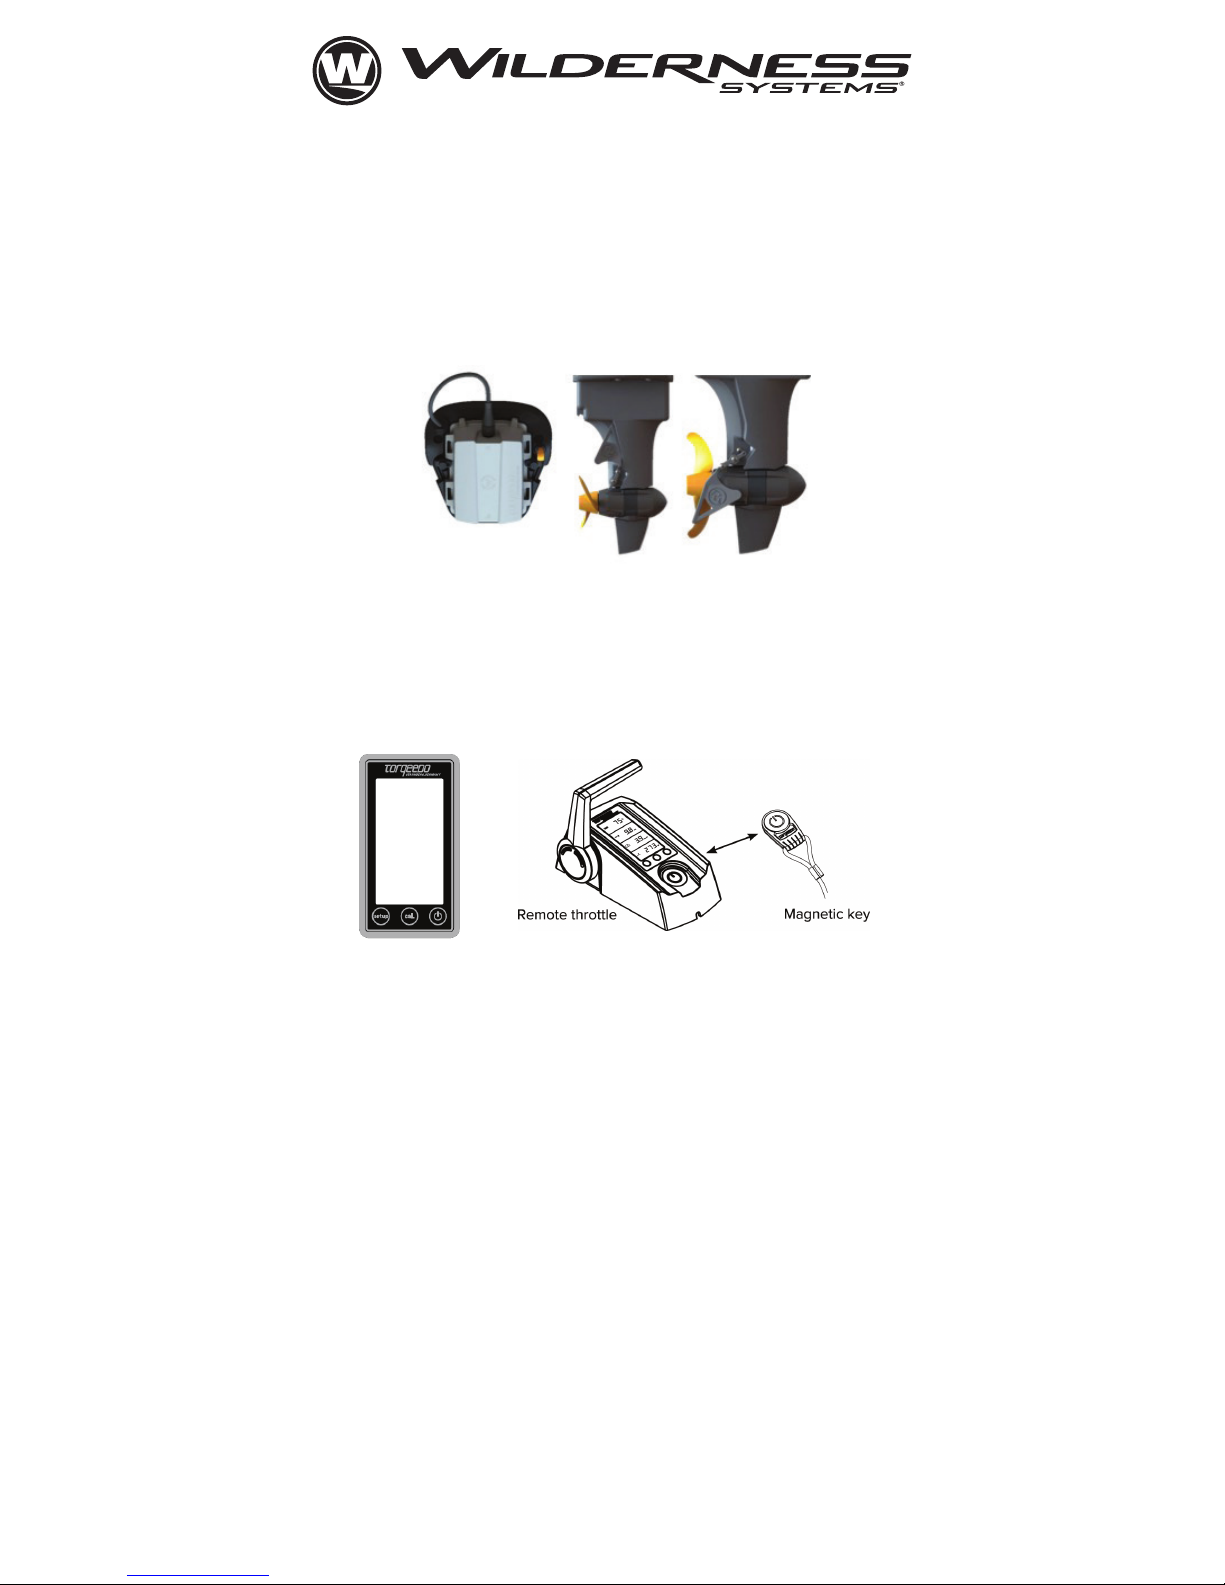
The remote throttle is equipped with an integrated display, on-board computer and three buttons.
• Press the “on/o button” for 1 second to turn the motor on.
• Press the “on/o button” for 3 seconds to turn the motor o.
The remote throttle is equipped with a magnetic key with an o/o function. The motor only works if you place the magnetic
key supplied on the proper groove on the remote throttle lever (see drawing). If the magnetic key is removed the motor stops.
You can only start the motor again if you first replace the magnetic key and then move the remote throttle lever to the middle
(neutral) position.
Control the Drive Power by Adjusting the Remote Throttle Lever:
• Forward movement of the remote throttle lever means the kayak moves forward.
• Backward movement of the remote throttle means the kayak moves backwards.
• The middle (neutral) position corresponds to the stop position.
Use the “setup” button to set the units for the display. You enter the menu by pressing the “setup” button for 3 seconds.
First you can select the units in which the remaining range is displayed. Press the middle button to select between kilometers,
American miles, nautical miles, and hours. You confirm your selection by pressing “setup” again. You then enter the speed
indicator setting. You can choose between kilometers per hour, miles per hour, and knots. The selection is made again by
pressing the middle button. You confirm your selection and leave the setup menu again by pressing the “setup” button again.
The “cal” label on the middle button stands for “calibration”. If the display shows a relevant error message you can recalibrate
the motor with the aid of this button. See the complete Owner’s Manual for more information on error codes.

Wilderness Systems, 575 Mauldin Road, Suite 200, Greenville, SC 29607 Rev. 04/16
Charging the Battery
The charging system consists of the charging power source with attached cord and a separate cord with wall plug and female
power source connection. Connect the female end of the separate cord to the male port of the charging source. Connect the
wall plug to a wall outlet and then connect the charging cord to the top port on the face of the battery with two connection ports.
You can charge the battery without the remote throttle cable being inserted. If the remote throttle is connected with the battery
the current charging status in percent and “charging” is displayed in the topmost field on the display.
Wilderness Systems
575 Mauldin Road Suite 200
Greenville, SC 29607
T (888) 525-2925
WildernessSystems.com
Table of contents
Other Wilderness Systems Boating Equipment manuals
Popular Boating Equipment manuals by other brands

DockCraft
DockCraft The DockSider 400 Series Assembly, installation and operating instructions

B&G
B&G H5000 Pilot Quick reference guide

Wema
Wema GPS Speedo installation instructions

Ultraflex
Ultraflex UC130-SVS Installation and maintenance manual

Aerial
Aerial FreeRide installation guide

TEMO
TEMO 450 user manual