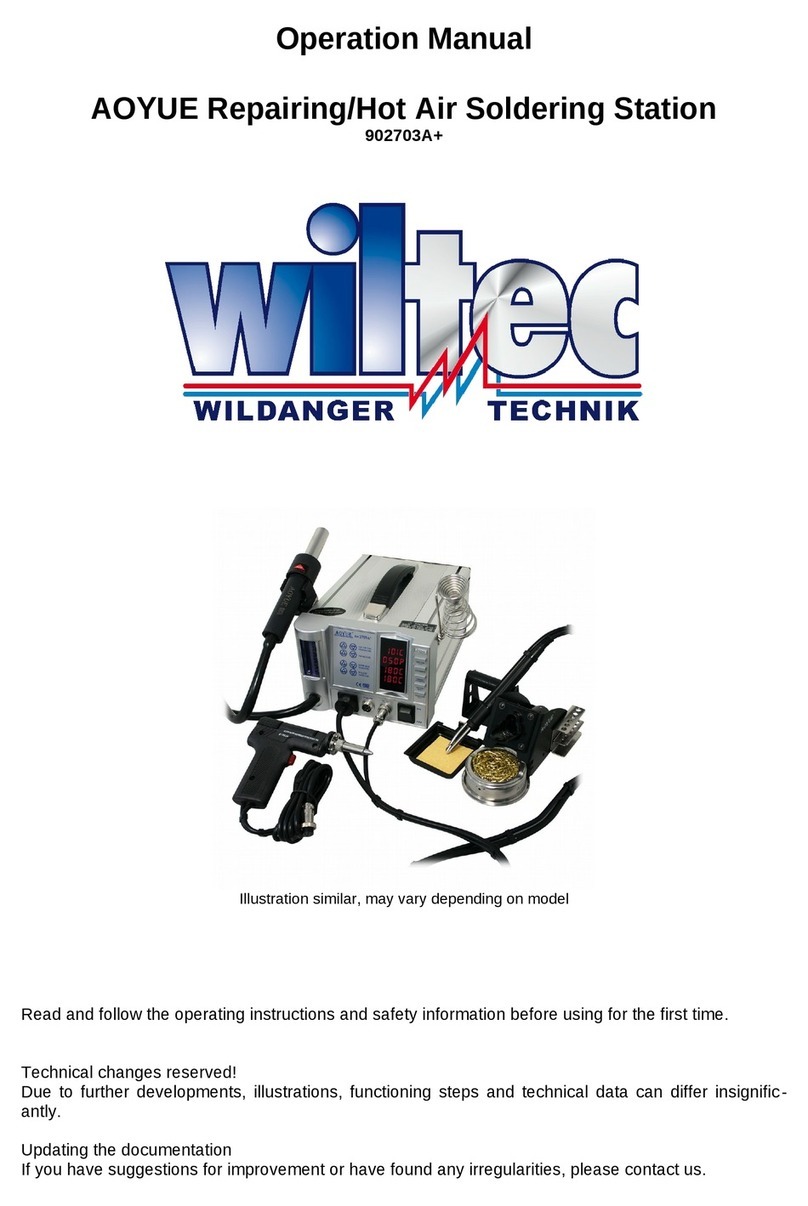
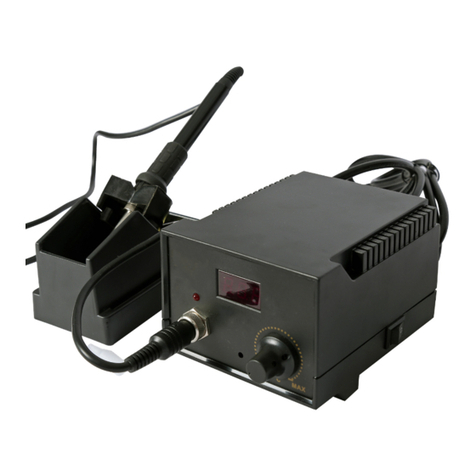
WilTec AOYUE Int9378 PRO Series User manual

User’s Manual
AOYUE Intelligent Soldering Station Int9378 PRO Se-
ries
909378pro
Illustration similar, may vary depending on model
Please read and follow the operating instructions and safety information prior to initial operation.
Technical changes reserved!
Illustrations, functional steps, and technical data may deviate insignificantly due to continuous further
developments.

© by WilTec Wildanger Technik GmbH Item 909378pro Page 2
http://www.WilTec.de
http://www.aoyue.eu 12 2022-1
http://www.teichtip.de
The information contained in this document may alter at any time without prior notice. No part of this
document may be copied or otherwise duplicated without prior written consent. All rights reserved.
WilTec Wildanger Technik GmbH cannot be held liable for any possible mistakes in this operating man-
ual, nor in the diagrams and illustrations shown.
Although WilTec Wildanger Technik GmbH has made every possible effort to ensure that this operating
manual is complete, accurate, and up-to-date, errors cannot be ruled out entirely.
If you have found an error or wish to suggest an improvement, we look forward to hearing from you.
Send us an e-mail to:
or use our contact form:
https://www.wiltec.de/contacts/
The most recent version of this manual in several languages can be found in our online shop:
https://www.wiltec.de/docsearch
Our postal address is:
WilTec Wildanger Technik GmbH
Königsbenden 12
52249 Eschweiler – Germany
To return your goods for exchange, repair, or other purposes, please use the following address. Atten-
tion! To allow for a trouble-free complaint or return, it is important to contact our customer service team
before returning your goods.
Retourenabteilung
WilTec Wildanger Technik GmbH
Königsbenden 28
52249 Eschweiler – Germany
E-mail: service@wiltec.info
Tel: +49 2403 55592–0
Fax: +49 2403 55592–15

© by WilTec Wildanger Technik GmbH Item 909378pro Page 3
http://www.WilTec.de
http://www.aoyue.eu 12 2022-1
http://www.teichtip.de
Introduction
Thank you for choosing to purchase this quality product. To minimise the risk of injury, we ask you to
always take some basic safety precautions when using this product. Please read this operating manual
carefully and make sure that you understand it.
Keep these operation instructions in a safe place.
General safety instructions
ATTENTION:
The use of this device is only allowed with a fault current protection switch with a triggering nominal
current up to 30 mA (according to VDE 0100 Article 702 and 738).
The device is not intended for use by persons (including children) with impaired or limited physical,
sensory, and mental abilities or lack of experience and/or real knowledge, unless they are supervised
by a person responsible for their safety or follow the instructions made by this person on how to correctly
use the device. Children should be supervised to ensure that they do not play with the device.
During operation, parts of the device have temperatures between 200 ℃ and 480 ℃. Therefore, per-
sonal injuries or material damage inside the work area might happen in case the unsoldering station is
not handled with care.
Obey the following principles when working with this device:
•After opening the parcel, check if every individual part of the device is in good condition or if you
can detect visible damage caused by transport. If there are damages visible, do not operate the
device, but immediately contact your vendor.
•Switch off the device and pull out the plug before moving it.
•Avoid exposing parts of the device to too high a mechanical stress (shocks, pushes, etc.).
ATTENTION:
•Perform a visual inspection of the device before every use. Do not use the device if the safety
appliances are damaged or worn out. Never override safety regulations.
•Only use the device accordingly to the intended purpose stated in this manual.
•You are responsible for the safety of the working zone.
•If the cable or the plug is damaged due to external influences, the cable must not be repaired,
but must be replaced with a new one.
•The voltage of 230 V AC indicated on the nameplate of the device must match the existent
mains voltage.
•Never lift, carry, or fix the device by using the power cable.
•Make sure that the electrical plug connection is protected from flood and moisture.
•Always unplug the device before working on it.
•Avoid exposing the device to direct jets of water.
•The user is responsible for complying with local safety and mounting regulations. If necessary,
ask a qualified electrician.
•In case of device failure, repairs can only be carried out by an electrician.
WARNING:
Read all safety precautions and instructions. Failure to obey the safety precautions and instructions
might cause an electric shock, a fire, and/or severe injuries. Keep all safety precautions and instructions
for future use.

© by WilTec Wildanger Technik GmbH Item 909378pro Page 4
http://www.WilTec.de
http://www.aoyue.eu 12 2022-1
http://www.teichtip.de
Electrical connection
The electrical connection is made to an earthed socket 230 V ~ 50 Hz, fuse min. 10 A.
Commissioning
•Place the device on a level and solid surface the temperature of which does not exceed 40 ℃.
At the operation site, the device must be in a horizontal position to work properly.
•Connect the device to the power supply.
Safety instructions
ATTENTION:
For your own safety, obey the following instructions, for otherwise material damage and/or personal
injuries might result:
•During operation, parts of this station can reach temperatures up to 480 ℃; therefore:
◦do not use the station near flammable gases, paper, or other flammable substances;
◦avoid touching hot parts of the station, for otherwise you might seriously injure yourself;
◦do not touch metallic pieces that are near the soldering tip.
•Overheating protection
◦The device is equipped with an automatic overheating protection that switches off the device
in case one of the temperatures is too high.
◦The device re-switches itself on as soon as its condition has normalised.
•Handle the device with care.
◦Never drop it, never expose it to shock/pushes!
◦The device contains fragile components that might be destroyed when not handled with
care.
•Disconnect the device from the mains before not using it for a longer period, if the power has
gone off, or before opening it.
•During soldering, vapours form that might be harmful. Only perform soldering inside a well-
ventilated work zone to avoid harmful accumulations.
•Do not modify the device in any way.
Description of the product
•The Aoyue Int9378 Pro Series is a high-performance multi-tool station with up to 75 W heating
power. Many different tools can be connected to it, e.g., micro-tweezers, sculpting tool, soldering
tip, T-series soldering iron, and LED soldering iron.
•Each tool is intelligently recognised by the station and the appropriate settings for the tool are
quickly made. All tools feature a fast-heating ceramic heater for quick response and heat recov-
ery.
•Intelligent functions and features such as the following are available: digital offset, auto wake-
up function, auto sleep function, auto tool detection, system lock, quick-jump function, temper-
ature scale selection, and LED light control.
Technical specifications
Intake voltage (V)
230
Size (㎜)
110 (W) × 98 (H) × 155 (D)
Weight (㎏)
1.5

© by WilTec Wildanger Technik GmbH Item 909378pro Page 5
http://www.WilTec.de
http://www.aoyue.eu 12 2022-1
http://www.teichtip.de
Max. power consumption (W)
75
Soldering iron
Power (W)
60
Temperature range (℃)
200–480
Heating element
Ceramic
Output voltage (V)
24
•Controlled by microprocessor
•Suitable for various tools: tweezer, sculpting tool, soldering tip, etc.
•Automatic detection of the tool connected
•Suitable for lead-free applications
•High-performance heating element for rapid heat recovery
•Large display with digital control
•Programmable sleep function with auto-sleep and auto-wake function
•Digital offset
•System lock function
•Quick access to preferred settings
•Switching between Celsius and Fahrenheit
Scope of delivery
1× soldering station
1× soldering iron
1× soldering iron holder 2660
1× power cable
1× user’s manual
Operational components
№
Name
№
Name
1
Display
4
Set button
2
Up/Down buttons
5
Socket for soldering iron
3
ON/OFF switch

© by WilTec Wildanger Technik GmbH Item 909378pro Page 6
http://www.WilTec.de
http://www.aoyue.eu 12 2022-1
http://www.teichtip.de
Instructions for use
Important:
•Make sure the device is on a level surface and that all heat-generating components are in their
designated holders.
•All switches must be off.
•All connections must be made properly.
Menu structure
Detected tool
Digital offset value (-70 to +70)
First quick-access setting (200–480)
Second quick-access setting (200–480)
Sleep timer (0–60 min), here set to 60 min
Locking function
Selection of Celsius or Fahrenheit scale
LED on/off for tools with LED
Save settings and exit
Exit without saving settings

© by WilTec Wildanger Technik GmbH Item 909378pro Page 7
http://www.WilTec.de
http://www.aoyue.eu 12 2022-1
http://www.teichtip.de
Commissioning
1. Plug the power cord into the socket on the back of the station.
2. Plug the power cord into an earthed wall outlet. The station is protected against electrostatic
discharge and must be earthed for full performance.
3. Make sure that the power switch is off before plugging or unplugging the soldering iron cord.
Otherwise, the circuit board may be damaged.
4. Assemble the soldering iron stand as shown.
5. Connect the soldering iron to the 8-pin output on the bottom right of the station.
6. Place the soldering iron on the soldering iron stand as shown.
7. Dampen the sponge with water, squeezing out excess water beforehand. Tips can be damaged
if used with a dry sponge.
8. The device is now ready for operation.
Setting the temperature
1. Switch the device on.
2. A number between 200 and 480 is shown on the display, indicating the set temperature.
3. The display panel then toggles and displays the actual temperature.
4. Set the desired target temperature by pressing the Up/Down buttons.
5. While the target temperature is being adjusted, the display shows the currently set target tem-
perature. After a few seconds, the display panel will switch to the actual temperature.
6. The temperature control range is from 200 ℃ to 480 ℃.
Setting the digital offset
The device is equipped with a digital offset function for tip adjustment. To set the tip temperature:
1. Set the desired working temperature.
2. Measure the temperature of the tip using an external thermometer with a thermocouple as sen-
sor. Make sure that the sensor of the external thermometer and the tip of the soldering iron can
keep sufficient contact. Wait for the display to reach the set temperature, then leave the tip on
the sensor for 60 s to measure the temperature correctly.
3. Press and hold the Set button to enter system configuration mode. Wait for the display to change
to [01], meaning “Current tool 01.”
4. Press the Set button again to enter the digital offset function. The display shows a number
preceded by an “A.” This means that the digital offset of the system is now being adjusted. A
display such as “A000” indicates that the digital setting is currently set to neutral.
5. Press the Up/Down buttons to change the digital offset. A number below zero indicates a down-
ward adjustment, a number above zero indicates an upward adjustment.
6. Adjust the value until the reading from the external temperature sensor and the set temperature
are the same.

© by WilTec Wildanger Technik GmbH Item 909378pro Page 8
http://www.WilTec.de
http://www.aoyue.eu 12 2022-1
http://www.teichtip.de
7. Repeatedly press the Set button until the display shows “SAVE.” Press the Up button to save
the value and exit system configuration mode.
8. The tip is now properly calibrated.
9. Saved settings remain saved and in effect unless changed by the user.
Quick access setting
The system has two adjustable quick access settings. The quick access functions allow the user to
easily jump to a previously set temperature. The two most commonly used temperatures must first be
stored in the system. With a simple press of two buttons, the system will automatically jump to these
pre-set temperature levels. To set these two quick access temperature levels:
1. Press and hold the Set button to enter system configuration mode.
2. Repeatedly press the Set button until the display shows a number preceded by a “b.” This
means that you can now set the first quick access value.
3. Select the desired quick access temperature by pressing the Up or Down button.
4. To set the second quick access value, press the Set button repeatedly until a number preceded
by a “C” appears. This means that the second quick access value can now be set.
5. Select the desired quick access temperature by pressing the Up or Down button.
6. To save the adjusted values, press the Set button repeatedly until the display shows “SAVE.”
Press the Down button to save the value and exit system configuration mode.
7. The two quick access values are now set and can now be called up as follows: the first quick
access value by pressing the Up button and the Set button at the same time, the second quick
access value by pressing the Down button and the Set button at the same time.
Up and Set button
First quick access value
b350 (pre-setting)
Down and Set button
Second quick access value
C430 (pre-setting)
Sleep function setting
The soldering iron is equipped with a vibration sensor. When the soldering iron is not moved, the system
starts counting down the idle time. A lowercase d is now displayed in the first digit, which means that
the system is preparing to enter sleep mode. Four dashes (“- - - -”) will appear on the display panel to
indicate that the system has entered sleep mode. To wake up the system, simply lift the soldering iron
or press any control button. The sleep countdown time can be set as follows:
1. With the device powered on, press and hold the Set button to enter the system configuration
mode.
2. Repeatedly press the Set button until a number preceded by a “t” or “t000” is displayed. This
means that you can now set the sleep countdown time.
3. The display “t000” means that the sleep function is currently switched off. To adjust the count-
down value, press the Up or Down button. The sleep countdown time is adjustable from 2 to
60 min.

© by WilTec Wildanger Technik GmbH Item 909378pro Page 9
http://www.WilTec.de
http://www.aoyue.eu 12 2022-1
http://www.teichtip.de
4. To save the adjusted values, press the Set button repeatedly until the display shows “SAVE.”
Press the Down button to save the value and exit system configuration mode.
System lock setting
The system lock function disables the setting of temperature and system configuration. The display
shows “SAFE” when the system lock function is on. To unlock the system, press and hold all three
buttons simultaneously for more than 15 s. To enable the system lock feature:
1. With the device powered on, press and hold the Set button to enter the system configuration
mode.
2. Press the adjustment button repeatedly until “LOFF” is displayed. This means that you can now
set the system lock.
3. “LOFF” means that the system lock feature is currently off. To activate the system lock, press
the Down button to switch the lock function to “LOn.”
4. To save the system lock settings and activate the lock, press the Set button repeatedly until the
display shows “SAVE.” Press the Down button to save the value and exit system configuration
mode.
5. “SAFE” will appear on the display, which means that the system lock is activated.
When the system lock is on, changes to the temperature and system settings are made impossible. The
system lock must first be unlocked to allow access to the system again. How to turn off the system lock
again:
1. With the device powered on, press and hold the Up button, the Set button, and the Down button
for more than 15 s.
2. The display changes from “SAFE” to the set temperature value when the system lock has been
released.
Selection of the temperature scale
The displayed temperature can be switched between the Celsius and Fahrenheit scale. To do this,
proceed as follows:
1. With the device powered on, press and hold the Set button to enter the system configuration
mode.
2. Press the adjustment button repeatedly until “℃” or “°F” is displayed. This means that the tem-
perature scale can now be adjusted.
3. “℃” means that the temperature is displayed in degrees Celsius. “°F” means that the tempera-
ture is displayed in degrees Fahrenheit. Press the Up or Down button to toggle between the two
temperature scales.
4. To save the temperature scale setting, press the Set button repeatedly until the display shows
“SAVE.” Press the Up button to save the value and exit system configuration mode.
The temperature display changes according to the selected scale. “F” / “###F” means the temper-
ature is displayed in degrees Fahrenheit, “C” / “###C” means the temperature is displayed in degrees
Celsius.
LED on/off
Only for tools with LED functionality. To toggle between on and off:
1. With the device powered on, press and hold the Set button to enter the system configuration
mode.
2. Press the Set button repeatedly until “POFF” is displayed. This means that the LED on/off set-
ting can now be configured. Press Up and Down button to choose between ON and OFF.
3. “OFF” indicates that the LED is off, “ON” indicates that the LED is on.

© by WilTec Wildanger Technik GmbH Item 909378pro Page 10
http://www.WilTec.de
http://www.aoyue.eu 12 2022-1
http://www.teichtip.de
4. To save the setting, press the Set button repeatedly until the display shows “SAVE.” Press the
Up button to save the value and exit system configuration mode.
Note: When the unit is in system configuration mode and you decide not to save the setting just
changed to system memory, press the Set button repeatedly until the display reads “CncL” (Cancel).
Press the Down button to exit system configuration mode without saving recent changes.
Maintenance
Tip temperature
High temperatures shorten tip life and can cause thermal shock to components. Always use the lowest
possible temperature when soldering. Standard temperature settings are 350 to 400 degrees Celsius.
Cleaning
Always clean the soldering tip before use to remove any solder or flux residue adhering to it. Use a clean
and damp cleaning sponge. Contamination on the tip has many adverse effects including reduced ther-
mal conductivity that contribute to poor soldering performance.
After use
Always clean the tip and re-coat it with fresh solder after use. This protects against oxidation and extends
the life of the tip.
Device care
Never leave the device idling for a long time in high temperatures. Use the auto sleep feature to save
energy and extend tip and heater life. If the device is not used for a long time, it is recommended to
switch off the device and unplug the power cord.
Tip inspection and cleaning
•Set the temperature to 250 ℃.
•As soon as the temperature has stabilised, clean the tip and check its condition. If it is much
worn or deformed, replace it.
•If the solder coated portion of the tip is covered with black oxide, apply fresh solder with flux and
clean the tip again. Repeat until all the oxide is removed, then coat the tip with fresh solder.
•Never file the tip to remove oxide.
•Residual oxide such as yellowing on the tip shaft can be removed with isopropyl alcohol.
Troubleshooting
1st problem: Device without power
1. Check if the device is switched on.
2. Check fuse. Replace with a fuse of the same type if blown.
3. Check power cord and make sure that it is properly connected everywhere.
4. Make sure that device is properly connected to power source.
2nd problem: Temperature does not increase
•1st case: Tip temperature does not increase, display shows “Err1”
Solution: The soldering iron is not or loosely connected to the main station. Insert and lock the
soldering iron firmly.
•2nd case: Soldering iron is correctly connected, display still shows “Err1”

© by WilTec Wildanger Technik GmbH Item 909378pro Page 11
http://www.WilTec.de
http://www.aoyue.eu 12 2022-1
http://www.teichtip.de
Solution: The heating element may be damaged. Replace heater or check soldering iron pin
wiring.
•3rd case: Soldering iron is connected correctly, display shows low temperature readings and
then changes to “Err2”
Solution: The heating element is damaged. Replace heater or check soldering iron pin wiring.
3rd problem: Soldering iron tip overheated
•Description: Soldering iron tip gets too hot.
Solution: The digital offset setting could be too high, resulting in an overheat protection case.
Repeat the steps under “Setting the digital offset” above. Make sure that the temperature is 480
℃ or less.
4th error: other error not mentioned here
Solution: Contact an authorised service centre.

© by WilTec Wildanger Technik GmbH Item 909378pro Page 13
http://www.WilTec.de
http://www.aoyue.eu 12 2022-1
http://www.teichtip.de
Regulations for waste disposal
The Waste Electrical and Electronic Equipment Directive (WEEE Directive, 2012/19/EU) of the EU was
implemented in the German law related to electrical and electronic equipment and appliances.
All WilTec electric devices that fall under the WEEE directive are labelled with the symbol of a crossed-
out wheeled rubbish bin. This symbol indicates that this electric device must not be disposed of with the
domestic waste.
WilTec Technik GmbH is registered with the German registration authority EAR (Stiftung Elektro-
Altgeräte Register) under the WEEE-registration number DE45283704.
Disposal of used electrical and electronic devices (in-
tended for use in the countries of the European Union
and other European countries with a separate waste
collection system for these devices).
The symbol on the packaging or the product itself indi-
cates that this product must not be treated as normal
domestic waste but must be disposed of at a recycling
collection station for electrical and electronic waste.
By disposing of this product correctly, you contribute to
the protection of the environment and the health of your
fellow people. Inappropriate disposal threatens the en-
vironment and health.
Material recycling helps to reduce the consumption of raw materials.
Additional information about the recycling of this product can be provided by your local commune, the
municipal waste disposal facilities, or the store where you purchased the product.
Address:
WilTec Wildanger Technik GmbH
Königsbenden 12 / 28
52249 Eschweiler Germany
Important Note:
Reproduction and any commercial use (of parts) of this operating manual, requires a written permission
of WilTec Wildanger Technik GmbH.
This manual suits for next models
1
Table of contents
Other WilTec Soldering Gun manuals