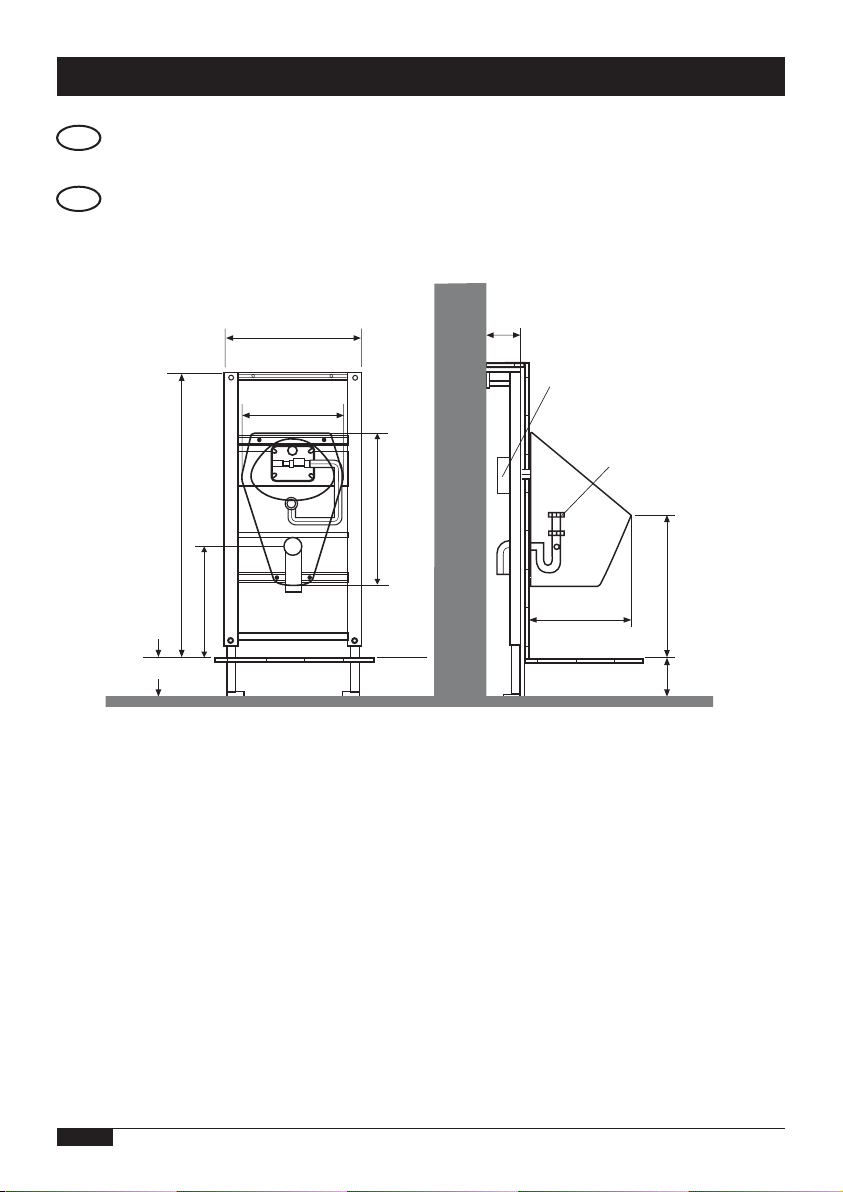
WimTec SanTec Inside Steel User manual

Montageanleitung
DE
Installation instructions
GB
INSIDE STEEL

2
Non-contact siphon-single
urinal control, invisible for
the user with stainless steel
urinal.
Adjustable main flushing and
24 h hygiene flushing.
For ready mounting suitable
for the assembly element
SanTec FIX INSIDE STEEL
or on SanTec wall recess
mounted box for walling in.
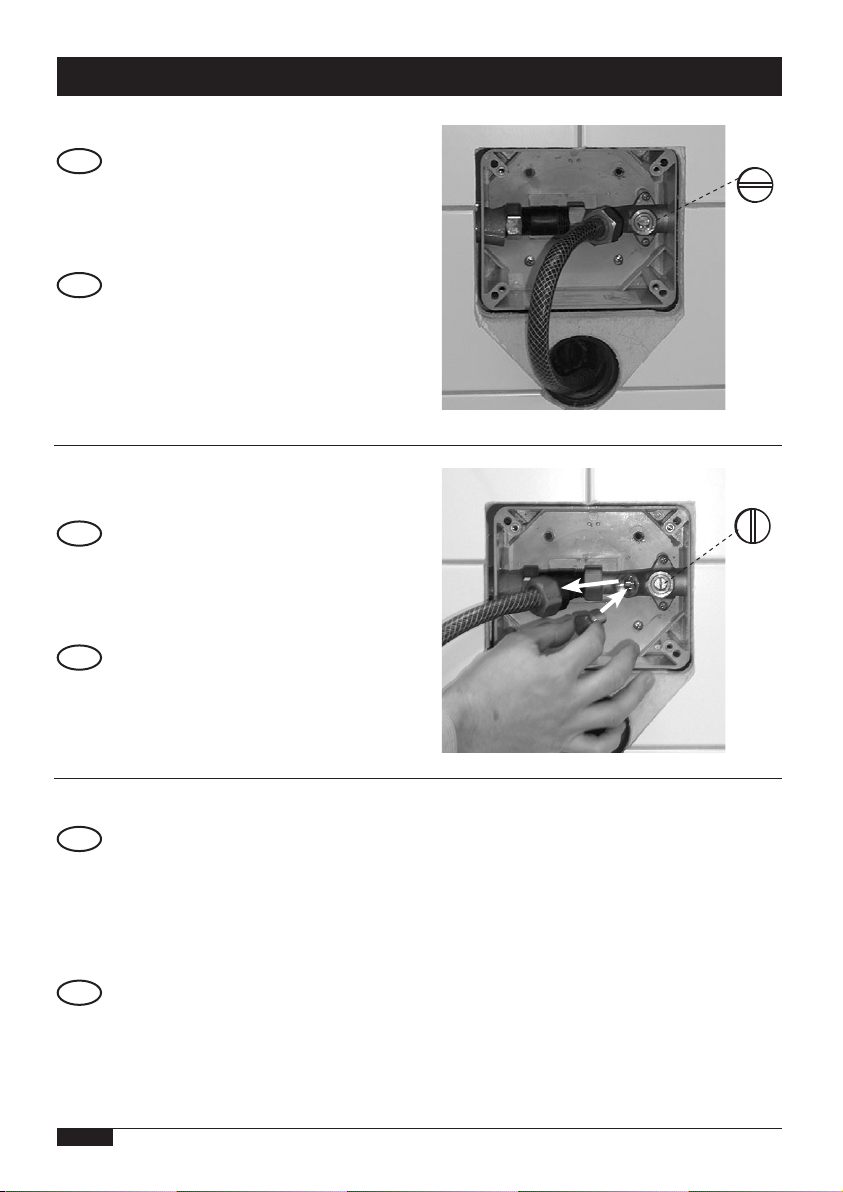
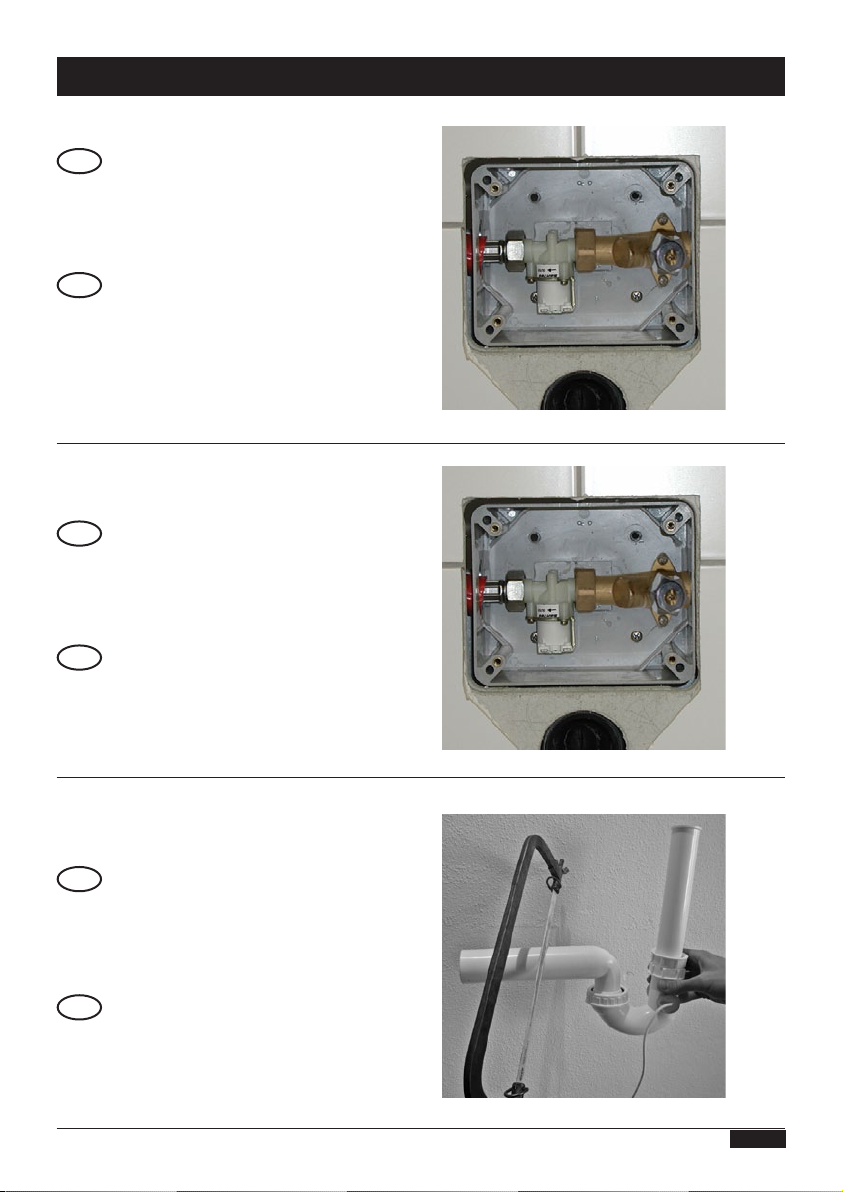
Consisting of:
Stainless steel urinal, sifon
with integraged sensor,
electronics and magnetic
valve.
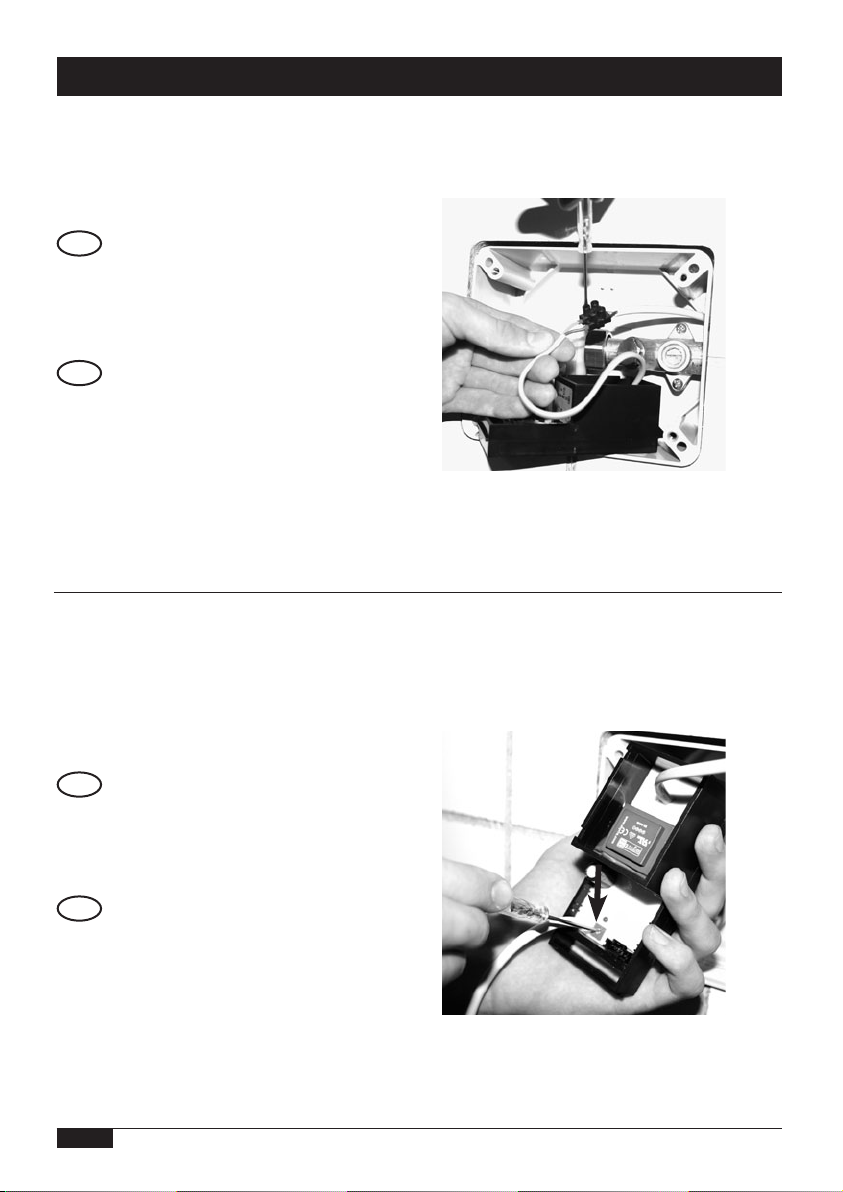
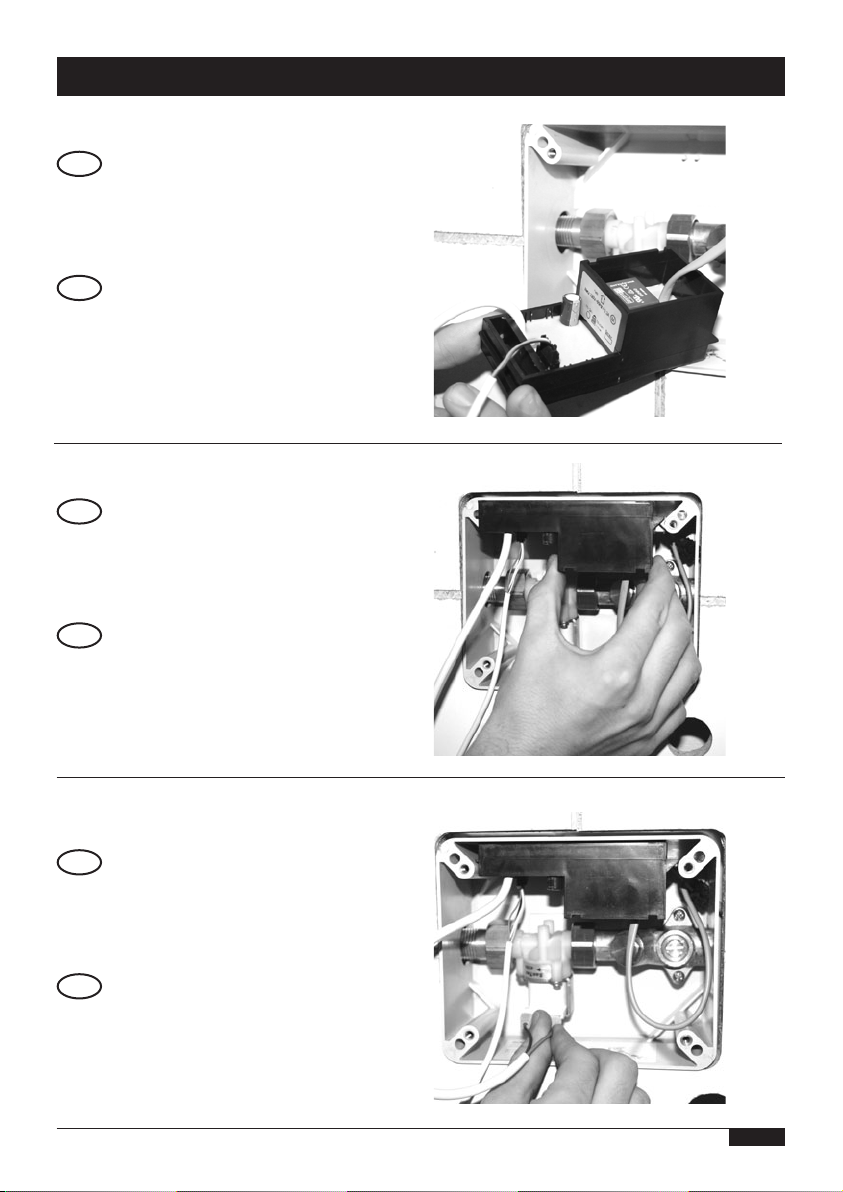
Mounting and installation must
be performed by licensed
craftsmen to DIN 1988, ÖVE/
ÖNORM E8001, and VDE
0100 Teil 701 standards only.
The mains supply lead is to be
led via a 2-pole mains switch
with at least a 3mm contact
gap and to be protected with
6A maximum!
When planning and installing
sanitary systems, the relevant
local, national, and internatio-
nal standards and regulations
must be complied with!
General installation
conditions at our webpage
www.wimtec.com.
Notes on Installation
GB
Berührungslose, für den
Benutzer unsichtbare Sifon-
Einzelurinalsteuerung mit
Edelstahl-Urinal. Einstellbare
Hauptspülung und 24 h
Hygienespülung.
Zur Fertigmontage passend
auf das Montageelement
SanTec FIX INSIDE STEEL
oder auf das SanTec
Rohbauset bei Einmauerung.
Bestehend aus:
Edelstahlurinal, Röhren-Sifon
mit integrierter Sensorik,
Steuerelektronik und
Magnetventil.
Die Montage und Installation
darf nur durch einen konzessi-
onierten Fachbetrieb, gemäß
DIN 1988, ÖVE/ÖNORM
E8001 sowie VDE 0100 Teil
701 erfolgen.
Die Netzzuleitung ist über
einen 2-poligen Hauptschalter
mit mindestens 3 mm
Kontaktöffnung zu führen und
mit maximal 6A abzusichern!
Bei der Planung und Errichtung
von Sanitäranlagen sind die
entsprechenden örtlichen,
nationalen und internationalen
Normen und Vorschriften zu
beachten!
Es gelten die „Allgemeinen
Installationsbedingungen“
unter www.wimtec.com.
Installationshinweise
D

3
Technische Daten, Technical Specifications
Betriebsspannung: 230 V / 50 Hz
Leistungsaufnahme: Standby: ca. 3 VA
Spülung: ca. 8 VA
Magnetventil: 24 V / 50 Hz
Hauptspülung: 1 - 10 s einstellbar
Fließdruck: 0,5 - 6 bar
Durchfluss: 0,3 - 0,7 l/sec. nach DIN 3265 redzierbar
Wasserzulauf: R 1/2“ IG
Abmessungen:
Wandeinbaukasten: 135 x 165 x 77 mm
Urinal: 605 x 360 mm
Operating voltage: 230V / 50 Hz
Power input: Standby: approx. 3 VA
flushing: approx. 8 VA
Magnetic valve: 24V / 50 Hz
Main flushing: 1 - 10 s adjustable
Flow pressure: 0.5 - 6 bar
Flow rate: 0.3 - 0.7 l/sec., can be red. acc. to DIN 3265
Water inlet: R 1/2“ IG
Dimensions:
Wall-recess-mounted box: 135 x 165 x 77 mm
Urinal: 605 x 360 mm
D
GB

4
Montage, Installation
D
GB
Verwendung eines Montageelements
Einbaumaße in mm
Use of assembly element
Mounting dimensions in mm
51,5
OK-FFB
OK-RFB
65 (Erwachsene)0-25
Zulauf
DN 15
Ablauf
DN 50
10-17,5
36
115
66,5
60,5
Sensorsifon
Steuerelektronik und
Ventileinheit sind
hinter dem Urinal-
becken montiert
35

5
Montage, Installation
11
Netzanschluss
230V/ 50Hz
herstellen (für den
Netzanschluss ist eine
Mantelleitung vorzusehen!)
2
2
Wasseranschluss
DN 15
herstellen
Hinweis
Um ein Ausspülen der Reinigungsmittel
in der Keramik zu vermeiden, sollte
bauseits eine zentrale Wasserabsperrung
bzw. Stromabschaltung für die Urinale
vorgesehen werden.
Establish connection to
water
(DN 15)
Establish connection to
mains (
230V/ 50Hz) (for
mains connection a hose
line has to be provided)
D
GB
1
1
2
2
Montageelement installieren, Netz- und Wasseranschluss herstellen.
Anschließend mit Gipskartonplatten doppelt beplanken und verfliesen.
Install assembly element. Establish connection to mains and water.
Afterwards cover with plaster boards (double) and tile.

6
Montage, Installation
Vorspülung mit Spülstück und
Schlauch durchführen
Carry out pre-flushing with
flexible pipe
Vorabsperrung schließen
Schmutzfilter einsetzen
Close shut-off valve
Insert dirt filter
Wasserzuleitung sowie Netzanschluss zu dem Urinal unterbrechen.
ACHTUNG!
Wasserzuleitung nicht öffnen bevor die Steuerung sowie die Keramik voll-
ständig fachgerecht montiert sind.
Shut-off water connection as well as mains connection to the urinal.
ATTENTION!
Do not open water connection before the control as well as the urinal cera-
mics are ready installed.
offen
open
zu
close
offen
open
zu
close
D
D
D
GB
GB
GB

7
Montage, Installation
Magnetventil mit Dichtungen lt.
Abbildung einsetzen.
Achtung! Flussrichtung bei MV
beachten.
Insert magnetic valve with gaskets
according to illustration.
Caution! Watch out for flow
direction at magnetic valve.
Vorabsperrung öffnen
(Wasserzuleitung zu Gerät abge-
sperrt lassen)
Open shut-off valve
(Water conduit to device has to
remain closed)
Länge des Sensorsifons an den Ablauf
anpassen
Amend length of the sensor-siphon to
the outlet.
D
D
D
GB
GB
GB

8
Montage, Installation
Establish connection to
mains
Falls gewünscht Spülzeit einstellen
(siehe Seite 10)
Adjust flushing time, if desired (see
page 10)
Netzanschluss herstellen.
D
D
GB
GB

9
Montage, Installation
Connect sensor-siphon to
electronic module
Elektronikmodul in den
UP-Kasten einschieben
Insert electronic module in
wall box
Magnetventil anschließen
Connect magnetic valve
Sensorsifon am
Elektronimodul anstecken
D
D
D
GB
GB
GB

10
Montage, Installation
Sensorsifon einstecken
Insert sensorsiphon
Becken aufsetzen.
Achtung - Kabel nicht einklemmen!
Put on the ceramics.
Attention! Do not pen in the sensor-
cable!
Hauptwasserabsperrung öffnen, Strom einschalten - Betriebsbereit
Open main water connection, turn on mains supply - ready to operate
D
D
D
GB
GB
GB

11
Montage, Installation
Funktion prüfen: mit Eingabe von 1l
Wasser erfolgt eine Spülung
Check function: by pooring 1l water
into urinal a flushing takes place.
Wasserdichte Silikonverfugung bei
Bedarf rund um das Edelstahlurinal
herstellen.
Optional: establish a water-proof
silicon-grout around the stainless
steel urinal.
D
D
GB
GB

12
Spülzeit einstellen 1-10 s
Adjust flushing time 1-10 s
Spülzeiteinstellung, Adjustment of flushing time
Fließdruck
Pressure
Spülmenge in Liter
Flush volume in liters
2,0 3,0 4,0
1 bar 5,5 s 7,0 s 10,0 s
2 bar 4,5 s 5,5 s 7,5 s
3 bar 3,0 s 4,5 s 6,0 s
4 bar 2,5 s 4,0 s 5,5 s
5 bar 2,5 s 4,0 s 5,0 s
Anschluss Sensorsifon
connection sensor-sifon
Magnetventil
Anschluss
magnetic valve con-
nection
Spülzeit einstellen 1-10 s
(8 s voreingestellt)
Adjust flushing time from 1-10 s
(8 s preadjusted)
1
5
10
Anschluss / connection
230 V / 50 Hz
D
GB

13
200 027
221 381
221 398
107 074
221 008
222 074
221 053
Ersatzteile, Spare Parts
Wandeinbaukasten,concealed, recess-mounted box
Absperrventil, shut-off valve
Sanitäroberteil 3/8“ für Absperrventil
Filter, filter
Magnetventil 24 V, 24 V magnetic valve
Dichtung, gasket (VPE: 5 Stk.)
Anschlussverschraubung R 1/2“ AG, threaded connecting piece R 1/2“ AG
200 027
221 381
221 398
107 074
221 008
222 074
221 053
Bezeichnung, Designation
No.:

SanTec INSIDE STEEL Elektronik, SanTec INSIDE STEEL Electronics
SanTec INSIDE STEEL Sensorsifon, SanTec INSIDE STEEL sensor-sifon
109 610
115 512
Ersatzteile, Spare Parts
Bezeichnung, Designation
No.:
109 610
115 512
14

15
Funktion, Function
Hygienespülung
bei 24 h
Nichtbenutzung
Hygiene flushing
at 24 h non-use
Auslöseautomatik
zur Funktionskontrolle.
Bei Eingabe von mind
1 l Wasser (Salzwasser)
wird eine Spülung
ausgelöst.
Automatic release
as function-check.
By pooring min. 1 l
water (salted water)
into urinal a flushing
takes place.
D
GB
Spülung
nach der
Benützung
Mains flushing
after use

Auflage 30 04 2011; Art.Nr.: 1001522
WIMTEC Elektronische Steuerungs- u. Meßgeräte GmbH
p: A - 3325 Ferschnitz, Freidegg 50, AUSTRIA
t: +43 (0) 7473 5000 f: +43 (0) 7473 5000 - 500
www.wimtec.com
Table of contents
Other WimTec Toilet manuals