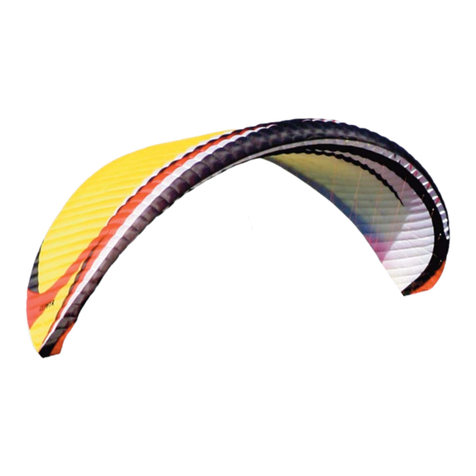
WINDTECH RALLY User manual

RALLY
POWERED BY WINDTECH
manual

> english ––––––––––––––– Page 3
> francais –––––––––––––– Page 15
> español –––––––––––– Página 27

3
Windtech
w w w . w i n d t e c h . e s
RALLY
XS-S-M-L
flight manual
english

4
> index
> congratulations ––––––––––––––––––––––––––––––– 5
> warning &liability ––––––––––––––––––––––––––––– 6
> design materials ––––––––––––––––––––––––––––––– 6
> best glide &speed system ––––––––––––––––––––––– 7
> pre flight –––––––––––––––––––––––––––––––––––– 9
> thermal flying –––––––––––––––––––––––––––––––– 9
> launch –––––––––––––––––––––––––––––––––––––– 9
> flying in turbulence ––––––––––––––––––––––––––– 10
-- asymmetrical tuck/collaps –––––––––––––––––––––– 10
-- front/symmetrical tuck collapse ––––––––––––––––––– 11
-- asymetric stall (spin) ––––––––––––––––––––––––––– 11
-- landing –––––––––––––––––––––––––––––––––––– 11
> weather to fly ––––––––––––––––––––––––––––––– 12
> emergency procedures &quick descent techniques –12
-- big ears ––––––––––––––––––––––––––––––––––– 12
-- spiral drive ––––––––––––––––––––––––––––––––– 13
-- b stall ––––––––––––––––––––––––––––––––––––– 13
> maintenance –––––––––––––––––––––––––––––––– 13
> warranty ––––––––––––––––––––––––––––––––––– 14
> technical specifications–––––––––––––––––––––––––39
> line measurements ––––––––––––––––––––––––––––41

5
> congratulations
Congratulations on the purchase of your new paraglider
The RALLY has been designed for intermediate and experienced pilots that are looking
for a superb all round performing wing with incredibly sweet, dynamic handling , and
absolutely minimal compromise in stability. The RALLY's amazing balance of perfor-
mance, ease of use and stabilty with give your flying skills and confidence a massive
boost, and take you easily to new levels of acheivement!
We strongly recommend that before you even unfold the RALLY you read this manual
carefully in order to be aware of any general limitations, performance characteristics,
take off and flight characteristics, landing procedures, dealing with emergency situa-
tions and general maintenance.
We appreciate your feedback, so please send us your comments, positive or negative, in
regard to the Windtech range.
You are the best feedback and support for future products, and please remember that
we are always happy to give you any help &advice.
best winds >Windtech team
english

6
> warning &liability
We must make it clear that, to fly this glider, IT IS NOT ENOUGH TO READ THIS MANU-
AL, but to have extensive experience and assimilate the concepts of flying in all types
of conditions.
Paragliding involves a risk, either due to the recklessness of the pilot himself, or due to
unexpected weather conditions, which in the worst case, can cause accidents.
Windtech is not responsible, in any way, for loss or injury, directly or indirectly derived
from the use or misuse of its products.
> design materials
The RALLY structure consists of 44 cells of different widths, with an internal structure
made up of diagonals. This considerably reduces the number of lines of lines, at the same
time that it is endowed with more internal pressure and longitudinal tension zones are cre-
ated, very important to stop possible collapses (especially the frontal ones).
Its new profile gives it great security and performance, as well as an efficient turn.
-- fabric
The intrados and the extrados are made of 38 and 32 gr nylon. of grammage and high
resistance. The ribs have a more resistant nylon, to prevent the deformation of the pro-
file, even after several years of intensive use. The rib reinforcements are made with 180
gr polyester. in the anchors and has a 2.4 mm rod in the mouths to facilitate inflation.
-- lines
Of various thicknesses, depending on the area of the paraglider, its core is made of
Kewlar and the cover is made of polyester to protect them against wear and abrasion.

7
The maillones of the bands are made of stainless steel. The tapes of the pre-stretched
polyester bands.
-- risers
The RALLY comes equipped with simple and functional risers to make flying easier and
more enjoyable.
The trim travel is secured by several seams, making it impossible for it to come loose
accidentally or in the event of an incident during the flight, offering a greater degree
of safety.
Band A is divided in two, to make it easier to make “ears”.
The trim is only used to adjust the wing speed. When the trim is closed (it has a mark
in the form of a seam), in which the bands compensate the delay of the sail, generated
by the thrust of the engine, and positions it again over our heads, achieving greater
speed and performance .
The trim travel still goes a bit further, but it should only be used in absolutely calm
conditions. If we need more speed and the day is turbulent, we recommend quickly
putting the trim in takeoff position and using the accelerator bar.
> best glide
&the speed system
-- without motor
The best glide without wind is the one
obtained with the standard setting of
the glider, that is, with free brakes
without accelerator and with the trim
located on the bottom seam (when all
the maillons are at the same height,
except for A on the extreme).
With a headwind, the best glide will
be obtained with the following set up
With 10km/h of face wind
we will use 25%
With 15km/h of face wind
we will use 50%
With 25km/h of face wind
we will use 100%.
english

8
With a tailwind the best performance is obtained with 0% trim and 10% brake.
The trim of this paraglider has been limited in its travel to a point where the stability
of the paraglider is still high and allows gaining 12 km/h. In any case, it is advisable
not to use it close to the ground and when we notice turbulence, close it down quickly,
up to the takeoff and turbulence position.
Note that glide angle is not affected by load, but safety is.
Always fly a paraglider of your size and remember that if your takeoff weight is below
the stipulated minimum, the speed range decreases and takeoff problems appear. In
addition, the handling worsens in turbulent conditions, being able to collapse the sail
more easily. If your takeoff weight is above the stipulated weight, you will have a high-
er minimum and landing speed and the stall speed on your glider will be higher.
The RALLY has a brake of medium
hardness (from 1.5 to 3 kg of
effort, for most of the manoeu-
vres) the stall is outside the brake
travel, and to access this configu-
ration (not recommended in any
type of paraglider) It takes more
than 9 kg of effort and take it a
couple wraps in the brake line.
-- with motor
The concept of performance with
the engine varies enormously in
consideration with free flight. This
depends on the thrust and dimen-
sions of the engine, its power, pro-
peller diameter, flight altitude, air
density, wing loading, etc.
What is true is that due to the
increase in wing loading and the
extra resistance of the chassis and
engine propeller, both the sink rate
and glide are affected, so we con-
sider it very important to choose
the engine that best suits suit our
weight and flight intentions, usual
flight altitude, etc. Combining all
this series of variants, we will
achieve some yields or others.
9
> pre flight
Each glider has a quality control sheet, which Windtech incorporates to verify that
the glider has been checked and inflated.
Contact your dealer for additional information, and in case your glider has not passed
the inflation test, ask them to do it for you.
There is a label located on the central rib (leading edge) with its serial number, size,
weight range, month and year of manufacture.
Check the risers, check that the maillons are correctly installed and check that the
lines are not tangled.
The brakes should have about 10 cm left over. From the fist knot, the length of both
cords must be the same, and their circulation through the pulleys must be fluid.
We recommend that your first flight be on a small slope, in mild conditions, before
doing dynamic or thermal flights.
We strongly recommend the use of a a helmet and a Wind-SOS emergency parachute
and a life jacket when flying above water.
> launch
The paramotor takeoff is always more complicated than in free, more weight, the
thrust of the engine, different position of the risers, the throttle grip in the hands, etc.,
it is the most complicated moment of the
flight.
We have to take into account that a mis-
carriage can cause the lines to become
entangled with the propeller, breaking the
lines and the propeller, or in the worst
case, injuring a spectator or ourselves.
We recommend that you always follow a
list of procedures when preparing your
equipment during takeoff and landing,
establishing wide safety margins. Don't
forget that flying with a propeller that
rotates 40 cm from your body is no game.
For a good take off with the RALLY
always remember the following:
-Place the axis of the sail perpendicular to
the direction of the wind.
english

10
-Forming an arc with it, we will get the center to inflate first and to rise straight and
uniform. If there is a little wind, a pre-inflation will increase our guarantee of success.
-Check that the risers are not twisted and the trim is firmly set.
-Check the lines, that are not tangled or twisted.
-The maillones and trim must be meticulously checked.
-Place the trimmers in takeoff position (lower seam).
-Check that the brake pulleys are not tangled.
-Continue with the corresponding check of your engine, following the guidelines indi-
cated in its manual.
-Once you have started the take off and when the glider reaches half past ten, a little
thrust from the engine will help us a lot on takeoff.
-With the glider already over our heads, a quick look at it will ensure that everything is
going correctly, making sure that both the glider and the lines are in perfect order for
takeoff.
-From that moment, place your body as vertical as possible, accelerate to maximum
power and in a few meters you will find yourself airborne.
> flying in turbulence
Only an experienced pilot can fly in these conditions. You have to absorb turbulence
with your brakes and your body to keep the glider on top and be careful not to stall
the wing by braking too much.
Remember that when giving our engine throttle, the glider is delayed by momentarily
increasing the pressure and decreasing the travel of the brake, with full throttle it is
not advisable to use more than 70% of its travel, if at this moment we cross through a
zone of turbulence, the sensations and the control of the paraglider differs a lot from
the usual.
In turbulent situations, your paraglider can suffer the following collapses:
-- asymmetrical tuck/collaps
An asymmetric collapse is a longitudinal collapse of part of the wing (20 to 70%) that
is normally caused by turbulence. In RALLY, these collapses are recovered automatical-
ly, without engine thrust, (THE GAS SHOULD ALWAYS BE GENTLY CUT OFF IN CASE OF
ANY INCIDENT AS ENGINE THRUST CAN EXTRAORDINARYLY COMPLICATE THE REAC-
TION OF THE SAIL), with a maximum turn of 90 degrees.
Either way, you should know the procedure to open it up, and thus, increase your security.

11
If you suffer an asymmetric collapse, shift your weight towards the open part (the one that
flies) of the glider, (this will cause a greater load on the glider, increasing the internal pres-
sure) and apply 20% and 40% brake to the glider. Open side to prevent a sudden twist of
the sail. Remember that you have previously smoothly decelerated the engine.
Be careful, the rotation must not come to a complete stop, as a complete stall can be
caused if the brake is abused. Hold the brake down on the folded side until it reopens.
Don´t do short pumps to the brakes since it causes a slower reopening. If you want to
help the glider open quickly, give one or more sustained pumps. You will need to
release your brakes as the glider reopens, if it is held down too long it is possible to
cause an asymmetric stall.
-- front/symmetrical tuck collapse
The leading edge of the wing, from the center of the sail to the end, collapses.
You can have a frontal collapse coming out of a strong thermal, using throttle in turbulent
flight, etc. This situation does not require any intervention on the part of the pilot, because
the glider reopens very quickly. If you want to help in the reopening, this is the procedure
to follow:
First you must stop actuating the throttle (if you had it engaged) and you must actuate
both brakes 50%, until the glider reopens by itself, then we will retract the trimmers to
their takeoff position, in the event that they were open, as it is clear that we are going
through a turbulent area.
-- asymmetric stall (spin)
This is a difficult incident to cause with the
RALLY
, because given its stall speed, you have
to abuse the brake a lot for it to happen, this route clearly decreases when the engine is
pushing at full throttle and the trimmers are in the take-off position. In any case, it would
happen if we find ourselves turning at a very low speed (almost stalling) we want to close
the turn more, and instead of lifting the outside brake gently (the correct thing) what we
do is brake the inside more, then we would cause a stall. of the inner wing in stall and it
would begin to rotate, one wing half will fly forward and the other backward.
In this case, to return to normal flight, you should lift the inside brake, at the same time
that we remove power, restoring normal flight with a dive, which, depending on how much
you have kept the spin flat, can be more or less strong. If you want to intervene to soften
the dive, you should get into a position of slightly more than a half brake, which you should
release once the dive stops.
-- landing
You must pay attention in your first landings, especially if it is your first glider that you
fly with a motor, you must always be clear about the direction of the wind in the land-
english

12
ing zone, type of approach (in U, L, "eights", etc.) and if We believe that the glipe angle
is correct to reach the landing, we will stop the engine, as it is much safer that way.
The rest of the landing process will always be the same as in free flight.
In the last meters of the landing you must release the brakes, which will accelerate the
wing (be careful, if there is turbulence you may not be able to do it, because you
should always keep it under control by braking it if necessary) this acceleration will
help you to, at the last moment, you can regain some height by stopping the glider
with strong braking and thus landing smoothly.
We remind you that once on the ground you must prevent the glider from falling for-
wards while it is still inflated, since the pressure exerted by the air not being able to
exit through the vents can break ribs or cells.
> weather to fly
It is totally discouraged to fly in
adverse weather conditions, strong
winds, rain, storms, with cumulus
nimbus or cumulus congestus. It is
strongly recommended that you find
out about the weather conditions in
your flight area and the weather
forecast for the next few hours at
your weather center, nearest airport
or local flying club. If flight condi-
tions deteriorate during the flight,
you must land immediately.
> emergency procedures &quick descent techiques
It could happen that sometime we find ourselves in the situation of having to "go
down" as quickly as possible, and for this, every pilot should take a course on "emer-
gency maneuvers and descent techniques" at an Official Approved School. These cours-
es are given in flights with enough height, over the water, and with a support boat. For
information purposes, the basic descent techniques are:
-- bigs ears
The simplest maneuver to descend. To do it, pull the outer band A, if you release the
brake grips and at the same time without lowering them when pulling.
The sink rate with this maneuver is 3 to 5 m/s. This maneuver is recommended to be
used near the ground, as it allows us to reach almost ground without opening them. If

13
we combine it with the accelerator, we will achieve a good descent rate, while main-
taining an acceptable speed.
-- spiral dive
Obtained by holding the glider in a banked turn. Little by little the wing speed up,
especially if we collaborate with the chair. Once the turn has turned into a spin, we
will control the speed of rotation and descent with small corrections with the external
brake. This maneuver will allow us to achieve sink rates of 10 to 15 m/s.
It is dangerous to do it if we are close to the ground, and due to the great centrifugal forces
we can achieve, it is possible that in some cases it can cause dizziness or blurred vision.
The exit from this configuration must be smooth and progressive, giving at least one
more lap to restore normal flight, for this we must gently raise the inside brake while
we can lower the outside a bit. If we start abruptly, we can make a great comeback in
height, followed by a dive.
-- b stall
If we pull the 2 risers B (left and right) until they are lowered to the height of the
maillons, the glider will go into parachute and its trajectory will become vertical. We
can control the speed of descent by pulling more or less on the risers once we are in
the parachutage, (obviously we will carry out this maneuver without the thrust of the
motor ) and we will obtain sink rates of 5 m/s. To get out of this configuration, we will
raise the risers "at the same time", and suddenly releasing the last 10 cm. At that
moment the glider will recover normal flight spontaneously, with a small dive.
> maintenance
Store the paraglider in a dry
place away from chemical
agents, ultraviolet light and high
temperatures. If your sail is wet
and you won't be using it soon,
open it up again and let it dry
before refolding it.
Keep the wing and its lines clean,
as the chemical components that
may be in that "dirt" can penetrate
the fibers and damage them. Clean
the wing only with running water
and a soft sponge. This should be
done every time it has been in
contact with salt water. Avoid all
english

14
contact with oils, solvents, gasoline and similar, they can "eat" or weaken the fabric. At
least once a year, have the glider fully serviced by Windtech or your dealer. You should
"periodically" check the risers, lines, fabric and seams of the sail.
> warranty
The guarantee of this paraglider is two years for defects in materials and manufactur-
ing. In case of defective materials during the warranty period, Windtech undertakes
to replace them without including shipping costs.
Damages caused by material wear, misuse or use outside the limits stipulated in this
manual are excluded from the guarantee.

15
Windtech
w w w . w i n d t e c h . e s
RALLY
XS-S-M-L
manuel de vol
français

16
> sommaire
> félicitations ––––––––––––––––––––––––––––––––– 17
> avertissements et responsabilités –––––––––––––––– 18
> construction et matériaux ––––––––––––––––––––– 18
> finesse max. et accélérateur ––––––––––––––––––– 20
-- sans moteur –––––––––––––––––––––––––––––––– 20
-- avec moteur –––––––––––––––––––––––––––––––– 21
> vol ––––––––––––––––––––––––––––––––––––––––– 21
> décollage –––––––––––––––––––––––––––––––––– 22
> vol en turbulences ––––––––––––––––––––––––––– 23
-- fermeture asymétrique –––––––––––––––––––––––– 23
-- fermeture frontale ––––––––––––––––––––––––––– 23
-- décrochage asymétrique –––––––––––––––––––––––– 24
-- atterrissage ––––––––––––––––––––––––––––––––– 24
> conditions de vol ––––––––––––––––––––––––––––– 25
> procedures d urgence et techniques de descente rapide 25
-- oreilles –––––––––––––––––––––––––––––––––––– 25
-- 360° engagés ––––––––––––––––––––––––––––––– 25
-- décrochage aux “B” ––––––––––––––––––––––––––– 26
> maintenance –––––––––––––––––––––––––––––––– 26
> garantie –––––––––––––––––––––––––––––––––––– 26
> spécifications techniques ––––––––––––––––––––––– 39
> plan de suspentage –––––––––––––––––––––––––-- 41

17
> félicitations
Nous tenons à vous féliciter pour l’acquisition de votre nouveau parapente Windtech.
La RALLY est une aile pensée et développée pour tous types de vols, des vols planés des
matins calmes aux cross les plus ambitieux. Nous vous conseillons vivement de lire les
recommandations contenues dans ce manuel afin de vous informer sur les conditions d’uti-
lisation et les caractéristiques techniques de l’aile. Vous trouverez également dans ce
manuel des conseils d’entretien vous permettant de prolonger la vie de votre voile.
Nous restons bien évidemment à votre entière disposition pour tous types de conseils
ou d’aide.
Sachez que vous êtes, dès à présent, notre meilleure source d’information et notre
meilleur appui pour la conception de nos futurs produits.
Merci de votre confiance et bons vols,
> L’équipe Windtech
français

18
> avertissements et responsabilités
Ce manuel qui a pour objectif de vous familiariser avec votre RALLY contient des
conseils qui devraient vous permettre de vous sentir à l’aise dès le premier jour.
Il est important de comprendre que la lecture de ce manuel est insuffisante pour
apprendre à voler. En aucun cas elle ne doit se substituer à un enseignement adapté ou
à une expérience de pilote acquise au cours de plusieurs années et d’heures de vols.
Windtech suppose que l’acheteur de ce parapente possède une assurance couvrant au
moins sa responsabilité civile (obligatoire en France), a suivi un enseignement adapté
au vol libre, possède les capacités et l’expérience nécessaires pour voler en toute sécu-
rité sous la RALLY.
Nous vous rappelons que le parapente est un sport qui comporte des risques, tant par
les imprudences pouvant subvenir de la part du pilote que par des conditions aérolo-
giques imprévues. Tout cela peut, dans certains cas, entraîner des accidents.
L’utilisation de ce parapente se fait sous votre entière responsabilité. Windtech et ses
représentants ne pourront en aucun cas être tenus responsables des accidents, blessures,
dommages directs ou indirects consécutifs à l’usage ou à un mauvais usage de ses produits.
> construction et matériaux
La RALLY comporte 44 cellules de tailles différentes et une structure interne consti-
tuée de diagonales évolutives, variables selon la taille de la cellule. Grâce à ce procédé,
la quantité de suspentes a pu être considérablement réduite tout en augmentant la
pression intérieure de l’aile. Des zones de tension longitudinale sont ainsi créées, ce qui
permet de limiter les fermetures (surtout les fermetures frontales).
Son nouveau profil lui procure un haut niveau de sécurité, un rendement élevé, ainsi
qu'un virage efficace.

19
-- tissus
L'intrados et l'extrados sont en nylon 38 et 32 gr. de grammage et de haute résistance. Les
baleines ont un nylon plus résistant, pour éviter la déformation du profil, même après plu-
sieurs années d'utilisation intensive. Les renforts de côtes sont en polyester 180 gr. dans les
ancres et a une tige de 2,4 mm dans les bouches pour faciliter le gonflage.
-- suspentes
De différentes épaisseurs, selon la zone du parapente, son noyau est en Kewlar et la
housse est en polyester pour les protéger de l'usure et de l'abrasion. Les maillones des
bandes sont en acier inoxydable. Les bandes des bandes de polyester pré-étirées.
-- élévateurs
Le RALLY est équipé d'élévateurs simples et fonctionnels pour rendre le vol plus facile
et plus agréable.
Le parcours de la sangle de trim est démultiplié, rendant impossible son détachement
accidentel ou en cas d'incident pendant le vol, offrant une plus grande sécurité.
La élévateur A est dépliée en deux,
pour faciliter la réalisation des
«oreilles».
Le trim sert uniquement à régler la
voile. Lorsque la garniture est
rétractée (elle a une marque en
forme de couture), dans laquelle
les bandes compensent le retard de
la voile, généré par la poussée du
moteur, et la positionnent à nou-
veau au-dessus de nos têtes, obte-
nant plus de vitesse et de perfor-
mance.
Le débattement du trim va encore
un peu plus loin, mais il ne doit
être utilisé que dans des conditions
absolument calmes. Si nous avons
besoin de plus de vitesse et que la
journée est mouvementée, nous
vous conseillons de mettre rapide-
ment le trim en position décollage
et d'utiliser l'accélérateur.
français

20
> finesse max. et accélérateur
-- sans moteur
La meilleure glisse sans vent est celle obtenue avec le réglage standard du parapente,
c'est-à-dire avec freins libres sans accélérateur et avec le trim situé sur la couture du
bas (lorsque tous les maillons sont à la même hauteur, sauf A sur le extrême ).
Par vent de face, la meilleure glisse sera obtenue avec les gaz ou trims suivants
A 10km/h de face nous utiliserons 25%
Avec 15km/h de face nous utiliserons 50%
Avec 25km/h de face nous utiliserons 100%.
Avec un vent arrière, les meilleures performances sont obtenues avec 0% d'accéléra-
teur, 0% de trim et 10% de frein.
L'assiette de ce parapente a été limitée dans son débattement à un point où la stabilité
du parapente est encore élevée et permet de gagner 12 km/h. Dans tous les cas, il est
conseillé de ne pas l'utiliser près du sol et lorsque l'on constate des turbulences, de le
ramasser rapidement, jusqu'à la position de décollage et de turbulence.
Notez que l'angle de plané n'est pas affecté par la charge, mais la sécurité l'est.
Pilotez toujours un parapente
de votre taille et rappelez-
vous que si votre poids au
décollage est inférieur au
minimum stipulé, la plage de
vitesse diminue et des pro-
blèmes de décollage apparais-
sent. De plus, la maniabilité
s'aggrave dans des conditions
turbulentes, pouvant plier la
voile plus facilement. Si votre
masse au décollage est supé-
rieure à la masse stipulée,
vous aurez une vitesse mini-
male et d'atterrissage plus
élevée et la vitesse de décro-
chage de votre parapente sera
plus élevée.
La RALLY dispose d'un frein
de dureté moyenne (de 1,5 à
3 kg d'effort, pour la plupart
Table of contents
Languages:
Other WINDTECH Aircraft manuals

WINDTECH
WINDTECH ARIAL XS Technical specifications

WINDTECH
WINDTECH TUAREG User manual

WINDTECH
WINDTECH ZEPHYR Series User manual

WINDTECH
WINDTECH KALi Series User manual

WINDTECH
WINDTECH Pulsar Series Technical specifications

WINDTECH
WINDTECH Windsos 16 User manual

WINDTECH
WINDTECH Tecno Series Technical specifications

WINDTECH
WINDTECH Tonic 25 User manual

WINDTECH
WINDTECH ZEPHYR-2 S Technical specifications

WINDTECH
WINDTECH Kinetik Series Technical specifications