Wisi Chameleon User manual

Quick Guide
www.
www.wisi.de
2016-05-04

©WISI Communications 2016, Subject to technical changes and misprints
2
www.
www.wisi.de
Visit wisi.de for
more info about
our products.
THE CHAMELEON PRODUCT LINE
COVERS ALMOST EVERY NEED
FOR CABLE-TV AND SMATV
DISTRIBUTION WITH ONLY ONE
HARDWARE..
The different inputs, processing
and outputs are defined by
software options, and all software
options can be updated at any
time.
The CHAMELEON includes a dual
DVB-S/S2/T/T2/C receiver,
furthermore it includes decoding of
MPEG-2 and MPEG-4 video formats
as well
CHAMELEON
Single Hardware Headend
as it supports MPEG, AAC HE and
Dolby audio decoding. The Dolby
audio decoding requires the latest HW
version.
The SW options define the different
“product realisations” you can
implement with the unique HW. For
your specific application, you simply
buy the SW options you need. When
you need further functionality, just
purchase additional SW options, and
update the installed HW.
CHAMELEON Product examples
■ Receiver DVB-S/S2/T(T2)/C
■ Transmodulators
■ DVB-C, QAM J.83 Annex B/C modulators
■ DVB-T modulators
■ DTMB, ISDB-T modulator
■ PAL, NTSC modulators
■ FM modulator
■Edge QAM/COFDM
■Dual MPEG2/4 SD decoder
■ Single MPEG2/4 HD decoder
■CI multi-decryptions
■ Remultiplexer multiple TS
■ DVB_CSA Scrambler
■IP streamer
■ ASI streamer
■SDI generator

©WISI Communications 2016, Subject to technical changes and misprints
3
www.
www.wisi.de
1 General information and SW options
Getting started
When delivered, the Chameleon is “empty”, and to get started you have to register your Chameleon at the
wisiconnect.tv portal. Once your Chameleon is registered, you can download the SW options from the
portal, and upload them to your Chameleon. For a Chameleon where SW options have not been added
after the original purchase, there is also a 30-days uptime installation period for all currently available
functionality.
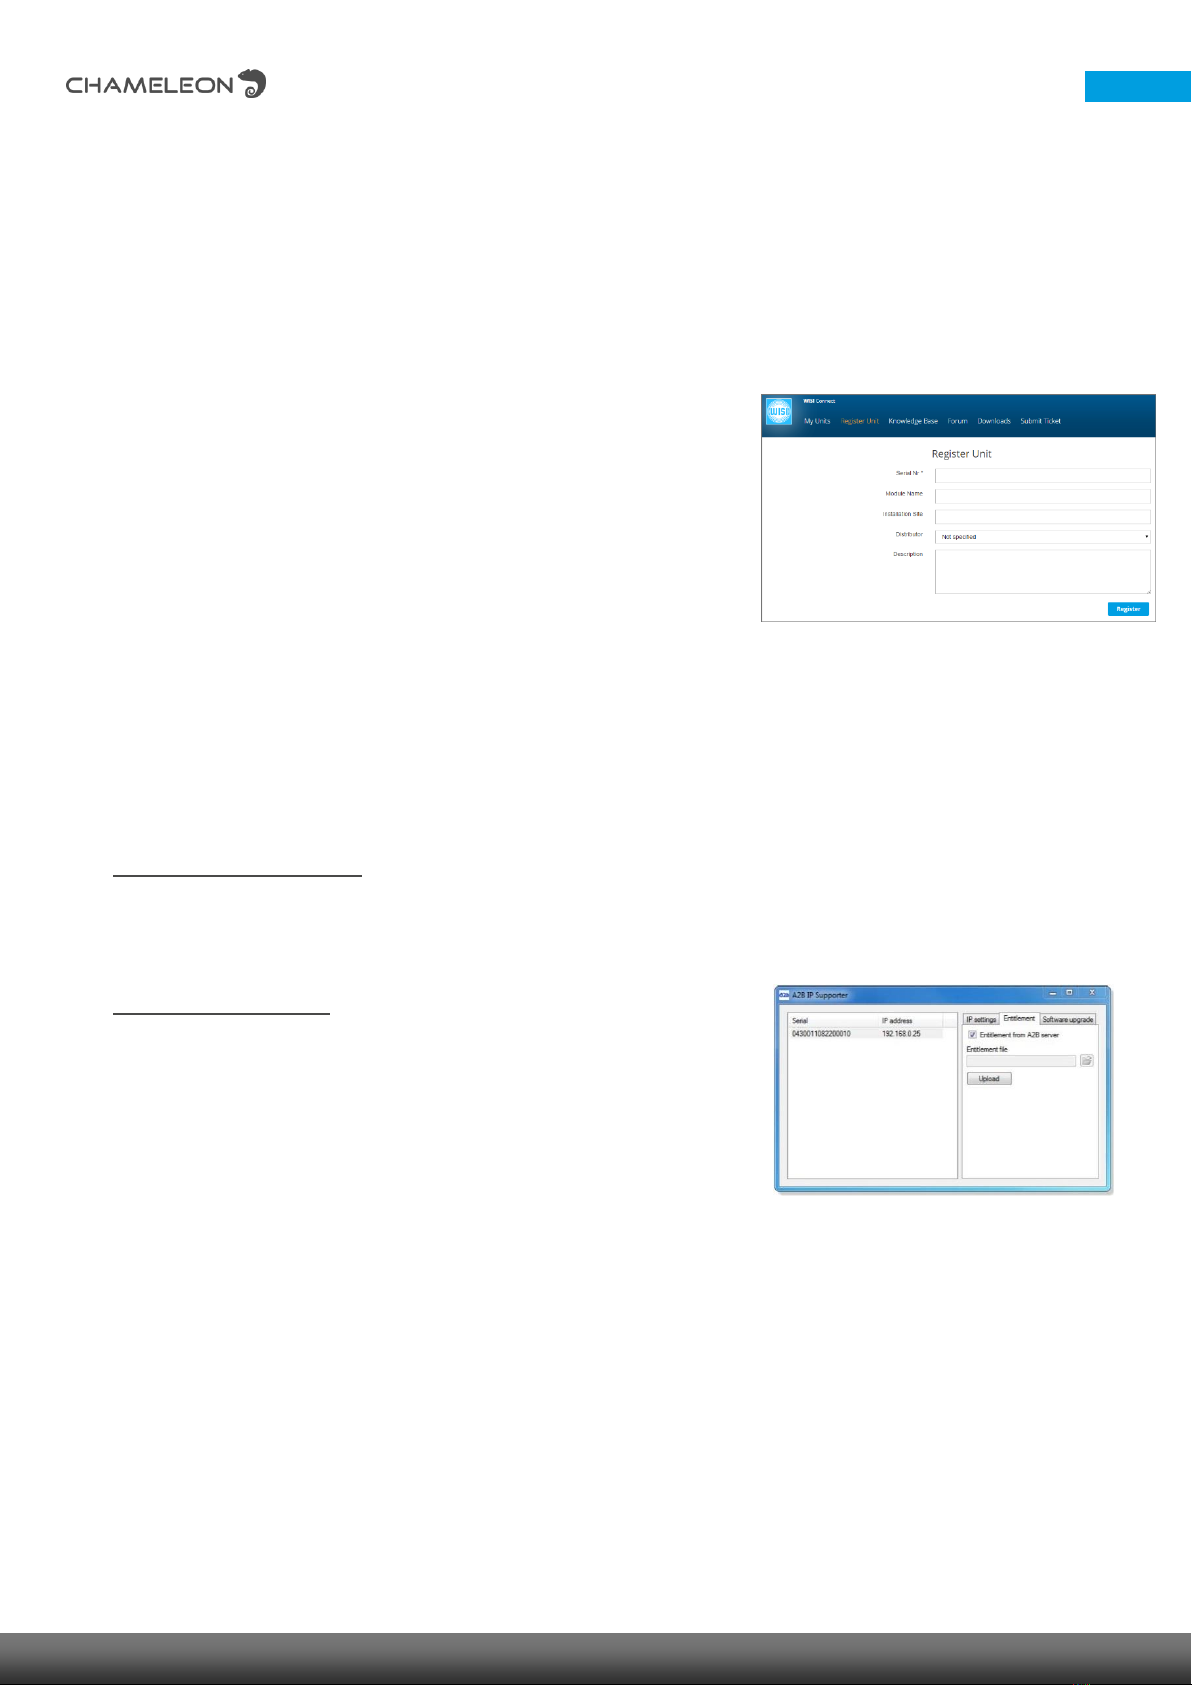
Register units at the wisiconnect.tv portal
After login, and clicking the “Register Unit”-tab, enter the serial number
of your Chameleon and select your distributor in the drop-down list.
Optionally, also enter Module name, Installation site, and Description
(these fields are intended for your own use, to be able to track and
maintain your installed base). Information about SLA End date and SW
options are entered automatically from the information stored in the
Unit Data Base.
Click the Register button to register the Chameleon.
Downloading SW options (entitlement file) to your computer
Go to the tab My Units, and click the serial number for the module to download the entitlement file that
contains the software options. Click Download entitlement. Save the file to your computer.
Uploading SW options (entitlement file) to your Chameleon
Via the Chameleon web UI (Further instructions below)
Under SETTINGS / SOFTWARE AND ENTITLEMENT UPGRADE, browse for the entitlement file you
previously downloaded to your computer. Click Upload, and reboot the module when the upload
is done.
Using the IP Supporter
With the Chameleon connected to your computer, and your computer
connected to Internet, you can upload the entitlement file directly.
Select you Chameleon, and check the box for Entitlement from A2B
server, and click Upload.
2 Connecting to the Chameleon web UI
Connecting to the default IP address:
The Chameleon default IP address is 192.168.0.20. Set the IP address on your computer or for your
network adaptor to an address in the same address range. Use a standard web browser to connect by
typing the IP address of the Chameleon in the address field.

©WISI Communications 2016, Subject to technical changes and misprints
4
www.
www.wisi.de
Changing the IP address
It is recommended to change to a unique IP address in your network. You can change the IP address
under SETTINGS / NETWORKING, or by using the IP Supporter.
3 Select Operation mode
Go to OPERATION MODE under SETTINGS. Select operation mode
with the radio buttons. Confirm by clicking the “yellow tick”.
The operation mode will have an impact on e.g. the possible selection
of output.
Information about the available operation modes are given in the web
UI.
4 Defining/adding inputs
Add input
1. Click the INPUTS tab, and Add new input.
2. Select input type in the drop down list.
a. For tuner inputs, select Configuration (tuner type)
3. Type or select the appropriate parameters and settings.
4. Confirm/save by clicking the “yellow tick”
All operation modes requires
corresponding
SW option(s) to be present.
The inputs you can select depend
on the SW options you have
enabled, and the HW.

©WISI Communications 2016, Subject to technical changes and misprints
5
www.
www.wisi.de
Status information
If your settings were OK, the status will show you basic information
and no error indication.
5 Defining/adding outputs
Add output
1. Click OUTPUTS, and Add new output.
2. Select output type in the drop down list.
3. Type or select the appropriate parameters and settings.
4. Confirm/save by clicking the “yellow tick”
6 Service management
Select service from input and add to output
1. Click on the SERVICE MANAGEMENT tab to
see available inputs and outputs.
2. Navigate to the Service level to list available
services.
3. Click the edit arrow of a service and select the
output to add it to.
4. Repeat step 3 to add more services.
Add more inputs by repeating the
“Add input” process.
The selectable outputs depend on the
SW options and operation mode.
Add more outputs by re-iterating the
“Add output” process.

©WISI Communications 2016, Subject to technical changes and misprints
7
www.
www.wisi.de
WISI Communications GmbH & Co. KG
Empfangs- und Verteiltechnik Inland: +49 72 33 66 -0, fax -320
Wilhelm-Sihn-Straße 5–7 Export: +49 72 33 66 -280, fax -350
75223 Niefern - Oeschelbronn, Germany E-mail: info@wisi.de
Technical modifications reserved. WISI cannot be held liable for any printing error.
Other manuals for Chameleon
2
Table of contents
Other Wisi Media Converter manuals