RS 005 Instruction 030
RS005 motion sensor function
8
1)When the wind comes up, the awning starts to shake. If the shaking is greater than the set threshold , the awning will
close automatically. At this time, the remote control is blocked and can not Open/Stop/Close the awning for 30s.
2)When the wind dies down, the shake is lower than the set threshold. The awning can be opened by the remote
control after 30s.
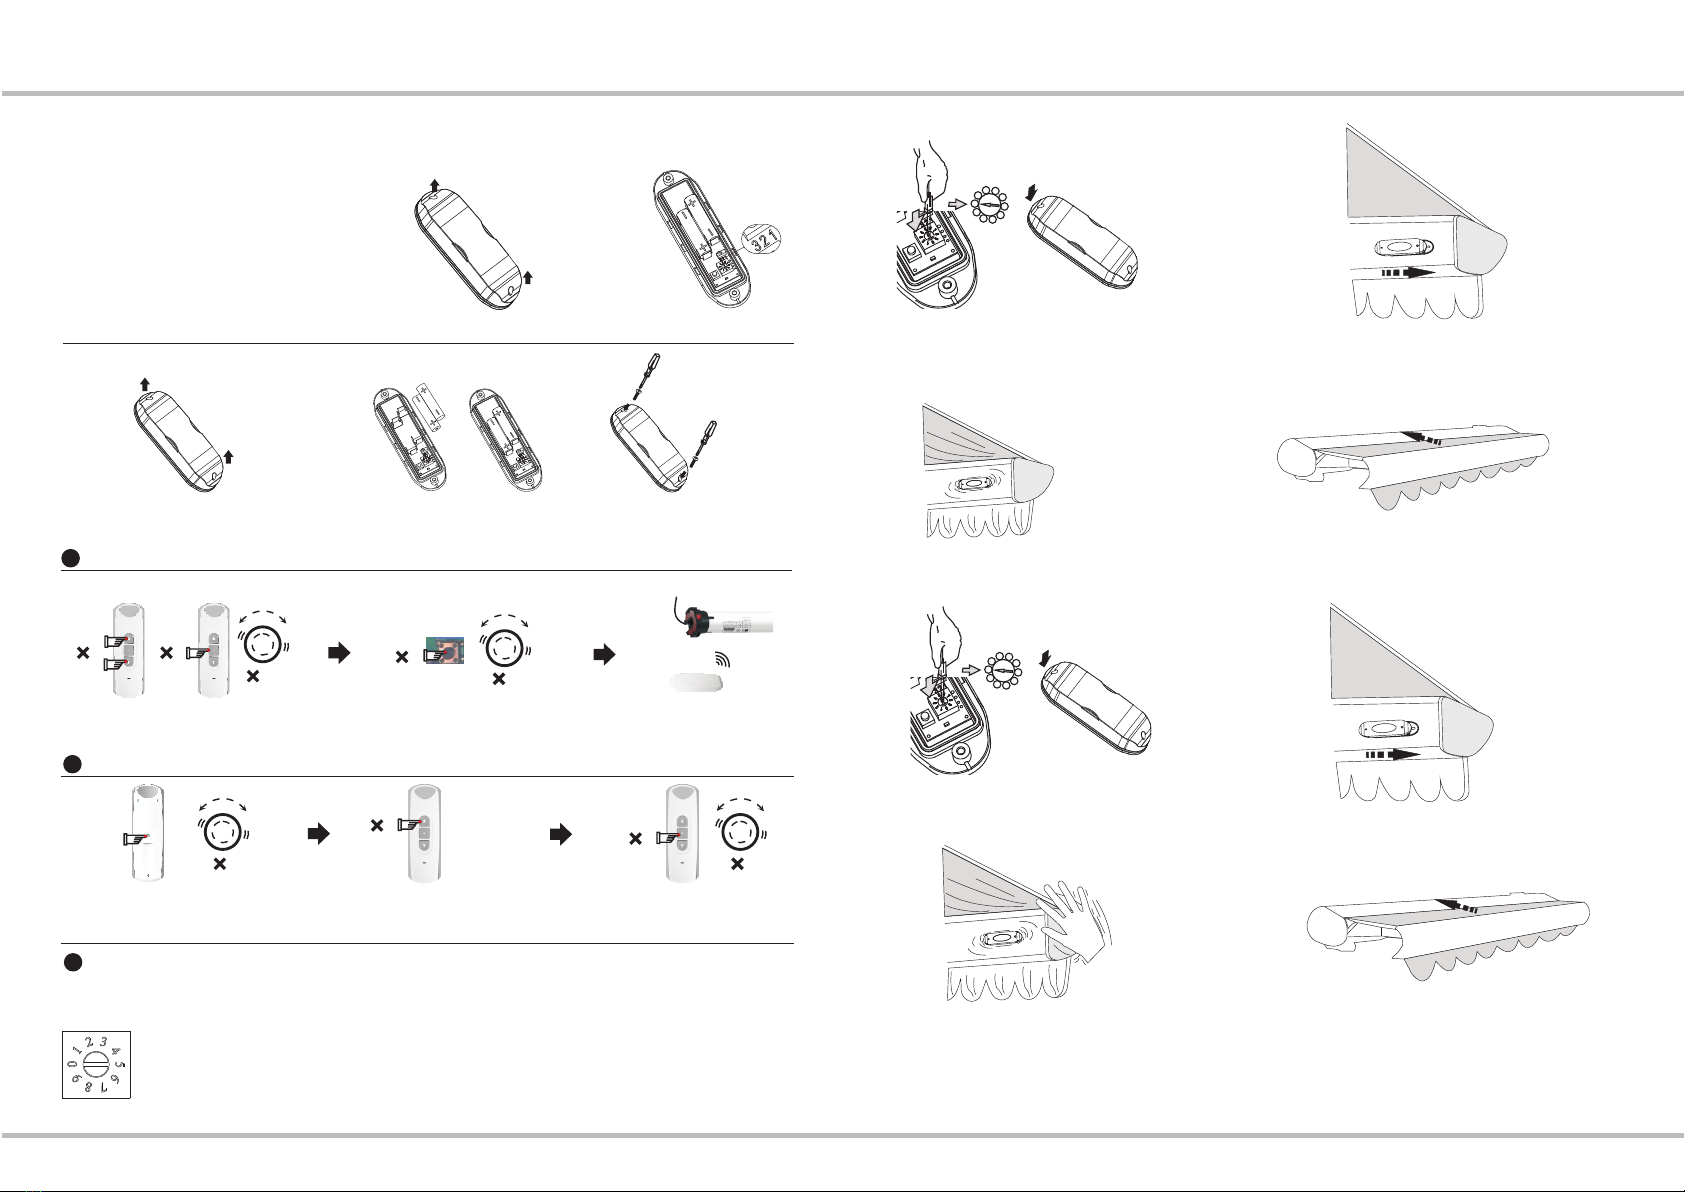
Replace batteries
9
Instruction
RS 005
Slide off the upper cover and open the inner cover and replace with 2 pcs of AAA Alkaline batteries. For details, please
refer to step 4.
10
1
Long press
for 5s
1
1
1)
emitter for 5s, the motor will vibrate once.
Press the learning button on the back of 2)Press Down button once. 3)
motor will vibrate once. De-activate
of RS005 motion sensor is successful.
Press Stop button to exit, and the
1
De-activate RS005 motion sensor
11
Problems
Causes Solutions
The LED does not flash when
batteries are inserted Batteries are inserted incorrectly Check the battery and make sure that
polarity are installed correctly
The awning does not close when
the wind comes up
Installation direction is incorrect
(bottom installation and side installation)
If installed in the load bar either at the ends or
in the middle, switch to the Fron/Back side by
connecting 1 and 2 position (use the supplied
connector). If installed at underside of the load
bar, switch to the Underside side by connecting
2 and 3 position (use the supplied connector)
Value setting is inappropriate
External wireless signal interfere, or
signal is blocked by metal objects
Motion sensor or the motor is broken
Reset the value
Check if there are sources of interference
or metal objects nearby
Shake the awning manually if the awning
does not retract, replace with new batteries
If the awning still does not retract,
check if the motion sensor and motor
works normally
The awning will close every 30
minutes and the motion sensor LED
lights flash continuously
The battery voltage is too low
(lower then 2.7 V)
Replace with new batteries
The awning close once per hour
Motion sensor is installed inappropriate Check if the upper cover and bottom
cover are connected well
Motion sensor and the motor could
not work and lose the radio link
The motion sensor does not work
Replace with new battery, shake the
awning to check if the awning still
could not retract
Replaced with new battery. If after replacing
the battery, the awning still retract once per
hour, then replace motion sensor
Problems and Solutions
12
Delete
! Notes
Setting may fail due to the interference of signal. If in this case, please reset.
Do not install the product where the rain may shower.
Set appropriate threshold, if the threshold set is too low, which will cause a larger power consumption; if the
threshold set is too high, which will cause the insensitivity. If the batter y voltage is low, motion sensor will not
work, please replace with new battery.
All products are as per material subjects if there is change in appearance, color, function etc. The information is
subject to changes without prior notice.
1
Note:There is a time interval of 5 minutes between deactive and active again.
The motion sensor could not
active successfully
There is a time interval of 5 minutes
between deactive and active again
wait for 5 minutes and active again
11.03.03.SMS-RS005YT-02-V2
A: Delete sensor:
not control the motor.
All emitters and motion sensor could 3)
2)
motor vibrate.
Press Up button once and the
1)Press Up and Down button simultaneously,
and press Down button 6 times.
1
1 6 1
B: Delete all emitters and motion sensors learned:
3Long press S 1
1) Long press the learnig button on
the sensor for 3s
2) the motor vibrates once 3) the sensor cannot control the motor