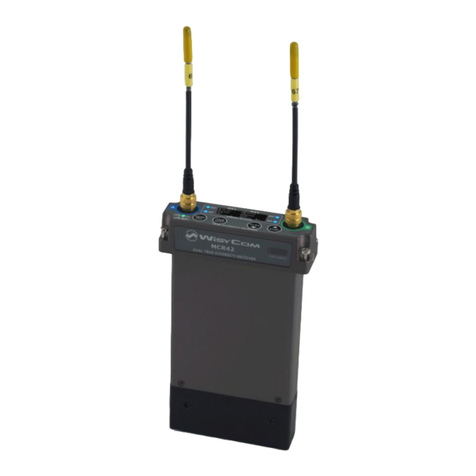
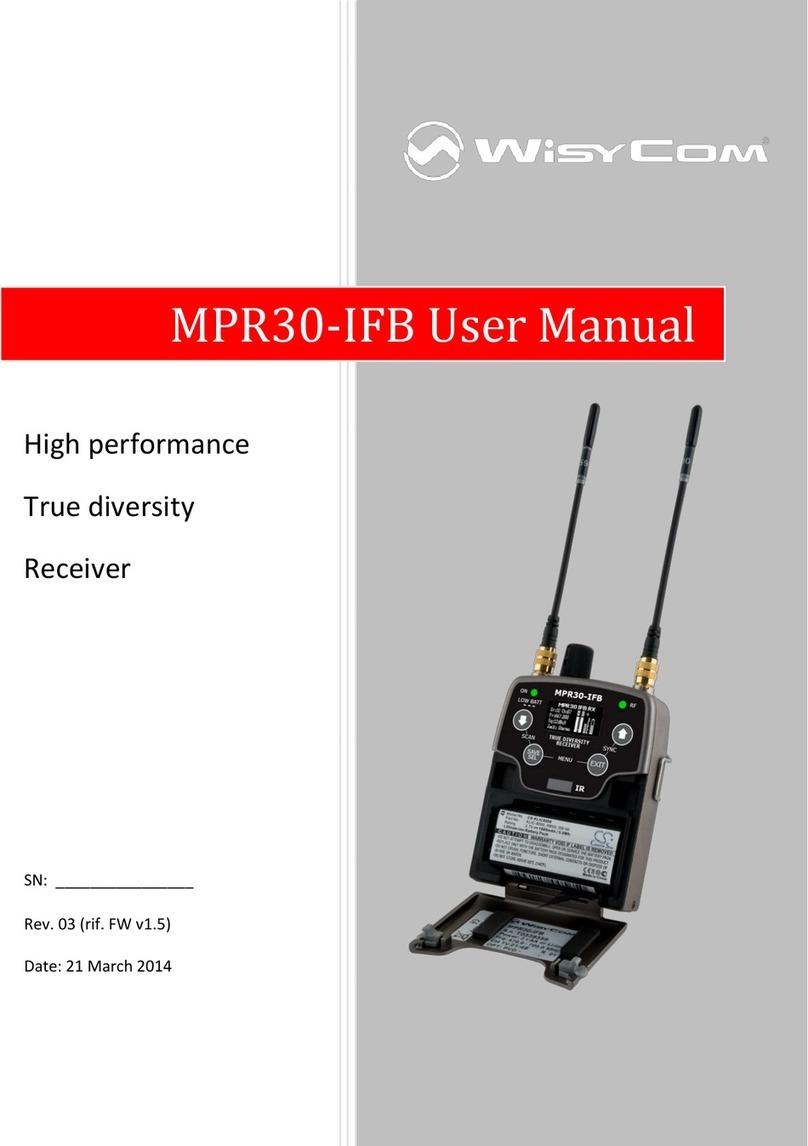
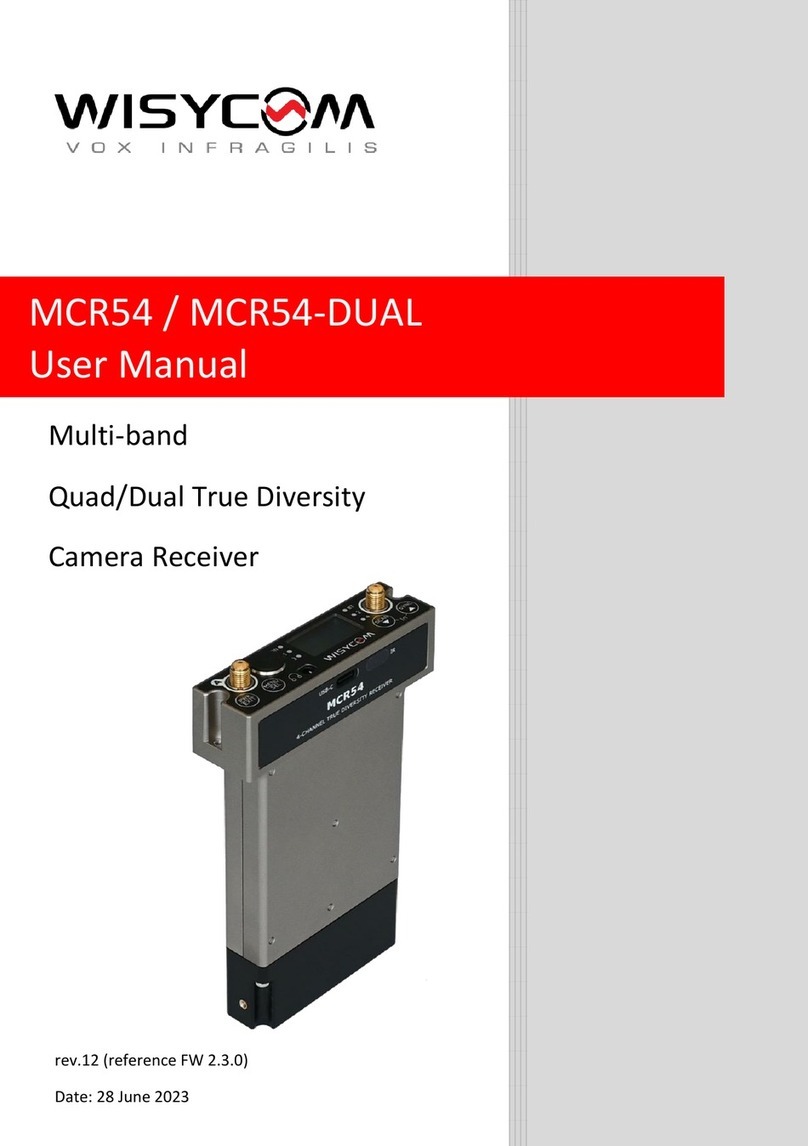
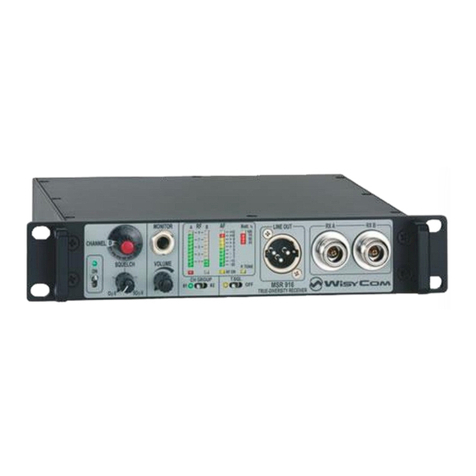
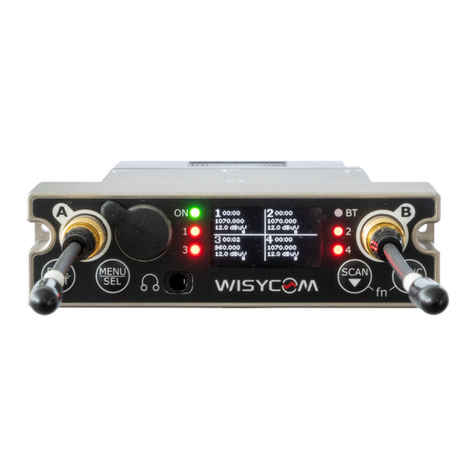
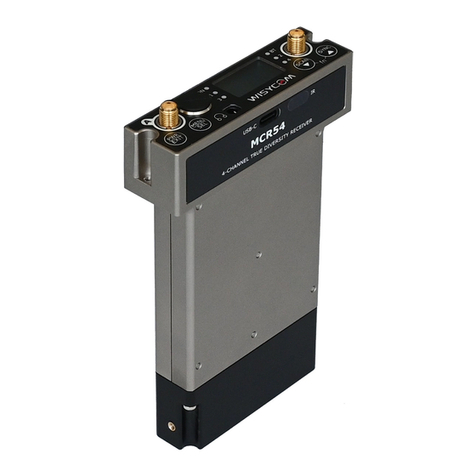
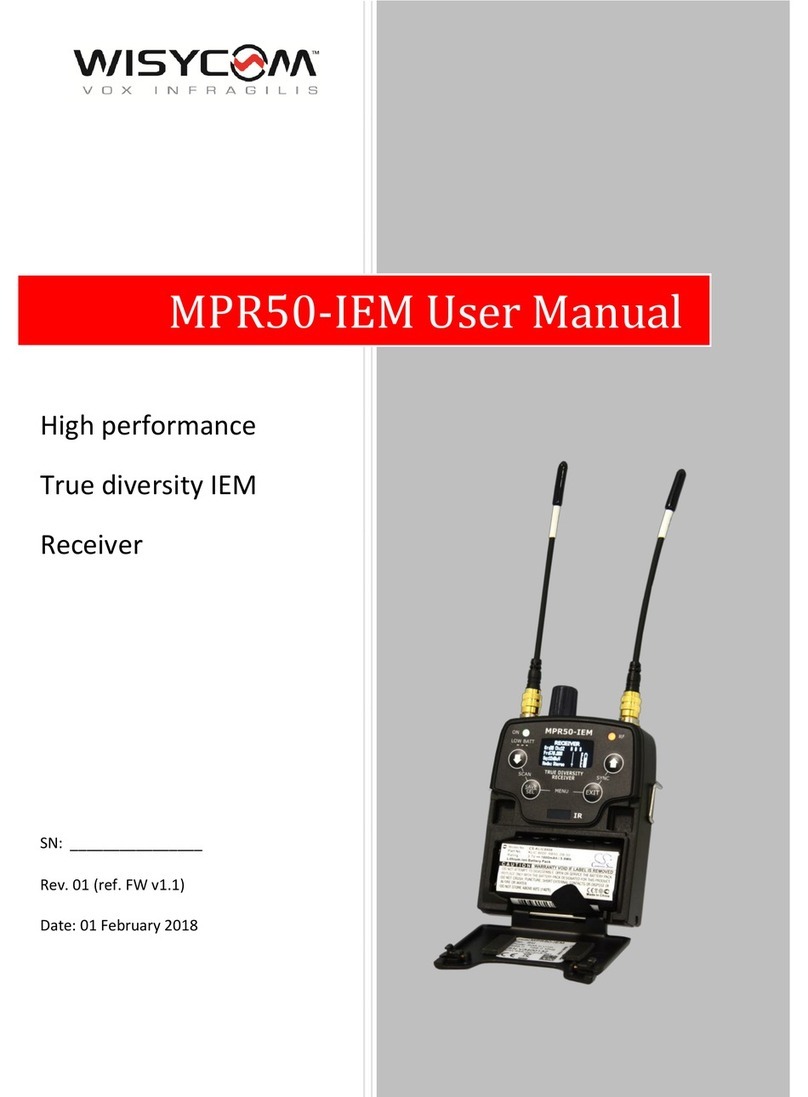
WisyCom MPR30-IEM User manual

MPR30-IEM User Manual
High performance
True diversity
Receiver
SN: ________________
Rev. 06 (ref. FW v1.6)
Date: 04 July 2014

MPR30-IEM User Manual
Rev. 06

MPR30-IEM User Manual
Rev. 06
BRIEF DESCRIPTION
MPR30 is a compact true diversity receiver designed for professional in-ear monitoring
applications. This receiver features a real TRUE DIVERSITY configuration along with a unique
wideband tuning range up to 232 MHz. Audio processing can be Stereo MPX or mono based.
The output audio stage is especially design to have maximum audio peak-dynamic of 200 mW.
MPR30-IEM is designed to be:
oautomatic setup functions (i.e. frequencies, scan for best channels),
oremote configuration utilities (thru infrared or micro-USB interface) using
Wisycom MPR30 RX Manager application
oOLED display with intuitive context menu navigation
oMPR30-IEM-N: 470/700 MHz (TV ch 21/49)
oMPR30-IEM-M:566/798 MHz (TV ch 33/61)
extreme RF sensitivity and immunity and superb audio quality
uminium
housing) and the possibility to upgrade/enhance units performances.
Above a schematic with an overview of main receiver functions.
Receiver-A
Receiver-B
TrueDiversity
Control Rx1
Communic.
and control
interface
Receiver supervisor
microcontroller
anduser interface
Front panel
A
B
Antennainputs
INFRARED
USB-B
RIGHT
Ear-phone
LEFT
AudioSettings
MPR30はプロフェッショナル用イン・イヤーモニタリング用途に設計されたトゥルーダイバシティのレシーバー
です。 このレシーバーは、最高232MHzまでの広帯域をチューニング範囲としながら、トゥルーダイバシティ
方式を採用しています。 オーディオプロセッシングはステレオMPXかモノラルがベースとなっています。
オーディオ出力段は、特に最大200Mwのピーク・ダイナミックを持つように設計されています。
MPR30-IEM の特色
簡単かつすばやく使用開始できます。
自動設定機能 (例:最適なチャンネル周波数スキャン)
リモートコンフィグレーションとして、(赤外線かマイクロUSBインターフェースを通して)
Wisycom MPR30 RXマネージャー ソフトウェアを使用することができます。
OLED(有機EL)ディスプレイに表示されるわかりやすいメニュー表記
非常に柔軟です。232MHzまでの驚異な周波数アジリティ
MPR30-IEM-N: 470/700 MHz (TV ch 21/49)
MPR30-IEM-M: 566/798 MHz (TV ch 33/61)
クラスで最高のパフォーマンス。 最新のWisycomテクノロジーにより、最高のRF感度、
対混信性、優れた音質
耐久性と拡張性。非常に堅牢に設計された(アルミニウム筐体)とユニットのアップグレード
/性能向上を考慮。
要約

MPR30-IEM User Manual
Rev. 06
SAFETY INSTRUCTION
Read this safety instruction and the manual first
Follow all instructions and information.
Do not lose this manual.
Do not use this apparatus under the rain or near the water.
Do not install the apparatus near heaters or in hot environments, do not use outside the
operating temperature range.
Do not open the apparatus, only qualified service technician are enabled to operate on it.
The apparatus needs servicing when it is not properly working or is damaged by liquids,
moisture or other objects are fallen in the apparatus.
Use only accessories or replacement parts authorized or specified by the manufacturer.
Clean the apparatus only with dry cloths, do not use liquids.
Report the serial number and the purchasing date in front of the manual. It is needed to
have proper replacement parts or accessories from the manufacturer.
When replacement parts are needed, use only replacement parts authorized from the
manufacturer. Substitution with not authorized parts could result in electric shock,
hazards or fire.
Keep attention on all the labels with warnings or hazards on the apparatus.
The apparatus is intended for professional use; anyway the manufacturer alerts the
user that the headphone output power of the apparatus could exceed the level of 85 dB(A) of
sound pressure level and this could be dangerous for the hearings. Do not use the headphone
with high power level or for long time. Reduce the power or suspend the hearing in case of any
kind of hearing problem.

MPR30-IEM User Manual
Rev. 06
BATTERIES
MPR30-IEM works with standard camera battery:
-2xIEC-LR6 1.5 size-AA alkaline or NiMh rechargeable
-KLIC 8000 (lithium-ion, rechargeable)
-Ricoh DB-50 (lithium-ion, rechargeable)
-DR9708 Duracell (lithium-ion, rechargeable)
Battery status can be checked on OLED display or looking the status of LED indicator ON.
Lithium-ion battery can be charged through
A. dedicated charger
B. integrated micro-usb-B connector
For B item, the charging status can be checked looking the status of LED indicator ON.
The receiver can be used also during the batteries charging with lithium
rechargeable batteries inside.
The receiver powered thru micro-USB without
batteries doesn't work correctly.
DO NOT operate the device with some new and some old batteries. Always replace
ALL BATTERIES.
Remember to remove the batteries when the device is not in use.
バッテリー
MPR30-IEM は標準のカメラバッテリーで動作します。
単三型のアルカリかニッケル水素充電電池を2個
KLIC 8000(リチウムイオン 充電電池)
Richo DB-50 (リチウムイオン 充電電池)
DR9708 Duracell(リチウムイオン 充電電池)
バッテリーの消耗具合は、OLEDディスプレイで確認できます。 また、ONのLEDの状態でも確認できます。
リチウムイオン電池を充電する際は、
専用の充電器を御使用ください
内蔵のマイクロUSBコネクターで充電してください。
Bアイテムに関しては、充電状況は ON の LED で確認することができます。
内蔵リチウムバッテリーに充電しながら、レシーバーを使用することもできます。
バッテリー交換時はすべてのバッテリーを交換してください。
レシーバーに、新品の電池と消耗した電池を混ぜて使用しないでください。
バッテリーを取り外した状態でレシーバーを使わないでください。 バッテリー未装着でマイクロUSB
から給電された状態では、レシーバーは正しく動作しません。
装置を使用しない時は、電池を取り外して保管してください。

MPR30-IEM User Manual
Rev. 06
PRODUCT OVERVIEW
Upper Panel
SMA antenna Connector A and B
MPR30-IEM is supplied with two couple of antennas. According to the working band, different
antenna models can be supply. All the models have
black cap and a black label with code in white colour.
For more details see the section Accessories and Parts
Headphone Output
The audio headphone output with 3.5 mm stereo jack socket lockable (TRS).
Audio level can be adjusted with the Volume control knob and the Audio settings> Pwr. Limit
menu.
Maximum output power: 2x150mW @ 32Ω, 2x200mW@16Ω
Pin Assignment: Tip = left (hot), Ring = right (hot), Sleeve = Gnd
On/Off/Volume control
The control knob in the upper panel allows:
To switch the receiver ON: turn the control knob volume control clockwise until it clicks
To switch the receiver OFF: turn the control knob volume control counter clockwise until it
clicks
To adjust the volume: turn the control knob volume control until the volume set has the
desired level.
To disable the lock volume: turn off and turn on the receiver within 1 second.
NOTE: turn off and turn on the receiver
within 1 secondMPR30 restarts without the initialization phase
after 1 second MPR30 restarts with complete initialization
Antenna Code label
SMA connector Antenna B
SMA connector Antenna A
On/Off/Volume
control
Headphone Output
ON LED indicator
製品の概要
上面
ON LED インジケーター
ヘッドフォン出力
音量調整
アンテナB
アンテナA
SMAアンテナコネクター A と B
MPR30-IEMには2つのアンテナがつきます。 御使用になる周波数帯により、異なるアンテナモデルが
供給されます。 すべてのモデルには、黒いキャップ、
白色で書かれたコードの黒いラベルがあります。
詳細は、Accessories and Parts の章を参照ください。
ヘッドフォン出力
オーディオヘッドフォン出力は、TRSタイプの3.5mm ステレオジャックソケットです。
音量は、ボリュームコントロールノブで調整できます。また、Audio settings > Pwr. Limit
menuで設定できます。
On / Off / 音量調整
上面のコントロールノブで以下の設定を行うことができます。
レシーバーを ON にする:ノブをカチッとなるまで時計回転方向に回す
レシーバーをOFFにする:ノブをカチッとなるまで反時計方向に回す
音量を調整する:適正な音量になるようにノブを回して調整します。
音量調整のロックを無効にする:1秒以内に、OFFしてからONにする。
備考: レシーバーの ONとOFFについて
1秒以内 → MPR30 は初期化せずに動作を再開します。
1秒後 → MPR30は初期化を伴って起動します。

MPR30-IEM User Manual
Rev. 06
Front panel
MPR30- OLED
display.
OLED Display
The receiver has a high contrast display. Pushing one of the 4 buttons while the receiver is
active (but the display is off), turn on automatically the display. After a time-out user setting
(see Display>Off timeout menu) the display turns off automatically.
SEL & EXIT Buttons
Push the 2 buttons together to enter on the function menu
SEL Button
EXIT Button
Push this button to turn off the display.
During menu navigation push this button to exit from current menu (escape function).
SYNC/UP Button
Push and keep this button to start a synchronisation with a Wisycom transmitter (follow
instructions on display). Before starting synchronization IRDA must be enabled on Wisycom
transmitter.
During menu navigation push this button to move -up and select the previous item.
SCAN/DOWN Button
Push and keep this button to start the automatic scan.
During menu navigation push this button to move-down and select the previous item
SCAN/DOWN
Button
SYNC/UP
MENU/EXIT
Button
MENU/SELECT
Button
ON Led Indicator
RF Led Indicator
Infrared Interface
(IR)
フロントパネル
MPR30-IEM は、RGB色のLEDとOLEDディスプレイを見ながらボタン操作で簡単かつクィックに設定を
行うことができます。
ON LED 表示
RF LED 表示
赤外線通信窓
OLED 有機ディスプレイ
レシーバーはくっきりとした明瞭な表示をします。レシーバーがアクティブ(かつディスプレイが表示オフ)の
状態で、4つあるボタンのどれか1つを押すことでディスプレイが表示されるようになります。 ユーザー設定
の時間(Display > Off timeout メニュー)が経過すると自動的に、ディスプレイ表示がオフになります。
この2つのボタンを同時に押すと、ファンクションメニューに入ります。
ファンクションメニューを決定するときに押します。 また、長押しすると設定を保存します。
ディスプレイをオフにする時に押します。 メニューで設定中にこのボタンが押されると、
現在のメニューを終了し(ファンクションを抜け)ます。
ボタン
ボタン
ボタン
ボタン
このボタンを長押しすると、Wisycomトランスミッターと同期を始めます(ディスプレイに表示される指示
に従って操作してください)。 同期を始める前に、WisycomトランスミッターのIRDAが有効になっていな
ければなりません。 メニュー設定中にこのボタンを押すと、メニュー項目を上に移動してアイテムを選
択することができます。
ボタン
このボタンを長押しすると、自動スキャンを開始します。 メニュー設定中にこのボタンを押すと、
メニュー項目を下に移動してアイテムを選択することができます。

MPR30-IEM User Manual
Rev. 06
ON & RF Led Indicators (Firmware rel. v0.2)
ON
RF
WHEN
MEANING
power up
red
off
when the receiver is power on,
during the power up phase
the receiver is not ready to use,
wait the status display on display
red
off/on
when the receiver is power on,
after the power up phase
the PLL is not locked on the select
frequency, wait for lock ( about
1second or less)
Tuning phase
red
off/on
when the receiver is power on,
during a frequency change
phase (see Gr-Ch or Frequency
menu)
the PLL is not locked on the select
frequency, wait for lock
fixed
green
off
after the tuning phase, no
transmitter is received
the receiver is locked on the
select frequency, the batteries
charge is good, no transmitter is
synchronized with the receiver,
no output audio available
fixed
green
blue
after the tuning phase, a stereo
signal is received
the transmitter is correctly tuned,
the bars in the status display
show the RF levels received from
antenna A and B
fixed
green
green
after the tuning phase, a mono
signal is received
the transmitter is correctly tuned,
the bars in the status display
show the RF levels received from
antenna A and B, in the status
display M symbol appears upper
the battery level
battery status
fixed
green
on/off
the batteries charge of the
receiver is good (>25% lifetime)
the batteries charge of the
receiver is good
slow
blinking
green
on/off
the batteries charge of the
receiver is low (<25% lifetime)
change or put on charge the
batteries as soon as possible
fast
blinking
green
on/off
the batteries charge of the
receiver is very low (<12%
lifetime)
change or put on charge the
batteries immediately
red
off
battery error
change the batteries
charging status
blinking
blue
off
during batteries charging
the batteries are charging (<90%
of complete charge)
blinking
green
off
during batteries charging
the batteries are
of charge reached)
fixed
green
off
during batteries charging
charge complete
white
green/
blue
device in bootloader mode*
* to put the MPR30-IEM in boot mode: power on the device push and keep both UP and DOWN buttons
for few seconds (until the led indicators light up, then release the buttons)
LED 表示(Firmware rel. v0.2)
意味
レシーバーの電源が入っていて
起動中。
レシーバーは使用できません。 ディスプレイ
にステータスが出るまでお待ちください。
レシーバーの電源が入っていて、起動後。
選択した周波数でPLLがロックされていませ
ん。 (1秒ほどお待ちください。)
起
動
チ
ュ
ー
ニ
ン
グ
段
階
電
池
状
態
充
電
状
態
レシーバーの電源が入っていて、周波数
が変更中 (Gr-Ch か
Frequencyメニューを参照)
選択した周波数でPLLがロックされていませ
ん。 ロックするまでお待ちください。
チューニング段階後、トランスミッターが
見つからない。
レシーバーは選択した周波数でロックし、
バッテリー残量は良好、レシーバーに同期
したトランスミッターがいません。
オーディオは無音です。
チューニング段階後、ステレオ信号を
レシーブ。
トランスミッターは正しくチューンされてい
て、アンテナが受信したRFレベルがディス
プレイに表示されています。
チューニング段階後、モノラル信号を
レシーブ。
トランスミッターは正しくチューンされていて、
アンテナが受信したRFレベルがディスプレイ
に表示されています。
バッテリーレベルの上に Mマーク表示。
バッテリー残量は良好
(25%以上 )
バッテリー残量は良好。
バッテリー残量が少ない。
(25%以下)
できれば、バッテリーを交換するか、充電
してください。
バッテリー残量が非常に少ない。
(12%以下)
すぐ、にバッテリーを交換するか、
充電してください。
バッテリー不良
バッテリーを交換してください。
バッテリー充電中
バッテリー充電中
バッテリー充電中
バッテリー充電中
(90%以上完了)
バッテリー充電完了
バッテリー充電中
(90%未満)
ブートローダーモード
MPR30-iemをブートモードにするには、UPとDOWNボタンを数秒間押しながらユニットの電源を
入れてください。
MPR30-IEM User Manual
Rev. 06
PUTTING THE DIVERSITY RECEIVER INTO OPERATION
Insert the batteries
Connect the headphones
Connect the 2 antennas on the SMA connectors
Turn the knob control clockwise until it clicks and verify on the display the Antenna
model to use (if the connected antennas on the receiver is different from the
antenna model indicate on the display, power off the receiver and replace them with
the proper model of antennas)
after the power up phase, the Status display is showed on the OLED display
verify the setting and eventually adjust the settings using the Operating Menu
Status display
- Receiver Name (ex. MPR30-IEM RX)
- Group (ex. Gr:00) and Channel (ex. Ch:01)
- Frequency (ex. Fr:697.000 MHz)
- Squelch (ex. Sq:12dBuV)
- Mode (ex. Stereo)
A. RF Level Antenna A and B (range 5 ÷ 70 dBµV)
B. Between the two RF bars there is a dotted line where the first 3 dots indicate
6/8/10dBµV and the other 15 dots indicate the rest of the range (from 14 to 70dBµV
with step of 4dBµV
An orizzontal sign in a central row shows the setted Squelch level
C. deviation level (range of 54 dB, bar with 3dB steps; upper level= 0dB, under level =-54dB)
the upper symbol:
indicates presence of audio output
indicates absence of audio output (RF level < Squelch)
indicate absence of audio output (no pilot tone detected)
NOTE: in case of absence of pilot tone and RF level < Squelch, the symbol will be
display
D. batteries level for MPR30-IEM receiver
the upper symbol:
indicates receiving of a mono signal
indicates receiving of a stereo signal
S
T
M
S
A
B
C
CSquelch level
ダイバシティ・レシーバーを運用状態にする
バッテリーを挿入します。
ヘッドフォンを接続します。
SMAコネクターに2つアンテナを取付けます。
コントロールノブをカチッとするまで時計回転方向に回した後、ディスプレイに表示されるアンテナ
モデルを確認してください。(もし接続されているアンテナが、ディスプレイに表示されたアンテナ
モデルと異なる場合は、電源を切ってから正しいアンテナに取り換えてください。)
ユニットが起動したら、OLEDディスプレイに ”Status display” が表示されます。
設定を確かめて、最後に”Operating Menu” の中で設定を調整してください。
レシーバーの名前(例:MPR30-IEM RX)
グループ(例:Gr:00)と チャンネル(例:Ch:01)
周波数(例:Fr:697.000MHz)
スケルチ(例:sq:12dBuV)
モード(例:Stereo)
スケルチ レベル
アンテナAとBのRFレベル(レンジ5 ~70 dBμV)
RFバーグラフの間にはドットラインがあり、最初の3ドットは 6/8/10 dBμV、他は15 dBμV
、残りの範囲(14~70 dBμV)では4 dBμVステップを表示します。
RFレベルの真ん中にあるマークは設定されたスケルチレベルを示します。
デビエーションレベル(54dBのレンジ、3dBステップのバー、上位レベル=0dB、下位レベル=-54dB)
シンボルマーク :
オーディオ出力が存在することを示します。
オーディオ出力が無音であることを示します。(RFレベル < スケルチ)
オーディオ出力が無音であることを示します。(パイロットトーン非検知)
備考:パイロットトーンを検出できなくて、 RFレベルがスケルチより低い場合、
表示されます。
シンボルが
MPR30-IEMレシーバーのバッテリー残量レベル
シンボルマーク :
モノラル信号を受信していることを示します。
ステレオ信号を受信していることを示します。

MPR30-IEM User Manual
Rev. 06
DISPLAY MENU
MENU
Audio
Settings
Out mode Stereo/Mono/Mix
Balance L|R
Equalizer Low (-12÷+12)
Hi (-12÷+12)
Vol. boost -12÷+12dB
Output load /
Pwr limit OFF/100mW/50mW/30mW
Edit RX
Gr-Ch GR (0÷39)
CH (0÷59)
Frequency N: 470.000÷700.000
M: 566.000÷798.000
Squelch OFF*-0/3/6/9/12/15/18/21/24//28/32/36/40/46 dBµV
Scan
Scan now
Channel GR 00 - 39
Groups more groups (max 10)
Freq freq. Min/ freq. Max/
step (100 or 200 kHz)
Squelch scan
Scan BTN Channel/Groups/Freq
View last
Deploy
Settings
Name 12 characters
ex. RECEIVER-123
Quick Menu Bal /Mix ; Clone ; Off
Display
Contrast 0÷5
Low timeout (sec) 5÷60 steps 5
Off timeout (sec) 10÷120 steps 10 - OFF
LED Full/Alarm/OFF
Infrared
Sync
Advanced
Lock volume Yes/No
Pilot Squelch Yes/No
Clone
Add 00÷23
Load default/0/...
Delete 00÷23
Delete all
Info
Model MPR30-IEM
Range 470÷700
Serial S2334437
FW
Version v1.5
BL v1.4d
App v1.54d
HW Version 6
Option N
Battery 3.71 Volt
Errors 0
Preset Restore 1/2/3/4/5/6/Factory
Save 1/2/3/4/5/6
*Only using lithium battery
Preset parameters
Clone parameters
It appears if
exist at least
1 clone

MPR30-IEM User Manual
Rev. 06
From Status Display push SEL and EXIT together to enter on the
Main menu
Use UP/DOWN to navigate on all available menus
Push SEL to select a menu item
Use UP/DOWN to move on the different parameters of the menu
Push SEL to modify the parameter menu
Use UP/DOWN to change the parameter value
Keep push SEL to save changing
Push EXIT to return on the Main Menu
Push EXIT to return on the Status display
Audio settings
The Audio settings menu allows to configure the audio output.
PARAMETER
SETTING
MEANING
Out mode
Stereo
The left and right signals are available as usual. The Balance
setting serves to adjust the balance between the left and
right stereo signal.
Mono
The left-right signals are mixed and are available as a mono
signal in both headphone channels. It is not possible to
adjust the level of the 2 channels as in Out mode Mix.
Mix
The left-right signals are mixed and are available as a mono
signal in both headphone channels.
The Mix mode setting serves to adjust the relative levels of
the two separate channels in the mixer mono signal.
Equalizer
Low and High
frequencies
-12dB/+12dB
1dB steps
This menu allows to of adjusting the gain of low and high
frequency components (bass and treble) within the audio
signal.
1. Push UP/DOWN button to increase/decrease the
gain of the Low frequencies (50Hz)
2. Push SEL button to shift on High frequencies,
3. Push UP/DOWN button to increase/decrease the
gain of the High frequencies (10kHz)
4. Keep push SEL button to SAVE
Vol. boost
-12/-6/0/3/6/9/12dB
This menu allows to increase or decrease the volume of the
output headphones, selectable from -12 dB to 12 dB. Set the
appropriate volume boost and then adjust the volume with
the control knob.
Output load
Set the Output load according to the impendence of the
headphones connected
Pwr limit
OFF (only using lithium
battery) / 100mW /
50mW / 30mW
This menu allows to limit the power output. If set to
OFF(only lithium battery), there is no power limit control. If
set to OFF using alkaline or NiMH batteries, the receiver set
automatically the max value permitted (100mW)
NOTE: When the volume knob is rotated, appears a screen with a
volume bar and the values of Pwr limit, Outpul load and Vol. boost
メニューは、音声出力に関する設定を行います。
メインメニューに入るには、ステータス画面で SEL と EXIT を同時に
押します。
メニューの中を移動するには、UP/DOWNを使用します。
メニューアイテムを選択するには、 SEL を押します。
異なるパラメーターへ移動するには、UP/DOWN を使用します。
パラメーターメニューを変更するには、 SEL を押します。
パラメーター値を変更するには、 UP/DOWN を使用します。
変更を保存するには、 SEL を押し続けます。
メインメニューに戻るには、EXIT を押します。
ステータスディスプレイに戻るには、EXIT を押します。
左右の信号は通常通り有効です。
バランス設定はステレオ信号の間でバランスを調整できます。
左右の信号はミックスされ、両方のヘッドフォンチャンネルへ
モノラルで送られます。 Out mode Mixのように2チャンネルの
レベルを調整することはできません。
左右の信号はミックスされ、両方のヘッドフォンチャンネルへ
モノラルで送られます。Mix mode設定は、ミキサーの中で2つの
分離したチャンネルのそれぞれのレベルを調整することができます。
オーディオ信号の低域と高域を補正することができます。
UP/DOWNボタンを押して、低域(50Hz)を増減します。
SELボタンを押すと高域設定に変わります。
UP/DOWNボタンを押して、高域(10kHz)を増減します。
SELボタンを押すとEQが保存されます。
1.
2.
3.
4.
ヘッドフォン出力の音量を増減できます。 設定範囲は
-12dBから+12dBです。 適切な音量ブーストに設定してから、
コントロールノブで音量を調整してください。
出力パワーを制限します。 Off(リチウム電池のみ)にすると
パワー制限しません。 アルカリ電池やNiMH電池でOffにして
も、自動的にレシーバーは100mWに制限します。
備考:
音量ノブが回されたとき、画面には音量バーとパワーリミット値(Pwr)、出力
ロード(Ω)、音量ブースト(Boost) が表示されます。
(オーディオ設定)

MPR30-IEM User Manual
Rev. 06
Edit RX
The Edit RX menu allows to configure the radio frequency settings.
PARAMETER
SETTING
MEANING
Gr-Ch
0÷39 groups
0÷59 channels
Select current group and channel. Group name and
channel frequency are displayed on the right.
Frequency
470÷700 MHz
for MPR30-IEM-N
566÷798 MHz
for MPR30-IEM-M
If the specific group/channel is not locked, the frequency
can be edited in this menu.
Squelch
OFF or
0/3/6/9/12/
15/18/21/
24/28/32/
36/40/46dBuV
This menu allows to disable the RF squelch or to setup the
desired squelch level in dBuV (note 0 dBuV is equal to -
107 dBm).
Scan
It allows making three types of scan over a desired
channel, group or frequency. MPR30-IEM manages up to
2400 custom frequencies organized in 40 groups of 60
channels each. This extreme flexibility makes the scan
function very flexible.
This function can be called also using the dedicated
DOWN&SEL buttons pushed together.
Squelch scanindicates the threshold below which a
channel is considered as free or almost free.
Scan BTNis the parameter to set the rapid function
called pressing DOWN&SEL buttons together.
View lastallows to see the result of the last scan
operation.
Deployallows to send to a MTK952 the last scan.
of the
last scan and choose the frequency to tune.
(*)As per Wisycom standard, group 00 and group 01 or 09 are special; respectively the “center
frequency” (474,482/MHz) and the intergap frequency (i.e. 470/478/486/MHz). A scan on group
00 will reveal in few seconds the overall DVB-T occupation on the area, while a scan on group 01 will
give possible working frequency, usable also in presence of strong DVB-T signal (sort to speak working
in the band-guard of 2 digital television channels).
メニューはラジオ周波数の設定を行います。
現在のグループとチャンネルを選択。
グループネームとチャンネル周波数は右側に表示されます。
特定のgroup/channel がロックされていないとき、
周波数はこのメニューで編集できます。
RFスケルチを無効にするか、任意のスケルチレベルを
dBuVで設定することができます。(0 dBuVは 107 dBmです。)
任意のチャンネル、グループ、周波数において、スキャンの種類
を3つ作ることができます。MPR30-IEMは60 channelsごとの
40 groupsに組まれた2400までのカスタム周波数を管理します。
この柔軟性がスキャン機能を非常に使い易くしています。
この機能は、DOWNとSELを同時に押すと呼び出すことができます。
“Squelch scan”
は、どのチャンネルが空いているか、ほとんど使われていないか
を決めるスレッショルド値を表示します。
“Scan BTN” は、DOWNとSELを同時に押すショートカットキー
に割り当てる機能を設定するものです。
Channel、Group、Frequency scan を設定することができます。
“View last” は最後にスキャン操作した結果を見ることができます。
“Deploy” は MTK952へ最後のスキャンを送ります。
トランスミッターからはスキャンのグラフィックを見ることができ、
チューンするための周波数を選択できます。
Wisycom標準で、group 00 と group 01 か 09 は特別です。 ”center frequency” (474,482/… MHz) と
intergap frequency (例 470/478/486/… MHz) です。group 00のスキャンは、数秒で そのエリアのDVB-T
occupation全体を表示します。group 01のスキャンは、使用している可能性のある周波数を表示し、強力な
DVB-T信号の存在も使用可能です。(2デジットテレビチャンネルのバンドガードの中でスピークワーキングへソート)
(RXの設定)

MPR30-IEM User Manual
Rev. 06
“Scan now” menu
The following table lists the three types of scans that can be performed
Channel
Once started a Channel scan operation the receiver asks for
group to be used*. Press and hold the SEL button to select the
group to scan.
Then it prompts to turn off all transmitters.
So press SEL to start the scan!
After few seconds, scan results are displayed sorted by level,
making easier to pick up the best one.
The dotted line in the graph indicate the squelch threshold.
Under the graph are reported the following parameters:
-Ch: Channel
-Rank: Ranking position
-Freq: Frequency
-Lev: RF level
Pushing simultaneously UP and DOWN button, the results can
be also displayed on a chart in ascending order according to
the number of the channel.
After the selection of the desired channel, a screen appears
with the selected frequency, channel and group and it is
possible to Set or Synchronize the receiver with the
transmitter. We recommend setting the frequency and then
synchronize it with the transmitter.
Groups
If the scan is done on Groups, you can choose a maximum of
10 groups from among the 40 groups shown in the table
(Press the SEL button to select and press it again to deselect).
In the upper left shows the number of the selected group and
the number of selected groups, while in the upper right corner
there is the item "START" to start the scan.
To select START, go to the box 39 and press the "UP" button or
go to the box 0 and press the "DOWN" button, so press SEL to
run the scansion.
Then it prompts to turn off all transmitters.
So press SEL to start the scan!
チャンネルスキャンを始まると、レシーバーは使用されるグループを
尋ねます。 SELボタンを長押ししてスキャンするためのグループを
選択してください。
次の表は、実行可能な3つのスキャンタイプです。
そして、すべてのトランスミッターをオフにするよう促します。
SEL を押すとスキャンが開始されます!
数秒後、スキャンの結果はレベルでソートされて表示されるので、
一番良いものをかんたんにピックアップすることができます。
グラフ中のドットラインはスケルチのスレッショルドを意味します。
グラフの下には、つぎのパラメーターがレポートされます。
UPとDOWNボタンを同時に押すと、チャンネル番号に沿って並べ替えら
れて結果が表示されます。
- ch: チャンネル
- Rank: ランキング位置
- Freq: 周波数
- Lev: RFレベル
任意のチャンネルを選択後、選択された周波数、チャンネル、
グループが表示され、レシーバーをトランスミッターに同期すること
ができます。 周波数を設定してからトランスミッターに同期すること
を推奨します。
もしスキャンがグループ上で行われると、テーブルの中に表示される
40グループの中から最大10グループを選ぶことができます。
(SELボタンを押すと選択され、もう一度押すと選択解除されます。)
左上には選択されたグループの数と選択されたグループの数が
表示され、右上にはスキャンを開始するための”START” があります。
STARTを選択するためには、box 39へ移動してから UPボタン
を押すか、box 0 に移動して DOWNボタンを押します。
次に SELボタンを押すとスキャンの手順に入ります。
次に、すべてのトランスミッターをオフにするよう促します。
SELボタンを押すと、スキャンが開始されます。

MPR30-IEM User Manual
Rev. 06
After few seconds, scan results are displayed on a histogram.
Each column of the histogram is divided into two parts by a
black line. The lower part indicates the number of free
channels (RF level < Squelch level - 6dBµV) in the group, while
the upper one the number of channels almost free
(Squelch level <RF level < Squelch level - 6dBµV).
We recommend to choose the group with the highest number
of free channels.
Press SEL to select the desiderate group and choose the
channel as in Channel scan
After the selection of the desired channel, a screen appears
with the selected frequency, channel and group and it is
possible to Set or Synchronize the receiver with the
transmitter. We recommend setting the frequency and then
synchronize it with the transmitter.
Freq
The Frequency scan allows to select a range of frequency to
scan, between a maximum and a minimum value and the step
with which to perform the scans. Press and hold the SEL
button to select the group to scan.
Then it prompts to turn off all transmitters.
So press SEL to start the scan!
After few seconds, scan results are displayed on a chart in
ascending order according to the frequency (step 1MHz). The
dotted line in the graph indicate the squelch threshold.
s possible to
zoom the graph to show all the steps of scan
After the selection of the desired frequency, a screen appears
with the selected frequency and the RF level and it is possible
to Set or Synchronize the receiver with the transmitter. We
recommend setting the frequency and then synchronize it
with the transmitter.
数秒後、スキャンの結果がヒストグラム上に表示されます。
ヒストグラムの各コラムは黒線で2つのパートに分かれています。
下部分はグループの中のフリーチャンネルの数(RFレベル<スケルチ
レベル – 6dBuV)です。
フリーチャンネルの数が一番大きいグループを選択することを推奨
します。
SELボタンを押して任意のグループを選択し、”Channel scan”
の中でチャンネルを選んでください。
任意のチャンネルを選択後、選択された周波数、チャンネル、グループ
が表示され、レシーバーをトランスミッターに同期することができます。
周波数を設定してからトランスミッターに同期することを推奨します。
周波数のスキャンは、スキャン範囲を最小値と最大値、スキャンを実行
するときのステップを指定することができます。
SELボタンを長押しすると、スキャンするためのグループを選択することが
できます。
SELボタンを押すとスキャンをスタートします。
次に、すべてのトランスミッターをオフにするよう促します。
数秒後にスキャン結果が、周波数(1MHzステップ)順のチャート
で表示されます。 グラフのドットラインはスケルチのスレッショルド
を意味します。
UPとDOWNを同時に押すと、スキャンの全ステップを見るために
グラフを拡大することができます。
任意の周波数を選択後、選択された周波数とRFレベルが画面に
表示され、レシーバーをトランスミッターに同期することができます。
周波数を設定してからトランスミッターに同期することを推奨します。

MPR30-IEM User Manual
Rev. 06
Settings
The Settings menu allows to configure main settings of the device.
PARAMETER
SETTING
MEANING
Name
12 case-sensitive alphanumeric
characters
The name menu allows to change the name of the
receiver. This is the name displayed in the top of
the Status display and it is the name sent to the
transmitter with the sync function (for the
transmitter with this advanced capability).
Use the UP/DOWN buttons to change the selected
character and push SEL button to switch to the
next character.
Quick
Menu
Bal/Mix ; Clone ; Off
The quick menu is displayed pushing UP or DOWN
buttons when the receiver is on the Status display.
Set to Bal/Mix to enter quickly to the Balance/Mix
mode menu (according to the Out mode
configured).
r quickly to the Load clone
menu
Set to
and UP or DOWN buttons are pushed, nothing
happens).
Display
Contrast
0÷5
Change contrast display from 0 (min) to 5 (max).
Low timeout
5÷60 (steps 5)
Low timeout sets the timeout from 5 to 60 seconds
(5sec steps) to decrease the brightness display.
Off timeout
10÷120 (steps 10)
or OFF
Off timeout sets the timeout from 10 to 120
seconds in 10 sec. steps to turn off the display.
With OFF setting the display never turns off.
LED
Full
Alarm
OFF
3 LED setting are available:
Full: LED indicators works normally;
Alarm: LED indicators lights up only when an alarm
happened;
OFF: LED indicators remain off.
Infrared
By this menu, MPR30-IEM can be connected to IRDA for setup or firmware upgrades.
When the Infrared interface is active, the following screen is displayed.
NOTE: while in this menu display is not automatically turned off.
メニューでは、デバイスのメイン設定を行います。
レシーバーの名前を変更できます。
この名前はステータス・ディスプレイのトップに表示され、
同期した時にトランスミッターに送られます。
UP / DOWN ボタンを使って、選択された文字を変更し、
SELボタンを押すと次の文字編集に変わります。
スキャン
ディスプレイ表示の濃淡を、0から5まで調整できます。
ディスプレイ輝度が減光するまでの時間を
5から60秒まで5秒間隔で設定できます。
ディスプレイ表示が消えるまでの時間を10から120秒
まで10秒間隔で設定できます。
OFFに設定するとディスプレイが消えることはありません。
3つのLED設定できます。
Full: LEDは通常どおりに働きます。
Alarm: LEDは警告時だけ光ります。
OFF: LEDは光りません。
レシーバーがステータス・ディスプレイの時、UPか
DOWNボタンを押すとクィックメニューが表示されます。
Bal/Mixに設定すると、Balance/Mixモードにアクセス
できます。
Cloneに設定すると、Load cloneメニューにアクセス
できます。Off に設定すると、UP, DOWNボタンを押し
ても、何も起こらなくなります。
ファームウェアアップグレードやセットアップのために、MPR30-IEMを IRDAに接続するときに
このメニューを使用します。 赤外線インターフェースが有効になっている時、つぎの画面が表示されます。
備考:このメニューでは、ディスプレイが自動的にオフになることはありません。
(設定)
(赤外線)

MPR30-IEM User Manual
Rev. 06
Sync
The SYNC function is useful to tune a transmitter on the same
frequency of the receiver via the IR interface. Before starting the
sync function tune the receiver on desired channel, manually or
using the SCAN utility. After this, enable the IR interface on the
transmitter. Now press UP&EXIT buttons together or enter in the
Sync menu to start the SYNC function. Keep the IR window of the
transmitter in front of the IR window of the receiver and, as soon as the connection is done, the
receiver will send to the transmitter all the information needed.
If the operation is not possible, (i.e. the frequency range of the transmitter is not compatible with
the frequency of the receiver), the display will show an error message.
If the transmitter function is completed it will
show the same name of the synchronized receiver.
Advanced
The Advanced menu allows to manage advanced settings.
PARAMETER
SETTING
MEANING
Lock volume
Yes / No
display an open lock is displayed on the Status
Display. After Display -Low timeout
becomes closed and the lock volume is enabled.
To enable the volume setting it is necessary turn
the volume knob below the previous setting or
Pilot Squelch
Yes / No
When the Pilot tone is enabled, the audio output is
muted unless the correct carrier is detected
(19kHz).
When the Pilot tone is disable, the audio output is
muted if RF level < Squelch level.
For the presence/absence of audio output, check
the upper symbol in the status display.
Clone *
Add
00÷23
To add a clone
Load
Default/00÷23
To load a clone *
Delete
00÷23
To delete a clone *
Delete all
To delete all the clones *
*A clone is a partial configuration of the MPR30-IEM which can be copied from a receiver to another
using the IRDA interface. It consists of the same parameters of pre-set configuration for less than
display, quick menu and headphones parameters (see the Operating menu for more details).
From firmware version v1.3 the MPR30-IEM is able to manage up to 24 clones (from 00 to 23). The
menus of the clone management allow to add/load and delete a clone.
* It appears if exist at least a1 clone
SYNC機能は、赤外線(IR)インターフェースを用いてレシーバーと同じ周波数
にトランスミッターをチューンするのに便利です。SYNC機能を始める前に、
任意のチャンネルのレシーバーの周波数を手動かスキャンユーティリティで
合わせてください。 その後、トランスミッターのIRインターフェースを有効にし
てください。
UPとEXITボタンを一緒に押すか、Syncメニューに入って、SYNC機能をスタートします。 レシーバーのIR窓の前に、
トランスミッターのIR窓をキープすると、すぐに接続が行われ、レシーバーはトランスミッターに必要な情報を送ります。
もし接続がうまくいかない(例:トランスミッターの周波数レンジがレシーバーの周波数に適合していない)場合は、
ディスプレイがエラーメッセージを表示します。もしトランスミッターで ”NAME”機能が有効になっていると、
SYNC機能が完了して、同期したレシーバーと同じ名前が表示されます。
メニューでは、より詳細な設定を行うことができます。
Yesに設定すると、ディスプレイが ”max brightness”
の間、ステイタス・ディスプレイ上でopen lockが表示
されます。 “Display-Low timeout” の時間が経過
すると、lockが閉じられて、lock volumeが有効になります。
音量設定を有効にするには、音量ノブを前の設定より下げ
るか、”quick turn off – turn on” にしてください。
パイロットトーンが有効だと、正しいキャリア(19kHz)が
認識されない限り、オーディオ出力がミュートされます。
パイロットトーンが無効だと、RFレベル<スケルチレベル
でオーディオ出力がミュートされます。
オーディオ出力が無音かそうでないかは、ステータス・ディ
スプレイに表示されているシンボルで確認できます。
クローンを追加。
クローンをロード。
クローンを削除。
すべてのクローンを削除。
クローンは、MPR30-IEMの部分的なコンフィグレーションで、IRDAインターフェースを使って、レシーバーから
他のレシーバーへコピーすることができます。コピー内容は、ディスプレイ、クィックメニュー、ヘッドフォンパラ
メーターを含まないプリセット・コンフィグレーションの同じパラメータで構成されます。
MPR30-IEMのファームウェアv1.3から、24までのクローン(00から23まで)を管理することができます。
クローンマネージメントのメニューで、クローンの追加、ロード、削除ができます。
Clone” のパラメータは、1台以上のクローンが少なくとも存在すれば表示されます。
(シンク)
(アドバンスド)

MPR30-IEM User Manual
Rev. 06
How to add a clone
Out mode
Balance
Equalizer
Vol boost
Pilot tone
Gr-Ch
Squelch
RX Name
How to load a clone
Use Clone>Load menu or UP/DOWN button (if the quick menu is configured to clone) to load a
clone. Afterwards push the arrows to change clone, SEL to activeted the clone and EXIT to exit
without changing.
Ex.
The configuration saved before the loading of the clone is saved on
the clone default, theref
allows to return with the previous settings. The following
arrows displayed near the clone number indicates the currently
clone loaded.
Clone name
Enable the IRDA interface on the RX from
which take the configuration (Infrared menu)
Enter in the Add menu and select the
wanted clone number. Then push SEL
to start the IRDA communication.
Put the receivers face
to face
At the end of the process the name
of the clone will be identify with the
name of the receiver.
(クローンの追加方法)
(クローンのロード方法)
クローンをロードする前に保存されるコンフィグレーションは、”default” という
名前のクローンに保存されています。つまりデフォルト”clone” をロードすると、
前のセッティングに戻ります。
クローン番号の近くにあるマーク ** に続いて、現在ロードされている
クローンを表示します。
Outモード
バランス
イコライザー
Volブースト
Group-Channel
スケルチ
RXネーム
クローンネーム
レシーバーのIRDAインターフェースをコンフィグレーショ
ン(Infraredメニュー) から有効にします。
レシーバーどうしのIR窓を
近づけてください。
通信終了時に、クローンネームが
レシーバーネームとして認識されます。
Addメニューの中でEnterし、設定したい
クローン番号を選択します。
そしてSELを押すと、赤外線通信が
始まります。
Clone > Load メニューか、(クイックメニューがcloneに設定されていれば)UP/DOWN ボタンで、クローン
をロードします。 その後、矢印のボタンを押してクローンを変更し、SELボタンを押すとクローンが有効に
なり、EXITを押すと変更せずに終了します。

MPR30-IEM User Manual
Rev. 06
Loading a clone, all the clone parameters are set on the receiver. The follow icon appears on the
right of the display indicating that a clone is loaded. The number and the name of the clone are
displayed on the top of the display menu and a brief list of the main parameters are displayed on the
status menu.
NOTE: the clones are saved on the EPROM and remains saved also after a reboot of the device.
NOTE: If a clone is loaded and then a reboot is executed, the MPR30-IEM always restarts with the
previous configuration (default clone).
NOTE: When a clone is loaded, it's not possible change the parameters
using Lithium battery, the power limit is set automatically to the max value permitted for no lithium
battery (that is 100mW).
Info
the INFO function shows many important features or information of MPR30-IEM receiver:
PARAMETER
MEANING
example
Model
Wisycom receiver model
MPR30-IEM
Range
Frequencies range of working
470-700
Serial
Serial number
S2334437
FW
Version *
Firmware version
V1.6
BL
Bootloader version
V1.4d
App
Application version
V1.63d
HW
Version
Hardware version
6
Option
MPR30-IEM Options
N= freq. range
470÷ 700 MHz
,
M= freq. range
566÷ 798 MHz
N
Battery
Batteries voltage
3.71 Volt
Errors
Number of errors.
If the number of errors is > 0 push SEL button to enter on the
Errors list. For each error a brief description and the error code is
showed. For more information, please see the Error List section.
4
* The Firmware Version recaps BL (Bootloader Version) and App (Application version).
Name of the clone
symbol to indicate that a
clone is loaded
is loaded
Number of the clone
Main parameters
クローンをロードすると、レシーバー上のすべてのパラメータが設定されます。 ディスプレイに右側に表示される **
アイコンは、クローンがロードされたことを示します。 クローンの番号とネームはディスプレイメニューのトップに表示
され、おもなパラメータの短いリストはステータスメニューに表示されます。
クローンの数
メイン パラメータ
クローンの名前
クローンがロードされた事を
しめすシンボルマーク
備考:クローンはEPROMに保存されるので、デバイスをリブートしても情報が残ります。
INFO機能は多くの重要な機能、デバイスの情報を表示します。
備考:もしクローンがロードされてからリブートを実行しても、MPR30-IEMは常に、事前のコンフィグレーション
(default clone)で再起動します。
備考: クローンがロードされるとき、パラメータを変更することはできません。
備考: リチウム電池を使っていないレシーバーで、Power limitの設定がOFFの設定になっているクローンが
ロードされると、Power limit設定は自動的に最大値(100mW)に変更されます。
エラーの数
もしエラーの数が 0以上なら、SELボタンを押すとエラーリストに入ります。
各エラーに対して短い記述とエラーコードが表示されます。詳細はエラー
リストの章を参照ください。
(インフォ)

MPR30-IEM User Manual
Rev. 06
Preset
This menu allows to load/save 6 user presets or load the Factory configuration.
PARAMETER
SETTING
MEANING
Restore
1/2/3/4/5/6/Factory
Select the Restore submenu and chose the presets
to load: user presets or Factory preset. Push and
keep SEL button to load the preset.
Save
1/2/3/4/5/6
Select the Save submenu and chose the user presets
to save. Push and keep SEL button to save the
preset
ERROR LIST
When an error occurs, the receiver
A. shows a message on the display
and for some error types
B. increases the errors counter in the info menu
C. inserts the error type and code on the error list in the info menu
When the error is solved, the message on the display disappear, but the error information
(code and description) are available on the error list in the Info menu (only for some error, see
the below table).
NOTE1: When the receiver is reset the error information (code and error type on the list) are
lost, with the exception of errors codes 87/88/89/8A.
NOTE2: To reset the error counter and the errors list, it is necessary to contact Wisycom.
Errors
Message on display
(A)
Error type
(C)
Code
(C)
HW init failed
HW init failed
Battery Low
Battery Low
Battery charge failed
I2C communication error
I2C access failed
04
Device ID copy1 invalid
Memory recovered
Device ID copy1 invalid
Memory recovered
Device ID copy 1
87
Device ID copy2 invalid
Memory recovered
Device ID copy2 invalid
Memory recovered
Device ID copy 2
88
RF copy1 invalid
Memory recovered
RF copy1 invalid
Memory recovered
RF mem copy 1
89
RF copy2 invalid
Memory recovered
RF copy2 invalid
Memory recovered
RF mem copy 2
8A
PLL unlocked
-
PLL unlocked
84
CH mem header
-
CH mem header
85
Param mem header
-
Param mem header
86
6つのユーザープリセットのload/saveと、Factory configurationのロードができます。
(エラーリスト)
(プリセット)
Restoreサブメニューを選択し、ロードしたいプリセットを
選択します。 SELボタンを長押しするとロードされます。
Saveサブメニューを選択し、セーブしたいプリセットを選択
します。 SELボタンを長押しするとロードされます。
エラーが発生すると、
Infoメニューのエラーリスト上でエラータイプとコードが挿入されます。
Infoメニューの中のエラー数が増加します。
ディスプレイにメッセージが表示されます。
そして、エラーの種類により、
エラーが解決されると、ディスプレイからエラーメッセージが消えますが、エラー情報(コードとその詳細)は
Infoメニューのエラーリストに残っています。 (エラーの一部を下記に示しています。)
備考1:レシーバーがリセットされるとエラー情報(コードとエラータイプ)も消えます。(error code
87/88/89/8A以外。)
備考2:エラーカウンターとエラーリストをリセットするには、Wisycomにご相談ください。

MPR30-IEM User Manual
Rev. 06
TROUBLESHOOTING
Problem
Possible cause
Possible solution
HW init failedmessage
appears on the display
Error during the hardware initialization
phase
-reset the receiver, if the
problem persists send to repair
at Wisycom Repair Centre
Battery Lowmessage
appears on the display
Low level on the battery
- change batteries or
- recharge the batteries
Battery charge failed
message appears on the
display
Error during batteries charger
(damage batteries or wrong batteries)
- change batteries
I2C communication error
message appears on the
display
Communication error on bus I2C
- send to repair at Wisycom
Repair Centre
Device ID copy1 invalid
Memory recovered
message appears on the
display
Error during the initialization phase. The
CRC-16 check of device data (copy 1)
detects error.
- nothing (the receiver
automatically replace the
corrupt copy1 with copy2)
Device ID copy2 invalid
Memory recovered
message appears on the
display
Error during the initialization phase. The
CRC-16 check of device data (copy 2)
detects error.
- nothing (the receiver
automatically replace the
corrupt copy2 with copy1)
RF copy1 invalid
Memory recovered
message appears on the
display
Error during the initialization phase. The
CRC-16 check of RF data (copy 1) detects
error.
- nothing (the receiver
automatically replace the
corrupt copy1 with copy2)
RF copy2 invalid
Memory recovered
message appears on the
display
Error during the initialization phase. The
CRC-16 check of RF data (copy 2) detects
error.
- nothing (the receiver
automatically replace the
corrupt copy2 with copy1)
The Serial Number of the
receiver in the Info menu
is UNCAL
Error during the initialization phase. The
CRC-16 check of device data (copy 1 and
copy 2) detects error.
- send to repair at Wisycom
Repair Centre
The errors 87 (Device ID
copy 1 ) and 88 (Device ID
copy 2) appear in the
errors list
Error during the initialization phase. The
CRC-16 check of device data (copy 1 and
copy 2) detects error.
- If the Serial Number in the
Info menu is UNCAL, then send
to repair at Wisycom Repair
Centre
- If the Serial Number in the
Info menu is not UNCAL,
continue to use the receiver
The errors 89 (RF mem.
copy 1 ) and 8A (RF meme.
copy 2) appear in the
errors list
Error during the initialization phase. The
CRC-16 check of RF data (copy 1 and copy
2) detects error.
- contact Wisycom for more
information
The receiver is not able to
tuned on the selected
frequency and the ON led
indicator remains red
Error during frequency tuning
- try to change the frequency, if
the problem persists send to
repair at Wisycom Repair
Centre
(トラブルシューティング)
"HW init failed”
が表示される。
“Battery Low”
が表示される。
リセットして改善されなければ、
修理に送ってください。
ハードウェアの初期化段階での障害。
問題
原因の可能性
対処
バッテリーの電圧が低い。
バッテリー交換か、充電してくだ
さい。
バッテリー充電中のエラー。
(バッテリー不良か、一次電池の装着)
バッテリーを交換してください。
修理センターに送ってください。
バス12Cの交信に障害。
初期化段階の障害。デバイスデータ
(copy1)のCRC-16チェックで識別
された障害。
ありません。(レシーバーは自動
的に壊れたcopy2をcopy1に交
換します。)
ありません。(レシーバーは自動
的に壊れたcopy1をcopy2に交
換します。)
初期化段階の障害。デバイスデータ
(copy2)のCRC-16チェックで識別
された障害
初期化段階の障害。RFデータ(copy2)の
CRC-16チェックで識別された障害。
ありません。(レシーバーは自動
的に壊れたcopy2をcopy1に交
換します。)
初期化段階の障害。RFデータ(copy2)の
CRC-16チェックで識別された障害。
修理に送ってください。
修理に送ってください。
初期化段階の障害。デバイスデータ
(copy1とcopy2)のCRC-16チェックで
識別された障害。
初期化段階の障害。デバイスデータ
(copy1とcopy2)のCRC-16チェックで
識別された障害。
Infoメニューでシリアル番号が
UNCALならば、修理に送ってく
ださい。
UNCALでなければレシーバーを
使い続けてください。
初期化段階の障害。デバイスデータ
(copy1とcopy2)のCRC-16チェックで
識別された障害。
周波数チューニング中の障害。
販売店に御相談下さい。
周波数の変更を試みてください
。改善されなければ、修理に送
ってください。
“Battery charge failed”
が表示される。
“12C communication
error” が表示される。
“Device ID copy 1 invalid
Memory recovered”
が表示される。
“Device ID copy 2 invalid
Memory recovered”
が表示される。
“RF copy1 invalid Memory
recovered” が表示される。
“RF copy2 invalid Memory
recovered” が表示される。
87(Device ID copy1) と
88(Device ID copy2)
がエラーリストに表示される
。
Infoメニューのシリアル
ナンバーが UNCAL。
“89(RF mem. Copy1)
と8A(RM mem. Copy2)
がエラーリストに表示される
レシーバーが選択された
周波数上でOnにならず、
ON LEDも赤のまま。
Other manuals for MPR30-IEM
2
Table of contents
Other WisyCom Receiver manuals

WisyCom
WisyCom MRK980 User manual

WisyCom
WisyCom MCR42 User manual

WisyCom
WisyCom MCR54 Series User manual

WisyCom
WisyCom MPR30-ENG User manual

WisyCom
WisyCom MCR41 User manual

WisyCom
WisyCom MCR54 Series Instruction manual

WisyCom
WisyCom MCR41 User manual

WisyCom
WisyCom MSR916 User manual

WisyCom
WisyCom MCR42 User manual

WisyCom
WisyCom MPR52-ENG User manual

WisyCom
WisyCom MCR42 User manual

WisyCom
WisyCom MPR50-IEM User manual

WisyCom
WisyCom MCR41 User manual

WisyCom
WisyCom MRK960 User manual

WisyCom
WisyCom MPR30-IFB User manual

WisyCom
WisyCom MCR41 User manual

WisyCom
WisyCom MCR54 Series User manual

WisyCom
WisyCom MRK980 User manual

WisyCom
WisyCom MPR30-IEM User manual