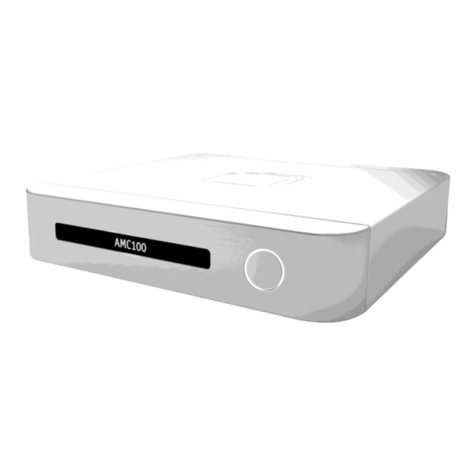
Wittenstein attocube AMC100 User manual

Interface Manual
AMC100 & AMC300

Modified:
02/2021
Products:
AMC100 | AMC300 | attoDISCOVERY Software | AMC Webserver Application | MOVE
© 2021 attocube systems AG. Product and company names listed are trademarks or trade names of their respective
companies. Any rights not expressly granted herein are reserved. ATTENTION: Specifications and technical data are
subject to change without notice.


Table of Contents | Page 1
Table of Contents
1System Integration.................................................................................................................2
1.1 Connecting to Third Party Hardware.............................................................................2
1.1.1 Cabling Restrictions............................................................................................2
1.1.2 Pin Assignments .................................................................................................2
2Software communication & interfaces ..................................................................................3
2.1 Introduction...................................................................................................................3
2.1.1 Web Interface.....................................................................................................3
2.1.2 JSON-RPC............................................................................................................3
2.1.3 C/C# DLLs............................................................................................................3
2.1.4 LabVIEW VIs .......................................................................................................4
2.1.5 Matlab Library ....................................................................................................4
2.2 Overview and implementation of the APIs ...................................................................5
2.2.1 JSON-RPC (JRPC2.0)............................................................................................5
2.2.2 C Library .............................................................................................................6
2.2.3 C# Library ...........................................................................................................8
2.2.4 LabVIEW .............................................................................................................9
2.2.5 Matlab ..............................................................................................................11
2.2.6 Python ..............................................................................................................11
2.3 Error handling..............................................................................................................13
2.3.1 C# error handling.............................................................................................. 13
2.3.2 Python error handling ......................................................................................13
2.3.3 LabVIEW error handling ...................................................................................14
3Functions..............................................................................................................................15
3.1 Access 15
3.2 Amcids .........................................................................................................................19
3.3 Control.........................................................................................................................27
3.4 Description ..................................................................................................................70
3.5 Diagnostic ....................................................................................................................74
3.6 Move 78
3.7 Res 99
3.8 Rotcomp ....................................................................................................................107
3.9 Rtin 113
3.10 Rtout 131
3.11 Status 147
3.12 About 156
3.13 System_service..........................................................................................................158
3.14 Network.....................................................................................................................168
3.15 System_service..........................................................................................................194
3.16 Update.......................................................................................................................196

Page 2 | Table of Contents
1System Integration
The AMC100 and the AMC300 can be integrated with external systems or devices by
-combining it with third party hardware
-establishing incoming and outgoing trigger connections (/IO upgrade required)
-controlling it with individual software interfaces
1.1 Connecting to Third Party Hardware
CAUTION
General hazard!
Inadequate hardware connections may cause injury and are likely to damage the device or
interfere with an appropriate functioning.
oAlways contact attocube for technical support, before combining the device with
third party hardware.
oDo carefully observe the information in this section when combining the device
with third party hardware.
NOTE
attocube is not liable for any damages resulting from an unauthorized combination of the
device with third party hardware. Unauthorized combination with third party hardware is
not covered by attocube's warranty.
1.1.1 Cabling Restrictions
For optimal performance, obey the following combination restrictions:
-Do not to connect cabling with a wire resistance > 5 Ω.
-Use EMV housings as enclosure for the D-sub connectors.
-Use extra shielded twisted pair wires for the piezo voltage supply.
-Do not connect any cable > 5 m.
1.1.2 Pin Assignments
The pins of the device’s positioner control cables can be found in the AMC100 or AMC300 User
Manual.

Software communication & interfaces | Page 3
2Software communication & interfaces
You can integrate your attocube Device into complex automated processes via individual
software interfaces. Attocube provides APIs for the programming languages C, C#, LabVIEW,
Python & Matlab as well as short programming examples to get you started.
The following sections provide information on methods, commands and parameters to be used
for calling up device functions with the respective language.
2.1 Introduction
The Device provides a set of software communication interfaces offering a broad set of
functions and options. These can be used to configure the Device as well as to read out data. In
particular, these are:
•Web interface (please also refer to the User Manual)
•JSON-RPC
•C DLL
•C# DLL
•LabVIEW VIs
•Matlab library
•Python Library
Most of the different functions are accessible within every interface. This is why we sort by
functions not by interfaces. For every function, we show how the implementation in the
particular interface is done. Anyway first we give a short explanation of the different interfaces:
NOTE
Part of the conventions mentioned below are specific for the handling of attocube devices
and are not necessarily applicable in other contexts.
2.1.1 Web Interface
The Device runs a built-in webserver. This means that a web interface can be accessed via a
common web browser. A how to set up the IP and a first connection is given in the User
Manual. The web interface is the most straightforward way to communicate with the Device
and almost the full functionality is implemented.
2.1.2 JSON-RPC
The device allows platform-independent communication using JSON-RPC via TCP/IP and
websocket. The JSON commands are the lower level that all other wrappers (e.g. Python or C)
use.
2.1.3 C/C# DLLs
Based on the JSON interface, C/C# libraries are available to implement the functions within
C/C#-based coding environments.

Page 4 | Table of Contents
2.1.4 LabVIEW VIs
We offer ready-made VIs to have a fast and easy implementation in National Instrument’s
LabVIEW environment.
2.1.5 Matlab Library
Based on the JSON interface, we offer ready-made Matlab functios to have a fast and easy
implementation in Mathwork’s Matlab environment.

Software communication & interfaces | Page 5
2.2 Overview and implementation of the APIs
2.2.1 JSON-RPC (JRPC2.0)
Your attocube Device allows platform-independent communication using JSON-RPC via TCP/IP.
When using JSON-RPC, the following conventions apply.
Transport protocols
TCP
Uses communication port 9090.
Calling a JSON RPC
2.0 method
A JSON RPC method is called by sending a message to the device.
{ "jsonrpc": "2.0", "method": "<method>", "params": [<param [0]>,
<param [1]>, …], "id": <call id>, “api”: <api version>}
<method>: String defined in chapter 2.2.
<param x>: Parameter for the method call if the PARAM is put
between two “, it is a string. Without “ it is a number
<call id>: A unique id to find the corresponding
answer
<api version>: A version identifier for backward compatibility,
please set to 2
Example
Example:
{ "jsonrpc": "2.0", "method":
"com.attocube.ids.displacement.getAxisDisplacement", "params":
[1], "id": 1, “api”: 2}
Receiving a JSON
RPC 2.0 response
The JSON RPC method answer is then sent back as payload to the
OK message:
{ "jsonrpc": "2.0", "result": [<return values [0]>, <return values
[1]>, …], "id": <call id>}
<return values [x]>: The return parameters
<call id>: The unique id of the method call
Example
Example:
{ "jsonrpc": "2.0", "results": [0, 4], "id": 1}
Example
Example:
Communication via PuTTY

Page 6 | Table of Contents
2.2.2 C Library
The C API is provided to integrate the Device with all its functionality within your C programs.
Open a Telnet connection with PuTTY.
Sending Json-Rpc commands in the command line interface.
Overview
The C API contains of following files:
Standard C API:
attocubeJSON.dll (x64 and x86 versions for a windows
environment)
attocubeJSON.lib (x64 and x86 versions for a windows
environment)
attocubeJSON.so (x64 and x86 versions for a linux
environment)
attocubeJSONCall.h (header file for the general functions)
generatedAPI.h (header file for the device specific
functions)
Disovery C API:
attocube-discovery-dll.dll
attocube discovery-dll.lib
attocube-discovery.h (header file)

Software communication & interfaces | Page 7
Using the .dll’s with
different systems
Note that if you want to use the .dlls within x64 based systems
outside the framework of Visual C, you might need to convert the
library into a static .a format.
Establishing a
connection
To connect to a device, please use (part of attocubeJSONCall.h):
int ATTOCUBE_API Connect(const char *deviceAddress, int*
deviceHandle)
The device handle is the reference to the connection and the device
and is input to all other device functions that are following.
To close the connection, please use:
int ATTOCUBE_API Disconnect(int * deviceHandle)
Both functions are included in the API.
For a TCP/IP connection, the port 9090 is used.
Discovering devices
within the same
network
The discovery function can be used:
It searches your network for available attocube devices and
returns a list of properties. This is done by a SSDP broadcast. If no
devices are found, please check the device connection via TCP/IP
(e.g. via the websever). The device must be in the same subnet
than the requesting PC.
IMPORTANT NOTE: These functions are part of an additional
discovery .dll –the “attocube discovery dll”, which is also part of
the standard delivery content.
Therefore, following functions are available:
int DLL_EXP AD_GetDeviceInfos(int index, DeviceInfo* info)
(Get informations about a discovered device)
void DLL_EXP AD_ReleaseInfo();
(Release memory allocated by AD_Check)
int DLL_EXP AD_Check(deviceType)
(Checks discoverable devices on the network and retrieves
informations)
Special data types:
typedef struct {
char ipAddress[32];

Page 8 | Table of Contents
2.2.3 C# Library
The C# API is provided to integrate the device with all its functionality within your C# programs
/**< IP address of the device */
char modelName[32];
/**< Type of the device */
char serialNumber[32];
/**< Serial number of the device */
char deviceName[32];
/**< Friendly name assigned to the device */
char macAddress[32];
/**< MAC address of the device */
bool locked;
/**< Device locked by other program */
} DeviceInfo;
typedef enum {
IDS,
MOTION_CTRLER,
BOTH
} deviceType;
Overview
The C# API contains of following files:
CSharpAPIDLL.dll (compiled as “any” version)
Newtonsoft.Json.dll (compiled as “any” version)
Attocube.chm (helpfile)
Establing a
connection
To connect to a device, please create an device object
public static Attocube<Device> client = new Attocube<Device>()
where <Device> is e.g. AMC or IDS
The connect function is a property of the Attocube<Device> class.

Software communication & interfaces | Page 9
2.2.4 LabVIEW
The LabVIEW API is provided to integrate the Device with all its functionality within your
LabVIEW Vis.
public void Connect(string ipAddress, int port)
The device handle is the reference to the connection to the device
and is input to all other device functions that are following.
To close the connection, please use:
public void Disconnect()
Both functions are included in the API and part of the device class
(so initialize a member of the class first).
For a TCP/IP connection, use the port 9090.
Discovering devices
within the same
network
The discovery function can be used:
It searches your network for available devices and returns a list of
properties. This is done by an SSDP broadcast. If no devices are
found, please check the device connection via TCP/IP (e.g. via the
websever) or make sure that the device is in the same subnet than
your PC
IMPORTANT NOTE: These functions are part of an additional
discovery .dll –the “attocube discovery dll”, which is also part of
the standard delivery content.
Therefore, following function is available:
public DiscoveryData[] Check()
Special data type:
Type: DiscoveryData
Class for handling the data of devices discovered using the discovery
protocol
Overview
The LabVIEW API contains a LabVIEW project which contains all
single function VIs and a master example VI that uses almost all
functions available and that mimics the web interfaces UI for easy
navigation.

Page 10 | Table of Contents
Implementation
To reduce complexity and external dependencies all TCP/IP calls
have been implemented with native LabVIEW TCP/IP elements. For
older LabVIEW Versions where there is no native TCP/IP support,
DLL based VIs have been created taking care of the TCP/IP
communication.
The folders “DLLHandler” or “TCPHandler” contain the respective
SubVIs handling the messaging and communication with your
attocube device, which are used within all low-level VIs. Those
should not be modified or used directly.
High-level Wrapper
VIs
For most functions that do have both a set and a get method a
higher level “controlMethod” VI has been created to reduce the
number of VIs and also be as backwards compatible as possible to
the older motion controller series ECC100 and ANC350. Some
additional high level VIs like the deviceInfo VI have been created
where multiple low-level VIs are combined into one VI and all In-
and Outputs are bundled into clusters.
In case you still want to use those low-level VIs instead, they can
be found inside folders that contain the word “SubVIs”. For code
cleanliness it is not recommended to use those. However to keep
the documentation consistent over all programming languages,
only the low-level methods are documented (see chapter 3).
Establing a
connection
To connect to an device, please use the connect VI
The output is the reference to the connection to the device and is
needed as an input to all other device functions that are following.
To close the connection, please use the Close VI
Both VIs are included in the API.
Discovering devices
within the same
network
The discovery function can be used:
It searches your network for available devices and returns a list of
properties. This is done by an SSDP broadcast. If no devices are
found, please check the device connection via TCP/IP (e.g. via the
websever) or make sure that your device is in the same subnet
than your PC.
IMPORTANT NOTE: These functions are part of an external DLL –
the “attocube discovery dll”, which is also part of the standard
delivery content.
Therefore, the “Check.vi” is available.

Software communication & interfaces | Page 11
2.2.5 Matlab
The Matlab API is provided to integrate the Device with all its functionality within your Matlab
scripts.
2.2.6 Python
The Python API is provided to integrate the device with all its functionality within your Python
programs.
Establing a
connection
To connect to an device, please use:
[success, DeviceHandle] = connect(IPAddress, port)
The device handle is the reference to the connection to the device
and is input to all other device functions that are following.
To close the connection, please use:
[success] = disconnect(DeviceHandle)
Both functions are included in the API.
For a TCP/IP connection, use the port 9090
Overview
The Python API contains a folder with domain specific files.
To have access to the python functions, please import the Device
within your python script:
import <Device>
where <Device> is your DeviceType, e.g. AMC or IDS
Establing a
connection
To connect to an device, please use:
device = <Device>.Device(ipAdress)
device.connect()
The device handle is the reference to the connection to the device
and is input to all other device functions that are following.
To close the connection, please use:
device .close()
Both functions are included in the API and part of the device class
(so initialize a member of the class first).
For a TCP/IP connection, the port 9090 is used per default.

Page 12 | Table of Contents
Discovering devices
within the same
network
The discovery function can be used:
It searches your network for available devices and returns a list of
properties. This is done by an SSDP broadcast. If no devices are
found, please check the device connection via TCP/IP (e.g. via the
websever) or make sure that the device is in the same subnet than
your PC
Therefore, following module function is available:
<Device>.discover()
This returns a dictionary containing all found devices combined with
their device information.

Software communication & interfaces | Page 13
2.3 Error handling
2.3.1 C# error handling
2.3.2 Python error handling
Introduction
The error handling in C# is realized with exceptions not by error
numbers. Errors can be caught using a try-catch statement. To
include the device specific exceptions, the catch clause will need
the AttocubeAPIException as argument. An example code is shown
below.
Example
public class AttocubeApiException:
ApplicationException
Example: Exception handling
try
{
attoDevice.<Method>();
}
catch (AttocubeApiException e)
{
int err = e.ErrorCode; // passes the errorcode of type int to
the variable "err"
string errmsg = attoDevice .ErrorNumberToString(0, err);
// converts "err" into the corresponding errormessage and passes
it to "errmsg" of type string
}
Introduction
The error handling in Python is realized with exceptions not by
error numbers. Errors can be caught using a try-except statement.
To include the specific exceptions, the catch clause will need the
AttoException as argument. An example code is shown below.
Example
#example for exception handling
from ACS import AttoException
try:
print(dev.<Method> ()) #OK
except AttoException as e:
print(e)

Page 14 | Table of Contents
2.3.3 LabVIEW error handling
Introduction
The error handling in LabVIEW is realized by using an error
message variable which should be looped through all VIs.
Therefore, every VI provides an error in and error out connector.
Note that we divide the error variable in error messages and “real”
errors, which are treated differently. Error messages have a
positive error number value combined with the Boolean error
status set on inactive (Boolean value on false –visualized by a
green hook icon), whereas “real” errors have a negative error
number values with an active (Boolean value on true –visualized
by a red cross icon) error status. Error messages do not influence
the execution of the following VIs, they are used to inform the
user. “Real” errors hinder the execution of following VIs, they are
meant to stop the program. Examples are shown below:
Example
Example for an error message
An indicator is used to visualize the error message in the front
panel ( see picture below ). Facing a positive error code value, an
error message is indicated. The status is still set on green meaning
no real error available. Error messages are intended to inform the
user or other functions about certain cases. If an error message is
inputted in a following VI, this VI still is executed.
Example for a “real” error
Facing a negative error code value, a “real” error is indicated (see
picture below) Therefore, also the status is set on red, which
means that the error is active. When an active error is inputted in a
following VI, the VI will not execute its function.

Functions | Page 15
3Functions
3.1 Access
getLockStatus
This function returns if the device is locked and if the current client is
authorized to use the device.
Function specific parameters
Out
errNo
errorCode
locked
Is the device locked?
authorized
Is the client authorized?
JSON Method
method: getLockStatus
params: []
Result: [errNo, locked, authorized]
C-DLL call
int AMC_getLockStatus(int deviceHandle, bool* locked, bool* authorized)
Python
locked, authorized = [dev].access.getLockStatus()
Matlab
[locked, authorized] = AMC_getLockStatus()
C#
Tuple<bool,bool> value = [Device].GetLockStatus()
LabVIEW
getLockStatus.vi

Page 16 | Table of Contents
grantAccess
Grants access to a locked device for the requesting IP by checking
against the password
Function specific parameters
In
password
string the current password
Out
errNo
errorCode
JSON Method
method: grantAccess
params: [password]
Result: [errNo]
C-DLL call
int AMC_grantAccess(int deviceHandle, const char* password)
Python
[dev].access.grantAccess(password)
Matlab
[] = AMC_grantAccess(password)
C#
void value = [Device].GrantAccess(string password)
LabVIEW
grantAccess.vi

Functions | Page 17
lock
This function locks the device with a password, so the calling of
functions is only possible with this password. The locking IP is
automatically added to the devices which can access functions
Function specific parameters
In
password
string the password to be set
Out
errNo
errorCode
JSON Method
method: lock
params: [password]
Result: [errNo]
C-DLL call
int AMC_lock(int deviceHandle, const char* password)
Python
[dev].access.lock(password)
Matlab
[] = AMC_lock(password)
C#
void value = [Device].Lock(string password)
LabVIEW
lock.vi
Other manuals for attocube AMC100
1
This manual suits for next models
1
Table of contents
Other Wittenstein Controllers manuals
Popular Controllers manuals by other brands

Rinnai
Rinnai CNTRLDRCIZHAW OPERATION AND CONFIGURATION MANUAL

Wesper
Wesper western peripherals TC-151 Hardware manual

PIETRO FIORENTINI
PIETRO FIORENTINI REVAL 182 Use and maintenance instructions

Leica Geosystems
Leica Geosystems Viva CS10 user manual

LOGICDATA
LOGICDATA DMD500 manual

EMKO
EMKO EAOM-210 FLJ user manual

A.O. Smith
A.O. Smith INTELLI-VENT troubleshooting manual

Siemens
Siemens SINAMICS S120 Getting started

Zamel
Zamel exta ZCM-22 Series instruction manual

Bard
Bard MV4000 SERIES Installation & parts manual

RoboteQ
RoboteQ AX3500 Quick start manual

Thermo Scientific
Thermo Scientific Uniry Lab Services UP150 Operation