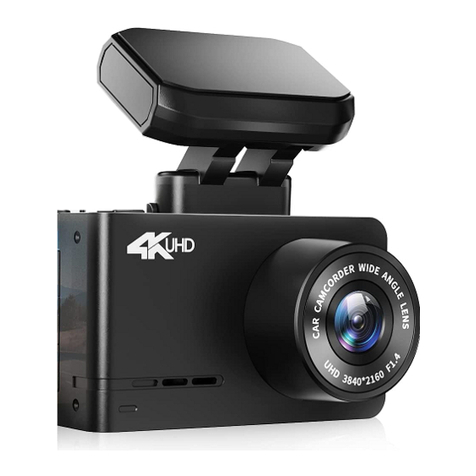
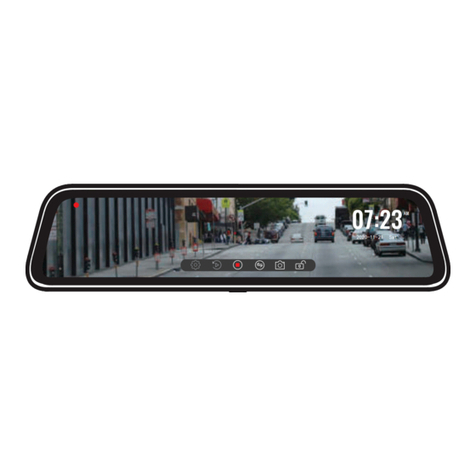
Wolfbox G910 User manual

2
Mirror Dash Cam G910
User Manual
V04


IC warning:
This device contains licence-exempt transmitter(s)/receiver(s)/ that comply with Innovation Science and
Economic Development Canada's licence-exempt RSS(s). Operation is subject to the following two conditions:
1. This device not cause interference.
2. This device must accept any interference, including interference that may cause undesired operation of the
device.
Radiation Exposure: This equipment complies with Canada radiation exposure limits set forth for an
uncontrolled environment. To maintain compliance with IC's RF Exposure guidelines, this equipment should be
installed and operated with minimum distance of 20cm the radiator your body. This device and its antenna(s)
must not be co-located or operation in conjunction with any other antenna or transmitter.
Déclaration de l'ISED Canada:
Cet appareil contient des tasmittre (s) / récepteur (s) sans licence / conformes à l'innovationRSS exemptes de
licence de Sciences et Développement économique Canada. L'opération est sous réserve des deux conditions
suivantes:
1. Cet appareil ne peut pas causer d'interférences et.
2. Cet dispositif doit accepter toute interférence, y compris peut provoquer le fonctionnement indésirable de
l'appareil.
Exposition aux rayonnements: Cet équipement est conforme aux radiations du Canada limites d'exposition
pour un environnement incontrôlé noncé d'exposition RF Pour maintenir le respect des guides d'exposition RF
d'IC, cquipment doit être.installé et actionné avec une distance minimale de 20cm le radiateur de votre corps.
Cet appareil et ses antennes ne doivent pas être co-localisé ou en opération en conjonction avec toute autre
antenne ou émetteur.
01
CONTENT
Product Overview
Product Specifications
Precautions
Warnings
Package Contents
Appearance
About the Micro-SD card
Installation
03
04
05
05
07
08
10
12

02
CONTENT
25
25
27
27
42
44
45
47
Power On/Off
Menu Settings
Playback Mode
Playback Menu
Home
Play on Computer
Trouble Shootings
One Year Limited Warranty

03
Thank you for choosing WOLFBOX G910 Mirror Dash Cam.This product provides high
quality image and capture irrefutable evidence Ultra-high pixels can also record the beauty
along the way for you.
WOLFBOX is a professional automotive supplies manufacturing company. We have worked
in the field of dash cam for more than ten years. We have a team of experienced and
imaginative engineers who are committed to building a reliable and trustworthy automotive
supplies brand.
Product Overview

04
Product Specifications
CPU
RAM
Front Cam
Display Type
Display Size
Display Resolution
Power Interface
Full Touch Screen
Split Screen
SD Card
Video Format
lmage Format
Rear Cam
Rear Len FPS
GPS
Photograph
ACC
Working Temperature
WIFI Connect
Function
V535
2Gb
GC2093
IPS
10 inch
1280*320
TYPE C
Support
Support
Include 32G Card, Max
Support 256G
Streaming media rear view mirror GPS/
time lapse/low voltage protection/
parking monitor /Collision Sensitivity/AI
pedestrian detection/Touch screen
TS
JPEG
AHD 1080P
25fps
External,3.5mm headphone interfcace
Support
Support Power by ACC with Hardware kit
-20℃~70℃
No

05
Pre-cautions
1. If you have any questions, or have a need of accessories, please CONTACT US by customer
service mailbox, we will solve it for you.
2. Please use original accessories provided in the package, just in case of compatible issues
after using others', especially use 2 or 3 in 1 cigar socket will lead to 100% insufficient current
supply.
3. Please don't splice rear camera wire for extension, the monitor may lose the rear image. The
length of original cable for rear camera is 20 feet, suitable for most types of cars. We also have
33 feet rear camera extension cables( ASIN : B082RZNJFY ) sold separately.
4. If you use micro SD card capacity > 32GB, Please change micro SD card [Class10 (10MB/
sec) required] format to FAT 32 on PC (a 32GB card is included in the package).
Warnings
Keep small accessories out of the reach of children.

06
Be sure to use included accessories and parts. Using other parts may damage the
equipment or cause fire, electric shock, or malfunction.
If this product is damaged or malfunctions, stop using it immediately and consult your
dealer. Continued use may cause fire, electric shock or vehicle failure.
If it interferes with driving, please do not install it. This may cause an accident.
This product is intended to be used as a reference material in the event of an accident We
do not guaran-tee its effectiveness as complete evidence.
Please note that this product may infringe on privacy and other rights depending on how it
is used.We are not responsible for these cases.
Since this product uses a wide-angle lens, part of the image may be distorted. It also
differs from the actual perspective. This is a characteristic of wide-angle lenses and is not a
malfunction.
This product is for DC12V/24Vvehicles only.
The specifications and appearance of this product are subject to change without notice for
improvement.

07
Do not operate or install the camera while driving, or attempt to change any setting etc. Pull
off the road first and only do so when it is safe.
Tip: In addition to the original accessories
in the package, we also provide separate
Hardwire -Kit (used for parking monitoring
and replacement of car chargers), rear
camera extension cable (approximately
10m long),and the rear camera mounting
bracket in the car (you can use this to
install the rear camera in the car). If you
need these accessories, please feel free to
contact us.
PACKAGE CONTENTS
1* 1296P Mirror Dash
Cam
1* 3M Adhesive
1* User Manual
1* 1080P Rear
Camera
4*Rubber Straps for
fixing front camera
1* Power Supply
Cable with Car
Charger
1* GPS
1*32GB TF Card
1* Rear Camera
Cable

08
Appearance
NO. Name Description
Record the front view of the
vehicle
Power Supply Port(Type-C)
Port used to connect the rear
camera
Provide extensible storage
(class 10 Max 256GB)
The machine can be fixed with
2 straps
Short press to wake and turn off
the screen, long press to turn
on and off the power
10 inch touch screen display
Front Camera
Power connector
Rear Camera Port
TF card slot
GPS port
Fasteners
Power button
Display screen
1
2
3
4
5
6
7
8
TYPE-C GPS
AV-IN
Used to connect GPS port(GPS
function requires optional GPS
antennal)

09
Speed & Driving Direction: Once GPS is connected,
the information will show
Settings: Touch to enter the menu setting
Switching front and rear camera view
Audio Record is on
Snapshot: Take a Snapshot
Recording
Date & Time
File Playback: Playback the video & Photo
Adjust the screen brightness
Recording Status: Yellow flashing means
Lock Recording
Start / Stop Recording
N
-- mph

10
About the Micro SD Card
When using a new MicroSD card, be sure to format it in the dash cam.
1. When you remove or insert the SD card, make sure the device is turned off.
2. Use a Micro SD card with Class 10 or higher (32GB-256GB). we recommend 32GB SD card
[Asin: B09Q87X76V] and 128GB SD card [Asin: B0B7KWV4CJ]
3. For stable use,it is recommended to format the micro SD card regularly. Recommend: Once
a month.
4. This product will check the Micro SD card at startup and will announce if it is not inserted or
damaged, that can prevent missed shots.
SD card selection and installation
SD card insertion
When SD card is inserted, make sure the dashcam is powered off.

11
SD card removal
When taking out the SD card, please ensure that the dashcam is powered off.

12
Installation
Please check the functionality of dash cam with its all accessories before installation.
When you use the dash cam for the first time, the dash cam comes with factory default settings
and you do not need to set it manually.
Host installation
Step 1: Place the host on the rear-view mirror by hand, be sure to separate the silicone brackets
on both sides of the rear-view mirror.

13
Step 2: Buckle the product in the rearview mirror by silicone button.
Step 3: Adjust the front lens to the right position.

14
Rear camera installation
TYPE-C GPS
AV-IN

15
We recommend install the rear camera above the license plate.
1. Fix camera with 3M adhesive
Find a best location tear off the 3M adhesive on the rear camera,
fix the rear camera near by the car license plate lamp. (if you need
to adjust the angle, please attach the rear camera bracket to the
rear camera and tighten it with screws first).
2. Remove the Panel
Remove the inner panel of the trunk to expose the rear wiring
compartment of the car. Open the trunk and look for a sturdy
inner panel covering the other side of the license plate installation
area. Then, insert a decorative removal tool or another thin device
behind the panel and pry it apart.

16
3. Install the cable
Look for lights near the license plate that have gaps to allow wires to pass through. Run the
rear camera cable through the gap into the trunk of your car.
4. Connect the rear cameras power cable to the extension cable.
After snaking your rear camera's extension cable, connect the
power cable to your rear camera's extension cord.
*If your car has its own reversing assist
system, please ignore the red wire on the
rear camera cable.

17
5. Route your rear camera's power cable to the front of the car.
If you'd like, use a trim removal tool to pop out the headlining
panel directly above your windshield. Then, run your cable
through the exposed chamber.
6. Power on the dash cam with box included car charger, don't
charge it with your own chargers.
We do not recommend to install the rear camera inside the car, it will make the effect of the
rear camera worse. If you need to install the rear camera in the car, please purchase a in-car
rear camera (Asin: B09Q84NBFN) or contact us.
If your car is a RV or a pickup truck, you can install the rear camera forward (the bracket is
below), and turn on the "Rear Flip" and turn off the "Rear Mirror" to adjust the image.
NOTE:
Table of contents
Other Wolfbox Dashcam manuals

Wolfbox
Wolfbox T10 User manual

Wolfbox
Wolfbox G840H User manual

Wolfbox
Wolfbox G890 User manual

Wolfbox
Wolfbox G840S User manual

Wolfbox
Wolfbox T10 User manual

Wolfbox
Wolfbox i07 User manual

Wolfbox
Wolfbox G880 User manual

Wolfbox
Wolfbox G900 User manual

Wolfbox
Wolfbox D07S User manual

Wolfbox
Wolfbox G930 User manual