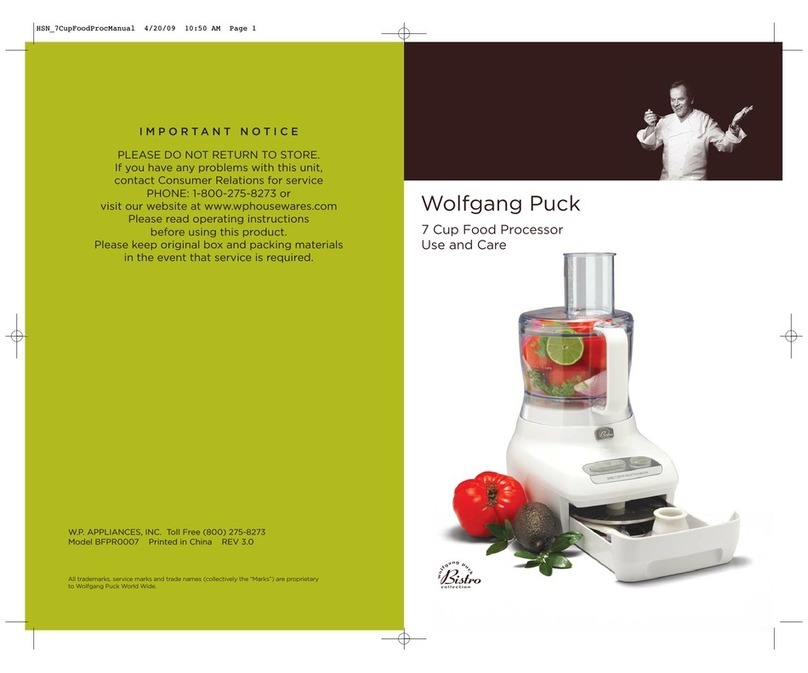
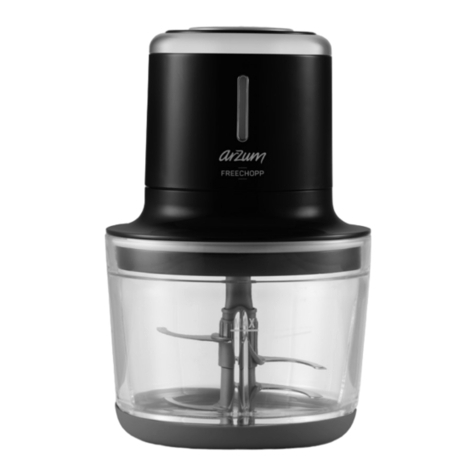
Wolfgang Puck SWPMCP120 Installation instructions

USE AND CARE
5 CUP
GLASS BOWL
CHOPPER
Model SWPMCP120
Wolfgang Puck is a trademark of Wolfgang Puck Worldwide
Actual product may differ slightly from images in this manual
IMPORTANT NOTICE
Please read operating instructions before using this
product. Please keep original box and packing materials
in the event that service is required.
Model SWPMCP120
Synergy Housewares, LLC.
Toll-free: 866-444-4033
Hours: M-F 9:00am-5:00pm EST
Website: warranty.synergyhousewares.com
Printed in China
For questions or concerns please contact customer service at:

Additional Safety Information
Before Your First Use
When using electrical appliances, basic safety precautions should be
followed, including the following:
IMPORTANT SAFEGUARDS
SAVE THESE INSTRUCTIONS
HOUSEHOLD USE ONLY
CAUTION: The blades are very sharp. Use care when handling.
Carefully unpack the Chopper and accessories, and remove all packaging
materials. Wash according to the Care & Cleaning section of this manual.
1 Read all instructions carefully.
2 To protect against risk of electrical shock, do not put Motor Base, Cord
or Plug of the appliance in water or other liquid.
3 Close supervision is necessary when any appliance is used by or near
children. Not recommended for use by children.
4 Unplug from outlet when not in use, before putting on or taking off
parts, and before cleaning. To unplug, grasp plug and pull from the
wall. Never yank on cord.
5 Avoid contacting moving parts.
6 Caution: Sharp blades - handle carefully.
7 Do not operate any appliance with a damaged cord or plug or after
the appliance malfunctions or is dropped or damaged in any manner.
Return the appliance to an authorized service facility for examination,
repair, or electrical or mechanical adjustment.
8 The use of attachments not recommended or sold by Synergy
Housewares, Inc. may cause fire, electric shock, or injury.
9 Do not use outdoors.
10 Do not let cord hang over edge of table or counter or touch hot
surfaces, including the stove.
11 Do not use this appliance for other than intended use.
12 Be certain the Lid is properly in place before operating appliance.
13 This appliance is equipped with a safety interlock that will prevent
operation without being properly assembled, do not attempt to defeat
this feature.
14 Keep hands and utensils away from cutting blades while chopping
food to reduce risk of severe injury to persons or damage the chopper.
A scraper may be used, but only when chopper is not running.
15 To reduce risk of injury, never place motor housing on cutting blades
assembly without first putting bowl lid in place properly.
16 Do not mix flammable non-food substances in this appliance.
17 Do not operate in the presence of explosive and/or flammable fumes.
1 Do not run the Chopper continuously for longer than 30 seconds. For
lighter loads of ingredients such as liquid ingredients, do not run the
Chopper continuously for longer than 60 seconds.
2 Do not place any parts of this appliance in the microwave.
3 Immediately release the selected Speed Button on the Motor Housing
in the event that the appliance malfunctions during use.
This appliance has a polarized plug (one blade is wider than the other).
As a safety feature, this plug will fit in a polarized outlet only one way. If
the plug does not fit fully in the outlet, reverse the plug. If it still does not
fit, contact a qualified electrician. Do not attempt to modify the plug in
any way.
A short power-supply cord is provided to reduce the hazards resulting
from entanglement or tripping over a longer cord. If it is necessary to use
an extension cord, it should be positioned such that it does not drape over
the counter or tabletop where it can be pulled on by children or tripped
over.
IMPORTANT
1 2

In the beginning, there was
Wolfgang Puck. There were
cooks and there were kitchens
and there were people eating
food, but the world had never
seen anything like Spago—
with its California cuisine, its
casual elegance, and its chef
whose genuine warmth and
love of craft redefined the
dining experience. And they
came—from LA and from
everywhere—to experience
the future. Wolfgang Puck
shaped the modern culinary
landscape: he was the first
celebrity chef, the inventor
of fusion cuisine, the first in
farm-to-table. His work is
inspired by California living,
and an insistence on only the
freshest ingredients. From
his legendary fine dining icons, his entrepreneurial spirit has built
an empire—from dining, to catering, to products for the home—
touching the lives of millions around the globe. Today, as always,
Chef Puck is earnestly, restlessly, tirelessly at work behind the scenes
inventing what’s next. He is driven by a genuine love of his craft, a
passion for what’s possible, and its potential to change the world.
Table of Contents
Important Safeguards ................................................................. 1
Additional Safety Information ............................................... 2
Before Your First Use ................................................................. 2
About Wolfgang Puck ............................................................... 3
Know Your Chopper ................................................................... 5
Chopper Assembly ...................................................................... 6
Chopper Disassembly ................................................................ 7
Using Your Assembled Chopper .......................................... 7
Care & Cleaning ............................................................................ 8
Recipes .............................................................................................. 9
Limited Warranty .......................................................................22
Contact Information ........................................................... Back
3 4

Actual product may differ slightly from illustrations throughout this manual
Know Your Chopper Chopper Assembly
1 CAUTION: Use extreme caution
when handling the Chopping Blade
Assemblies as they are extremely
sharp. Always ensure the Motor
Housing is unplugged before adding
or removing parts.
2 Place the Nonskid Ring on a clean, dry,
level surface. Place the Chopper Bowl
on top of the Nonskid Ring to prevent
the bowl from sliding during use.
3 To assemble both Blade Assemblies,
always hold the lower Chopping Blade
Assembly by the lower rectangular
indentations on the Shaft. Hold the
Upper Blade Assembly by the ridged
plastic above the blade (see Figure 1).
4 Place the Upper Blade Assembly over
the Shaft of the Lower Blade Assembly
and rotate left until it clicks into place.
5 Hold the assembled Upper and Lower
Blades by the metal tip of the Shaft
then lower it into the Chopper Bowl
over the Spindle located at the bottom
of the Chopper Bowl.
6 Ensure that the Lid Gasket is fully
seated on the underside of the Lid's
rim. Align Lid handles with Chopper
Bowl handles then lower Lid until they
are fully nested together.
7 Place Motor Housing on the Lid. Slightly
turn the Motor Housing left and right
until it falls flush into the opening of the
Lid. See Figure 2 for assembly order.
Low
Speed
Button
Motor
Housing
High Speed Button
Chopper Bowl
Storage Cover
Figure 2
Lid
Upper Blade
Assembly
Metal Tip
Chopper Bowl
Nonskid
Ring
Lower
Blade
Assembly
Lid
Gasket
Shaft
Spindle
Figure 1
Spatula
5 6

Care & Cleaning
Function Speed
• Wipe the Motor Housing with a damp cloth. Dry thoroughly. Do not use
any abrasive cleaners or scouring pads on the Motor Housing as this
will damage the finish.
• Wash the Chopper Bowl, Lid, Storage Cover, disassembled Blade
Assemblies, Lid Gasket, Spatula and Nonskid Ring in warm water using
a mild detergent (or see dishwasher instructions below).
Dishwasher Use
The following parts can also be placed in the top rack of the dishwasher:
• Chopper Bowl
• Lid
• Storage Cover
• Spatula
• Disassembled Blade Assemblies
1 CAUTION: Use extreme caution when handling the Chopping Blade
Assemblies as they are extremely sharp. Always ensure the Motor
Housing is unplugged before adding or removing parts.
2 Remove the Motor Housing from the Lid.
3 Remove the Lid from the Chopper Bowl.
4 Remove the Blades from the Chopper Bowl by grabbing the metal tip
of the Shaft.
5 To disassemble both Blade Assemblies, always hold the lower Chopping
Blade Assembly by the lower rectangular indentations on the Shaft.
Hold the Upper Blade Assembly by the ridged plastic above the blade
(see Figure 1).
6 While holding the Lower Blade Assembly as indicated above, rotate the
Upper Blade Assembly by turning right then lifting straight up.
CAUTION: Use extreme caution when handling the Chopping Blade
Assemblies as they are extremely sharp. Always ensure the Motor Housing
is unplugged before adding or removing parts, or before cleaning.
Chopper Disassembly
Using Your Assembled Chopper
1 CAUTION: Use extreme caution when handling the Chopping Blade
Assemblies as they are extremely sharp. Always ensure the Motor
Housing is unplugged before adding or removing parts.
2 Always place Blade Assemblies in the Chopper Bowl before adding
food.
3 Plug the power cord into a 120V AC power outlet.
4 Press and hold down the desired Speed Button to process your
ingredients. It is best to pulse in short bursts to avoid over processing
the ingredients.
5 Unplug after use, remove Motor Housing and Lid, then remove the
Blade Assembly prior to removing your food.
6 Carefully remove the Chopping Blade Assembly as described above.
7 Remove the processed food from the Chopper Bowl.
8 You can use the Storage Lid with the Glass Bowl for any leftovers.
Note: When processing liquid ingredients, do not fill the Chopper Bowl
more than half full. When processing dry or wet ingredients, do not fill
the Chopper Bowl more than 2/3 full.
7 8

Recipes
Tomato Salsa
Makes 1 1/2 cups
INGREDIENTS
4 small ripe vine tomatoes
1/4 medium white onion
Serrano peppers to taste
1 garlic clove
1 tablespoon fresh lime juice
1/4 cup fresh cilantro leaves
Kosher salt to taste
METHOD
1. Lower assembled Upper and Lower Blades into the Chopper Bowl.
2. Add all ingredients to the Chopper Bowl then cover with Lid.
3. Place Motor Housing on the Lid.
4. Pulse the High Speed Button for 10-15 seconds until salsa is chunky or
desired consistency is achieved.
5. Serve immediately.
9 10

Mango Sorbet
Makes 2 cups
INGREDIENTS
2 cups frozen mango chunks
1 wedge of a lime with rind
1 cup orange juice
METHOD
1. Lower assembled Upper and Lower Blades into the Chopper Bowl.
2. Add all ingredients to the Chopper Bowl then cover with Lid.
3. Place Motor Housing on the Lid.
4. Pulse the High Speed Button for 10-15 seconds or until smooth.
5. Remove Motor Housing and Lid then carefully scrape down the sides of
the Chopper Bowl using the spatula.
6. Replace Lid and Motor Housing then pulse for an additional 5-10 seconds.
7. Serve immediately.
Strawberry Smoothie
Makes 2 cups
INGREDIENTS
8 large strawberries
1 banana
1/4 cup plain yogurt
1 tablespoon honey
1/2 cup ice cubes
METHOD
1. Lower assembled Upper and Lower Blades into the Chopper Bowl.
2. Add all ingredients to the Chopper Bowl then cover with Lid.
3. Place Motor Housing on the Lid.
4. Pulse the High Speed Button for 10-15 seconds or until smooth.
5. Serve immediately.
11 12

Corn Salsa
Makes 1 1/4 cups
INGREDIENTS
2 ears yellow corn, husks and silk removed
1/2 Serrano pepper, stems removed
1/4 medium red onion
1/4 red bell pepper, stemmed and seeded
1 tablespoon olive oil
Zest from 1 lime
1 tablespoon fresh lime juice
1 teaspoon honey
A handful of fresh cilantro leaves
Kosher salt to taste
METHOD
1. On a grill or in a grill pan, cook the corn and Serrano peppers on all sides
until slightly charred.
2. Let cool slightly then cut the corn from the cobs.
3. Lower assembled Upper and Lower Blades into the Chopper Bowl.
4. Add the cooked corn, Serrano peppers and remaining ingredients to the
Chopper Bowl then cover with Lid.
5. Place Motor Housing on the Lid.
6. Pulse the High Speed Button for 10-15 seconds or until chunky.
7. Serve immediately.
Chicken Salad
Makes 2 servings
INGREDIENTS
1/4 celery stalk
1 slice red onion
2 tablespoons walnuts, toasted
1 cup skinless and boneless chicken, cooked
1 tablespoon sweet relish
1/4 cup mayonnaise
1 tablespoon yellow mustard
Kosher salt and fresh pepper to taste
METHOD
1. Lower assembled Upper and Lower Blades into the Chopper Bowl.
2. Add all ingredients to the Chopper Bowl then cover with Lid.
3. Place Motor Housing on the Lid.
4. Pulse the High Speed Button for 5-10 seconds or until chunky.
5. Serve immediately or store covered and refrigerated for up to 2 days.
13 14

Easy Chopper Coleslaw
Makes 2 servings
INGREDIENTS
1/8 of a head of green cabbage, chunked
1/4 carrot, chunked
1/4 cup mayonnaise
1/8 cup heavy cream
1 teaspoon cider vinegar
1 tablespoon granulated sugar
Kosher salt and fresh pepper to taste
METHOD
1. Lower assembled Upper and Lower Blades into the Chopper Bowl.
2. Fill Chopper Bowl half full of cold water then add half of the cabbage and
carrots.
3. Cover with Lid then place Motor Housing on the Lid.
4. Pulse the High Speed Button for 5 seconds or until finely chopped.
5. Transfer to a strainer then repeat with remaining cabbage and carrots.
6. Press to remove as much water from the vegetables as possible then
transfer to a mixing bowl.
7. Stir remaining ingredients into the mixing bowl contents until combined.
8. Serve cold.
Asian Style Peanut Dressing
Makes about 1 cup
INGREDIENTS
1/4 cup coconut milk, microwaved until hot
1/2 cup peanut butter, warmed in the microwave
1/4 small yellow onion
2 garlic cloves
2 coins fresh ginger
Zest and juice of 1 lime
1 tablespoon honey
1 teaspoon fish sauce or anchovy paste
1 tablespoon soy sauce
Sriracha or other hot sauce to taste
Chopped peanuts, for garnishing
METHOD
1. Lower assembled Upper and Lower Blades into the Chopper Bowl.
2. Add all ingredients, except chopped peanuts, to the Chopper Bowl then
cover with Lid.
3. Place Motor Housing on the Lid.
4. Pulse the High Speed Button for 10-15 seconds or until smooth. If peanut
butter sticks to the sides of the Chopper Bowl, carefully scrape down
using the spatula then pulse the High Speed Button for an additional 5
seconds.
5. Pour into a small serving bowl, top with chopped peanuts and use as
desired.
6. Leftover dressing can be kept covered in the refrigerator for up to 5 days.
15 16

Fruit or Vegetable Baby Food
Makes 2-4 servings
INGREDIENTS
For Fruit Baby Food
1 cup fresh or frozen fruit of choice, preferably organic
1/4 cup water or fruit juice, breast milk or formula
For Vegetable Baby Food
1 cup diced vegetable of choice, preferably organic, steamed until tender
1/4 - 1/2 cup water, juice or breast milk or formula
METHOD
1. Lower assembled Upper and Lower Blades into the Chopper Bowl.
2. Add all ingredients for either fruit or vegetable baby food to the Chopper
Bowl then cover with Lid.
3. Place Motor Housing on the Lid.
4. Pulse the High Speed Button for 10-15 seconds or until smooth.
5. Carefully scrape down sides of the Chopper Bowl using the spatula then
pulse the High Speed Button for an additional 10-15 seconds. If a smoother
texture is desired, push mixture through a fine mesh strainer.
6. Serve immediately or cover and refrigerate for up to 2 days or freeze for
up to 1 month.
Chocolate Cheese Dip
Makes 1 cup
INGREDIENTS
1/3 cup heavy cream, very hot
1/3 cup bittersweet chocolate chips
1 package (8 oz.) cream cheese, warmed
1/3 cup powdered sugar
1 teaspoon vanilla extract
METHOD
1. Lower assembled Upper and Lower Blades into the Chopper Bowl.
2. Add the hot heavy cream and chocolate chips to the Chopper Bowl then
cover with Lid.
3. Place Motor Housing on the Lid.
4. Pulse the High Speed Button for 10-15 seconds or until chocolate is melted.
5. Add remaining ingredients then pulse the High Speed Button for an
additional 10-15 seconds or until uniform in color.
6. Serve with your choice of dippers.
17 18

NotesHomemade Sno Cones
Makes 2 servings
INGREDIENTS
2 cups ice cubes
Flavored syrup of choice (see recipes below)
Raspberry Syrup
1 1/2 cups frozen raspberries
1/3 cup water
2/3 cup granulated sugar
1/2 teaspoon citric acid or 2 tablespoons lemon juice
Pineapple Syrup
1 1/2 cups frozen pineapple chunks
1/3 cup water
2/3 cup granulated sugar
1/2 teaspoon citric acid or 2 tablespoons lemon juice
Lime Syrup
Zest of 2 limes
2/3 cup fresh lime juice
2/3 cup granulated sugar
1–2 drops green food coloring
Blueberry Syrup
1 1/2 cups frozen blueberries
1/3 cup water
2/3 cup granulated sugar
1/2 teaspoon citric acid or 2 tablespoons lemon juice
METHOD
To Prepare Syrups
1. Combine all ingredients of desired syrup in a medium saucepan, bring to
a boil over medium-high heat then remove from heat.
2. Strain through a fine mesh strainer into a lidded storage container.
3. Let cool and use or store in the refrigerator for up to 1 month. Pour into a
squeeze bottle when ready to use.
To Prepare Sno Cones
1. Lower assembled Upper and Lower Blades into the Chopper Bowl.
2. Add ice cubes to the Chopper Bowl then cover with Lid.
3. Place Motor Housing on the Lid.
4. Pulse the High Speed Button for 5-10 seconds or until ice is crushed.
5. Scoop crushed ice into little cups or cones.
6. Top with desired syrup and serve immediately.
19 20

Limited Warranty
This warranty covers all defects in workmanship or materials in the mechanical
and electrical parts, arising under normal usage and care, in this product for
a period of 12 months from the date of purchase provided you are able to
present a valid proof-of-purchase. A valid proof-of-purchase is a receipt
specifying item, date purchased, and cost of item. A gift receipt with date
of purchase and item is also an acceptable proof-of-purchase. Product is
intended for household use only. Any commercial use voids the warranty.
This warranty covers the original retail purchaser or gift recipient. During
the applicable warranty period within normal household use, we will repair
or replace, at our discretion, any mechanical or electrical part which proves
defective, or replace unit with a comparable model.
To obtain service under the terms of this warranty, call Toll Free (866) 444-
4033.
THIS LIMITED WARRANTY COVERS UNITS PURCHASED AND USED WITHIN
THE UNITED STATES AND CANADA AND DOES NOT COVER:
• Damages from improper installation.
• Defects other than manufacturing defects.
• Damages from misuse, abuse, accident, alteration, lack of proper care and
maintenance, or incorrect current or voltage.
• Damage from service by other than an authorized dealer or service center.
This warranty gives you special legal rights and you may also have other
rights to which you are entitled which may vary from state (province) to state
(province).
Proof of purchase required to validate the warranty.
Shipping and handling charges may apply.
Notes
21 22
Table of contents
Other Wolfgang Puck Food Processor manuals

Wolfgang Puck
Wolfgang Puck BFPR0012 Signature Collection User manual

Wolfgang Puck
Wolfgang Puck BFPR0035 Bistro collection Installation instructions

Wolfgang Puck
Wolfgang Puck Bistro BFPR0040 Installation instructions

Wolfgang Puck
Wolfgang Puck BFPR0015 Bistro collection User manual

Wolfgang Puck
Wolfgang Puck BIBC2050 Installation instructions

Wolfgang Puck
Wolfgang Puck BFPR0011 Installation instructions

Wolfgang Puck
Wolfgang Puck SWPIKC30 Installation instructions

Wolfgang Puck
Wolfgang Puck Bistro BFPR0007 Owner's manual

Wolfgang Puck
Wolfgang Puck WPMFP15 User manual

Wolfgang Puck
Wolfgang Puck WPMFP15AC User manual