8660
SOSS 100 Hinge Jig
Owners Manual
Please Read Carefully!
ASSEMBLY
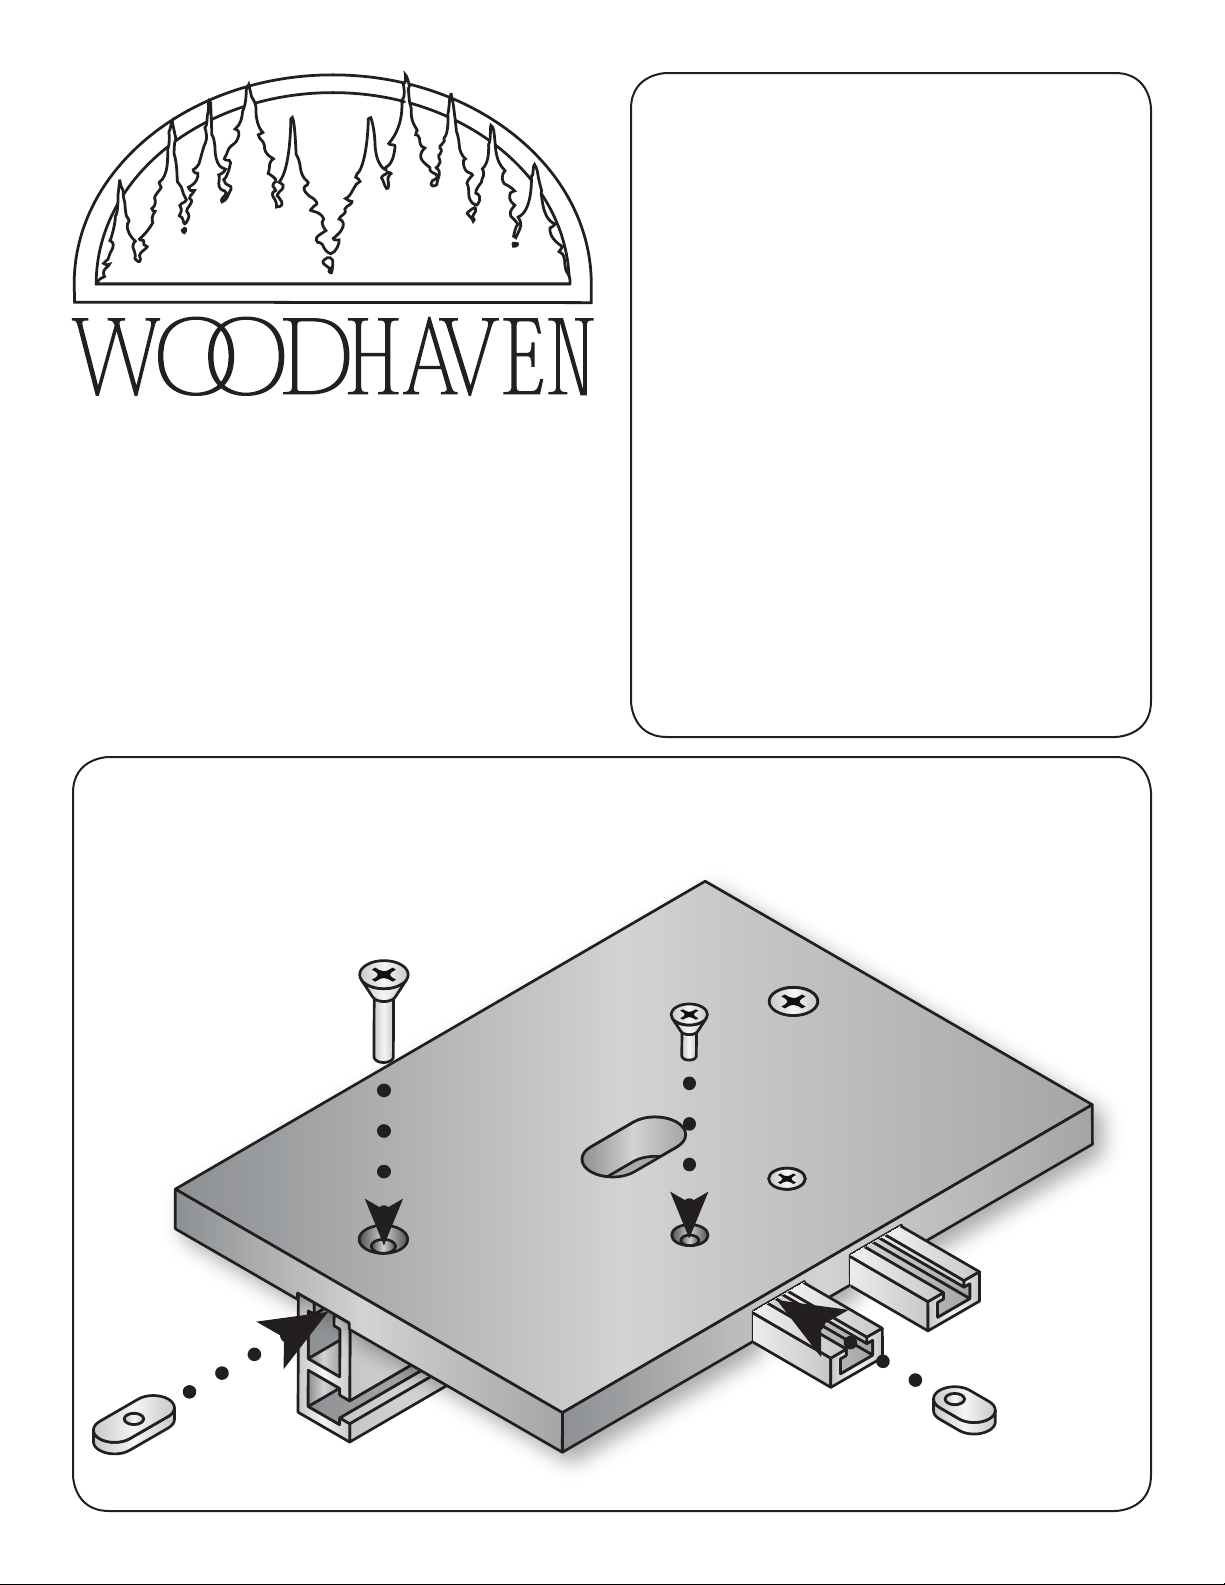
Insertthetwo1/4-20x3/4"flatheadscrews(MF010)
thruthelargercountersunkholesintheSOSSHingeJig
(8660B).Starta1/4-20ovalnut(5760B - flat side first) onthe
endofeachscrew.Slidethe12"DoubleTrack(4012)onto
theovalnutsandinthegrooveintheundersideoftheHinge
Jiguntilcenteredend-to-end,thentightenthescrews.
Insertthetwo10-24x5/16"
flatheadscrews(MF001)thruthe
remainingtwocountersunkholes
intheHingeJigandstarta10-24
ovalnut(5750B - raised side first)
ontheendofeachscrew.
Slidea2-7/8"OneTrack(8660T)ontoeachoval
nutandintothegroovesintheundersideoftheHingeJig
untilcoveringtheovalnut,thentighteneachscrew.
BEFORE BEGINNING
Identifyandverifythatyouhaveallthepartslisted.
Readthrutheinstructionsatleastonce,familiarizing
yourselfwiththepartsandtheirusebeforeproceeding.You'll
needa#2Phillipsscrewdriverforassembly.
The8660 SOSS Hinge Jigisdesignedtoworkwitha5/8"
bushing&locknut(our PN 5030K)anda3/8"upcutspiralbit(our PN
15406).Ifyouhaveyourown3/4"bushing,makesurethenoseisn't
over3/8"long.You'llneedaplungeroutertocutthehingemortises.
Thequalityoftheplungemechanismcaneffectthesizeofthemortise,
resultinginapoorfitiftheplungemechanismhasexcessiveslop.
MF010 x2
5760B x2
5750B x2
MF001 x2
8660 Hinge Jig for
SOSS 100 Hinge
4008
8660T x2
Parts List:
Please identify and verify that you have all of the parts
listed below prior to assembly.
Part Description . . . . . . . . . . . Quantity
8660B Hinge Jig for SOSS 100. . . . . . . . . . . . . . . . . . . 1
4008 8” Double Track.........................1
MF010 1/4-20 x 3/4" flat head screw . . . . . . . . . . . . . 2
5760B 1/4-20 oval nut . . . . . . . . . . . . . . . . . . . . . . . . . 2
8660T 2-7/8" One Track . . . . . . . . . . . . . . . . . . . . . . . . 2
MF001 10-24 x 5/16” flat head screw. . . . . . . . . . . . . 2
5750B 10-24 oval nut..........................2


